
Quilt Cake: Prepare to be captivated by a dessert that’s as visually stunning as it is delicious! Have you ever seen a cake that looks like a patchwork quilt? This show-stopping dessert is guaranteed to impress your guests and become the centerpiece of any celebration. I remember the first time I saw a Quilt Cake; I was immediately drawn to its intricate design and vibrant colors. It looked almost too beautiful to eat!
While the exact origins of the Quilt Cake are somewhat shrouded in mystery, its appeal is universal. The concept likely evolved from a desire to create visually appealing and texturally diverse desserts. The beauty of a Quilt Cake lies not only in its appearance but also in the delightful combination of flavors and textures. Each “patch” can be a different flavor of cake, creating a symphony of tastes in every bite. Think rich chocolate squares nestled alongside fluffy vanilla, or perhaps a tangy lemon cake paired with a sweet strawberry one. The possibilities are truly endless!
People adore this cake for several reasons. First, it’s a conversation starter. Its unique design makes it an instant hit at parties and gatherings. Second, it’s incredibly versatile. You can customize the flavors and colors to suit any occasion or personal preference. And third, despite its impressive appearance, a Quilt Cake is surprisingly achievable for home bakers. With a little patience and creativity, you can create a masterpiece that will wow everyone who tastes it. So, let’s embark on this baking adventure together and create a Quilt Cake that’s as beautiful as it is delicious!
Ingredients:
- For the Chocolate Cake Layers:
- 2 cups all-purpose flour
- 2 cups granulated sugar
- ¾ cup unsweetened cocoa powder
- 1 ½ teaspoons baking powder
- 1 ½ teaspoons baking soda
- 1 teaspoon salt
- 1 cup buttermilk
- ½ cup vegetable oil
- 2 large eggs
- 2 teaspoons vanilla extract
- 1 cup boiling water
- For the Vanilla Cake Layers:
- 2 ½ cups all-purpose flour
- 1 ½ cups granulated sugar
- 1 tablespoon baking powder
- ½ teaspoon salt
- 1 cup milk
- ½ cup (1 stick) unsalted butter, softened
- 2 large eggs
- 2 teaspoons vanilla extract
- For the Strawberry Cake Layers:
- 2 ½ cups all-purpose flour
- 1 ½ cups granulated sugar
- 1 tablespoon baking powder
- ½ teaspoon salt
- 1 cup milk
- ½ cup (1 stick) unsalted butter, softened
- 2 large eggs
- 2 teaspoons vanilla extract
- 1 cup strawberry puree (fresh or frozen strawberries, pureed and strained)
- Red food coloring (optional, for a more vibrant color)
- For the Cream Cheese Frosting:
- 8 ounces cream cheese, softened
- ½ cup (1 stick) unsalted butter, softened
- 4 cups powdered sugar
- 2 teaspoons vanilla extract
- 2-4 tablespoons milk (or heavy cream), for desired consistency
Preparing the Chocolate Cake Layers:
- Preheat and Prep: Preheat your oven to 350°F (175°C). Grease and flour two 9-inch round cake pans. You can also line the bottoms with parchment paper rounds for easy removal. This prevents sticking and ensures a clean release.
- Combine Dry Ingredients: In a large bowl, whisk together the flour, sugar, cocoa powder, baking powder, baking soda, and salt. Make sure everything is evenly distributed. This step is crucial for a consistent texture.
- Combine Wet Ingredients: In a separate bowl, whisk together the buttermilk, oil, eggs, and vanilla extract. Whisk until well combined and smooth.
- Combine Wet and Dry: Gradually add the wet ingredients to the dry ingredients, mixing on low speed until just combined. Be careful not to overmix. Overmixing can lead to a tough cake.
- Add Boiling Water: Slowly pour in the boiling water while mixing on low speed. The batter will be thin. Don’t worry, this is normal! The hot water helps to bloom the cocoa powder and creates a moist cake.
- Bake: Divide the batter evenly between the prepared cake pans. Bake for 30-35 minutes, or until a wooden skewer inserted into the center comes out clean.
- Cool: Let the cakes cool in the pans for 10 minutes before inverting them onto a wire rack to cool completely. Make sure they are completely cool before frosting.
Preparing the Vanilla Cake Layers:
- Preheat and Prep: Preheat your oven to 350°F (175°C). Grease and flour two 9-inch round cake pans. Again, parchment paper rounds are your friend!
- Cream Butter and Sugar: In a large bowl, cream together the softened butter and sugar until light and fluffy. This step is important for incorporating air into the batter, which results in a tender cake. Use an electric mixer for best results.
- Add Eggs: Beat in the eggs one at a time, then stir in the vanilla extract. Make sure each egg is fully incorporated before adding the next.
- Combine Dry Ingredients: In a separate bowl, whisk together the flour, baking powder, and salt.
- Alternate Wet and Dry: Gradually add the dry ingredients to the wet ingredients, alternating with the milk, beginning and ending with the dry ingredients. Mix until just combined. Again, avoid overmixing. Start with adding about 1/3 of the dry ingredients, then half of the milk, then another 1/3 of the dry ingredients, the remaining milk, and finish with the last 1/3 of the dry ingredients.
- Bake: Divide the batter evenly between the prepared cake pans. Bake for 25-30 minutes, or until a wooden skewer inserted into the center comes out clean.
- Cool: Let the cakes cool in the pans for 10 minutes before inverting them onto a wire rack to cool completely.
Preparing the Strawberry Cake Layers:
- Preheat and Prep: Preheat your oven to 350°F (175°C). Grease and flour two 9-inch round cake pans.
- Cream Butter and Sugar: In a large bowl, cream together the softened butter and sugar until light and fluffy.
- Add Eggs: Beat in the eggs one at a time, then stir in the vanilla extract.
- Combine Dry Ingredients: In a separate bowl, whisk together the flour, baking powder, and salt.
- Alternate Wet and Dry: Gradually add the dry ingredients to the wet ingredients, alternating with the milk, beginning and ending with the dry ingredients. Mix until just combined.
- Add Strawberry Puree: Gently fold in the strawberry puree. If desired, add a few drops of red food coloring to enhance the color. Be careful not to overmix after adding the puree, as this can make the cake tough.
- Bake: Divide the batter evenly between the prepared cake pans. Bake for 25-30 minutes, or until a wooden skewer inserted into the center comes out clean.
- Cool: Let the cakes cool in the pans for 10 minutes before inverting them onto a wire rack to cool completely.
Preparing the Cream Cheese Frosting:
- Cream Cheese and Butter: In a large bowl, beat together the softened cream cheese and butter until smooth and creamy. It’s crucial that both the cream cheese and butter are softened to room temperature to avoid lumps in your frosting.
- Add Powdered Sugar: Gradually add the powdered sugar, one cup at a time, beating on low speed until combined. Be sure to scrape down the sides of the bowl occasionally to ensure everything is evenly mixed.
- Add Vanilla and Milk: Stir in the vanilla extract. Then, add the milk (or heavy cream) one tablespoon at a time, until you reach your desired consistency. You want the frosting to be smooth, creamy, and spreadable.
- Whip: Beat the frosting on medium-high speed for 2-3 minutes, until light and fluffy. This will help to incorporate air into the frosting and make it even more delicious.
Assembling the Quilt Cake:
- Level the Cakes: Using a serrated knife, level the tops of each cake layer to create a flat surface. This will ensure that your cake is stable and doesn’t wobble.
- Cut the Cakes: This is where the “quilt” comes in! You’ll need to cut each cake layer into squares or rectangles. The size of the squares is up to you, but I recommend starting with 2-inch squares. You can use a ruler or a template to ensure that the squares are uniform in size.
- Chocolate Cake: Cut each chocolate cake layer into squares.
- Vanilla Cake: Cut each vanilla cake layer into squares.
- Strawberry Cake: Cut each strawberry cake layer into squares.
- First Layer: Place a dollop of cream cheese frosting on your cake stand or serving plate. This will help to secure the first layer of cake. Arrange the cake squares in a quilt-like pattern on the plate. Alternate the chocolate, vanilla, and strawberry squares to create a visually appealing design.
- Frosting: Spread a layer of cream cheese frosting over the first layer of cake squares. Be generous with the frosting, as it will help to hold the cake together.
- Second Layer: Repeat the process with the remaining cake squares, arranging them in a different pattern than the first layer. This will create a more interesting and dynamic quilt design.
- Final Frosting: Frost the entire cake with the remaining cream cheese frosting. You can create a smooth finish or add swirls and texture with a spatula.
- 2 cups all-purpose flour
- 2 cups granulated sugar
- ¾ cup unsweetened cocoa powder
- 1 ½ teaspoons baking powder
- 1 ½ teaspoons baking soda
- 1 teaspoon salt
- 1 cup buttermilk
- ½ cup vegetable oil
- 2 large eggs
- 2 teaspoons vanilla extract
- 1 cup boiling water
- 2 ½ cups all-purpose flour
- 1 ½ cups granulated sugar
- 1 tablespoon baking powder
- ½ teaspoon salt
- 1 cup milk
- ½ cup (1 stick) unsalted butter, softened
- 2 large eggs
- 2 teaspoons vanilla extract
- 2 ½ cups all-purpose flour
- 1 ½ cups granulated sugar
- 1 tablespoon baking powder
- ½ teaspoon salt
- 1 cup milk
- ½ cup (1 stick) unsalted butter, softened
- 2 large eggs
- 2 teaspoons vanilla extract
- 1 cup strawberry puree (fresh or frozen strawberries, pureed and strained)
- Red food coloring (optional, for a more vibrant color)
- 8 ounces cream cheese, softened
- ½ cup (1 stick) unsalted butter, softened
- 4 cups powdered sugar
- 2 teaspoons vanilla extract
- 2-4 tablespoons milk (or heavy cream), for desired consistency
- Preheat and Prep: Preheat your oven to 350°F (175°C). Grease and flour two 9-inch round cake pans. You can also line the bottoms with parchment paper rounds for easy removal. This prevents sticking and ensures a clean release.
- Combine Dry Ingredients: In a large bowl, whisk together the flour, sugar, cocoa powder, baking powder, baking soda, and salt. Make sure everything is evenly distributed. This step is crucial for a consistent texture.
- Combine Wet Ingredients: In a separate bowl, whisk together the buttermilk, oil, eggs, and vanilla extract. Whisk until well combined and smooth.
- Combine Wet and Dry: Gradually add the wet ingredients to the dry ingredients, mixing on low speed until just combined. Be careful not to overmix. Overmixing can lead to a tough cake.
- Add Boiling Water: Slowly pour in the boiling water while mixing on low speed. The batter will be thin. Don’t worry, this is normal! The hot water helps to bloom the cocoa powder and creates a moist cake.
- Bake: Divide the batter evenly between the prepared cake pans. Bake for 30-35 minutes, or until a wooden skewer inserted into the center comes out clean.
- Cool: Let the cakes cool in the pans for 10 minutes before inverting them onto a wire rack to cool completely. Make sure they are completely cool before frosting.
- Preheat and Prep: Preheat your oven to 350°F (175°C). Grease and flour two 9-inch round cake pans. Again, parchment paper rounds are your friend!
- Cream Butter and Sugar: In a large bowl, cream together the softened butter and sugar until light and fluffy. This step is important for incorporating air into the batter, which results in a tender cake. Use an electric mixer for best results.
- Add Eggs: Beat in the eggs one at a time, then stir in the vanilla extract. Make sure each egg is fully incorporated before adding the next.
- Combine Dry Ingredients: In a separate bowl, whisk together the flour, baking powder, and salt.
- Alternate Wet and Dry: Gradually add the dry ingredients to the wet ingredients, alternating with the milk, beginning and ending with the dry ingredients. Mix until just combined. Again, avoid overmixing. Start with adding about 1/3 of the dry ingredients, then half of the milk, then another 1/3 of the dry ingredients, the remaining milk, and finish with the last 1/3 of the dry ingredients.
- Bake: Divide the batter evenly between the prepared cake pans. Bake for 25-30 minutes, or until a wooden skewer inserted into the center comes out clean.
- Cool: Let the cakes cool in the pans for 10 minutes before inverting them onto a wire rack to cool completely.
- Preheat and Prep: Preheat your oven to 350°F (175°C). Grease and flour two 9-inch round cake pans.
- Cream Butter and Sugar: In a large bowl, cream together the softened butter and sugar until light and fluffy.
- Add Eggs: Beat in the eggs one at a time, then stir in the vanilla extract.
- Combine Dry Ingredients: In a separate bowl, whisk together the flour, baking powder, and salt.
- Alternate Wet and Dry: Gradually add the dry ingredients to the wet ingredients, alternating with the milk, beginning and ending with the dry ingredients. Mix until just combined.
- Add Strawberry Puree: Gently fold in the strawberry puree. If desired, add a few drops of red food coloring to enhance the color. Be careful not to overmix after adding the puree, as this can make the cake tough.
- Bake: Divide the batter evenly between the prepared cake pans. Bake for 25-30 minutes, or until a wooden skewer inserted into the center comes out clean.
- Cool: Let the cakes cool in the pans for 10 minutes before inverting them onto a wire rack to cool completely.
- Cream Cheese and Butter: In a large bowl, beat together the softened cream cheese and butter until smooth and creamy. It’s crucial that both the cream cheese and butter are softened to room temperature to avoid lumps in your frosting.
- Add Powdered Sugar: Gradually add the powdered sugar, one cup at a time, beating on low speed until combined. Be sure to scrape down the sides of the bowl occasionally to ensure everything is evenly mixed.
- Add Vanilla and Milk: Stir in the vanilla extract. Then, add the milk (or heavy cream) one tablespoon at a time, until you reach your desired consistency. You want the frosting to be smooth, creamy, and spreadable.
- Whip: Beat the frosting on medium-high speed for 2-3 minutes, until light and fluffy. This will help to incorporate air into the frosting and make it even more delicious.
- Level the Cakes: Using a serrated knife, level the tops of each cake layer to create a flat surface. This will ensure that your cake is stable and doesn’t wobble.
- Cut the Cakes: This is where the “quilt” comes in! You’ll need to cut each cake layer into squares or rectangles. The size of the squares is up to you, but I recommend starting with 2-inch squares. You can use a ruler or a template to ensure that the squares are uniform in size.
- Chocolate Cake: Cut each chocolate cake layer into squares.
- Vanilla Cake: Cut each vanilla cake layer into squares.
- Strawberry Cake: Cut each strawberry cake layer into squares.
- First Layer: Place a dollop of cream cheese frosting on your cake stand or serving plate. This will help to secure the first layer of cake. Arrange the cake squares in a quilt-like pattern on the plate. Alternate the chocolate, vanilla, and strawberry squares to create a visually appealing design.
- Frosting: Spread a layer of cream cheese frosting over the first layer of cake squares. Be generous with the frosting, as it will help to hold the cake together.
- Second Layer: Repeat the process with the remaining cake squares, arranging them in a different pattern than the first layer. This will create a more interesting and dynamic quilt design.
- Final Frosting: Frost the entire cake with the remaining cream cheese frosting. You can create a smooth finish or add swirls and texture with a spatula.
- Make sure all ingredients are at room temperature for best results, especially for the cream cheese frosting.
- Don’t overmix the cake batters, as this can lead to a tough cake.
- Use a serrated knife to level the cake layers for a more professional look.
- Get creative with your quilt pattern! There are no rules when it comes to arranging the cake squares.
- This cake is best served chilled.

Conclusion:
And there you have it! This Quilt Cake isn’t just a dessert; it’s a conversation starter, a showstopper, and a delicious journey back to simpler times. I truly believe this recipe is a must-try for anyone who loves baking, enjoys a beautiful presentation, or simply craves a comforting and flavorful treat. The combination of textures and tastes, from the moist cake layers to the rich frosting and the delightful patchwork design, makes it an unforgettable experience.
But why is this Quilt Cake so special? It’s more than just a cake; it’s an edible work of art. The process of creating the quilt pattern is surprisingly therapeutic, allowing you to unleash your creativity and personalize each square. Plus, the joy on people’s faces when they see this masterpiece is absolutely priceless. Its a guaranteed crowd-pleaser at any gathering, from casual family dinners to elegant celebrations.
Beyond its visual appeal, the taste is simply divine. The cake itself is tender and flavorful, perfectly complemented by the creamy, decadent frosting. It’s a harmonious blend of sweetness and richness that will leave you wanting more. And the best part? It’s surprisingly easy to make, even for beginner bakers.
Serving Suggestions and Variations:
Now, let’s talk about how you can make this Quilt Cake your own! Feel free to experiment with different cake flavors. Chocolate, vanilla, lemon, or even a spice cake would work beautifully. You can also customize the frosting to your liking. Consider adding a hint of citrus zest, a splash of liqueur, or a sprinkle of chopped nuts for added flavor and texture.
For serving, a simple dusting of powdered sugar or a drizzle of melted chocolate can add an extra touch of elegance. You can also serve it with a scoop of vanilla ice cream or a dollop of whipped cream for a truly indulgent experience. And if you’re feeling adventurous, try pairing it with a complementary fruit compote, such as berries or peaches.
Another fun variation is to use different colors of frosting to create a more vibrant and eye-catching quilt pattern. You can also use different shapes and sizes of cake pieces to create a more intricate design. The possibilities are endless!
Don’t be afraid to get creative and have fun with it. Baking should be an enjoyable experience, so let your imagination run wild and create a Quilt Cake that is uniquely yours.
I’m so excited for you to try this recipe! I know you’ll love it as much as I do. It’s a perfect way to impress your friends and family, celebrate a special occasion, or simply treat yourself to something delicious and beautiful.
So, grab your apron, gather your ingredients, and get ready to bake a masterpiece. I promise you won’t be disappointed. And when you do, please share your creations with me! I’d love to see your unique Quilt Cake designs and hear about your baking experience. Tag me in your photos on social media and let me know what you think. Happy baking! I can’t wait to see what you create and how you make this Quilt Cake your own!
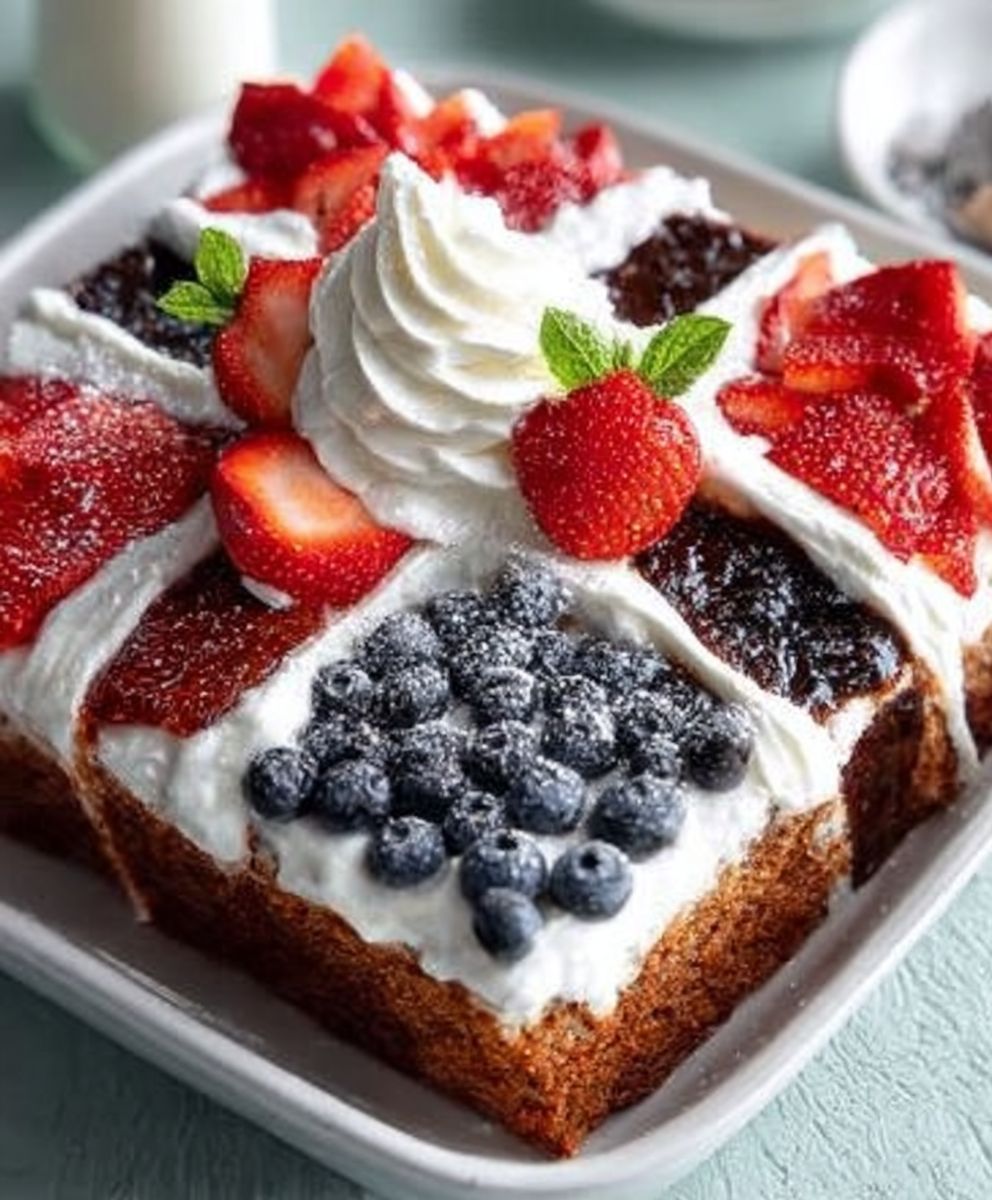
Quilt Cake: How to Make This Stunning Dessert
A stunning quilt cake with layers of chocolate, vanilla, and strawberry cake squares, held together by luscious cream cheese frosting. A show-stopping dessert that's fun to make and eat!


Leave a Comment