
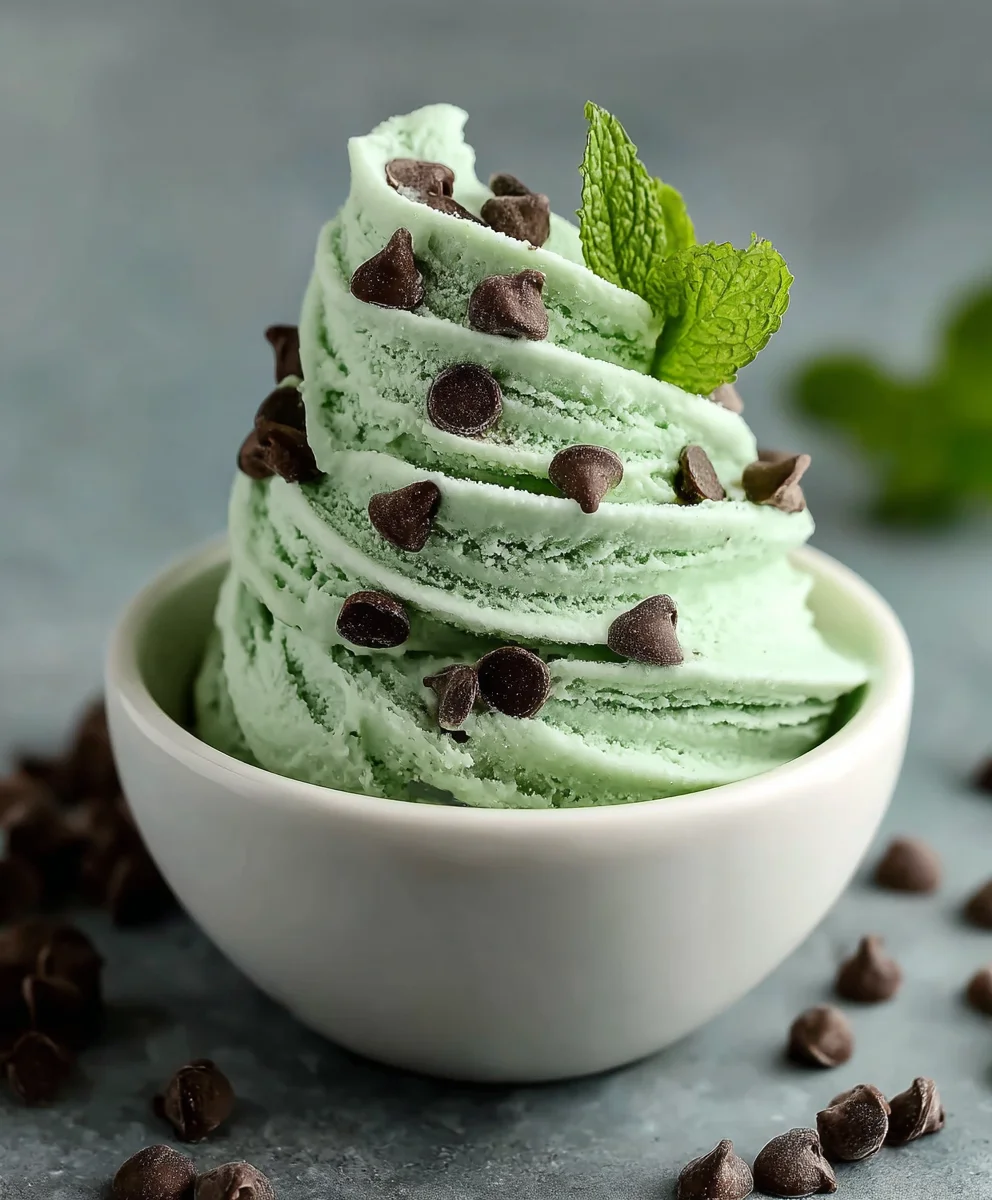
Ninja Creami Mint Chocolate Chip – imagine a dessert that not only refreshes your palate but also satisfies your deepest chocolate cravings, all while being incredibly simple to create at home. I believe this isn’t just any frozen treat; it’s a testament to how classic flavors can be elevated to new heights of creamy perfection. The timeless appeal of vibrant, cool mint dancing with rich, decadent chocolate chips has captivated dessert lovers for generations, reportedly gaining widespread adoration after its win at a White House dessert competition in the 1970s, solidifying its place as a beloved classic.
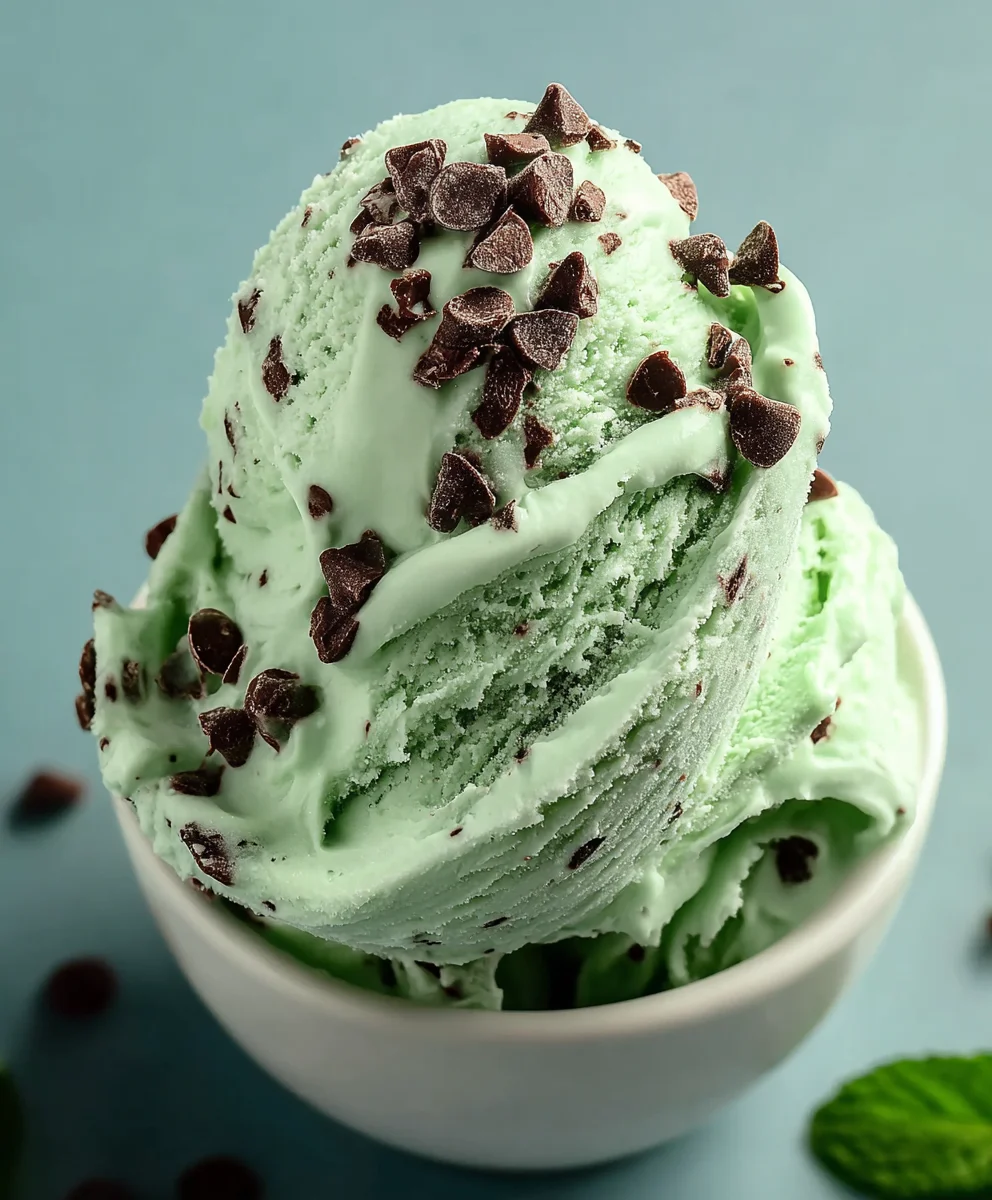
What makes this specific rendition truly extraordinary, and why I am so excited to share it with you, is the unparalleled, velvety texture achieved with the revolutionary Ninja Creami. Gone are the days of icy, hard-to-scoop homemade ice cream. Instead, you’re treated to a luxuriously smooth, melt-in-your-mouth experience that rivals gourmet parlors. People adore this dish not only for its invigorating taste and the delightful crunch of chocolate but also for the incredible ease and customization it offers. Preparing your own Ninja Creami Mint Chocolate Chip allows you to control the sweetness, the intensity of the mint, and the amount of chocolate, ensuring every spoonful is exactly to your liking. Get ready to transform simple ingredients into an unforgettable frozen delight!
Ingredients:
- For the Creamy Mint Base:
- 1 ¾ cups (about 420ml) whole milk. I find whole milk gives the best richness, but you could use a lower fat milk for a lighter version, adjusting other ingredients slightly to maintain creaminess.
- ¼ cup (about 60ml) heavy cream. This is crucial for that luxurious, indulgent texture that makes homemade ice cream so delightful.
- 2 tablespoons (about 30g) full-fat cream cheese, softened. Don’t skip this! This is my secret ingredient for achieving an incredibly smooth and scoopable texture, preventing iciness that can sometimes occur in homemade frozen treats.
- ½ cup (about 100g) granulated sugar. You can adjust this slightly to your preference, but this amount gives a perfectly balanced sweetness.
- ½ teaspoon pure mint extract. Quality matters here! Use a good quality extract for an authentic mint flavor that isn’t too overpowering or artificial tasting. Start with ½ teaspoon and you can always add a tiny bit more if you prefer a stronger mint.
- A few drops of green food coloring (optional, but highly recommended for that classic mint chocolate chip look!). I usually go for 3-5 drops of gel food coloring to get that lovely pastel mint green.
- Pinch of salt. Just a tiny pinch enhances all the other flavors beautifully.
- For the Mix-ins:
- ½ cup (about 85g) mini chocolate chips or finely chopped dark chocolate. Mini chips are fantastic because they distribute evenly and give you a little chocolatey burst in every bite without being too chunky. If using regular chocolate chips, I sometimes chop them a bit smaller.
Preparing the Minty Base
- Warm the Milk and Cream Cheese: In a medium-sized saucepan, combine 1 ¾ cups of whole milk with 2 tablespoons of softened cream cheese. Place the saucepan over medium-low heat. Whisk continuously and gently. My goal here is not to boil the milk, but rather to warm it up just enough to help the cream cheese fully melt and incorporate smoothly into the milk without any lumps. This usually takes about 3-5 minutes. You’ll see the cream cheese dissolving and the mixture becoming uniform. This step is vital for a super smooth Ninja Creami Mint Chocolate Chip experience!
- Dissolve the Sugar: Once the cream cheese is fully dissolved and the mixture is smooth, remove the saucepan from the heat. Add ½ cup of granulated sugar and the pinch of salt. Whisk vigorously until the sugar is completely dissolved. Take your time here; you don’t want any gritty sugar crystals in your final ice cream. You can feel the bottom of the pan with a spoon to ensure no sugar remains undissolved.
- Add Heavy Cream and Flavor: Pour in the ¼ cup of heavy cream. Now it’s time to infuse that wonderful minty goodness! Add ½ teaspoon of pure mint extract. At this point, I like to give it a quick taste – careful, it’s warm! If you feel it needs a tiny bit more mint, add another ¼ teaspoon. Remember, flavors can mellow slightly when frozen, but it’s always easier to add more than to take away.
- Achieve that Classic Green Hue: If you’re going for that iconic mint chocolate chip look (and who isn’t?), add a few drops of green food coloring. I typically start with 2-3 drops of gel food coloring, whisk thoroughly, and then add more a drop at a time until I reach my desired pastel green shade. Remember, a little goes a long way, and you can always add more. I aim for a color that reminds me of a fresh mint leaf, not too dark or artificial. This step really brings the “Ninja Creami Mint Chocolate Chip” visual appeal to life!
- Cool the Mixture: Give the entire base mixture one final good whisk to ensure everything is perfectly combined. Now, we need to cool this beautiful minty liquid completely. You can do this by letting it sit on the counter for about 30 minutes, then transferring it to the refrigerator for at least 2-3 hours. For a quicker chill, you can place the saucepan in an ice bath, stirring occasionally, until it’s cold. Chilling the base properly is essential before freezing, as it helps develop the flavors and prevents ice crystal formation.
Freezing the Pint for Perfection
- Pour into the Ninja Creami Pint: Once your mint ice cream base is thoroughly chilled, give it another quick stir. Carefully pour the entire mixture into an empty Ninja Creami pint container. Make sure not to fill it past the MAX FILL line marked on the pint.
- Prepare for Freezing: Securely place the lid on the Ninja Creami pint. Now, here comes the most patient part of the process!
- Freeze Solid: Place the sealed pint container on a flat, level surface in your freezer. This is absolutely non-negotiable for success with your Ninja Creami. The base must be frozen completely solid and flat. This usually takes at least 24 hours in a standard home freezer set to 0°F (-18°C). I often leave mine for 24-48 hours to ensure it’s rock-hard. If the base isn’t fully frozen or has a dome in the middle, your Ninja Creami won’t be able to process it correctly, and you’ll end up with a less-than-ideal texture. A perfectly frozen block is the key to that incredible Ninja Creami Mint Chocolate Chip texture we’re aiming for.
The Ninja Creami Process: From Block to Bliss
- Remove from Freezer and Prepare for Spinning: Once your mint base is frozen solid, take it out of the freezer. Remove the lid from the pint. Place the pint into the outer bowl of your Ninja Creami machine. Make sure it’s seated properly and securely.
- Install the Paddle and Lid: Attach the Ninja Creami lid with the paddle firmly onto the outer bowl. You’ll hear a click when it’s properly secured. Then, place the entire outer bowl assembly onto the motor base of the Ninja Creami, twisting the handle clockwise until it clicks into place.
- Choose Your Cycle: Plug in your Ninja Creami. For this creamy mint base, I typically use the “ICE CREAM” setting. This cycle is perfectly calibrated for dairy-based mixtures like ours. Press the “ICE CREAM” button. The machine will now work its magic, transforming your rock-hard frozen block into a delightful, scoopable frozen treat.
- First Spin Assessment: The machine will run for a few minutes. Once the cycle is complete, carefully remove the outer bowl from the motor base, and then remove the lid. Don’t be alarmed if your ice cream looks a bit crumbly, powdery, or like frozen “snow” after the first spin. This is completely normal and expected! This initial consistency is usually too firm to enjoy as is. This is a critical point in achieving the perfect Ninja Creami Mint Chocolate Chip texture.
- The Essential Re-Spin: Gently use a spoon to push any of the “snowy” mixture from the sides down towards the center. Place the lid back on the outer bowl (without removing the pint) and return it to the machine. Select the “RE-SPIN” button. The re-spin cycle is designed to further break down any remaining ice crystals and incorporate air, making the texture significantly creamier and smoother.
- Assess and Adjust (if needed): After the re-spin, check the consistency of your Ninja Creami Mint Chocolate Chip. It should now be much creamier, softer, and more scoopable, similar to soft-serve ice cream. If it’s still a bit powdery or too firm, you can add 1-2 tablespoons of milk or cream directly into the pint (right over the ice cream), and then run the “RE-SPIN” cycle again. Sometimes, depending on your freezer’s temperature or the exact fat content of your ingredients, an extra re-spin with a little liquid is all it takes to achieve pure perfection. My goal is always that velvety smooth, melt-in-your-mouth Ninja Creami Mint Chocolate Chip texture.
Adding Those Wonderful Chocolatey Mix-ins
- Create a Well for Mix-ins: Once your mint ice cream has reached your desired creamy consistency, it’s time for the best part – adding the chocolate chips! Using a spoon, create a small, narrow well in the center of the ice cream, going almost to the bottom of the pint. This well will hold your mix-ins.
- Add Your Chocolate Chips: Pour your ½ cup of mini chocolate chips (or finely chopped chocolate) directly into the well you just created. Try to keep them concentrated in the center for the best mix-in results.
- The “MIX-IN” Cycle: Place the lid (with the paddle) back onto the outer bowl, and return the assembly to the Ninja Creami machine. Select the “MIX-IN” cycle. This specialized cycle is gentler and designed to evenly distribute your additions throughout the ice cream without over-processing the base. This ensures you get that satisfying crunch of chocolate in almost every spoonful of your Ninja Creami Mint Chocolate Chip!
- Final Check and Serve: Once the “MIX-IN” cycle is complete, remove the outer bowl and lid. Your homemade Ninja Creami Mint Chocolate Chip ice cream should now be perfectly creamy, infused with refreshing mint, and bursting with delightful chocolate chips throughout. Give it a gentle stir with a spoon to ensure everything is evenly distributed.
Serving and Storing Your Delicious Creation
- Enjoy Immediately: Your Ninja Creami Mint Chocolate Chip ice cream is best enjoyed immediately after processing. At this stage, it will have a wonderful soft-serve consistency that is absolutely divine. Grab a spoon and dive right in!
- Storing Leftovers: If you have any leftovers (which is a rare occurrence in my house!), you can smooth the top of the ice cream in the pint, replace the lid, and put it back in the freezer.
- Re-spinning Leftovers: When you’re ready to enjoy the leftovers, you’ll find they’ve frozen solid again. Simply take the pint out of the freezer, remove the lid, place it back in the outer bowl, and run the “RE-SPIN” cycle on your Ninja Creami. This will bring it back to that perfectly creamy and scoopable consistency, making sure every scoop of your Ninja Creami Mint Chocolate Chip is as good as the first. You might notice the chocolate chips are a bit more broken up, but the flavor will still be incredible.
Tips for the Ultimate Ninja Creami Mint Chocolate Chip:
- Don’t Rush the Freeze: I cannot stress this enough – a perfectly frozen, flat block is the secret to Ninja Creami success. Plan ahead!
- Taste Test the Base: Always taste your liquid base before freezing. It allows you to adjust sweetness and mint intensity to your exact preference. Remember, flavors can be slightly muted when frozen, so a little bolder in the base is often ideal.
- Experiment with Chocolate: While mini chocolate chips are my go-to, feel free to try shaved dark chocolate, finely chopped chocolate bars, or even chocolate-covered cookie pieces for a different texture.
- Add-in Before Freezing: Some people like to add a portion of their chocolate chips before freezing for a more embedded distribution, then add the rest as a mix-in. I personally prefer adding all of them post-spin to maintain their integrity.
- Clean Your Ninja Creami Promptly: To keep your machine in top condition, clean the pint, outer bowl, and paddle right after use. This makes cleanup a breeze and ensures your Ninja Creami is always ready for its next delicious creation.
Why This Recipe Shines:
This Ninja Creami Mint Chocolate Chip recipe truly delivers on flavor and texture. The cream cheese creates a luxuriously smooth base that holds up beautifully in the Creami, preventing that icy disappointment often found in homemade ice cream. The balance of mint and rich chocolate is simply divine, and the ability of the Ninja Creami to transform a frozen block into a scoopable dream in minutes means fresh, delicious dessert is always within reach. It’s a game-changer for anyone who loves mint chocolate chip and wants to customize their frozen treats at home!
Conclusion:
After diving deep into the magical process of crafting this incredible frozen treat, I truly hope you’re as excited as I am about it. This isn’t just another dessert; it’s an experience. What makes this recipe an absolute game-changer is its ability to deliver unparalleled creaminess and flavor intensity that you simply won’t find in store-bought options. We’re talking about a vibrant, refreshing mint combined with decadent chocolate chips, all transformed into a silken, smooth delight thanks to the revolutionary power of the Ninja Creami. It’s light yet satisfying, indulgent without feeling heavy, and surprisingly simple to master. Imagine the look of pure joy on your family’s faces, or the appreciative sighs from your guests when you serve up a scoop of this homemade perfection. It’s more than just a sweet ending to a meal; it’s a refreshing escape, a moment of pure bliss in every spoonful. The freshness of the mint, the perfect crunch of the chocolate, and that signature Creami texture come together in a symphony of flavors that truly sets this recipe apart from anything else you’ve ever tried. This isn’t just a recipe; it’s a revelation for your taste buds.
Elevate Your Experience: Serving Suggestions and Creative Variations
Now, let’s talk about taking this masterpiece to the next level. While it’s utterly divine on its own, a few creative touches can elevate your dessert experience even further. For a classic approach, consider serving a generous scoop in a chilled bowl, perhaps garnished with a fresh sprig of mint for an extra aromatic kick. If you’re feeling a bit more adventurous, how about transforming it into a luxurious sundae? A drizzle of hot fudge, a dollop of homemade whipped cream, and an extra sprinkle of mini chocolate chips would make for an irresistible treat. You could even crumble some crushed chocolate wafer cookies or brownie bits over the top for added texture and richness. For those who enjoy a little extra sophistication, a sprinkle of high-quality cocoa nibs can offer a pleasing bitterness that beautifully contrasts with the sweet mint. The possibilities for customisation are truly endless!
But the fun doesn’t stop there! This versatile base opens up a world of possibilities for variations. If you prefer a slightly different chocolate experience, try swapping out standard chocolate chips for white chocolate chips or even chopped dark chocolate chunks for varying intensity. For a touch of nutty goodness, a handful of finely chopped pistachios or walnuts could be a delightful mix-in. Feeling fruity? A swirl of raspberry or cherry puree added during the re-spin cycle can create an exciting new flavor profile. And for those looking for a grown-up version, a tiny splash of peppermint schnapps or crème de menthe added right before the final spin can impart a sophisticated, boozy twist – just remember to enjoy responsibly! Don’t be afraid to experiment with different extracts, like almond or coconut, to create entirely new flavor dimensions. The beauty of the Ninja Creami is its adaptability, allowing you to tailor every batch to your exact cravings and preferences.
Your Turn: Try the Ninja Creami Mint Chocolate Chip Today!
So, what are you waiting for? This is your invitation to step into the kitchen and unleash your inner artisan. I genuinely believe that once you taste the homemade difference, especially with the incredible texture achieved by the Ninja Creami, you’ll be hooked. There’s something immensely satisfying about creating such a professional-quality dessert right in your own home. I promise, the effort is minimal, and the reward is absolutely immense.
I am so incredibly eager for you to try this specific recipe. Go ahead, gather your ingredients, fire up your Ninja Creami, and prepare to be amazed by the ultimate creamy, dreamy delight that is our Ninja Creami Mint Chocolate Chip frozen dessert. Don’t let another day pass without experiencing this vibrant, refreshing, and utterly delicious creation. Once you’ve whipped up your batch, please don’t keep this delicious secret to yourself! I would absolutely love to hear all about your experience. Did you add any unique toppings? Did you try a fun variation? What was your favorite part? Share your photos and your thoughts with us! Your feedback and creative twists inspire not just me, but our entire community of dessert lovers. Let’s build a delightful collection of shared experiences around this fantastic treat. Happy churning, and I can’t wait to see what delicious magic you create!
Recipe
A delicious recipe
Ingredients
Instructions
Important Information
Nutrition Facts (Per Serving)
It is important to consider this information as approximate and not to use it as definitive health advice.
Allergy Information
Please check ingredients for potential allergens and consult a health professional if in doubt.


Leave a Comment