
Michigan Cherry Cobbler: the very name conjures images of sun-drenched orchards, the sweet, tart aroma of ripe cherries, and the comforting warmth of a homemade dessert. Have you ever bitten into a spoonful of warm cherry cobbler, the juicy cherries bursting in your mouth, the buttery crust melting on your tongue? If not, you’re in for a treat! This isn’t just a dessert; it’s a taste of Michigan summer, a slice of Americana, and a guaranteed crowd-pleaser.
Cobblers, in general, have a humble history, originating as a resourceful way for early American settlers to create delicious desserts with limited ingredients. But Michigan Cherry Cobbler takes on a special significance in the Great Lakes State, where cherry orchards flourish. Michigan is renowned for its tart cherries, and this cobbler is a celebration of that bounty. It’s a dish passed down through generations, each family adding their own unique twist to the recipe.
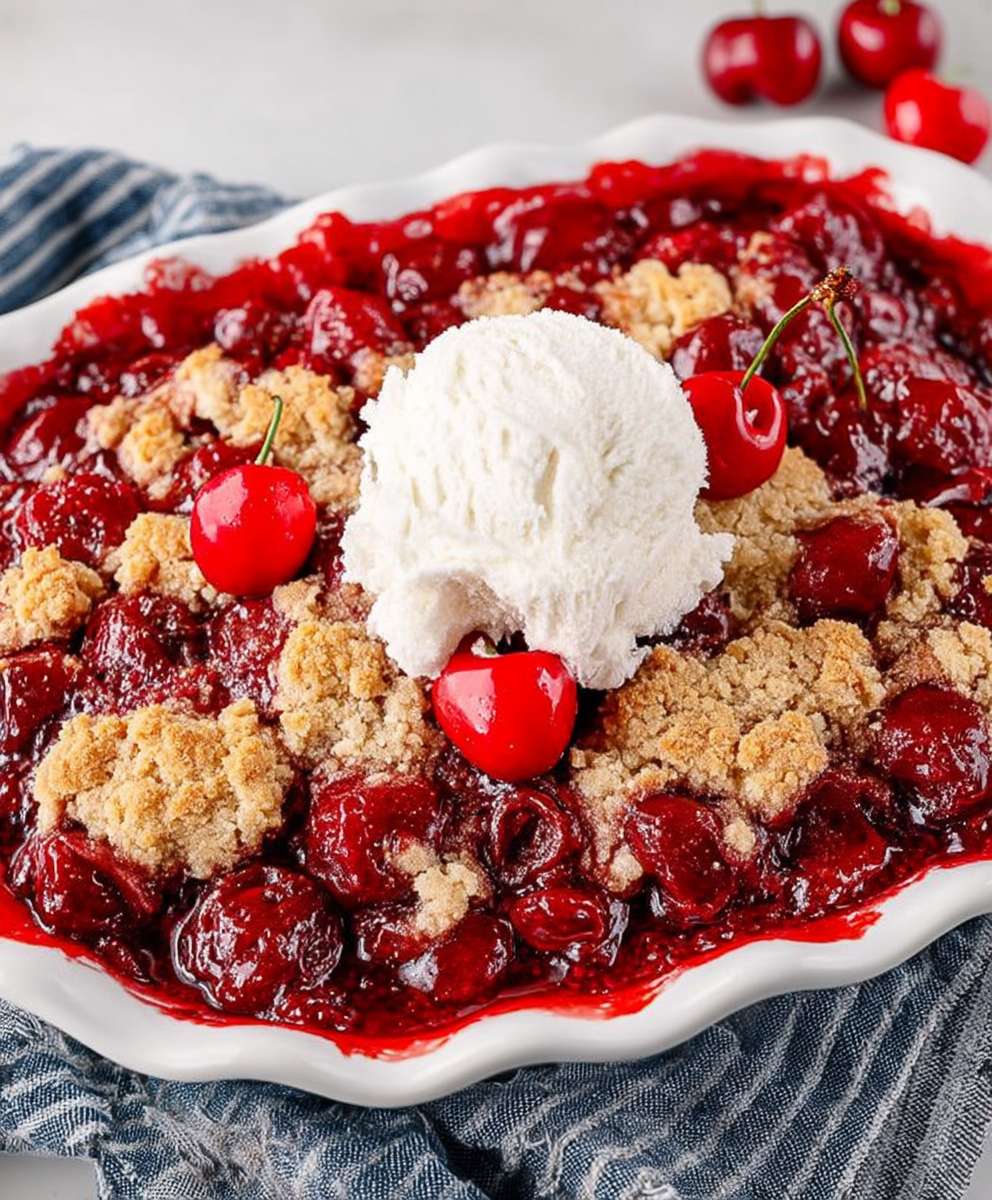
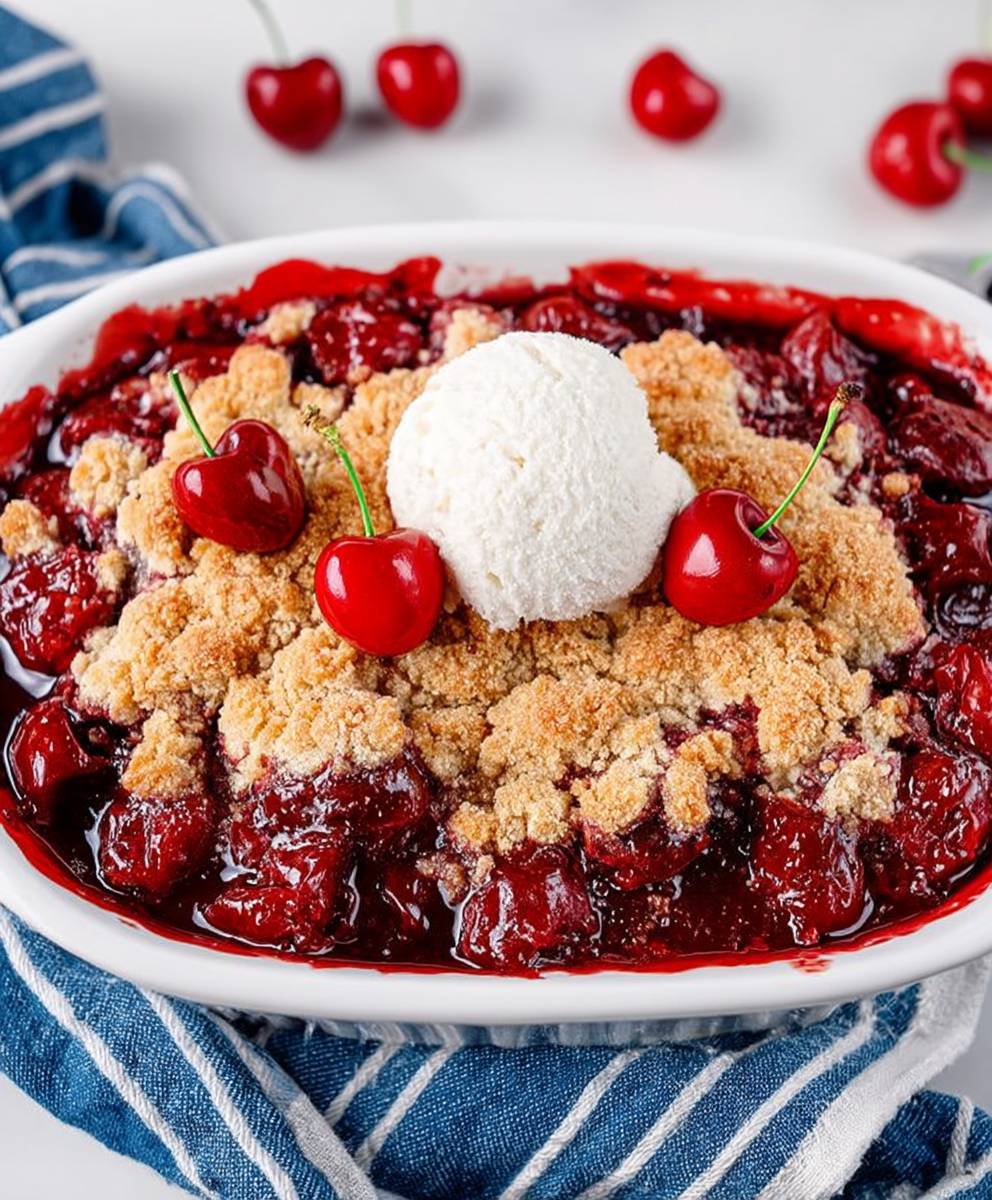
People adore this dish for its simplicity and incredible flavor. The combination of sweet and tart cherries, nestled beneath a golden, biscuit-like topping, is simply irresistible. It’s easy to make, requiring minimal effort for maximum reward. Whether you’re serving it warm with a scoop of vanilla ice cream or enjoying it on its own, Michigan Cherry Cobbler is the perfect dessert for any occasion. So, let’s get baking and bring a little bit of Michigan sunshine into your kitchen!
Ingredients:
- For the Cherry Filling:
- 6 cups fresh or frozen pitted Michigan cherries (if frozen, thaw slightly)
- ¾ cup granulated sugar (adjust to taste depending on cherry sweetness)
- 3 tablespoons cornstarch
- 1 tablespoon lemon juice
- 1 teaspoon almond extract (optional, but highly recommended!)
- ¼ teaspoon salt
- 2 tablespoons cold unsalted butter, cut into small pieces
- For the Biscuit Topping:
- 2 cups all-purpose flour
- 2 tablespoons granulated sugar
- 1 tablespoon baking powder
- ½ teaspoon baking soda
- ½ teaspoon salt
- ½ cup (1 stick) cold unsalted butter, cut into small pieces
- ¾ cup buttermilk (or milk with 1 tablespoon lemon juice or vinegar added, let sit for 5 minutes)
- 2 tablespoons heavy cream or milk, for brushing (optional)
- 2 tablespoons granulated sugar, for sprinkling (optional)
Preparing the Cherry Filling:
- In a large saucepan, combine the pitted cherries, granulated sugar, cornstarch, lemon juice, almond extract (if using), and salt.
- Stir everything together well to ensure the cornstarch is evenly distributed. This is important to prevent lumps in your filling.
- Place the saucepan over medium heat and bring the mixture to a simmer, stirring constantly.
- Once simmering, continue to cook for about 5-7 minutes, or until the cherry filling has thickened and the cherries have softened slightly. Keep stirring to prevent sticking and burning. You’ll notice the mixture becoming glossy and more viscous.
- Remove the saucepan from the heat and stir in the cold butter pieces. The butter will melt into the hot filling, adding richness and a lovely sheen.
- Set the cherry filling aside while you prepare the biscuit topping. This allows the filling to cool slightly and thicken further.
Making the Biscuit Topping:
- Preheat your oven to 375°F (190°C).
- In a large bowl, whisk together the flour, sugar, baking powder, baking soda, and salt. Make sure everything is well combined. This ensures even rising and a consistent texture in your biscuits.
- Add the cold, cubed butter to the dry ingredients. Using a pastry blender or your fingertips, cut the butter into the flour mixture until it resembles coarse crumbs. The butter should be in small pieces, about the size of peas. This creates pockets of fat that will melt during baking, resulting in flaky biscuits.
- Make a well in the center of the dry ingredients and pour in the buttermilk (or your milk mixture).
- Using a fork or spatula, gently stir the wet and dry ingredients together until just combined. Be careful not to overmix! Overmixing will develop the gluten in the flour, resulting in tough biscuits. The dough should be slightly shaggy and a little sticky.
- Turn the dough out onto a lightly floured surface.
- Gently pat the dough into a circle about ¾ inch thick.
- Using a biscuit cutter (about 2-3 inches in diameter) or a knife, cut out biscuits. If you don’t have a biscuit cutter, you can simply cut the dough into squares or rectangles.
- Gently gather the scraps of dough, pat them out again, and cut out more biscuits. Try to handle the dough as little as possible to keep the biscuits tender.
Assembling and Baking the Cobbler:
- Pour the cherry filling into a 9×13 inch baking dish. Make sure the filling is evenly distributed.
- Arrange the biscuit topping over the cherry filling. You can place the biscuits close together for a more cohesive topping, or leave some space between them for a more rustic look.
- If desired, brush the tops of the biscuits with heavy cream or milk for a golden-brown color. This step is optional, but it adds a nice visual appeal.
- Sprinkle the tops of the biscuits with granulated sugar for a touch of sweetness and a bit of sparkle. This is also optional.
- Bake in the preheated oven for 30-35 minutes, or until the biscuits are golden brown and the cherry filling is bubbly. Keep an eye on the cobbler during baking, and if the biscuits start to brown too quickly, you can tent the baking dish with aluminum foil.
- Remove the cobbler from the oven and let it cool slightly before serving. This allows the filling to thicken a bit more and prevents you from burning your mouth!
Serving Suggestions:
Michigan cherry cobbler is delicious served warm, either on its own or with a scoop of vanilla ice cream or a dollop of whipped cream. The contrast of the warm, sweet-tart cherry filling and the cool, creamy topping is simply divine. You can also sprinkle a little cinnamon or nutmeg over the top for added flavor. Leftovers can be stored in the refrigerator for up to 3 days. Reheat gently in the oven or microwave before serving.
Tips and Variations:
- Cherry Variety: While this recipe calls for Michigan cherries, you can use other types of cherries as well. Sweet cherries will require less sugar in the filling, while tart cherries will need more. Adjust the sugar accordingly to your taste.
- Frozen Cherries: If using frozen cherries, be sure to thaw them slightly before using. This will help to prevent the filling from becoming too watery. You can also drain off any excess liquid before adding the cherries to the saucepan.
- Biscuit Variations: You can add other ingredients to the biscuit dough for added flavor and texture. Try adding a handful of chopped nuts, such as pecans or walnuts, or a sprinkle of cinnamon or nutmeg. You can also add a tablespoon of lemon zest for a bright, citrusy flavor.
- Cobbler Topping Alternatives: If you’re not a fan of biscuits, you can use other types of toppings for your cobbler. A streusel topping made with flour, butter, sugar, and oats is a delicious alternative. You can also use a cake batter topping or even a pie crust topping.
- Individual Cobblers: For a fun and elegant presentation, you can bake the cobbler in individual ramekins. Simply divide the cherry filling and biscuit topping among the ramekins and bake as directed.
- Make Ahead: You can prepare the cherry filling and biscuit dough ahead of time. Store the cherry filling in the refrigerator for up to 2 days. Store the biscuit dough in the refrigerator for up to 1 day. When ready to bake, simply assemble the cobbler and bake as directed.
- Gluten-Free Option: To make this cobbler gluten-free, simply substitute the all-purpose flour with a gluten-free all-purpose flour blend. Be sure to use a blend that contains xanthan gum, as this will help to bind the ingredients together.
- Vegan Option: To make this cobbler vegan, substitute the butter with vegan butter and the buttermilk with plant-based milk (such as almond milk or soy milk) mixed with 1 tablespoon of lemon juice or vinegar.
Troubleshooting:
- Filling Too Runny: If your cherry filling is too runny, you can add a little more cornstarch to thicken it up. Mix 1 tablespoon of cornstarch with 2 tablespoons of cold water to form a slurry, then stir the slurry into the filling and cook for a few more minutes until thickened.
- Biscuits Too Dry: If your biscuits are too dry, you may have overmixed the dough. Be sure to mix the wet and dry ingredients together until just combined. You can also add a little more buttermilk to the dough to make it more moist.
- Biscuits Not Rising: If your biscuits are not rising, your baking powder or baking soda may be old. Be sure to use fresh baking powder and baking soda for best results. You may also have overmixed the dough, which can prevent the biscuits from rising properly.
- Cobbler Burning: If your cobbler is burning on top, you can tent the baking dish with aluminum foil to prevent further browning. You can also lower the oven temperature slightly and bake for a longer period of time.
Nutritional Information (Approximate):
Please note that the nutritional information provided below is an estimate and may vary depending on the specific ingredients used and portion sizes.
- Calories: 350-450 per serving
- Fat: 15-20 grams
- Saturated Fat: 8-12 grams
- Cholesterol: 40-60 mg
- Sodium: 200-300 mg
- Carbohydrates: 50-6
Conclusion:
This Michigan Cherry Cobbler isn’t just a dessert; it’s a warm hug on a plate, a burst of summer sunshine even on the gloomiest days. The combination of sweet, tart cherries nestled under a golden, buttery biscuit topping is simply irresistible. Trust me, once you take that first bite, you’ll understand why I’m so passionate about this recipe. Its a symphony of textures and flavors that will have you reaching for seconds (and maybe even thirds!).
But what truly makes this cobbler a must-try is its simplicity. You don’t need to be a seasoned baker to achieve cobbler perfection. The recipe is straightforward, the ingredients are readily available, and the results are consistently delicious. It’s the kind of dessert that’s perfect for a casual weeknight treat or a show-stopping centerpiece for a weekend gathering. Its also a fantastic way to showcase the incredible flavor of Michigan cherries, bringing a taste of the Great Lakes to your table.
Looking for serving suggestions? I’ve got you covered! A scoop of vanilla ice cream melting over the warm cobbler is a classic pairing that never fails. But don’t be afraid to experiment! A dollop of freshly whipped cream, a sprinkle of chopped nuts (almonds or pecans would be divine!), or even a drizzle of chocolate sauce can elevate this dessert to new heights. For a slightly tangier twist, try serving it with a spoonful of Greek yogurt.
And if you’re feeling adventurous, here are a few variations to consider:
* Spice it up: Add a pinch of cinnamon, nutmeg, or even a dash of cardamom to the cherry filling for a warm, aromatic flavor.
* Berry Bonanza: Mix in other berries like blueberries, raspberries, or blackberries for a more complex flavor profile.
* Citrus Zest: A little lemon or orange zest in the biscuit topping adds a bright, refreshing note.
* Almond Extract: A teaspoon of almond extract in the cherry filling enhances the cherry flavor and adds a subtle nutty aroma.
* Make it Gluten-Free: Simply substitute the all-purpose flour in the biscuit topping with a gluten-free blend.I truly believe this Michigan Cherry Cobbler will become a staple in your recipe repertoire. It’s a dessert that’s guaranteed to impress your family and friends, and it’s a wonderful way to celebrate the flavors of summer (or any season, really!).
So, what are you waiting for? Gather your ingredients, preheat your oven, and get ready to experience the magic of homemade cobbler. I’m confident that you’ll love it as much as I do.
And most importantly, I want to hear about your experience! Did you try the recipe? Did you make any variations? What did your family and friends think? Share your photos, comments, and feedback in the comments section below. I can’t wait to see your creations and hear your stories. Happy baking! Let me know if you have any questions, and I’ll do my best to help. Enjoy your delicious Michigan Cherry Cobbler!
Michigan Cherry Cobbler: A Delicious & Easy Recipe
Sweet and tart Michigan cherry cobbler with flaky homemade biscuits. A comforting classic perfect with ice cream!
Ingredients
- 6 cups fresh or frozen pitted Michigan cherries (if frozen, thaw slightly)
- ¾ cup granulated sugar (adjust to taste depending on cherry sweetness)
- 3 tablespoons cornstarch
- 1 tablespoon lemon juice
- 1 teaspoon almond extract (optional, but highly recommended!)
- ¼ teaspoon salt
- 2 tablespoons cold unsalted butter, cut into small pieces
- 2 cups all-purpose flour
- 2 tablespoons granulated sugar
- 1 tablespoon baking powder
- ½ teaspoon baking soda
- ½ teaspoon salt
- ½ cup (1 stick) cold unsalted butter, cut into small pieces
- ¾ cup buttermilk (or milk with 1 tablespoon lemon juice or vinegar added, let sit for 5 minutes)
- 2 tablespoons heavy cream or milk, for brushing (optional)
- 2 tablespoons granulated sugar, for sprinkling (optional)
Instructions
- In a large saucepan, combine the pitted cherries, granulated sugar, cornstarch, lemon juice, almond extract (if using), and salt.
- Stir everything together well to ensure the cornstarch is evenly distributed.
- Place the saucepan over medium heat and bring the mixture to a simmer, stirring constantly.
- Once simmering, continue to cook for about 5-7 minutes, or until the cherry filling has thickened and the cherries have softened slightly. Keep stirring to prevent sticking and burning.
- Remove the saucepan from the heat and stir in the cold butter pieces.
- Set the cherry filling aside while you prepare the biscuit topping.
- Preheat your oven to 375°F (190°C).
- In a large bowl, whisk together the flour, sugar, baking powder, baking soda, and salt.
- Add the cold, cubed butter to the dry ingredients. Using a pastry blender or your fingertips, cut the butter into the flour mixture until it resembles coarse crumbs.
- Make a well in the center of the dry ingredients and pour in the buttermilk (or your milk mixture).
- Using a fork or spatula, gently stir the wet and dry ingredients together until just combined. Be careful not to overmix!
- Turn the dough out onto a lightly floured surface.
- Gently pat the dough into a circle about ¾ inch thick.
- Using a biscuit cutter (about 2-3 inches in diameter) or a knife, cut out biscuits.
- Gently gather the scraps of dough, pat them out again, and cut out more biscuits.
- Pour the cherry filling into a 9×13 inch baking dish.
- Arrange the biscuit topping over the cherry filling.
- If desired, brush the tops of the biscuits with heavy cream or milk for a golden-brown color.
- Sprinkle the tops of the biscuits with granulated sugar for a touch of sweetness and a bit of sparkle.
- Bake in the preheated oven for 30-35 minutes, or until the biscuits are golden brown and the cherry filling is bubbly.
- Remove the cobbler from the oven and let it cool slightly before serving.
Notes
- Cherry Variety: While this recipe calls for Michigan cherries, you can use other types of cherries as well. Sweet cherries will require less sugar in the filling, while tart cherries will need more. Adjust the sugar accordingly to your taste.
- Frozen Cherries: If using frozen cherries, be sure to thaw them slightly before using. This will help to prevent the filling from becoming too watery. You can also drain off any excess liquid before adding the cherries to the saucepan.
- Biscuit Variations: You can add other ingredients to the biscuit dough for added flavor and texture. Try adding a handful of chopped nuts, such as pecans or walnuts, or a sprinkle of cinnamon or nutmeg. You can also add a tablespoon of lemon zest for a bright, citrusy flavor.
- Cobbler Topping Alternatives: If you’re not a fan of biscuits, you can use other types of toppings for your cobbler. A streusel topping made with flour, butter, sugar, and oats is a delicious alternative. You can also use a cake batter topping or even a pie crust topping.
- Individual Cobblers: For a fun and elegant presentation, you can bake the cobbler in individual ramekins. Simply divide the cherry filling and biscuit topping among the ramekins and bake as directed.
- Make Ahead: You can prepare the cherry filling and biscuit dough ahead of time. Store the cherry filling in the refrigerator for up to 2 days. Store the biscuit dough in the refrigerator for up to 1 day. When ready to bake, simply assemble the cobbler and bake as directed.
- Gluten-Free Option: To make this cobbler gluten-free, simply substitute the all-purpose flour with a gluten-free all-purpose flour blend. Be sure to use a blend that contains xanthan gum, as this will help to bind the ingredients together.
- Vegan Option: To make this cobbler vegan, substitute the butter with vegan butter and the buttermilk with plant-based milk (such as almond milk or soy milk) mixed with 1 tablespoon of lemon juice or vinegar.
Leave a Comment