
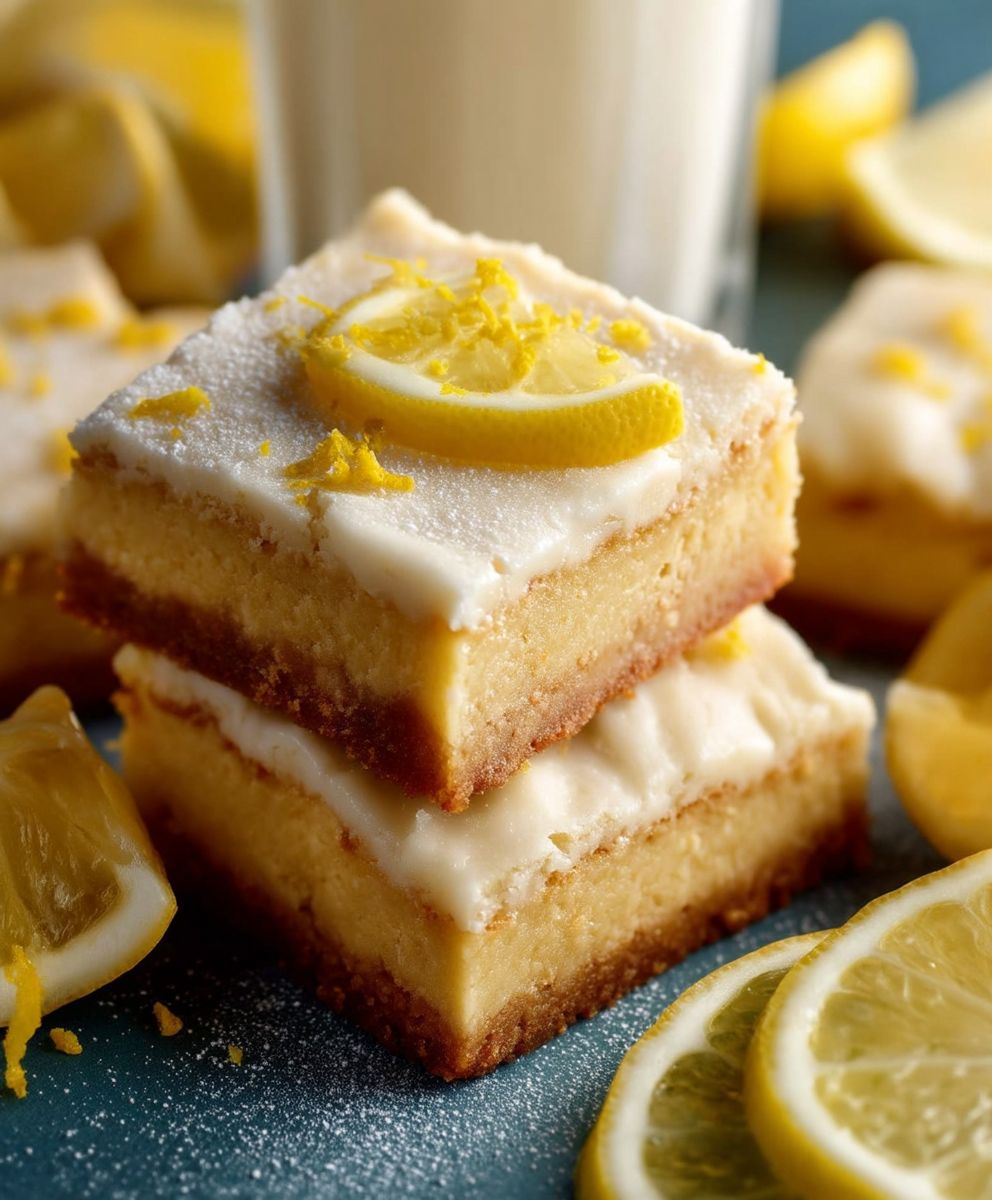
Lemon cookie bars: Prepare to be transported to a sunny citrus grove with every single bite! Imagine sinking your teeth into a buttery, crumbly shortbread crust, topped with a tangy, sweet, and utterly irresistible lemon filling. These aren’t just any dessert; they’re a burst of sunshine on a cloudy day, a perfect pick-me-up, and a guaranteed crowd-pleaser.
While the exact origins of the lemon bar are debated, similar citrus curds and tarts have been enjoyed for centuries, particularly in England. The American version, often featuring a cookie or shortbread base, gained popularity in the mid-20th century, becoming a staple at bake sales and family gatherings. It’s a testament to the enduring appeal of simple, bright flavors.
What makes lemon cookie bars so universally loved? It’s the perfect balance of textures and tastes. The buttery, slightly salty crust provides a delightful contrast to the smooth, tart, and sweet lemon filling. They’re also incredibly easy to make, requiring minimal ingredients and effort. Whether you’re a seasoned baker or a kitchen novice, you can whip up a batch of these delightful treats in no time. Plus, they’re perfect for any occasion, from a casual afternoon snack to an elegant dessert at a dinner party. Get ready to experience the zesty joy of homemade lemon cookie bars!
Ingredients:
- For the Crust:
- 1 1/2 cups (180g) all-purpose flour
- 1/2 cup (100g) granulated sugar
- 1/4 teaspoon salt
- 1/2 cup (113g) unsalted butter, cold and cubed
- 1 large egg yolk
- 2 tablespoons ice water
- For the Lemon Filling:
- 4 large eggs
- 1 3/4 cups (350g) granulated sugar
- 1/4 cup (30g) all-purpose flour
- 1/4 teaspoon salt
- 1 cup (240ml) freshly squeezed lemon juice (from about 5-6 lemons)
- 2 tablespoons lemon zest (from about 2-3 lemons)
- Powdered sugar, for dusting (optional)
Preparing the Crust:
- In a large bowl, whisk together the flour, granulated sugar, and salt. This ensures the salt is evenly distributed, which is crucial for flavor.
- Add the cold, cubed butter to the flour mixture. Using a pastry blender or your fingertips, cut the butter into the flour until the mixture resembles coarse crumbs. The smaller the butter pieces, the flakier the crust will be! If you’re using your fingertips, work quickly to prevent the butter from melting.
- In a small bowl, whisk together the egg yolk and ice water. This combination adds richness and helps bind the dough without making it too tough.
- Pour the egg yolk mixture over the flour and butter mixture. Stir with a fork until the dough just comes together. Be careful not to overmix, as this can develop the gluten in the flour and result in a tough crust.
- Gently press the dough into a ball. Flatten it into a disc, wrap it in plastic wrap, and refrigerate for at least 30 minutes. This chilling time allows the gluten to relax and the butter to firm up, which will prevent the crust from shrinking during baking. You can even chill it for longer, up to a few hours, if needed.
- Preheat your oven to 350°F (175°C). While the oven is preheating, prepare a 9×13 inch baking pan by lining it with parchment paper, leaving an overhang on the sides. This will make it easy to lift the baked lemon bars out of the pan later.
- Remove the chilled dough from the refrigerator. On a lightly floured surface, roll out the dough to fit the bottom of the prepared baking pan. You can also press the dough directly into the pan if you find it easier.
- Once the dough is in the pan, prick it all over with a fork. This prevents the crust from puffing up during baking.
- Bake the crust for 18-20 minutes, or until it is lightly golden brown. Keep a close eye on it, as oven temperatures can vary. You want it to be set but not overly browned.
Making the Lemon Filling:
- While the crust is baking, prepare the lemon filling. In a large bowl, whisk together the eggs, granulated sugar, flour, and salt until smooth. Make sure there are no lumps of flour remaining.
- Add the freshly squeezed lemon juice and lemon zest to the egg mixture. Whisk until well combined. The mixture will be quite liquidy, but that’s perfectly normal.
- Once the crust is par-baked, remove it from the oven. Pour the lemon filling evenly over the hot crust.
Baking the Lemon Bars:
- Return the baking pan to the oven and bake for 25-30 minutes, or until the filling is set and no longer jiggles in the center. The edges should be slightly golden brown. The center might still have a slight wobble, but it will firm up as it cools.
- Remove the lemon bars from the oven and let them cool completely in the pan. This is crucial for the filling to set properly. I know it’s tempting to cut into them while they’re still warm, but trust me, patience is key!
- Once the lemon bars are completely cool, lift them out of the pan using the parchment paper overhang.
- Cut the lemon bars into squares or rectangles using a sharp knife. For clean cuts, wipe the knife clean between each slice.
- Dust the lemon bars with powdered sugar, if desired. This adds a touch of sweetness and makes them look even more appealing.
Tips for the Best Lemon Bars:
- Use Freshly Squeezed Lemon Juice: Bottled lemon juice just doesn’t compare to the bright, tangy flavor of freshly squeezed juice. It’s worth the extra effort!
- Don’t Overbake: Overbaked lemon bars will be dry and rubbery. The filling should be set but still slightly soft in the center.
- Chill Thoroughly: Chilling the lemon bars completely before cutting them is essential for clean cuts and a firm filling.
- Zest Wisely: When zesting the lemons, be careful not to zest the white pith underneath the peel, as it can be bitter.
- Adjust Sweetness: If you prefer a less tart lemon bar, you can increase the amount of sugar in the filling slightly.
- Storage: Store leftover lemon bars in an airtight container in the refrigerator for up to 3 days. They are best enjoyed cold.
Variations:
- Lime Bars: Substitute lime juice and lime zest for the lemon juice and zest for a delicious twist.
- Orange Bars: Use orange juice and orange zest for a sweeter, more mellow flavor.
- Coconut Lemon Bars: Add 1/2 cup of shredded coconut to the lemon filling for a tropical touch.
- Berry Lemon Bars: Swirl in some fresh or frozen berries into the lemon filling before baking. Raspberries and blueberries work particularly well.
- Gluten-Free Lemon Bars: Use a gluten-free all-purpose flour blend in both the crust and the filling. Make sure the blend contains xanthan gum for binding.
Troubleshooting:
- Crust is too hard: You may have overmixed the dough or added too much flour. Be careful not to overwork the dough and measure the flour accurately.
- Filling is too runny: You may not have baked the lemon bars long enough, or the oven temperature may have been too low. Make sure the filling is set before removing the bars from the oven.
- Filling is cracked: This can happen if the oven temperature is too high or if the lemon bars are baked for too long. Reduce the oven temperature slightly and check the bars frequently.
- Crust is shrinking: This is usually caused by gluten development. Make sure to chill the dough thoroughly before baking and avoid overmixing.
Conclusion:
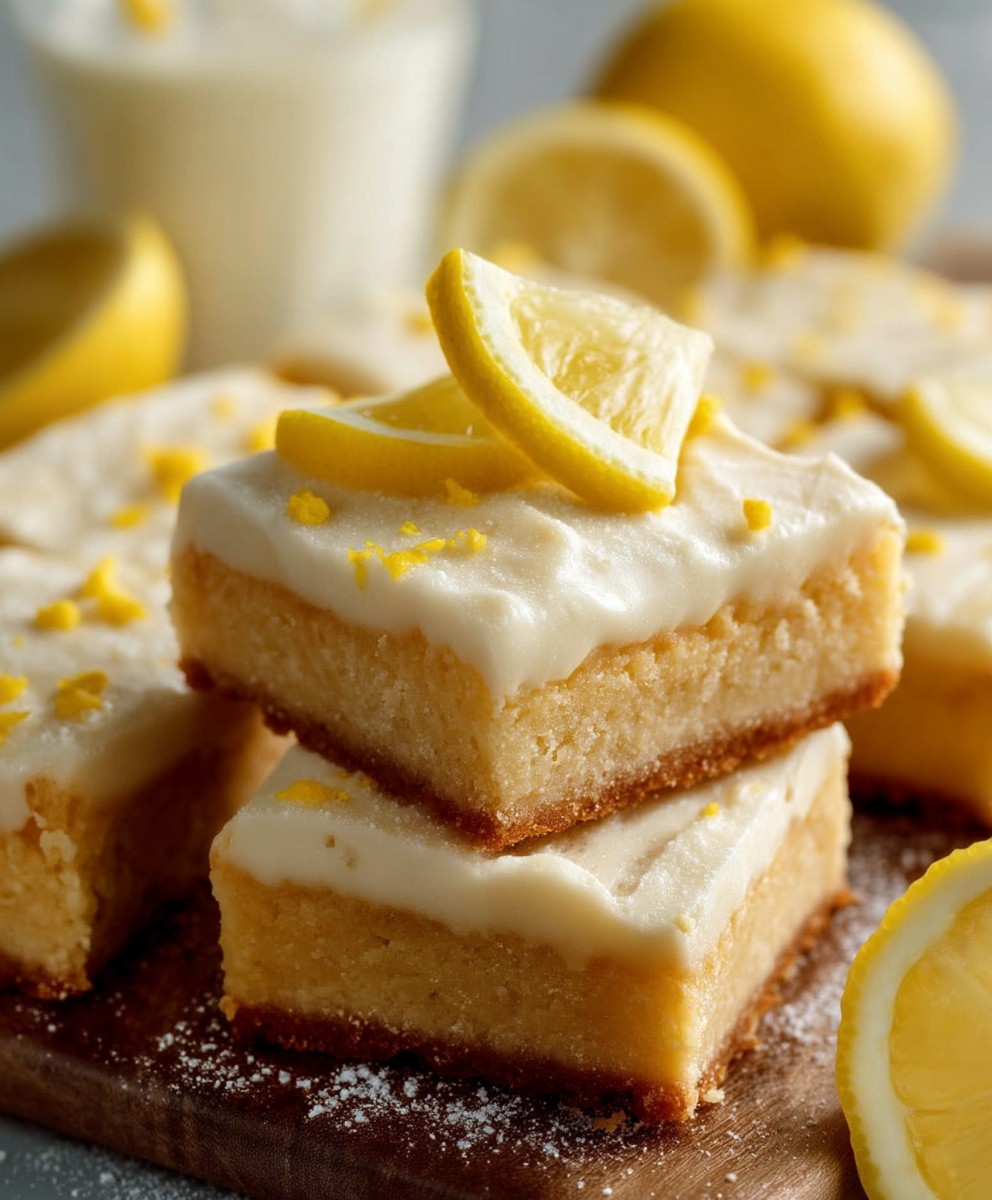
And there you have it! These Lemon Cookie Bars are truly a ray of sunshine in dessert form, and I genuinely believe they’re a must-try for anyone who loves a bright, citrusy treat. The combination of the buttery, slightly chewy cookie base with the tangy, sweet lemon topping is simply irresistible. It’s a flavor explosion that will leave you wanting more, and trust me, that’s a good thing!
But why are these bars so special? It’s more than just the taste. They’re incredibly easy to make, requiring minimal effort and ingredients you likely already have in your pantry. Plus, they’re perfect for any occasion, from a casual afternoon snack to a potluck gathering. They’re guaranteed to be a crowd-pleaser! I’ve made these for countless events, and they always disappear in a flash.
Beyond their simplicity and deliciousness, these bars are incredibly versatile. While I’ve shared my go-to recipe, feel free to experiment and make them your own. For a richer flavor, try using brown butter in the cookie base. The nutty notes will complement the lemon beautifully. If you’re feeling adventurous, add a handful of white chocolate chips to the batter for a touch of sweetness and creaminess.
Serving Suggestions and Variations:
* Dust the bars with powdered sugar for an elegant presentation.
* Serve them chilled for a refreshing treat on a hot day.
* Pair them with a scoop of vanilla ice cream or a dollop of whipped cream for an extra indulgent dessert.
* For a gluten-free option, substitute the all-purpose flour with a gluten-free blend.
* Add a sprinkle of poppy seeds to the lemon topping for a subtle crunch and visual appeal.
* If you’re a fan of lavender, infuse the sugar with lavender buds for a floral twist.
* Consider adding a thin layer of raspberry jam between the cookie base and the lemon topping for a burst of fruity flavor.
I’m confident that you’ll love these Lemon Cookie Bars as much as I do. They’re the perfect balance of sweet and tart, and they’re guaranteed to brighten your day. The ease of preparation makes them a winner in my book, especially when I’m craving something delicious but don’t want to spend hours in the kitchen.
So, what are you waiting for? Grab your ingredients and get baking! I promise you won’t regret it. And once you’ve tried them, I’d love to hear about your experience. Did you make any variations? What did you think of the flavor? Share your photos and comments with me I can’t wait to see your creations! I am always looking for new ways to improve my lemon cookie bars. Happy baking!
Lemon Cookie Bars: The Ultimate Guide to Baking Perfection
Tangy and sweet lemon bars with a buttery shortbread crust and a bright, citrusy filling. Perfect for a refreshing dessert!
Ingredients
- 1 1/2 cups (180g) all-purpose flour
- 1/2 cup (100g) granulated sugar
- 1/4 teaspoon salt
- 1/2 cup (113g) unsalted butter, cold and cubed
- 1 large egg yolk
- 2 tablespoons ice water
- 4 large eggs
- 1 3/4 cups (350g) granulated sugar
- 1/4 cup (30g) all-purpose flour
- 1/4 teaspoon salt
- 1 cup (240ml) freshly squeezed lemon juice (from about 5-6 lemons)
- 2 tablespoons lemon zest (from about 2-3 lemons)
- Powdered sugar, for dusting (optional)
Instructions
- In a large bowl, whisk together the flour, granulated sugar, and salt.
- Add the cold, cubed butter to the flour mixture. Using a pastry blender or your fingertips, cut the butter into the flour until the mixture resembles coarse crumbs.
- In a small bowl, whisk together the egg yolk and ice water.
- Pour the egg yolk mixture over the flour and butter mixture. Stir with a fork until the dough just comes together. Be careful not to overmix.
- Gently press the dough into a ball. Flatten it into a disc, wrap it in plastic wrap, and refrigerate for at least 30 minutes.
- Preheat your oven to 350°F (175°C). Line a 9×13 inch baking pan with parchment paper, leaving an overhang on the sides.
- Remove the chilled dough from the refrigerator. On a lightly floured surface, roll out the dough to fit the bottom of the prepared baking pan. You can also press the dough directly into the pan if you find it easier.
- Once the dough is in the pan, prick it all over with a fork.
- Bake the crust for 18-20 minutes, or until it is lightly golden brown.
- While the crust is baking, prepare the lemon filling. In a large bowl, whisk together the eggs, granulated sugar, flour, and salt until smooth.
- Add the freshly squeezed lemon juice and lemon zest to the egg mixture. Whisk until well combined.
- Once the crust is par-baked, remove it from the oven. Pour the lemon filling evenly over the hot crust.
- Return the baking pan to the oven and bake for 25-30 minutes, or until the filling is set and no longer jiggles in the center. The edges should be slightly golden brown.
- Remove the lemon bars from the oven and let them cool completely in the pan.
- Once the lemon bars are completely cool, lift them out of the pan using the parchment paper overhang.
- Cut the lemon bars into squares or rectangles using a sharp knife. For clean cuts, wipe the knife clean between each slice.
- Dust the lemon bars with powdered sugar, if desired.
Notes
- Use freshly squeezed lemon juice for the best flavor.
- Don’t overbake the lemon bars; the filling should be set but still slightly soft in the center.
- Chill the lemon bars completely before cutting them for clean cuts and a firm filling.
- When zesting the lemons, be careful not to zest the white pith underneath the peel, as it can be bitter.
- If you prefer a less tart lemon bar, you can increase the amount of sugar in the filling slightly.
- Store leftover lemon bars in an airtight container in the refrigerator for up to 3 days. They are best enjoyed cold.


Leave a Comment