

Honey Butter Skillet Corn has this way of making people stop and ask what’s in it. This happens to me every time I make it, whether it’s for a casual weeknight dinner or a busy potluck. It really transforms frozen corn into something surprisingly special. The magic is in the simple ingredients: butter, honey, and a little cream cheese that makes it so wonderfully creamy and rich. It tastes like a treat, but it comes together faster than you can believe, often while the main part of the meal is still cooking. You get that classic sweet and buttery flavor, amplified by the creaminess, all in under 15 minutes. It’s a side dish that just works, no matter the occasion.
Why Folks Love This Dish
People gravitate towards this Honey Butter Skillet Corn because it’s familiar yet feels a little indulgent. The sweetness from the honey isn’t overwhelming; it just balances the salty butter perfectly. And that touch of cream cheese is key—it smooths everything out into a luscious sauce that coats every kernel of corn. It’s the kind of comfort food that appeals to almost everyone, from picky eaters to adults who appreciate good flavor. Plus, knowing it uses a simple bag of frozen corn makes it an accessible choice for cooks of all levels.
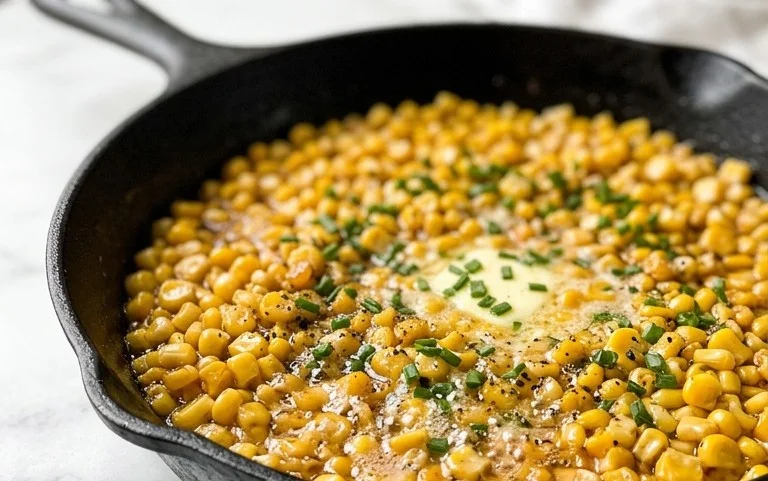
Honey Butter Skillet Corn
This Honey Butter Skillet Corn is the kind of side dish that makes everyone ask for the recipe. It’s wonderfully simple, using just a few pantry staples to transform everyday frozen corn into something truly special. The sweetness of the honey and the richness of the butter are a classic pairing, and when they meld with the creamy texture from the cream cheese, you get a comforting, slightly decadent corn dish that’s perfect for weeknight dinners or potlucks. It comes together so quickly that you can whip it up while your main course is finishing in the oven or on the stovetop.
Ingredients:
- 2 tbsp salted butter – adds richness and depth
- 2 tbsp honey – for a touch of natural sweetness
- 1 bag (16 oz) frozen corn – the base of the dish
- 2 oz cream cheese, cut into chunks – makes it extra creamy
Cooking Instructions
Getting this delicious corn dish on the table is a breeze. The key is to let each step build on the last, creating layers of flavor and that irresistible creamy texture. You’ll want to use a skillet that has a good, even heating surface – a cast iron skillet is fantastic for this if you have one, as it holds heat beautifully and ensures even cooking.
Phase 1: Building the Flavor Base
The first thing we need to do is melt our butter and get it nice and warm. Place your skillet over medium heat. Add the 2 tbsp salted butter to the skillet. Let it melt completely. You’ll want to swirl the pan a little to make sure the butter coats the entire bottom. Once the butter is melted and starts to gently bubble, it’s ready for the next step. Don’t let it brown too much at this stage; we’re just looking for a nice, melted state.
Phase 2: Adding Sweetness and Corn
Once the butter is melted and shimmering slightly, it’s time to add the sweetness. Pour in the 2 tbsp honey. Stir the honey into the melted butter. You’ll see them emulsify a bit, creating a lovely glaze. Let this mixture heat for about 30 seconds to a minute, allowing the honey to warm up and mingle with the butter. This combination is what gives the corn its signature sweet and savory profile. Next, add the 1 bag (16 oz) frozen corn directly into the skillet. Make sure the corn is spread out as much as possible in an even layer. Don’t worry if it looks like a lot; it will cook down. Stir the corn well to coat every kernel with the honey-butter mixture. This coating is essential for infusing the corn with that delicious flavor from the very beginning.
Phase 3: Cooking the Corn
Now, let the corn cook for about 5 to 7 minutes. You want to stir it occasionally, maybe every couple of minutes, to prevent sticking and ensure even cooking. As the corn heats up, it will start to thaw and then begin to get slightly tender. You might notice some of the kernels starting to blister a little – that’s a good sign! This process helps to develop a bit of sweetness in the corn itself. Keep an eye on it and stir to scrape up any bits that might be sticking to the bottom of the pan.
Phase 4: Achieving Creaminess
Once the corn has been cooking for its initial 5-7 minutes and is mostly thawed and heated through, it’s time to add the secret ingredient for ultimate creaminess: the cream cheese. Add the 2 oz cream cheese, cut into chunks, directly into the skillet with the corn. Stir everything together gently. The warmth from the corn and the skillet will start to melt the cream cheese. Continue to stir and cook for another 3 to 5 minutes, or until the cream cheese has completely melted and has created a smooth, luscious sauce that coats all the corn kernels. This step is where the magic happens, transforming the corn from just cooked kernels to a rich, creamy side dish. If the mixture seems a little too thick, you can add a splash of milk or cream, but usually, the moisture from the corn and the melting cream cheese is enough.
Phase 5: Finishing Touches and Serving
Once the cream cheese is fully incorporated and the corn is coated in a beautiful, glossy sauce, taste a few kernels to check the seasoning. Because we used salted butter, you might not need any additional salt, but always taste and adjust as needed. If you like, a tiny pinch of salt can really make the flavors pop. You can also add a grind of black pepper if you wish, or even a pinch of red pepper flakes for a subtle kick. Serve the Honey Butter Skillet Corn immediately while it’s hot and creamy. This corn is a fantastic accompaniment to grilled chicken, beef chops, steak, or even just a simple piece of fish. It’s so satisfying that sometimes we just have it with a big salad for a light meal.
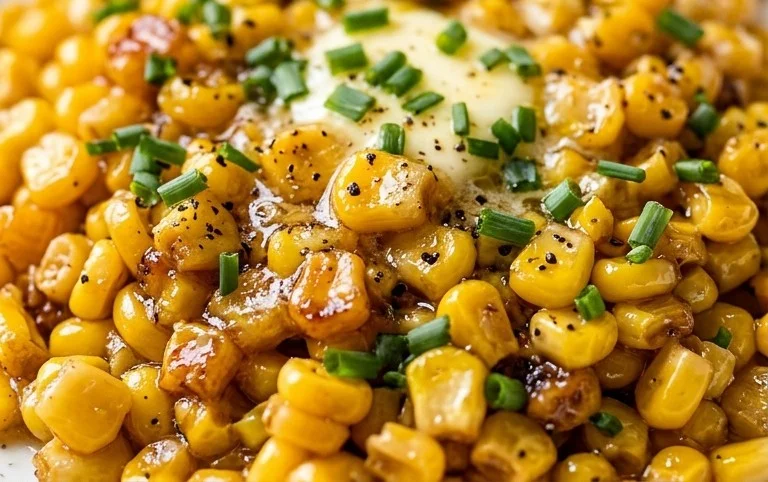
Conclusion:
This Honey Butter Skillet Corn is a side dish that punches well above its weight. It’s incredibly easy to make, tastes like something from a fancy restaurant, and uses pantry staples. That sweet, buttery, creamy goodness is hard to resist, and the speed at which it comes together makes it a weeknight hero. Don’t hesitate to give it a try the next time you need a crowd-pleasing side that feels a little bit special without requiring much effort. It’s a recipe that you’ll want to keep coming back to, especially when you need to round out a meal quickly.
Serving Suggestions
This corn is fantastic alongside grilled chicken, beef chops, or steak. It also pairs wonderfully with barbecue dishes or even a simple roasted chicken. It’s versatile enough to be a star at a summer picnic or a cozy winter dinner.
Variations to Try
For a bit of heat, add a pinch of red pepper flakes when the butter melts. A sprinkle of fresh chives or parsley at the end adds a nice pop of color and freshness. Some people even stir in a tablespoon of sour cream along with the cream cheese for an extra tangy kick.
Frequently Asked Questions
Can I use fresh or canned corn instead of frozen?
You can, but you’ll need to adjust the cooking time. Fresh corn might need a few extra minutes to cook through and soften. Canned corn is already cooked, so you’d just need to heat it through in the honey butter mixture, being careful not to overcook it or it can become mushy.
How do I store leftovers?
Leftovers can be stored in an airtight container in the refrigerator for up to 3 days. Reheat gently on the stovetop over low heat or in the microwave, adding a splash of milk or cream if it seems a bit thick.
Honey Butter Skillet Corn
A quick and easy skillet corn recipe with a sweet and savory honey butter glaze, made extra creamy with cream cheese.
Ingredients
-
2 tbsp salted butter
-
2 tbsp honey
-
1 bag (16 oz) frozen corn
-
2 oz cream cheese, cut into chunks
-
1/4 tsp salt
-
1/8 tsp black pepper
Instructions
-
Step 1
Melt butter in a large skillet over medium heat. -
Step 2
Add frozen corn to the skillet and cook, stirring occasionally, for 5-7 minutes until heated through. -
Step 3
Stir in honey, salt, and pepper. -
Step 4
Add cream cheese chunks to the skillet and stir until melted and the corn is coated and creamy. -
Step 5
Continue to cook for another 2-3 minutes until the sauce has thickened. -
Step 6
Serve hot.
Important Information
Nutrition Facts (Per Serving)
It is important to consider this information as approximate and not to use it as definitive health advice.
Allergy Information
Please check ingredients for potential allergens and consult a health professional if in doubt.


Leave a Comment