
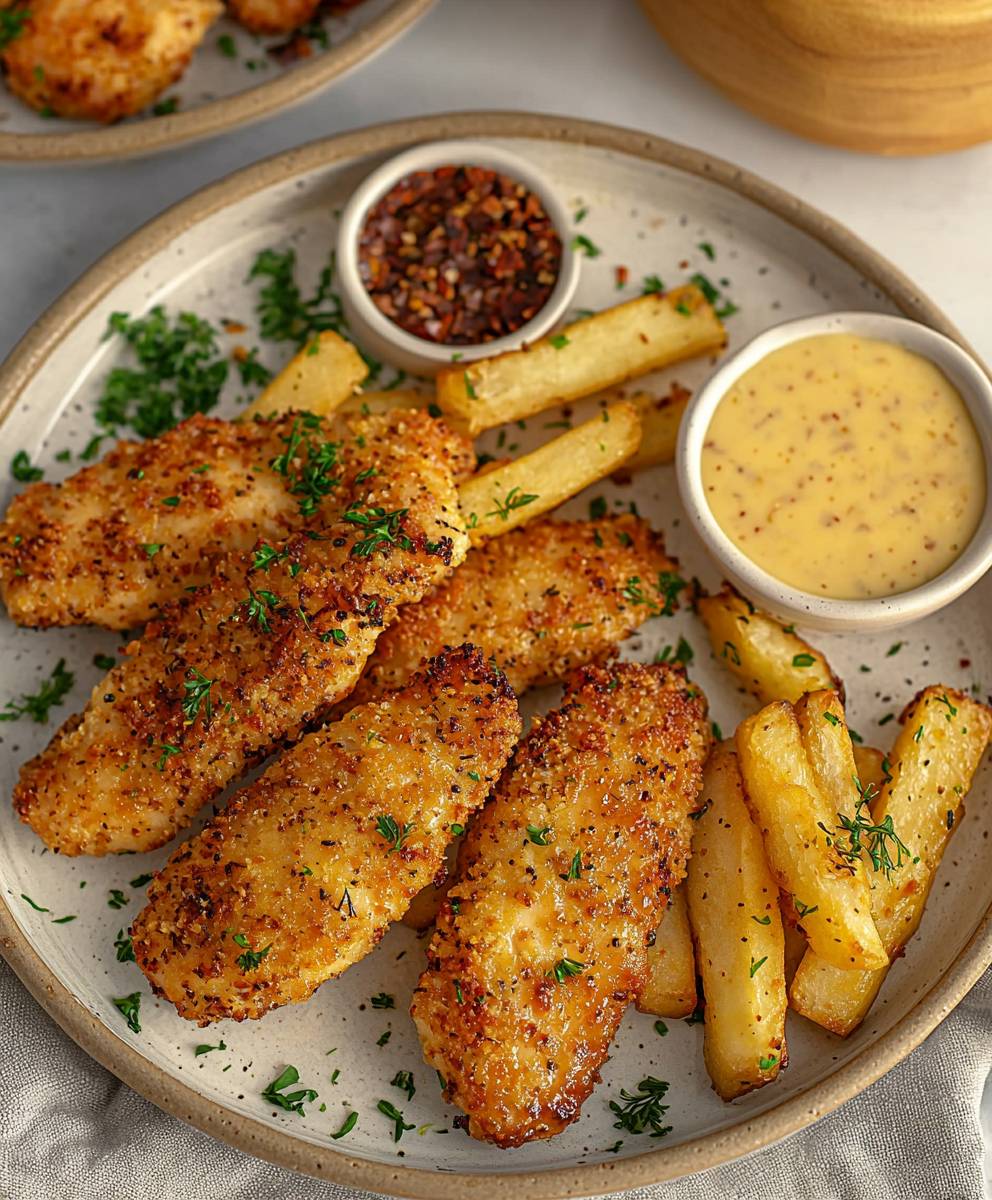
Healthy Baked Chicken Tenders: Craving that satisfying crunch of fried chicken tenders but without the guilt? You’ve come to the right place! Forget the deep fryer and say hello to a healthier, equally delicious alternative that will have everyone reaching for seconds. These aren’t your average baked chicken tenders; we’re talking about juicy, flavorful, and perfectly crispy tenders that are surprisingly easy to make.
Chicken tenders, in their various forms, have become a staple comfort food across the globe. While their exact origins are debated, the concept of breaded and fried chicken has roots in numerous cultures. What makes them so universally appealing? It’s the perfect combination of textures the satisfying crunch of the coating giving way to the tender, juicy chicken inside. Plus, they’re incredibly versatile! Serve them with your favorite dipping sauce, add them to salads, or tuck them into wraps for a quick and easy meal.
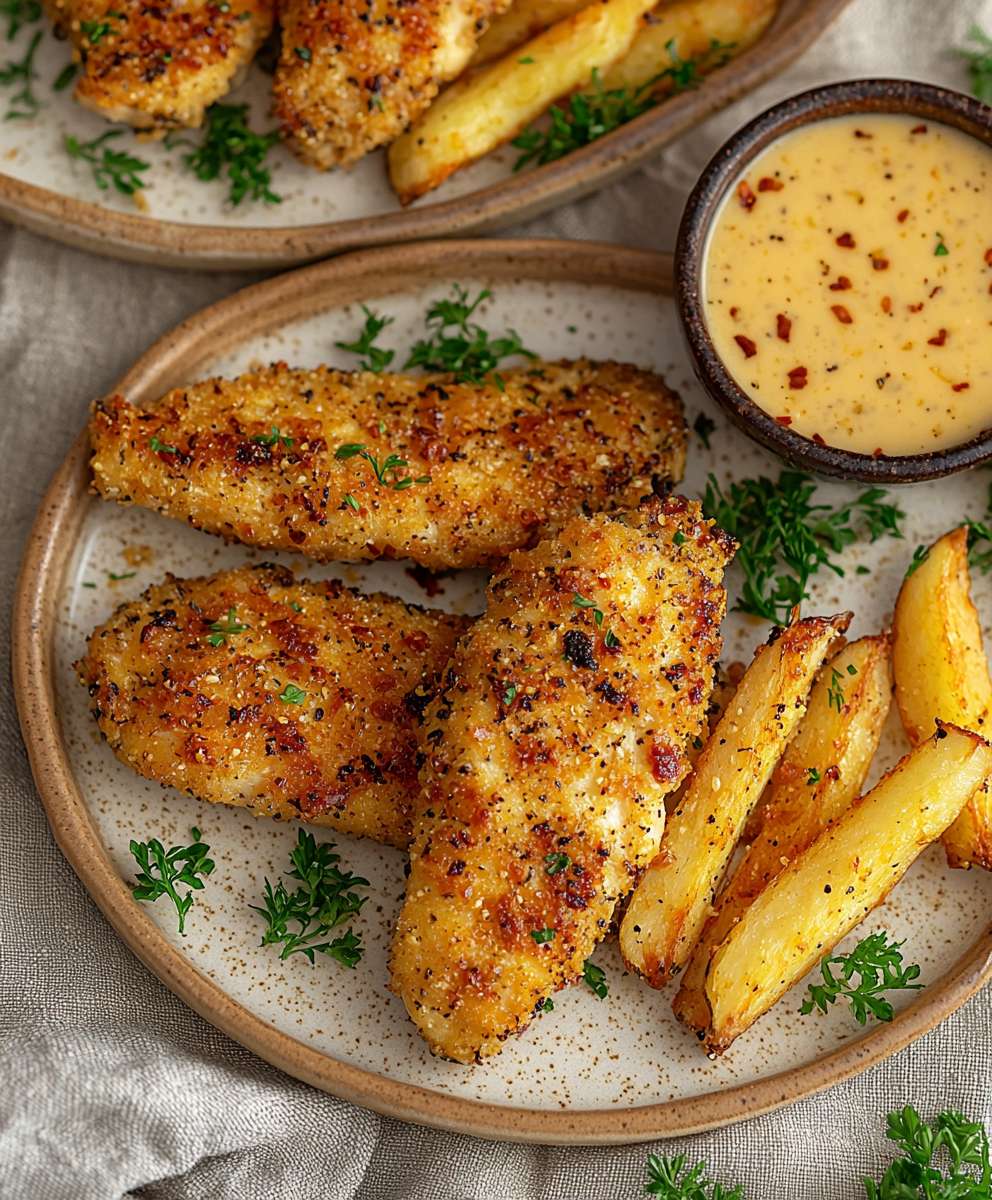
But let’s be honest, traditional fried chicken tenders aren’t exactly a health food. That’s where our healthy baked chicken tenders recipe shines. We’ve taken all the things you love about this classic dish the crispy coating, the tender chicken, the satisfying flavor and reimagined it with wholesome ingredients and a simple baking method. Get ready to enjoy a guilt-free indulgence that’s perfect for weeknight dinners, game day snacks, or even a fun family project in the kitchen. Trust me, once you try these, you’ll never go back to the fried version!
Ingredients:
- 1.5 lbs boneless, skinless chicken breasts, cut into 1-inch thick strips
- 1 cup plain Greek yogurt (non-fat or low-fat)
- 1/4 cup Dijon mustard
- 1 tablespoon lemon juice
- 1 teaspoon garlic powder
- 1 teaspoon onion powder
- 1/2 teaspoon smoked paprika
- 1/4 teaspoon cayenne pepper (optional, for a little kick!)
- Salt and freshly ground black pepper to taste
- 1.5 cups whole wheat breadcrumbs (or gluten-free breadcrumbs)
- 1/2 cup grated Parmesan cheese
- 1/4 cup chopped fresh parsley
- 2 tablespoons olive oil, divided
- Cooking spray
Preparing the Chicken:
Okay, let’s get started! First things first, we need to prep our chicken. This is super important for getting those tenders nice and flavorful.
- Cut the chicken: Take your chicken breasts and cut them into strips that are about 1-inch thick. You want them to be uniform in size so they cook evenly. If some are thicker than others, they might take longer to cook, and you’ll end up with some dry tenders. Nobody wants that!
- Prepare the marinade: In a medium-sized bowl, whisk together the Greek yogurt, Dijon mustard, lemon juice, garlic powder, onion powder, smoked paprika, and cayenne pepper (if you’re using it). This marinade is the key to keeping the chicken moist and adding a ton of flavor. Don’t skip the lemon juice it helps tenderize the chicken!
- Marinate the chicken: Add the chicken strips to the bowl with the marinade. Make sure each piece is fully coated. Cover the bowl with plastic wrap or a lid and refrigerate for at least 30 minutes. The longer you marinate, the more flavorful and tender the chicken will be. I usually aim for at least an hour, but even 30 minutes will make a difference. You can even marinate it overnight for maximum flavor!
Preparing the Breadcrumb Mixture:
While the chicken is marinating, let’s get our breadcrumb mixture ready. This is what will give our tenders that crispy, golden-brown coating.
- Combine dry ingredients: In a shallow dish or on a large plate, combine the whole wheat breadcrumbs, Parmesan cheese, and chopped fresh parsley. Mix everything together really well. The Parmesan cheese adds a nice salty, savory flavor, and the parsley adds a touch of freshness.
- Add olive oil: Drizzle one tablespoon of olive oil over the breadcrumb mixture. Use your fingers to toss and combine the oil with the breadcrumbs. This helps the breadcrumbs get nice and crispy in the oven.
Coating the Chicken:
Now for the fun part coating the chicken! This is where we transform those marinated chicken strips into delicious, crispy tenders.
- Prepare your baking sheet: Preheat your oven to 400°F (200°C). Line a baking sheet with parchment paper. This will prevent the chicken from sticking and make cleanup a breeze. Lightly spray the parchment paper with cooking spray. This will help the breadcrumbs get extra crispy on the bottom.
- Coat the chicken: Take one chicken strip at a time from the marinade and dredge it in the breadcrumb mixture. Make sure to coat it evenly on all sides, pressing the breadcrumbs gently to help them adhere. You want a nice, thick coating of breadcrumbs.
- Place on baking sheet: Place the coated chicken strip on the prepared baking sheet. Repeat with the remaining chicken strips, making sure to leave a little space between each one so they can cook evenly.
- Drizzle with olive oil: Drizzle the remaining tablespoon of olive oil over the coated chicken tenders. This will help them get even more golden brown and crispy in the oven.
Baking the Chicken Tenders:
Almost there! Now it’s time to bake our chicken tenders to perfection.
- Bake: Place the baking sheet in the preheated oven and bake for 20-25 minutes, or until the chicken is cooked through and the breadcrumbs are golden brown and crispy. The internal temperature of the chicken should reach 165°F (74°C). Use a meat thermometer to check the temperature it’s the best way to ensure the chicken is cooked safely.
- Flip (optional): For extra even browning, you can flip the chicken tenders halfway through the baking time. This isn’t absolutely necessary, but it can help them get crispy on both sides.
- Rest: Once the chicken is cooked, remove the baking sheet from the oven and let the tenders rest for a few minutes before serving. This allows the juices to redistribute, resulting in more tender and flavorful chicken.
Serving Suggestions:
These healthy baked chicken tenders are incredibly versatile! Here are a few ideas for serving them:
- Dipping sauces: Serve with your favorite dipping sauces, such as honey mustard, BBQ sauce, ranch dressing, or a spicy sriracha mayo.
- Salads: Add them to a salad for a protein-packed lunch or dinner. They’re great on top of a Caesar salad or a mixed green salad with your favorite veggies.
- Wraps: Use them in wraps or sandwiches with lettuce, tomato, and your favorite condiments.
- Sides: Serve them with healthy sides like roasted vegetables, sweet potato fries, or a quinoa salad.
- Kids’ meals: These are a great healthy alternative to traditional chicken nuggets for kids. Serve them with some carrot sticks and a side of fruit for a balanced meal.
Tips and Tricks for Perfect Chicken Tenders:
- Don’t overcrowd the baking sheet: Make sure to leave enough space between the chicken tenders on the baking sheet so they can cook evenly. If they’re too close together, they’ll steam instead of bake, and they won’t get as crispy.
- Use fresh breadcrumbs: Fresh breadcrumbs will give you the best texture and flavor. If you don’t have fresh breadcrumbs, you can use store-bought, but try to find a good quality brand.
- Adjust the seasonings to your liking: Feel free to adjust the seasonings in the marinade and breadcrumb mixture to suit your taste. If you like things spicy, add more cayenne pepper. If you prefer a more savory flavor, add more garlic powder or onion powder.
- Make them gluten-free: To make these chicken tenders gluten-free, simply use gluten-free breadcrumbs.
- Store leftovers properly: Store any leftover chicken tenders in an airtight container in the refrigerator for up to 3 days. Reheat them in the oven or air fryer for the best results.
Enjoy!
I hope you enjoy these healthy baked chicken tenders as much as I do! They’re a delicious and guilt-free way to enjoy a classic comfort food. Let me know in the comments below if you try them and what you think!
Conclusion:
So, there you have it! These Healthy Baked Chicken Tenders are more than just a healthier alternative to the fried version; they’re a flavor explosion waiting to happen. I truly believe this recipe is a must-try for anyone looking for a quick, easy, and delicious meal that the whole family will love. From picky eaters to health-conscious adults, these tenders are a guaranteed crowd-pleaser. Why is it a must-try? Well, let’s recap. First, we’re talking about incredibly juicy and tender chicken, coated in a crispy, flavorful breading that’s baked, not fried. That means you get all the satisfying crunch without the guilt. Second, the recipe is incredibly versatile. You can easily adjust the spices to suit your taste preferences. Want a little kick? Add a pinch of cayenne pepper. Prefer a more savory flavor? Increase the garlic powder and paprika. The possibilities are endless! Third, it’s a time-saver. From prep to plate, you’re looking at under an hour, making it perfect for busy weeknights. But the deliciousness doesn’t stop there! Let’s talk serving suggestions. These tenders are fantastic on their own, dipped in your favorite sauce. Classic ketchup and honey mustard are always winners, but don’t be afraid to get creative! Try a tangy BBQ sauce, a creamy ranch dressing, or even a spicy sriracha mayo. For a complete meal, serve them alongside some roasted vegetables like broccoli, carrots, or sweet potatoes. They’re also amazing in salads, wraps, or even as a topping for homemade pizzas. Looking for variations? Consider using different types of breading. Panko breadcrumbs will give you an extra crispy texture, while crushed cornflakes offer a slightly sweeter flavor. You can also experiment with different herbs and spices. Italian seasoning, dried thyme, or even a touch of smoked paprika can add a unique twist. For a gluten-free option, use gluten-free breadcrumbs or almond flour. And if you’re feeling adventurous, try marinating the chicken in buttermilk or yogurt for a few hours before coating it. This will make it even more tender and flavorful. I’m genuinely excited for you to try this recipe. I know you’ll be amazed at how easy it is to make and how delicious the results are. It’s a game-changer for healthy eating, proving that you don’t have to sacrifice flavor to enjoy a nutritious meal. These Healthy Baked Chicken Tenders are a testament to that. So, what are you waiting for? Head to your kitchen, gather your ingredients, and get cooking! I promise you won’t be disappointed. And most importantly, I want to hear about your experience! Did you try any variations? What sauces did you use? What did your family think? Share your photos and comments below. I can’t wait to see your creations and hear your feedback. Happy cooking! Let me know if you have any questions, and I’ll do my best to answer them. Enjoy your healthy and delicious chicken tenders! Print
Healthy Baked Chicken Tenders: The Crispiest, Easiest Recipe
- Total Time: 45 minutes
- Yield: 4–6 servings 1x
Description
Crispy, flavorful baked chicken tenders with a Greek yogurt marinade and Parmesan-herb breadcrumb coating. A healthy and delicious alternative to fried chicken!
Ingredients
- 1.5 lbs boneless, skinless chicken breasts, cut into 1-inch thick strips
- 1 cup plain Greek yogurt (non-fat or low-fat)
- 1/4 cup Dijon mustard
- 1 tablespoon lemon juice
- 1 teaspoon garlic powder
- 1 teaspoon onion powder
- 1/2 teaspoon smoked paprika
- 1/4 teaspoon cayenne pepper (optional)
- Salt and freshly ground black pepper to taste
- 1.5 cups whole wheat breadcrumbs (or gluten-free breadcrumbs)
- 1/2 cup grated Parmesan cheese
- 1/4 cup chopped fresh parsley
- 2 tablespoons olive oil, divided
- Cooking spray
Instructions
- Cut the chicken: Cut chicken breasts into 1-inch thick strips.
- Prepare the marinade: In a medium bowl, whisk together Greek yogurt, Dijon mustard, lemon juice, garlic powder, onion powder, smoked paprika, and cayenne pepper (if using).
- Marinate the chicken: Add chicken strips to the marinade, ensuring each piece is fully coated. Cover and refrigerate for at least 30 minutes (or up to overnight).
- Combine dry ingredients: In a shallow dish, combine breadcrumbs, Parmesan cheese, and parsley.
- Add olive oil: Drizzle 1 tablespoon of olive oil over the breadcrumb mixture and toss to combine.
- Preheat oven: Preheat oven to 400°F (200°C). Line a baking sheet with parchment paper and lightly spray with cooking spray.
- Coat the chicken: Take one chicken strip at a time and dredge it in the breadcrumb mixture, coating evenly on all sides.
- Place on baking sheet: Place the coated chicken strip on the prepared baking sheet, leaving space between each.
- Drizzle with olive oil: Drizzle the remaining 1 tablespoon of olive oil over the coated chicken tenders.
- Bake: Bake for 20-25 minutes, or until the chicken is cooked through (internal temperature of 165°F/74°C) and the breadcrumbs are golden brown and crispy. Flip halfway through for even browning (optional).
- Rest: Let the tenders rest for a few minutes before serving.
Notes
- Marinating the chicken longer (up to overnight) will result in more flavorful and tender chicken.
- Use fresh breadcrumbs for the best texture and flavor.
- Adjust seasonings to your liking.
- To make gluten-free, use gluten-free breadcrumbs.
- Serve with your favorite dipping sauces, salads, wraps, or sides.
- Don’t overcrowd the baking sheet for even cooking.
- Store leftovers in an airtight container in the refrigerator for up to 3 days. Reheat in the oven or air fryer.
- Prep Time: 20 minutes
- Cook Time: 25 minutes


Leave a Comment