
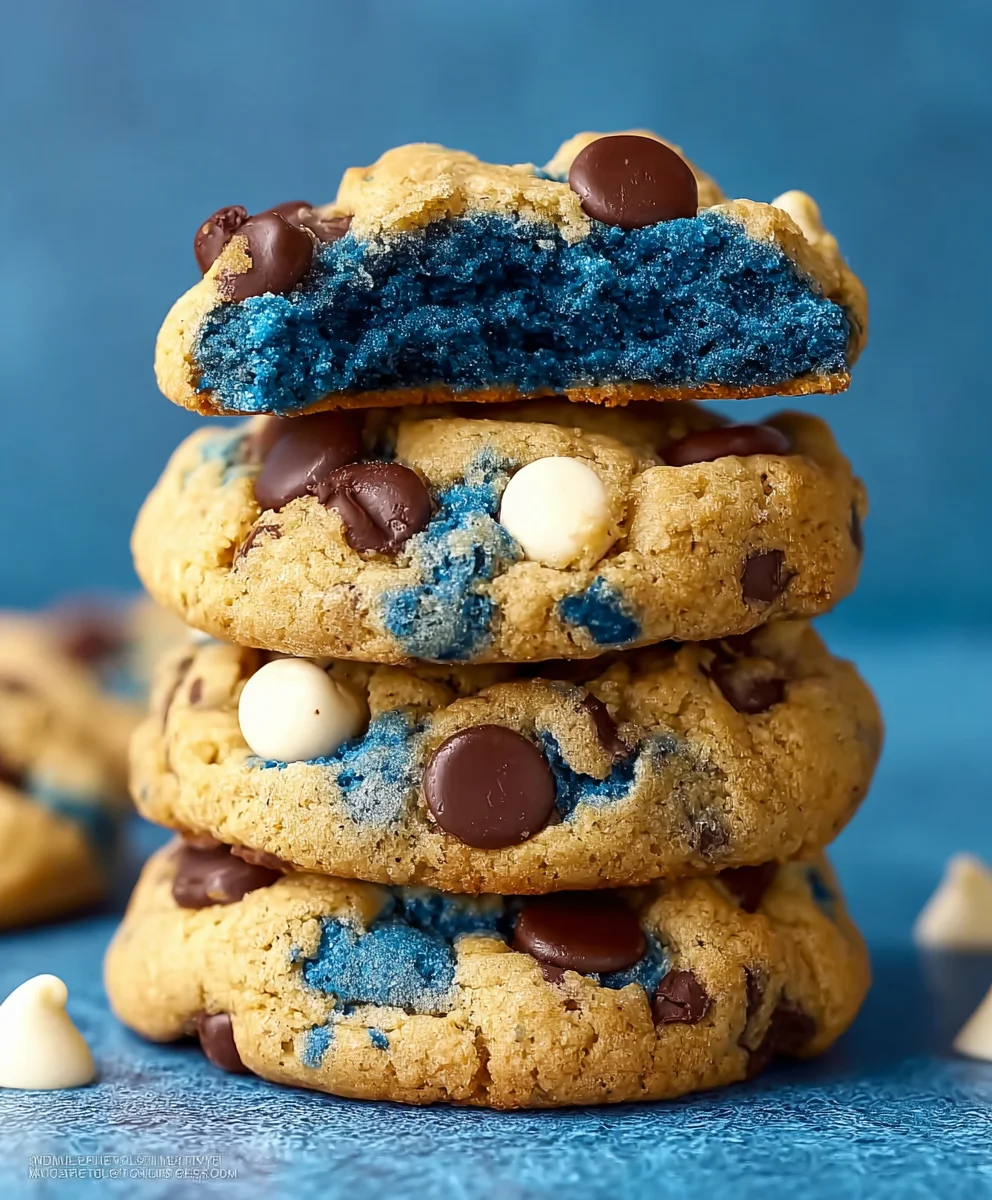
Cookie Monster Cookies are more than just a dessert; they are a vibrant, nostalgic journey back to childhood, instantly recognizable by their iconic blue hue and irresistible mix-ins. Imagine sinking your teeth into a perfectly chewy, sky-blue cookie, generously studded with an abundance of chocolate chips, crunchy crushed Oreo cookies, and even delightful mini chocolate chip cookies. It’s a whimsical confection that promises to capture the hearts and taste buds of everyone, young and old, bringing an immediate smile with every single bite.
The inspiration for these delightful treats, of course, comes directly from everyone’s favorite furry, blue, cookie-obsessed character from the beloved Sesame Street. Since his memorable debut, Cookie Monster has been a cherished figure, embodying a joyful, unapologetic passion for cookies and teaching us that sometimes, it’s perfectly okay to embrace a little bit of pure, unadulterated indulgence. Our recipe for these ultimate Cookie Monster Cookies pays homage to that very spirit, ensuring every bite is packed with the kind of over-the-top deliciousness he would surely approve of.
People absolutely adore this dish not only for its playful, eye-catching appearance but for the incredible explosion of textures and flavors within. The soft, tender crumb provides the perfect base, while the satisfying crunch of Oreos and the melt-in-your-mouth chocolate create a symphony of sensory delight that is simply unparalleled. These cookies are perfect for themed birthday parties, school events, or simply brightening a dreary afternoon. Get ready to embark on a fun-filled baking adventure that will bring smiles, spark delightful conversations, and satisfy even the most voracious cookie cravings with a treat that’s as fun to look at as it is to devour!
Ingredients:
- Yes, you can freeze the dough balls on a baking sheet until solid, then transfer them to a freezer bag. Bake from frozen, adding an extra minute or two to the baking time.
The Magic of Preparing Cookie Monster Cookies: Freezing and Baking from Frozen
Hello, fellow cookie enthusiasts! Today, we’re diving deep into a topic that will revolutionize your Cookie Monster Cookie experience: the art of freezing your dough balls and baking them from frozen. While the idea of a fresh-baked Cookie Monster Cookie straight from the oven is already a dream come true, sometimes life gets busy, or we simply want to enjoy that warm, gooey goodness on demand without the fuss of starting from scratch every time. That’s where the incredible power of your freezer comes into play, transforming a simple batch of dough into a convenient, ready-to-bake delight. I’m going to walk you through everything you need to know to harness this culinary superpower, ensuring you always have a stash of these delightful blue treats at your fingertips.
Our key “ingredient” today isn’t a list of flour and sugar, but rather a powerful technique outlined in our core principle: the ability to freeze your precious Cookie Monster Cookie dough balls and bake them from frozen. This isn’t just a suggestion; it’s a game-changer for anyone who loves the idea of fresh-baked cookies but also values efficiency and spontaneity. Imagine this: a craving for that iconic blue cookie, perhaps speckled with chocolate chips and crushed cookie pieces, strikes, and within minutes, you can have them baking in your oven. This process ensures that every Cookie Monster Cookie you pull from your freezer stash bakes up perfectly, maintaining all the flavor, texture, and visual charm you’d expect from a freshly made batch, but with unparalleled convenience. It’s truly about bringing that bakery-fresh experience to your home, any time you desire, without the extensive prep work each time.
Understanding Your Cookie Monster Cookie Dough Balls
Before we delve into the freezing specifics, let’s briefly consider the “dough balls” mentioned in our core principle. For perfect Cookie Monster Cookies, these dough balls should ideally be uniformly sized. Typically, for a standard-sized cookie, I aim for about 1.5 to 2 tablespoons of dough per ball. Uniformity is key here, not just for aesthetic appeal but also for consistent baking. If some dough balls are significantly larger or smaller than others, they won’t bake evenly, leading to some being overdone while others are still raw in the middle. We want that perfect chewiness and slightly crisp edge across the board for our beloved Cookie Monster creations, and consistent size is the first step towards achieving that.
The texture of your dough is also crucial for optimal freezing and baking. It should be firm enough to hold its shape when rolled, yet still pliable. If your dough is too sticky, it might be challenging to roll into balls, and they might stick together too much during the initial freezing phase. A slightly chilled dough often works best for forming perfect spheres. You can achieve this by refrigerating your freshly mixed Cookie Monster Cookie dough for about 30 minutes to an hour before portioning. This slight chill helps to solidify the fats within the dough, making it much easier to handle and less prone to spreading prematurely when it finally hits the heat of the oven. Properly prepared dough balls are the foundation of a successful frozen cookie experience.
Freezing for Future Freshness: The Initial Steps
Now, let’s get to the heart of the matter: how do we properly freeze these delightful Cookie Monster Cookie dough balls? Our guiding principle explicitly states: “freeze the dough balls on a baking sheet until solid.” This is a critical first step known as “flash freezing,” and it’s absolutely essential for preventing your dough balls from clumping together into one giant, unmanageable cookie lump once they’re all stored together in a freezer bag. This individual freezing ensures that each cookie maintains its perfect shape and allows for easy portioning later on.
Step 1: Preparing Your Baking Sheet for Flash Freezing
- First, gather your freshly portioned Cookie Monster Cookie dough balls. As discussed, aim for consistent size for the best results.
- Line a sturdy baking sheet (or several, if you have a large batch of Cookie Monster Cookie dough) with parchment paper. This non-stick surface is crucial as it prevents the dough from sticking to the sheet during freezing, making them incredibly easy to remove later without any damage to their shape. I strongly recommend against using aluminum foil directly, as dough can sometimes stick stubbornly to it.
- Arrange your dough balls on the prepared baking sheet, ensuring there’s ample space between each one. They shouldn’t be touching at all. This individual spacing is what allows each dough ball to freeze solid independently, preserving its perfect spherical shape and preventing them from becoming a frozen blob.
- Once all your dough balls are spaced out on the baking sheet, carefully place the entire sheet into your freezer. Make sure it’s on a flat, level surface where the dough balls won’t roll into each other or deform as they begin to freeze. This initial freeze is where the magic of “grab-and-bake” really begins.
Step 2: Flash Freezing Until Solid
The duration for this flash-freezing step can vary slightly depending on the size of your dough balls and the efficiency and temperature of your freezer. Generally, it takes anywhere from 1 to 3 hours for the dough balls to become completely solid. You’ll know they’re ready when they feel hard to the touch and can be easily picked up without any give or stickiness. Resist the urge to rush this step; ensuring they are fully solid is absolutely key to successful long-term storage and convenient baking later on. For peace of mind and optimal results, I often leave them in the freezer overnight if I’m preparing them in the evening, just to be absolutely sure they are rock-solid.
Step 3: Transferring to a Freezer Bag for Long-Term Storage
- Once your Cookie Monster Cookie dough balls are completely solid, remove the baking sheet from the freezer. They should now be firm, distinct spheres.
- Our guiding principle then instructs us to “transfer them to a freezer bag.” This instruction is simple yet vital for proper long-term storage. Choose high-quality freezer bags that are specifically designed to protect food from freezer burn, which can compromise the taste and texture of your delicious cookies.
- Carefully place the frozen dough balls into the chosen freezer bag. At this stage, because they are already solid, you can pack them relatively tightly without worrying about them sticking together. This saves valuable freezer space!
- Before sealing the bag, make every effort to remove as much air as possible from inside. Excess air is the primary culprit behind freezer burn, which can severely affect the flavor and texture of your baked Cookie Monster Cookies. A vacuum sealer is ideal for this, but if you don’t have one, pressing out the air by hand before sealing works very well.
- Finally, and this is a step I never skip, label your freezer bag with the date you froze the dough and the type of cookie (e.g., “Cookie Monster Cookies – October 26, 2023”). This helps you keep track of freshness and ensures you grab the right cookie for your craving. Properly stored, these frozen dough balls can last for up to 2-3 months in the freezer without a significant drop in quality, ready to bring joy whenever you are.
Baking From Frozen: The Grand Finale
The ultimate goal of this meticulous freezing process is the effortless baking of warm, delicious Cookie Monster Cookies whenever you desire. Our guiding principle clearly states: “Bake from frozen, adding an extra minute or two to the baking time.” This is where convenience truly meets culinary excellence, allowing you to enjoy a homemade treat with minimal effort at a moment’s notice.
Step 1: Preparing for Baking Your Frozen Cookie Monster Cookies
- When that unmistakable Cookie Monster Cookie craving strikes, the first thing to do is preheat your oven to the temperature specified in your original recipe for Cookie Monster Cookies (typically around 350°F or 175°C, but always defer to your specific recipe). It is absolutely essential to ensure your oven is fully preheated before placing the cookies inside, as consistent temperature is crucial for even baking and proper texture development.
- While your oven is preheating, line a fresh baking sheet with parchment paper. As before, this prevents sticking and makes cleanup an absolute breeze, allowing you to focus on enjoying your cookies rather than scrubbing pans.
- Take the desired number of frozen Cookie Monster Cookie dough balls directly from the freezer bag and arrange them on the prepared baking sheet. Leave adequate space between each cookie (at least 2 inches), as they will spread during baking. There’s no need to thaw them; baking directly from frozen is the beauty of this method and is key to achieving that perfect texture!
Step 2: Adjusting Baking Time for Frozen Dough Balls
- Carefully place the baking sheet with the frozen dough balls into your preheated oven.
- Now, for the critical adjustment mentioned in our guiding principle: “adding an extra minute or two to the baking time.” If your original recipe calls for, say, 10-12 minutes for unfrozen dough, you’ll want to extend that to 12-14 minutes for the frozen dough. This extra time allows the internal temperature of the frozen dough to rise sufficiently and cook through without burning the outside. The exact increase can vary slightly depending on your specific oven and the size of your cookies, so it’s always a good idea to keep a close eye on them.
- I recommend starting with the lower end of the extended time (e.g., 12 minutes if the original was 10-12) and then checking for doneness. Look for golden-brown edges and centers that still appear slightly soft, especially for a chewy Cookie Monster Cookie. If they still look too pale or undercooked after the initial extended time, add another minute or two, checking frequently. Remember, a few extra minutes can make all the difference between a perfectly gooey center and an overbaked, dry cookie.
Why Bake From Frozen? The Benefits for Your Cookie Monster Cookies
Baking from frozen isn’t just a matter of unparalleled convenience; it actually offers several distinct benefits that can significantly enhance the quality of your Cookie Monster Cookies, making them even more delightful than if baked from fresh dough:
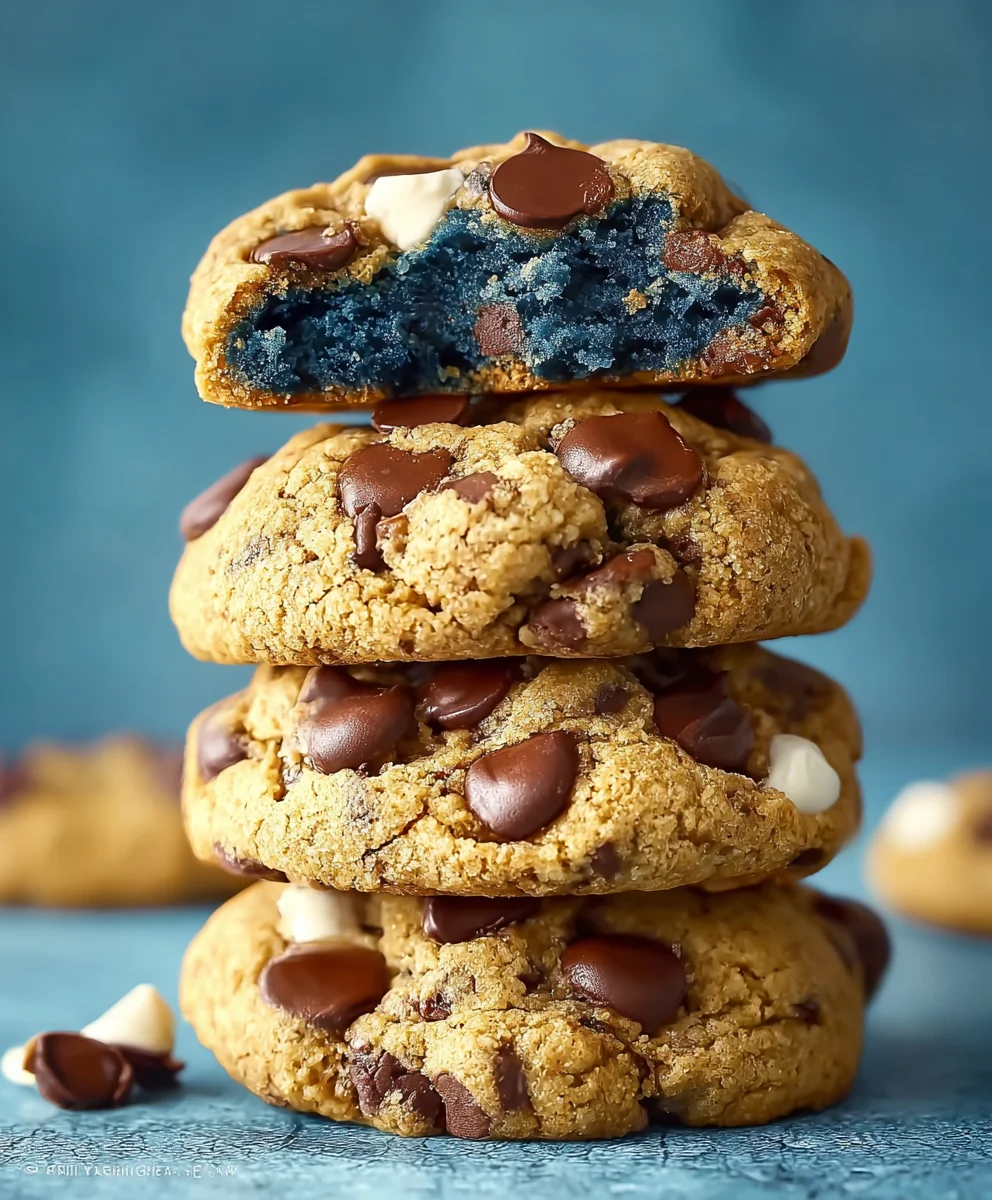
- Superior Texture: The rapid heat from the oven hits the super-cold dough, creating a thermal shock. This shock helps the edges of the cookie set faster while the center remains deliciously cold, allowing it to gradually warm and become gooey. This often results in cookies with perfectly crisp edges and delightfully soft, chewy centers – a hallmark of a truly great Cookie Monster Cookie.
- Reduced Spreading and Thicker Cookies: Because the dough starts frozen solid, it takes longer for the butter (or fat) in the dough to melt and spread across the baking sheet. This extended melting time means the cookie has more time to “set” structurally before spreading too much, which can lead to thicker, more substantial cookies. I personally love this, especially for a hearty and visually appealing cookie like our blue Cookie Monster friends.
- Freshly Baked Aroma on Demand: There’s nothing quite like the comforting, inviting smell of fresh cookies filling your home. With frozen dough balls readily available, you can have that incredible experience anytime, whether for an unexpected guest, a sudden late-night sweet tooth, or a delightful morning pick-me-up. It’s an instant mood booster!
- Unbeatable Portion Control: Instead of baking an entire batch and potentially overindulging (we’ve all been there, and there’s no judgment!), you can bake just one or two Cookie Monster Cookies at a time. This is fantastic for portion control, for satisfying a specific craving without committing to a full dozen, or for households with varying cookie preferences.
- Always Prepared for Anything: Hosting an impromptu gathering? Need a last-minute, impressive contribution to a potluck, school event, or work function? Your freezer stash of perfectly portioned Cookie Monster Cookie dough balls ensures you’re always ready to impress with minimal effort and maximum deliciousness. It’s a true baking hack that keeps you perpetually prepared.
Final Tips for Perfect Frozen-to-Oven Cookie Monster Cookies
While our “ingredient” gives us the core instructions for freezing and baking, a few additional tips can elevate your experience and ensure your Cookie Monster Cookies turn out absolutely perfect every single time:
- Do Not Thaw: I cannot stress this point enough. Resist the urge to thaw your dough balls before baking. Baking them directly from frozen is absolutely critical for achieving the desired texture, preventing excess spreading, and delivering those perfect crisp edges and chewy centers. Thawing them beforehand would negate many of the benefits of this method.
- Know Your Oven’s Quirks: Every oven is a little different and has its own hot spots. Get to know how yours bakes. If your cookies seem to be browning too quickly on the bottom, try doubling up on baking sheets (stacking one on top of another) or using a lighter-colored baking sheet. This can help insulate the bottom of the cookies and promote more even baking.
- Add Decorations After Baking (Mostly): If your Cookie Monster Cookies include candy googly eyes or extra crumbled cookie pieces on top for that iconic look, it’s often best to add them immediately after they come out of the oven, while the cookies are still warm and pliable. This allows them to adhere beautifully to the soft, warm cookie surface. If you add them before freezing and baking, they might get lost, discolored, or even burnt in the oven.
- Cool on a Rack for Best Results: Once baked to perfection, let your Cookie Monster Cookies cool on the baking sheet for just a few minutes (about 5-10 minutes) before carefully transferring them to a wire rack to cool completely. This initial cooling on the hot sheet helps them to set up properly and prevents them from becoming too crumbly or falling apart when moved.
So there you have it! The seemingly simple instruction to freeze your Cookie Monster Cookie dough balls and bake from frozen unlocks a world of convenience and consistently delicious results. Embrace this incredibly useful method, and you’ll always be just minutes away from a warm, chewy, iconic blue cookie. Happy baking, and enjoy those delightful Cookie Monster Cookies whenever the craving strikes, knowing you’ve mastered the art of freezer-friendly cookie preparation!
Conclusion:
And there you have it, my friends! We’ve reached the sweet end of our journey for what I truly believe are the most enchanting and utterly delightful treats you’ll ever pull from your oven. If there’s one recipe you absolutely must add to your baking repertoire this year, it’s this one for our incredible Cookie Monster Cookies. Seriously, these aren’t just any cookies; they are an experience, a burst of joy, and a guaranteed smile-inducer rolled into one perfectly soft, chewy, and gloriously colorful package. I promise you, the moment you see that signature blue dough studded with all those delightful mix-ins, your heart will do a little happy dance.
Why are they a must-try? Well, where do I even begin? First, there’s the sheer visual appeal. These cookies are a feast for the eyes before they even touch your tongue, with their vibrant, playful hue and an abundance of textures from the chocolate chips to the iconic cookie pieces. Then, of course, comes the taste. Each bite delivers a symphony of flavors – the classic sweetness of a perfect homemade cookie, complemented by the rich notes of chocolate and the familiar crunch and creaminess of those beloved sandwich cookies. The texture is what truly sets them apart: perfectly crisp edges giving way to a wonderfully soft and chewy center that practically melts in your mouth. They’re nostalgic, comforting, and undeniably fun, making them perfect for literally any occasion – from a casual afternoon pick-me-up to the centerpiece of a birthday party dessert table. They manage to be sophisticated enough for adults to appreciate while being undeniably kid-friendly and exciting. You’ll be amazed at how quickly these disappear!
Now, let’s talk about how to make these irresistible cookies even more spectacular, or how to put your own spin on them. While they are utterly perfect straight out of the oven, warm and gooey, I highly recommend pairing them with a tall glass of cold milk. There’s just something magical about that classic combination that elevates the experience. For a truly decadent treat, try crumbling a warm cookie over a scoop of vanilla bean ice cream, or even better, sandwich a scoop of your favorite ice cream between two slightly cooled cookies for an unforgettable homemade ice cream sandwich! Imagine a vibrant blue cookie embracing a scoop of creamy vanilla – pure bliss!
Feeling adventurous? You can absolutely play around with the mix-ins! While the traditional chocolate chips and crushed sandwich cookies are essential for that authentic Cookie Monster vibe, don’t be afraid to experiment. Consider adding a handful of white chocolate chips for an extra layer of sweetness, or perhaps some M&M’s for even more color and a satisfying candy crunch. You could even try swapping out the sandwich cookies for another favorite cookie crumb, though I must admit, the classic choice is hard to beat for authenticity. For those who love a hint of salt to balance their sweet, a tiny sprinkle of flaky sea salt on top before baking can really make the flavors pop.
I genuinely cannot wait for you to try this recipe. It’s one of those special ones that bring so much joy to everyone who tastes them. So, gather your ingredients, turn on your favorite baking playlist, and prepare to create some magic in your kitchen. Once you’ve whipped up your batch of these delightful treats, please, please, please come back and share your experience with me! Did you try a new variation? What was your favorite part? Did they bring smiles to everyone’s faces? Tag me in your photos on social media, leave a comment below, or just send me a virtual high-five! Your feedback and stories are what make this baking community so wonderful. Happy baking, my friends – get ready to unleash your inner Cookie Monster!
People Also Ask:
How do I store Cookie Monster Cookies to keep them fresh?
To keep your delicious Cookie Monster Cookies fresh and chewy, store them in an airtight container at room temperature for up to 3-5 days. If you find them hardening slightly, you can place a slice of bread or a half an apple inside the container overnight; the moisture will transfer to the cookies and soften them up.
Can I freeze these cookies or the dough?
Absolutely! These cookies freeze beautifully. You can freeze the baked cookies in an airtight container for up to 3 months. Thaw them at room temperature or warm them slightly in the microwave for that fresh-baked feel. You can also freeze the unbaked cookie dough balls! Just scoop them onto a baking sheet, freeze until solid, then transfer to a freezer-safe bag or container for up to 3 months. When you’re ready to bake, place the frozen dough balls on a baking sheet and add an extra 2-3 minutes to the baking time.
What gives Cookie Monster Cookies their vibrant blue color?
The signature vibrant blue color of these fun cookies comes from a few drops of blue food coloring, typically gel food coloring. Gel food coloring provides a more concentrated color without adding much liquid to the dough, ensuring the perfect texture. I recommend using a high-quality gel food coloring for the best, brightest results!
Can I use different mix-ins besides chocolate chips and sandwich cookies?
While the classic mix-ins are essential for that iconic Cookie Monster Cookies look and flavor, you can definitely experiment! White chocolate chips, M&M’s, or even some sprinkles can be fun additions. Just make sure your total amount of mix-ins doesn’t exceed the original recipe’s volume to maintain the dough’s integrity.
Are these cookies suitable for kids’ parties?
These cookies are absolutely perfect for kids’ parties! Their vibrant color, fun name, and delicious taste make them a huge hit with children (and adults!). They are visually appealing, easy to eat, and guaranteed to bring smiles to every face. They’re often a show-stopper on any dessert table!
Delicious Cookie Monster Cookies Recipe – Fun & Easy Bake!
This guide provides instructions for efficiently freezing your Cookie Monster Cookie dough balls and baking them from frozen to achieve perfectly textured cookies on demand. It covers preparing dough for flash freezing, proper storage, and adjusting baking times for optimal results. Please note: The actual ingredient list (flour, sugar, butter, etc.) for making the cookie dough itself is not included in this article, which focuses specifically on the freezing and baking technique.
Ingredients
-
Yes, you can freeze the dough balls on a baking sheet until solid, then transfer them to a freezer bag. Bake from frozen, adding an extra minute or two to the baking time.
Instructions
-
Step 1
For perfect results, use uniformly sized dough balls (approx. 1.5-2 tablespoons each). If dough is sticky, chill it for 30-60 minutes before portioning to ensure a firm, pliable texture. -
Step 2
Line a sturdy baking sheet with parchment paper. Arrange dough balls on the sheet, ensuring they do not touch. Place the sheet into the freezer until the dough balls are completely solid (typically 1-3 hours, or overnight for best results). -
Step 3
Once solid, remove dough balls from the baking sheet and transfer them to a high-quality freezer bag. Remove as much air as possible before sealing. Label the bag with the date and cookie type. Store for up to 2-3 months in the freezer. -
Step 4
When ready to bake, preheat your oven to the temperature specified in your original Cookie Monster Cookie recipe (e.g., 350°F or 175°C). Line a fresh baking sheet with parchment paper. -
Step 5
Take the desired number of frozen dough balls directly from the freezer bag and arrange them on the prepared baking sheet. Leave at least 2 inches of space between each cookie, as they will spread during baking. Do not thaw them before baking. -
Step 6
Place the baking sheet in the preheated oven. Add an extra 1-2 minutes to the original recipe’s baking time (e.g., if the original was 10-12 minutes, bake for 12-14 minutes). Bake until the edges are golden brown and the centers still appear slightly soft for a chewy texture. -
Step 7
Once baked, let the cookies cool on the baking sheet for 5-10 minutes before carefully transferring them to a wire rack to cool completely. If adding decorations like candy googly eyes or crumbled cookie pieces, do so immediately after removing them from the oven while they are still warm.
Important Information
Nutrition Facts (Per Serving)
It is important to consider this information as approximate and not to use it as definitive health advice.
Allergy Information
Please check ingredients for potential allergens and consult a health professional if in doubt.


Leave a Comment