
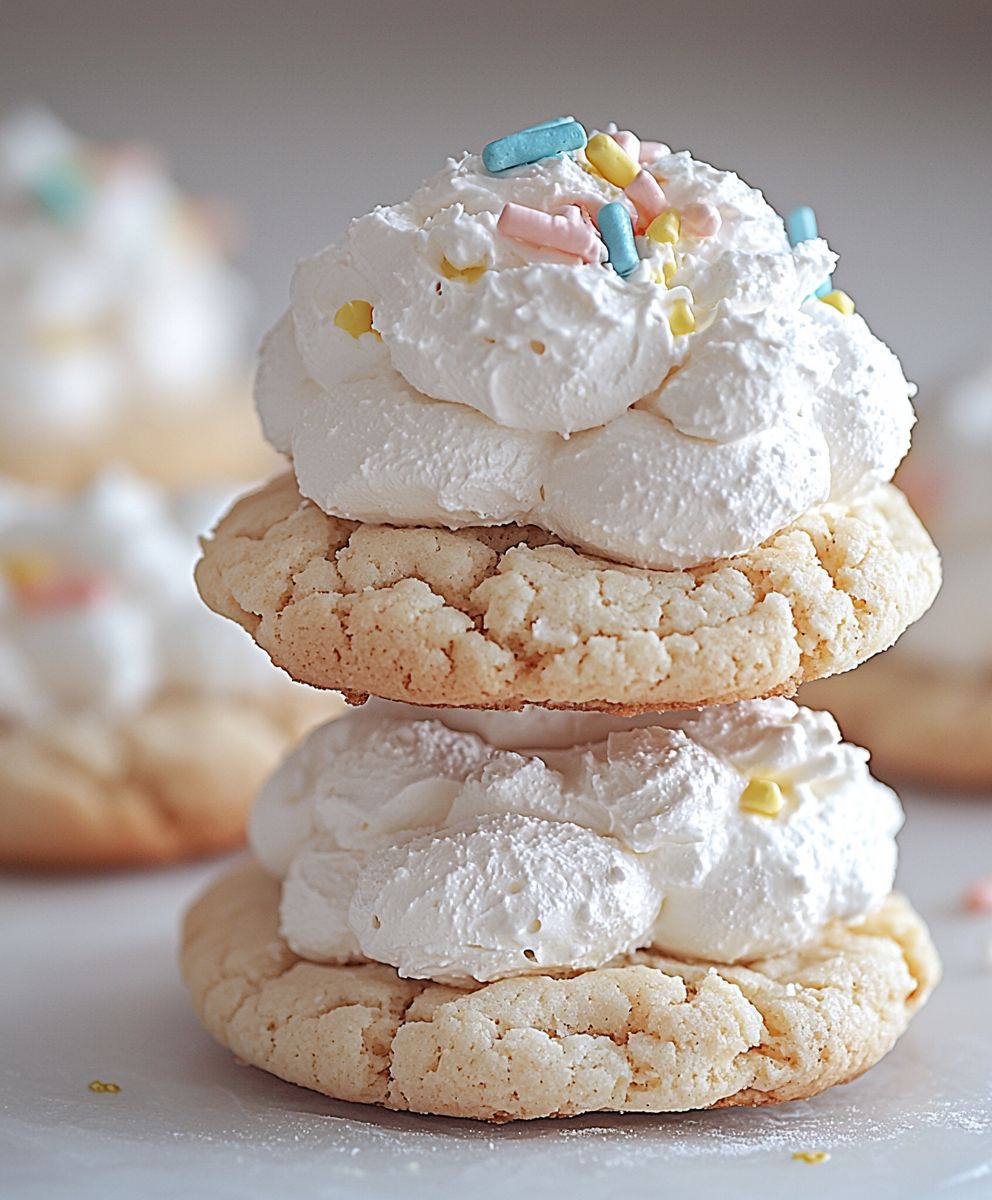
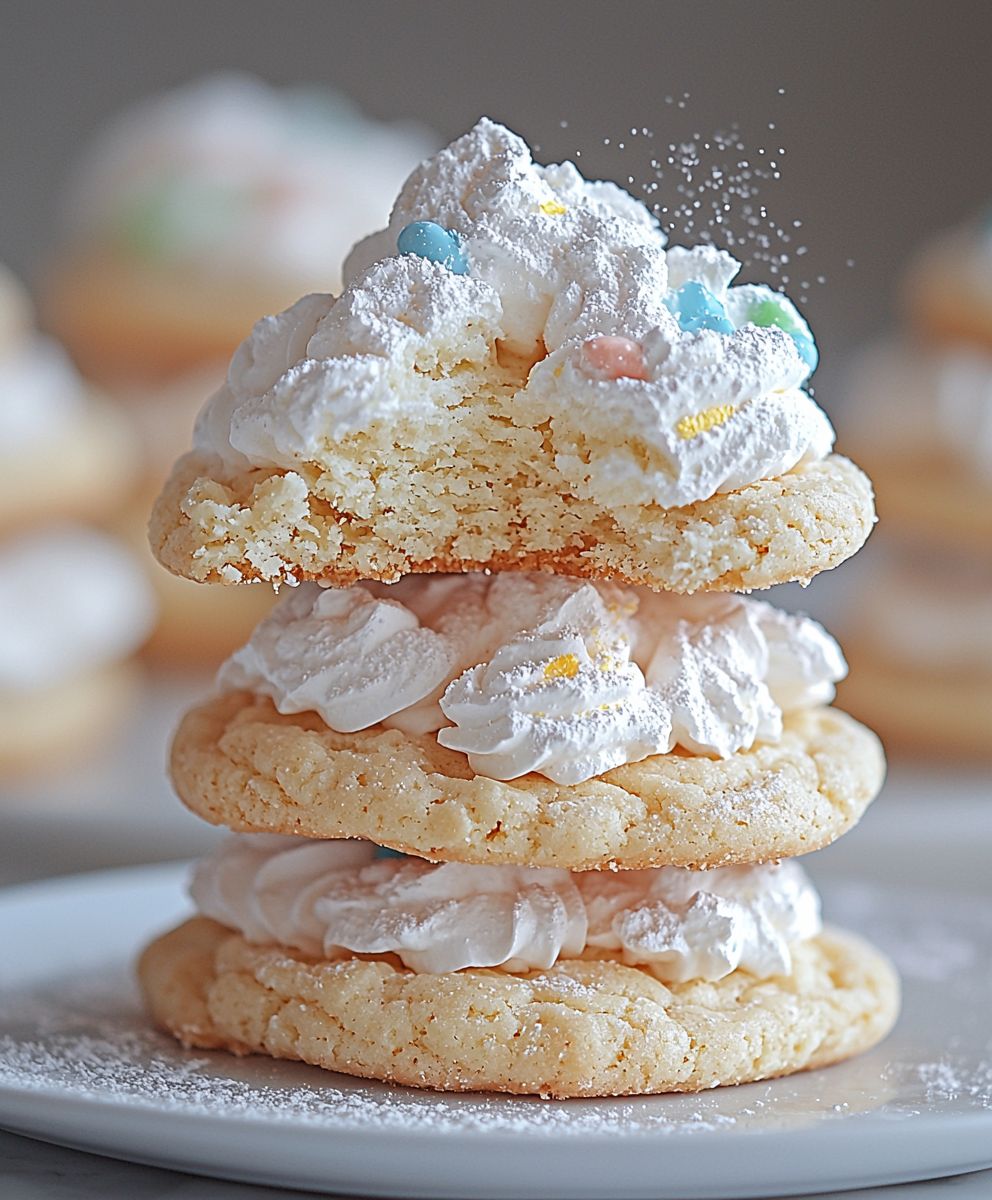
Cool Whip Cookies: Prepare to be amazed! Imagine sinking your teeth into a cloud-like cookie, so soft and pillowy it practically melts in your mouth. That’s the magic of these delightful treats. These aren’t just any cookies; they’re a testament to simple ingredients creating extraordinary results.
While the exact origins of Cool Whip Cookies are shrouded in a bit of mystery, they gained popularity in the mid-20th century, coinciding with the rise of convenience foods. Cool Whip, a revolutionary whipped topping, offered a quick and easy way to add richness and sweetness to desserts. Home bakers quickly discovered its potential beyond topping pies and incorporated it into cookie recipes, resulting in the uniquely tender texture we adore today.
What makes these cookies so irresistible? It’s a combination of factors. The Cool Whip contributes to an incredibly soft and moist crumb, while the simple ingredients ensure a delicate sweetness that isn’t overpowering. They are incredibly easy to make, requiring minimal effort and ingredients, making them perfect for busy weeknights or when you need a quick dessert fix. Plus, their light and airy texture makes them a crowd-pleaser, loved by both kids and adults alike. Get ready to experience cookie perfection with this easy and delicious recipe!
Ingredients:
- 1 box (15.25 oz) cake mix (any flavor, but vanilla, chocolate, or strawberry work best!)
- 1 container (8 oz) Cool Whip, thawed
- 1 large egg
- Optional: 1/2 cup sprinkles (for decorating)
- Optional: 1/2 cup chocolate chips, chopped nuts, or other mix-ins
Instructions:
Okay, let’s get baking! These Cool Whip cookies are seriously the easiest cookies you’ll ever make. They’re soft, chewy, and practically melt in your mouth. Plus, with only three ingredients (plus optional sprinkles, because who doesn’t love sprinkles?), they’re perfect for a quick dessert when you don’t have a lot of time or ingredients on hand. Here’s how to do it:
Preparing the Dough:
- Preheat your oven to 350°F (175°C). This is always the first step! Make sure your oven is properly heated before you start mixing, so the cookies bake evenly.
- In a large bowl, combine the cake mix and Cool Whip. Just dump both ingredients into the bowl. Don’t worry about sifting the cake mix or anything fancy like that. We’re going for easy here!
- Add the egg. Crack the egg into the bowl with the cake mix and Cool Whip.
- Mix everything together until well combined. Use a hand mixer or a sturdy spoon to mix the ingredients until you have a smooth, uniform dough. Be careful not to overmix, but make sure there are no streaks of cake mix or Cool Whip remaining. The dough will be quite thick and sticky, which is perfectly normal. If you’re using a hand mixer, start on low speed to avoid a cloud of cake mix!
- (Optional) Add mix-ins. If you’re feeling adventurous, now’s the time to add your mix-ins. Chocolate chips, chopped nuts, sprinkles, dried fruit the possibilities are endless! Gently fold the mix-ins into the dough until they’re evenly distributed.
Forming the Cookies:
- Prepare your baking sheet. Line a baking sheet with parchment paper or a silicone baking mat. This will prevent the cookies from sticking and make cleanup a breeze. If you don’t have parchment paper or a baking mat, you can lightly grease the baking sheet with cooking spray.
- Drop spoonfuls of dough onto the prepared baking sheet. Use a spoon or a small cookie scoop to drop rounded spoonfuls of dough onto the baking sheet, leaving about 2 inches of space between each cookie. The cookies will spread slightly as they bake, so don’t overcrowd the baking sheet. I usually aim for about 12 cookies per baking sheet.
- (Optional) Add sprinkles. If you’re using sprinkles, now’s the time to sprinkle them over the tops of the cookies. Gently press the sprinkles into the dough so they don’t fall off during baking.
Baking the Cookies:
- Bake for 8-10 minutes. Place the baking sheet in the preheated oven and bake for 8-10 minutes, or until the edges of the cookies are lightly golden brown and the centers are set. Keep a close eye on them, as they can burn easily. The baking time will vary depending on your oven, so start checking them at 8 minutes.
- Let the cookies cool on the baking sheet for a few minutes. Once the cookies are done baking, remove the baking sheet from the oven and let the cookies cool on the baking sheet for a few minutes before transferring them to a wire rack to cool completely. This will help them firm up and prevent them from breaking.
- Transfer the cookies to a wire rack to cool completely. Use a spatula to carefully transfer the cookies to a wire rack to cool completely. This will allow air to circulate around the cookies and prevent them from getting soggy.
Tips and Variations:
These cookies are incredibly versatile, so feel free to experiment with different flavors and mix-ins. Here are a few ideas to get you started:
- Chocolate Chip Cookies: Use a chocolate cake mix and add 1 cup of chocolate chips to the dough.
- Strawberry Cookies: Use a strawberry cake mix and add 1/2 cup of chopped dried strawberries to the dough.
- Lemon Cookies: Use a lemon cake mix and add 1 tablespoon of lemon zest to the dough.
- Red Velvet Cookies: Use a red velvet cake mix and add 1/2 cup of white chocolate chips to the dough.
- Spice Cookies: Use a spice cake mix and add 1 teaspoon of ground cinnamon and 1/2 teaspoon of ground nutmeg to the dough.
- Peanut Butter Cookies: Use a yellow cake mix and add 1/2 cup of peanut butter to the dough. You can also drizzle melted peanut butter over the cooled cookies.
- Funfetti Cookies: Use a vanilla cake mix and add 1/2 cup of rainbow sprinkles to the dough.
- Double Chocolate Cookies: Use a chocolate cake mix and add 1/2 cup of chocolate chips and 1/4 cup of cocoa powder to the dough.
- M&M Cookies: Use a vanilla cake mix and add 1 cup of M&Ms to the dough.
- Oatmeal Raisin Cookies: Use a spice cake mix and add 1/2 cup of rolled oats and 1/2 cup of raisins to the dough.
Storage: Store the cooled cookies in an airtight container at room temperature for up to 3 days. They can also be frozen for up to 2 months. To freeze, place the cookies in a single layer on a baking sheet and freeze until solid. Then, transfer them to a freezer-safe bag or container.
Troubleshooting:
- Cookies are too flat: This could be due to overmixing the dough or using too much Cool Whip. Make sure to mix the dough just until combined and use the correct amount of Cool Whip.
- Cookies are too dry: This could be due to overbaking the cookies. Make sure to bake them for the correct amount of time and don’t overbake them.
- Cookies are too sticky: This could be due to not letting the cookies cool completely before transferring them to a wire rack. Make sure to let them cool on the baking sheet for a few minutes before transferring them.
Enjoy your delicious and easy Cool Whip cookies! They’re perfect for a quick treat, a party, or any time you’re craving something sweet.
Conclusion:
So there you have it! These Cool Whip Cookies are truly a must-try for anyone looking for a simple, delicious, and surprisingly versatile treat. I know, I know, the ingredient list seems almost too good to be true, but trust me, the magic is real. The combination of the Cool Whip, cake mix, and egg creates a texture that’s both soft and chewy, with a subtle sweetness that isn’t overpowering. They’re the perfect little bite of happiness to brighten any day.
But why are these cookies so special? Its the ease of preparation, of course! Forget creaming butter and sugar, or chilling dough for hours. These cookies come together in minutes, making them ideal for those last-minute cravings or when you need a quick and easy dessert to impress. Plus, the clean-up is a breeze! One bowl, a baking sheet, and you’re done. What’s not to love?
Beyond the simplicity, the flavor is simply irresistible. The Cool Whip adds a unique lightness and moisture that you won’t find in traditional cookies. They practically melt in your mouth! And the best part? You can customize them to your heart’s content.
Serving Suggestions and Variations:
These cookies are fantastic on their own, but they’re also incredibly versatile. Here are a few ideas to get you started:
* Ice Cream Sandwiches: Use two cookies to sandwich a scoop of your favorite ice cream. Vanilla, chocolate, or even strawberry would be amazing!
* Cookie Crumble Topping: Crumble the cookies over yogurt, ice cream, or even a bowl of fruit for a delightful textural contrast.
* Dipped in Chocolate: Melt some chocolate chips and dip the cooled cookies halfway for an extra touch of decadence. Add sprinkles before the chocolate sets for a festive look.
* Flavor Variations: The possibilities are endless! Try using different flavors of cake mix to create unique flavor combinations. Chocolate cake mix with peanut butter chips, strawberry cake mix with white chocolate chips, or lemon cake mix with poppy seeds are just a few ideas. You can also add extracts like vanilla, almond, or peppermint to enhance the flavor.
* Add-Ins Galore: Don’t be afraid to experiment with different add-ins. Chocolate chips, nuts, dried fruit, sprinkles, M&Ms, or even chopped-up candy bars would all be delicious additions.
I truly believe that everyone should have this recipe in their back pocket. It’s a guaranteed crowd-pleaser, and it’s so easy to make that even the most novice baker can whip up a batch in no time. These Cool Whip Cookies are a testament to the fact that sometimes, the simplest recipes are the best.
So, what are you waiting for? Grab your ingredients, preheat your oven, and get ready to experience the magic of these incredible cookies. I promise you won’t be disappointed.
And most importantly, I want to hear about your experience! Did you try the recipe? What variations did you make? What did your family and friends think? Share your photos and stories in the comments below. I can’t wait to see what you create! Happy baking!
Cool Whip Cookies: Easy Recipe & Baking Tips
Easy 3-ingredient Cool Whip cookies that are soft, chewy, and melt-in-your-mouth delicious! Perfect for a quick dessert.
Ingredients
- 1 box (15.25 oz) cake mix (vanilla, chocolate, or strawberry recommended)
- 1 container (8 oz) Cool Whip, thawed
- 1 large egg
- Optional: 1/2 cup sprinkles (for decorating)
- Optional: 1/2 cup chocolate chips, chopped nuts, or other mix-ins
Instructions
- Preheat: Preheat your oven to 350°F (175°C).
- Combine: In a large bowl, combine the cake mix and Cool Whip.
- Add Egg: Crack the egg into the bowl.
- Mix: Mix everything together until well combined. The dough will be thick and sticky.
- (Optional) Mix-ins: Gently fold in chocolate chips, nuts, or other mix-ins.
- Prepare Baking Sheet: Line a baking sheet with parchment paper or a silicone baking mat.
- Drop Dough: Drop spoonfuls of dough onto the prepared baking sheet, leaving about 2 inches between each cookie.
- (Optional) Sprinkles: Sprinkle the tops of the cookies with sprinkles.
- Bake: Bake for 8-10 minutes, or until the edges are lightly golden brown and the centers are set.
- Cool: Let the cookies cool on the baking sheet for a few minutes.
- Transfer: Transfer the cookies to a wire rack to cool completely.
Notes
- Variations: Experiment with different cake mix flavors and mix-ins (chocolate chips, dried fruit, lemon zest, etc.). See the recipe text for specific flavor combinations.
- Storage: Store cooled cookies in an airtight container at room temperature for up to 3 days. Freeze for up to 2 months.
- Troubleshooting:
* Cookies too flat: Avoid overmixing and ensure correct Cool Whip amount.
* Cookies too dry: Avoid overbaking.
* Cookies too sticky: Let cookies cool on the baking sheet before transferring.


Leave a Comment