
Chicken Koobideh, the very name conjures images of sizzling skewers and the intoxicating aroma of grilled perfection! Have you ever experienced that moment when the first bite of perfectly seasoned, juicy ground chicken melts in your mouth, leaving you craving more? If not, prepare to be amazed! This isn’t just a recipe; it’s a culinary journey to the heart of Persian cuisine.
Koobideh, traditionally made with ground lamb or beef, boasts a rich history deeply intertwined with Persian culture. Passed down through generations, it’s a staple at celebrations, family gatherings, and everyday meals alike. Our Chicken Koobideh adaptation offers a lighter, equally delicious alternative that’s perfect for any occasion.
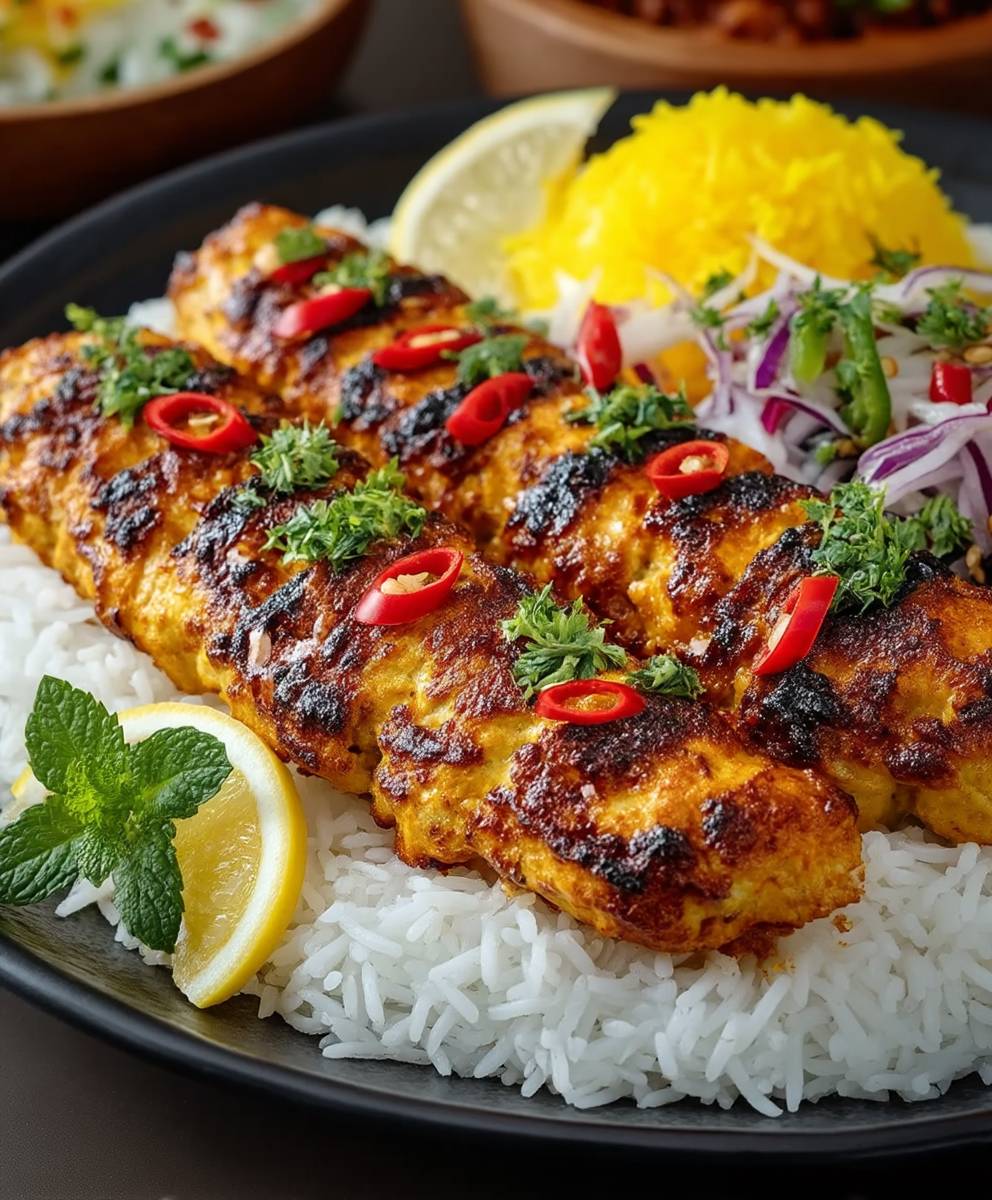
What makes Koobideh so universally loved? It’s the harmonious blend of flavors the savory meat, the fragrant spices, and the subtle char from the grill. The texture is equally captivating: tender and juicy on the inside, with a slightly crisp exterior. Plus, it’s incredibly versatile! Serve it with fluffy basmati rice, grilled vegetables, or wrapped in warm lavash bread for a truly authentic experience. Get ready to discover why Chicken Koobideh is a dish that will quickly become a favorite in your household!
Ingredients:
- 2 lbs ground chicken (thigh meat preferred for juiciness)
- 1 large onion, finely grated (about 1 cup grated)
- 2 cloves garlic, minced
- 1/2 cup finely chopped fresh parsley
- 1/4 cup finely chopped fresh cilantro
- 1 large egg
- 1 teaspoon ground turmeric
- 1 teaspoon ground cumin
- 1/2 teaspoon ground coriander
- 1/4 teaspoon red pepper flakes (optional, for a little heat)
- 1 tablespoon sumac (optional, for a tangy flavor)
- 2 tablespoons olive oil
- Salt and freshly ground black pepper to taste (usually about 1.5-2 teaspoons salt)
- Wooden or metal skewers (flat skewers are best to prevent the meat from spinning)
- Saffron rice, for serving (recipe follows)
- Grilled tomatoes and peppers, for serving (optional)
- Lemon wedges, for serving
Preparing the Chicken Mixture:
Okay, let’s get started! The key to amazing Chicken Koobideh is in the preparation of the chicken mixture. We want it to be flavorful, well-combined, and have the right consistency so it sticks to the skewers.
- Grate the Onion: This is probably the most important step. Grate the onion using a box grater or food processor. We want it finely grated, almost like a paste. This is crucial for binding the meat and adding moisture. Once grated, place the onion in a clean kitchen towel or cheesecloth and squeeze out as much liquid as possible. This step prevents the Koobideh from falling apart on the grill. Trust me, don’t skip this! You’ll be surprised how much liquid comes out. Discard the onion juice.
- Combine the Ingredients: In a large bowl, combine the ground chicken, grated and squeezed onion, minced garlic, chopped parsley, and chopped cilantro. Make sure everything is evenly distributed.
- Add the Spices: Now, add the egg, turmeric, cumin, coriander, red pepper flakes (if using), sumac (if using), salt, and pepper. Don’t be shy with the spices! They’re what give Koobideh its signature flavor.
- Mix Thoroughly: This is where you really need to get your hands dirty! Use your hands to thoroughly mix all the ingredients together. The mixture should be very well combined and almost sticky. This process helps to develop the protein in the chicken, which will help it bind to the skewers. Mix for at least 5-7 minutes. The mixture should be homogenous and feel slightly tacky.
- Rest the Mixture: Cover the bowl with plastic wrap and refrigerate the chicken mixture for at least 2 hours, or preferably overnight. This allows the flavors to meld together and the mixture to firm up, making it easier to handle and skewer. This resting period is essential for preventing the Koobideh from falling apart during grilling.
Skewering the Chicken:
Now comes the slightly tricky part skewering the chicken. Don’t worry, with a little practice, you’ll get the hang of it! Flat skewers are definitely your best friend here, as they provide more surface area for the chicken to grip onto.
- Prepare Your Skewers: If using wooden skewers, soak them in water for at least 30 minutes before grilling. This will prevent them from burning on the grill. Metal skewers don’t need to be soaked.
- Divide the Chicken Mixture: Divide the chicken mixture into equal portions, about 4-6 ounces each, depending on the size of your skewers.
- Shape the Chicken: Take one portion of the chicken mixture and shape it into a sausage-like log.
- Attach to the Skewer: Wet your hands with cold water. This will prevent the chicken from sticking to your hands. Insert the skewer lengthwise through the center of the chicken log.
- Mold the Chicken Around the Skewer: Using your wet hands, gently mold the chicken around the skewer, pressing it firmly to create an even layer. Use your fingers to create ridges along the length of the Koobideh. These ridges not only look nice but also help the chicken cook more evenly. The chicken should be about 1/2 inch thick.
- Repeat: Repeat steps 3-5 with the remaining chicken mixture and skewers.
- Chill Again (Optional): If you have time, place the skewered Koobideh in the refrigerator for another 30 minutes before grilling. This will help them hold their shape even better.
Grilling the Chicken Koobideh:
Alright, time to fire up the grill! The key to perfectly grilled Koobideh is to use medium-high heat and to turn them frequently. This will ensure they cook evenly and don’t burn.
- Prepare the Grill: Preheat your grill to medium-high heat (about 375-400°F). Make sure the grates are clean and lightly oiled to prevent sticking.
- Grill the Koobideh: Place the skewered Koobideh on the grill.
- Turn Frequently: Grill for about 8-10 minutes total, turning frequently (every 1-2 minutes) to ensure even cooking. The chicken should be cooked through and have a nice golden-brown color. Be careful not to overcook them, or they will become dry.
- Check for Doneness: To check for doneness, insert a meat thermometer into the thickest part of the Koobideh. The internal temperature should reach 165°F.
- Remove from Grill: Once cooked through, remove the Koobideh from the grill and let them rest for a few minutes before serving.
Saffron Rice Recipe:
No Chicken Koobideh meal is complete without a side of fluffy, fragrant saffron rice! Here’s how I make mine:
- 2 cups basmati rice
- 4 cups water
- 1 teaspoon salt
- 2 tablespoons butter or olive oil
- Pinch of saffron threads, crushed
- 2 tablespoons hot water
- Rinse the Rice: Rinse the basmati rice in a fine-mesh sieve under cold water until the water runs clear. This removes excess starch and helps the rice cook up fluffy.
- Soak the Rice (Optional): For even fluffier rice, soak the rinsed rice in cold water for 30 minutes. Drain well before cooking.
- Cook the Rice: In a medium saucepan, combine the rice, water, and salt. Bring to a boil over high heat.
- Simmer: Once boiling, reduce the heat to low, cover the saucepan tightly, and simmer for 15-20 minutes, or until all the water is absorbed and the rice is tender. Do not lift the lid during this time!
- Prepare the Saffron: While the rice is cooking, crush the saffron threads using a mortar and pestle or your fingers. Place the crushed saffron in a small bowl and add 2 tablespoons of hot water. Let it steep for at least 10 minutes to extract the color and flavor.
- Fluff and Saffronize: Once the rice is cooked, remove it from the heat and let it sit, covered, for 5-10 minutes. This allows the steam to redistribute and the rice to become even fluffier. Fluff the rice gently with a fork. Drizzle the saffron water and melted butter or olive oil over the rice and gently mix to combine.
Serving Suggestions:
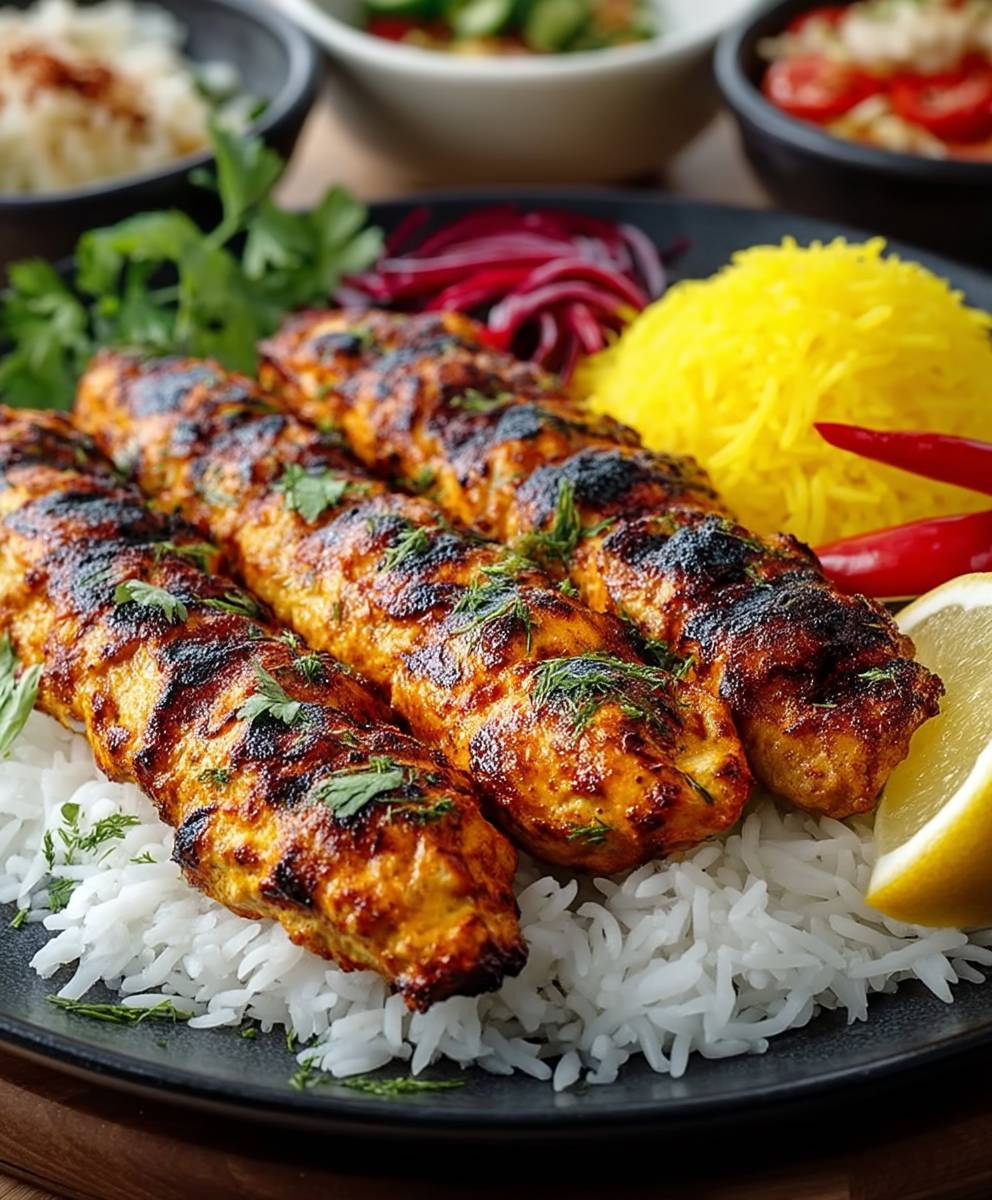
Now for the best part serving! Chicken Koobideh is traditionally served with saffron rice, grilled tomatoes and peppers, and lemon wedges. Here are a few more ideas:
- Serve with: A dollop of yogurt or tzatziki sauce.
- Add: A side of Shirazi salad (a refreshing cucumber, tomato, and onion salad).
- Garnish: Sprinkle with extra sumac for a tangy kick.
- Enjoy: With warm pita bread or lavash.
Enjoy your delicious homemade Chicken Koobideh! I hope you love it as much as I do!
Conclusion:
And there you have it! I truly believe this Chicken Koobideh recipe is a must-try for anyone looking to expand their culinary horizons and experience the vibrant flavors of Persian cuisine. It’s not just a meal; it’s an experience, a journey for your taste buds that will leave you wanting more. The combination of tender, juicy chicken, infused with aromatic spices and grilled to perfection, is simply irresistible. Forget bland chicken dishes this is a flavor explosion!
What makes this recipe so special? It’s the perfect balance of simplicity and sophistication. The ingredients are readily available, the preparation is straightforward, and the results are consistently delicious. Whether you’re a seasoned cook or a beginner in the kitchen, you’ll find this recipe easy to follow and incredibly rewarding. Plus, it’s a fantastic way to impress your friends and family with your culinary skills. Imagine serving these succulent skewers at your next barbecue or dinner party they’re guaranteed to be a hit!
But the best part about this Chicken Koobideh is its versatility. While I’ve provided a classic recipe, feel free to experiment and make it your own. Want to add a little heat? Incorporate a pinch of cayenne pepper or a finely chopped chili into the chicken mixture. Prefer a sweeter flavor profile? A touch of honey or brown sugar can do the trick. The possibilities are endless!
Serving Suggestions and Variations:
* Serve your Chicken Koobideh with fluffy basmati rice, grilled vegetables, and a dollop of creamy yogurt sauce (Mast-o Khiar).
* For a lighter meal, wrap the Koobideh in warm pita bread with fresh herbs, tomatoes, and onions.
* Try using ground turkey or lamb instead of chicken for a different flavor profile.
* Add finely chopped bell peppers or zucchini to the chicken mixture for extra texture and nutrients.
* Don’t forget the grilled tomato! It’s a classic accompaniment to Koobideh and adds a burst of juicy sweetness.
Why You Should Make This Recipe Today
I know there are countless recipes out there, but I genuinely believe this Chicken Koobideh stands out from the crowd. It’s a dish that’s both comforting and exciting, familiar yet exotic. It’s a celebration of flavors and textures that will tantalize your senses and leave you feeling satisfied and nourished.
So, what are you waiting for? Gather your ingredients, fire up the grill, and get ready to embark on a culinary adventure. I promise you won’t be disappointed. This recipe is more than just a set of instructions; it’s an invitation to explore the rich and diverse world of Persian cuisine. It’s a chance to create something truly special and share it with the people you love.
Share Your Experience!
I’m so excited for you to try this recipe and experience the magic of Chicken Koobideh for yourself. Once you’ve made it, I’d love to hear about your experience. Did you make any variations? What did you serve it with? What did your friends and family think? Share your photos and stories in the comments below I can’t wait to see what you create! Your feedback is invaluable and helps me continue to improve and share delicious recipes with the world. Happy cooking!
Chicken Koobideh: A Delicious and Easy Recipe
Juicy, flavorful Persian Ground Chicken Kabob (Chicken Koobideh) made with onion, herbs, and spices, grilled and served with saffron rice.
Ingredients
- 2 lbs ground chicken (thigh meat preferred for juiciness)
- 1 large onion, finely grated (about 1 cup grated)
- 2 cloves garlic, minced
- 1/2 cup finely chopped fresh parsley
- 1/4 cup finely chopped fresh cilantro
- 1 large egg
- 1 teaspoon ground turmeric
- 1 teaspoon ground cumin
- 1/2 teaspoon ground coriander
- 1/4 teaspoon red pepper flakes (optional, for a little heat)
- 1 tablespoon sumac (optional, for a tangy flavor)
- 2 tablespoons olive oil
- Salt and freshly ground black pepper to taste (usually about 1.5-2 teaspoons salt)
- Wooden or metal skewers (flat skewers are best to prevent the meat from spinning)
- Saffron rice, for serving (recipe follows)
- Grilled tomatoes and peppers, for serving (optional)
- Lemon wedges, for serving
- 2 cups basmati rice
- 4 cups water
- 1 teaspoon salt
- 2 tablespoons butter or olive oil
- Pinch of saffron threads, crushed
- 2 tablespoons hot water
Instructions
- Grate the Onion: Grate the onion using a box grater or food processor until finely grated, almost like a paste. Place the grated onion in a clean kitchen towel or cheesecloth and squeeze out as much liquid as possible. Discard the onion juice.
- Combine the Ingredients: In a large bowl, combine the ground chicken, grated and squeezed onion, minced garlic, chopped parsley, and chopped cilantro.
- Add the Spices: Add the egg, turmeric, cumin, coriander, red pepper flakes (if using), sumac (if using), salt, and pepper.
- Mix Thoroughly: Use your hands to thoroughly mix all the ingredients together for at least 5-7 minutes. The mixture should be homogenous and feel slightly tacky.
- Rest the Mixture: Cover the bowl with plastic wrap and refrigerate the chicken mixture for at least 2 hours, or preferably overnight.
- Prepare Your Skewers: If using wooden skewers, soak them in water for at least 30 minutes before grilling.
- Divide the Chicken Mixture: Divide the chicken mixture into equal portions, about 4-6 ounces each, depending on the size of your skewers.
- Shape the Chicken: Take one portion of the chicken mixture and shape it into a sausage-like log.
- Attach to the Skewer: Wet your hands with cold water. Insert the skewer lengthwise through the center of the chicken log.
- Mold the Chicken Around the Skewer: Using your wet hands, gently mold the chicken around the skewer, pressing it firmly to create an even layer. Use your fingers to create ridges along the length of the Koobideh. The chicken should be about 1/2 inch thick.
- Repeat: Repeat steps 3-5 with the remaining chicken mixture and skewers.
- Chill Again (Optional): If you have time, place the skewered Koobideh in the refrigerator for another 30 minutes before grilling.
- Prepare the Grill: Preheat your grill to medium-high heat (about 375-400°F). Make sure the grates are clean and lightly oiled to prevent sticking.
- Grill the Koobideh: Place the skewered Koobideh on the grill.
- Turn Frequently: Grill for about 8-10 minutes total, turning frequently (every 1-2 minutes) to ensure even cooking. The chicken should be cooked through and have a nice golden-brown color.
- Check for Doneness: To check for doneness, insert a meat thermometer into the thickest part of the Koobideh. The internal temperature should reach 165°F.
- Remove from Grill: Once cooked through, remove the Koobideh from the grill and let them rest for a few minutes before serving.
- Rinse the Rice: Rinse the basmati rice in a fine-mesh sieve under cold water until the water runs clear.
- Soak the Rice (Optional): For even fluffier rice, soak the rinsed rice in cold water for 30 minutes. Drain well before cooking.
- Cook the Rice: In a medium saucepan, combine the rice, water, and salt. Bring to a boil over high heat.
- Simmer: Once boiling, reduce the heat to low, cover the saucepan tightly, and simmer for 15-20 minutes, or until all the water is absorbed and the rice is tender. Do not lift the lid during this time!
- Prepare the Saffron: While the rice is cooking, crush the saffron threads using a mortar and pestle or your fingers. Place the crushed saffron in a small bowl and add 2 tablespoons of hot water. Let it steep for at least 10 minutes to extract the color and flavor.
- Fluff and Saffronize: Once the rice is cooked, remove it from the heat and let it sit, covered, for 5-10 minutes. Fluff the rice gently with a fork. Drizzle the saffron water and melted butter or olive oil over the rice and gently mix to combine.
Notes
- Using ground chicken thigh meat is highly recommended for a juicier Koobideh.
- Squeezing the liquid out of the grated onion is crucial to prevent the Koobideh from falling apart on the grill.
- Mixing the chicken mixture thoroughly helps develop the protein and bind the ingredients together.
- Resting the chicken mixture in the refrigerator allows the flavors to meld and the mixture to firm up.
- Flat skewers are best for preventing the meat from spinning on the grill.
- Wetting your hands with cold water helps prevent the chicken from sticking to your hands while skewering.
- Turning the Koobideh frequently while grilling ensures even cooking and prevents burning.
- Serve with saffron rice, grilled tomatoes and peppers, and lemon wedges for a complete meal.
- Optional serving suggestions include yogurt or tzatziki sauce, Shirazi salad, extra sumac, and warm pita bread or lavash.


Leave a Comment