

Butterfinger Balls start with that irresistible combination of peanut butter and chocolate, all packed into a single, delightful bite. If you’ve ever loved the unique crunch and flavor of a Butterfinger bar, these homemade versions are sure to become a new favorite. They take the essence of the candy bar and transform it into a confection that’s surprisingly simple to make. The magic really happens when the rich, creamy peanut butter filling mingles with the sharp, shattered pieces of the Butterfinger candy bars. They’re ideal for bake sales, holiday cookie boxes, or when you just need that specific Butterfinger fix without the wrapper. These Butterfinger Balls are proof that you can capture the spirit of a favorite candy in a homemade treat that’s even better. Get ready to impress your friends and family with these addictive little balls.
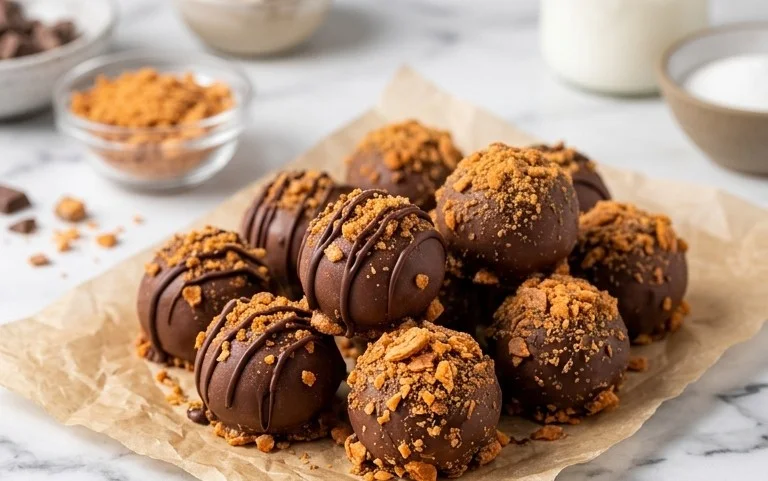
Butterfinger Balls
These Butterfinger Balls capture that unmistakable crunchy, peanut-buttery, chocolatey goodness in an easy-to-make, bite-sized treat. They’re perfect for parties, holiday cookie platters, or just satisfying a serious Butterfinger craving. The magic happens when the creamy peanut butter filling meets the shattered pieces of Butterfinger candy bars. If you love the classic Butterfinger flavor, you’re going to adore these. Making them is straightforward, and the results are always a crowd-pleaser.
Ingredients:
- 1 cup creamy peanut butter
- 1/4 cup unsalted butter (softened)
- 2 cups powdered sugar
- 1 teaspoon vanilla extract
- Pinch of salt
- 6 Butterfinger candy bars (finely crushed)
- 12 ounces semisweet or milk chocolate (chopped (for dipping, optional))
Making the Peanut Butter Base
First, we need to get our peanut butter base ready. In a medium-sized mixing bowl, combine the 1 cup of creamy peanut butter and the 1/4 cup of softened unsalted butter. Softened butter is key here; it should be pliable and easy to mix, not melted or hard. You want them to blend together smoothly to form a creamy foundation. Using a spatula or an electric mixer on low speed, cream these two ingredients together until they are well combined and there are no streaks of butter visible. This creates a smooth and rich starting point for our balls.
Next, we’ll add the dry and flavoring ingredients. Gradually add the 2 cups of powdered sugar to the peanut butter and butter mixture. It’s best to add the powdered sugar in two or three additions, mixing thoroughly after each addition. This helps prevent the sugar from flying everywhere. Once the powdered sugar is mostly incorporated, stir in the 1 teaspoon of vanilla extract and a pinch of salt. The vanilla adds a lovely aroma and flavor, while the salt helps to balance the sweetness and enhance the peanut butter taste. Continue mixing until everything is combined into a thick, dough-like consistency. This mixture should be firm enough to hold its shape. If it feels a little too sticky, you can add another tablespoon or two of powdered sugar, but be careful not to make it too dry.
Incorporating the Butterfinger Crunch
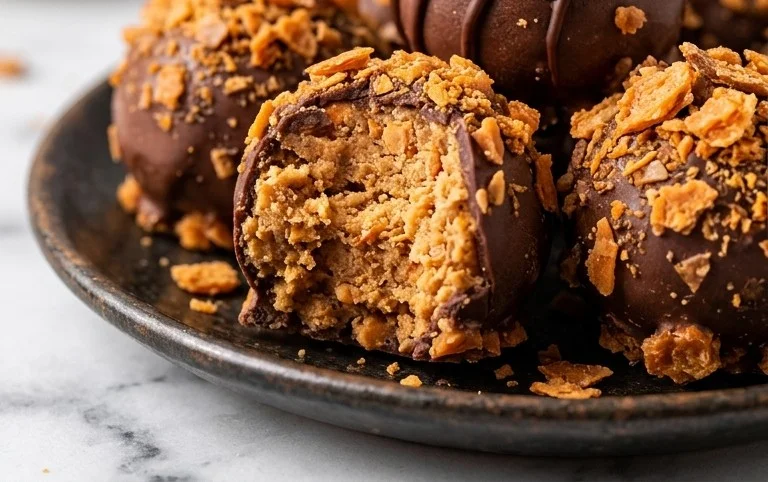
Now for the star ingredient: the Butterfinger! You’ll need to finely crush your 6 Butterfinger candy bars. The easiest way to do this is to place the candy bars in a sturdy plastic bag and then use a rolling pin or a meat mallet to break them into small pieces. You don’t want big chunks, but rather a fine, crumbly texture that will distribute evenly throughout the balls. Aim for pieces that are roughly the size of coarse sand or breadcrumbs. This ensures you get that signature Butterfinger crunch in every bite without overwhelming the peanut butter filling.
Gently fold the crushed Butterfinger pieces into the peanut butter mixture. Use a spatula or a wooden spoon for this. Be careful not to overmix at this stage. You want the Butterfinger pieces to be distributed throughout the dough, but you don’t want to crush them further or make the mixture tough. The goal is to have pockets of peanut butter goodness interspersed with crunchy Butterfinger bits. Once the Butterfinger is evenly distributed, the mixture is ready to be formed into balls.
Forming and Dipping the Balls
Take the peanut butter and Butterfinger mixture and roll it into small balls. Aim for a size of about 1 inch in diameter. You can use a small cookie scoop or just your hands. If the mixture is a bit sticky, lightly wetting your hands with water or dusting them with a tiny bit of powdered sugar can help prevent sticking. Place the rolled balls onto a baking sheet lined with parchment paper. It’s important to make them relatively uniform in size so they freeze and dip evenly. Once all the balls are rolled, place the baking sheet in the freezer for at least 30 minutes. This chilling step is crucial, especially if you plan to dip them in chocolate. It firms them up, making them much easier to handle and preventing them from falling apart when dipped.
If you’re opting for the chocolate coating, which I highly recommend for an extra layer of deliciousness, it’s time to prepare the chocolate. In a microwave-safe bowl, melt the 12 ounces of chopped semisweet or milk chocolate. Heat in 30-second intervals, stirring well after each interval, until the chocolate is smooth and fully melted. Be careful not to overheat the chocolate, as it can seize up. You can also melt the chocolate using a double boiler if you prefer. Once the chocolate is melted and smooth, you can begin dipping.
Take the chilled peanut butter balls from the freezer, one at a time. Using a fork or a dipping tool, dip each ball into the melted chocolate, ensuring it’s fully coated. Let any excess chocolate drip back into the bowl. Place the chocolate-covered balls back onto the parchment-lined baking sheet. If you like, you can even sprinkle a few extra crushed Butterfinger pieces on top of the chocolate before it sets for a decorative touch and an extra crunch. Once all the balls are dipped, place the baking sheet back into the refrigerator for about 15-20 minutes, or until the chocolate has completely hardened. This ensures a firm, clean coating.
Storage and Serving
Once the Butterfinger Balls have set, they are ready to be enjoyed! Store them in an airtight container in the refrigerator. They will keep well for about a week, though I doubt they’ll last that long. The chilling helps maintain their firmness and prevents the chocolate from melting. When serving, you can arrange them on a platter for guests or simply grab one (or two!) straight from the container. They are absolutely delicious at room temperature but are particularly refreshing when slightly chilled. These are wonderfully simple to make and always disappear quickly, making them a go-to treat for any occasion.
Conclusion:
These Butterfinger Balls are a fantastic way to enjoy that classic candy bar flavor in a new, bite-sized format. They’re surprisingly straightforward to make, even if you’re new to candy making. The combination of creamy peanut butter, crunchy Butterfinger pieces, and a hint of chocolate is always a winner, making them perfect for any occasion, from casual get-togethers to more formal holiday gatherings. Don’t be afraid to experiment with different types of chocolate for dipping, or even add a sprinkle of sea salt on top for an extra flavor pop. For best results, ensure your peanut butter base is well-chilled before rolling, and try to crush the Butterfinger bars finely so they distribute evenly throughout the balls. Store them in an airtight container in the refrigerator for up to a week.
Frequently Asked Questions:
- Can I use crunchy peanut butter instead of creamy?Yes, you can use crunchy peanut butter if you prefer a little extra texture in the base. Just be aware that the final texture will be different from the smooth center described here.
- Do I have to dip them in chocolate?No, dipping in chocolate is entirely optional. The balls are delicious on their own. However, the chocolate coating adds an extra layer of flavor and helps them hold their shape, especially in warmer temperatures.
- How should I store Butterfinger Balls?Store them in an airtight container in the refrigerator. They tend to soften at room temperature, especially if they have a chocolate coating. They should stay fresh for about a week when kept chilled.
Butterfinger Balls
Delicious no-bake balls with the irresistible crunch of Butterfinger candy bars, coated in creamy peanut butter goodness.
Ingredients
-
1 cup creamy peanut butter
-
1/4 cup unsalted butter, softened
-
2 cups powdered sugar
-
1 teaspoon vanilla extract
-
Pinch of salt
-
6 Butterfinger candy bars, finely crushed
-
12 ounces semisweet or milk chocolate, chopped (for dipping, optional)
Instructions
-
Step 1
In a large bowl, beat together the creamy peanut butter and softened unsalted butter until smooth. -
Step 2
Gradually add the powdered sugar and vanilla extract, mixing until well combined and a dough forms. -
Step 3
Stir in the pinch of salt. -
Step 4
Gently fold in the finely crushed Butterfinger candy bars until evenly distributed. -
Step 5
Roll the mixture into 1-inch balls and place them on a parchment-lined baking sheet. -
Step 6
If desired, melt the chocolate and dip each ball, allowing excess to drip off. Place back on the parchment-lined sheet. -
Step 7
Refrigerate for at least 30 minutes, or until firm.
Important Information
Nutrition Facts (Per Serving)
It is important to consider this information as approximate and not to use it as definitive health advice.
Allergy Information
Please check ingredients for potential allergens and consult a health professional if in doubt.


Leave a Comment