
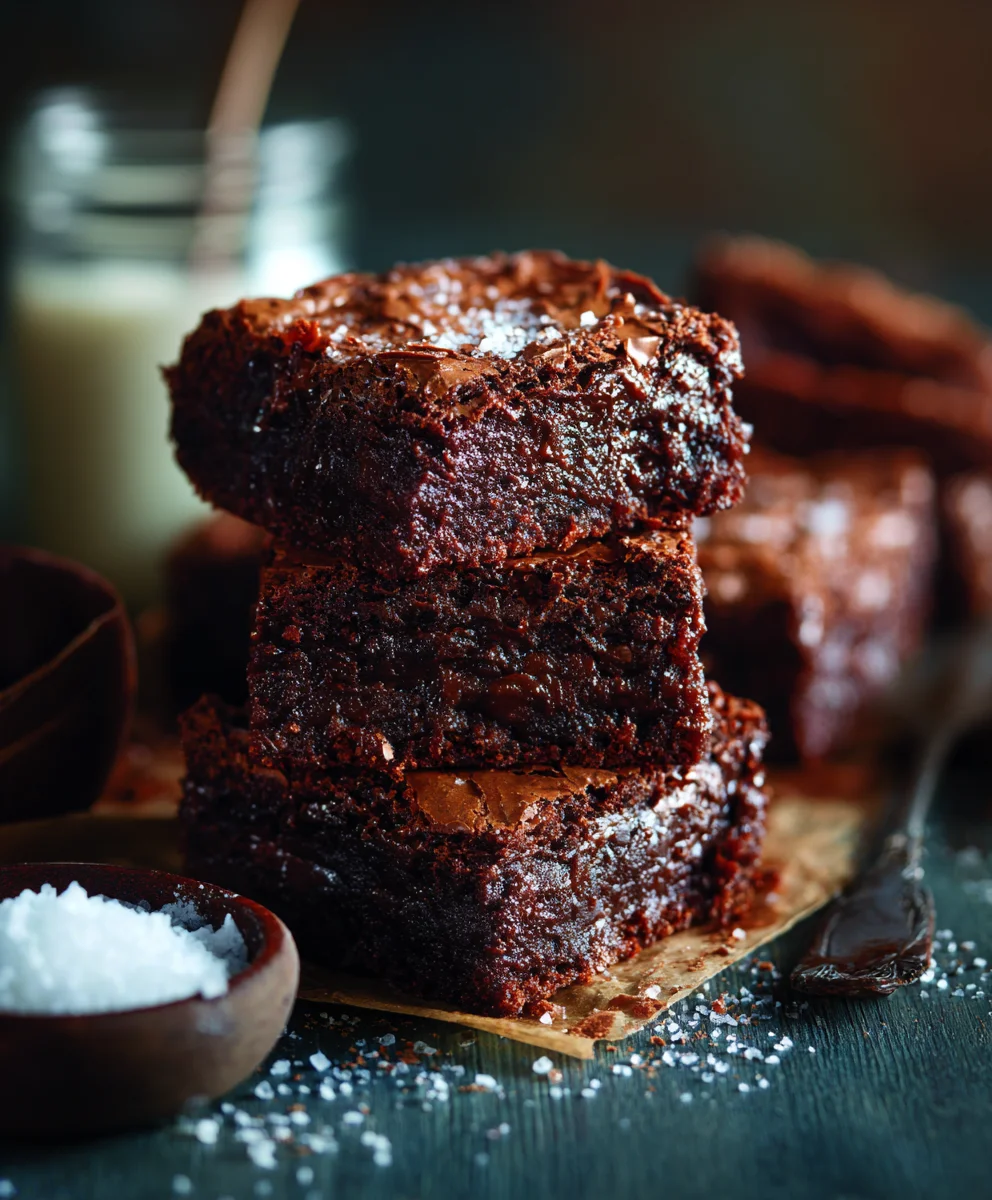
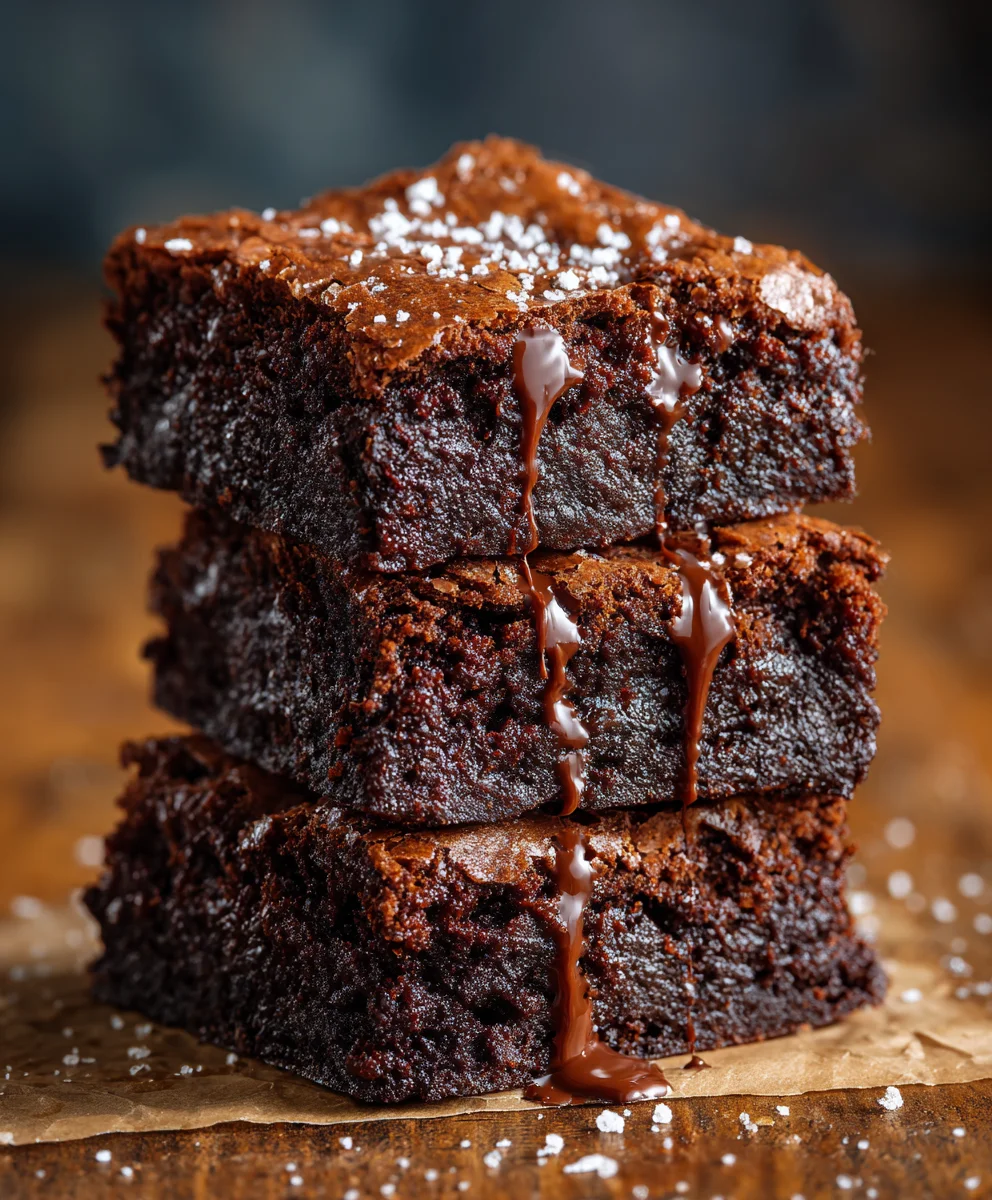
Triple Chocolate Brownies – the mere mention conjures images of pure, unadulterated bliss. Imagine a dessert so intensely chocolatey, so perfectly fudgy, with a delightful crackle on top, that it melts in your mouth and leaves an echo of cocoa glory. It’s not just a treat; it’s an experience. This beloved baked good combines the comforting familiarity of a cake with the dense richness of fudge, offering a symphony of textures and flavors that is simply irresistible. From the deep, dark cocoa base to the delightful pockets of melted chocolate chips, every bite is a journey into chocolate heaven.
While their exact origin is a bit debated, brownies are generally credited as an American invention, often traced back to the late 19th or early 20th century. One popular tale suggests they were created when a chef forgot to add baking powder to a cake, resulting in the dense, flat treat we adore today. Regardless of its precise beginning, the brownie quickly captured hearts and became a staple in bakeries and home kitchens alike, evolving into countless variations.
Our recipe for Triple Chocolate Brownies elevates this classic to new heights, ensuring an unparalleled depth of flavor. We’re talking three distinct forms of chocolate working in harmony to create the ultimate indulgence. You’ll understand why these brownies continue to be a go-to for celebrations, comfort, or simply a moment of sweet escape. We are confident this recipe will become a cherished favorite in your repertoire.
Ingredients:
- For the Brownies:
- 1 cup (226g) unsalted butter, cut into cubes
- 1 ½ cups (270g) high-quality bittersweet chocolate chips or finely chopped bittersweet chocolate (60-70% cacao), divided
- ¾ cup (150g) granulated sugar
- ¾ cup (160g) packed light brown sugar
- 4 large eggs, at room temperature
- 1 tablespoon pure vanilla extract
- 1 cup (125g) all-purpose flour, spooned and leveled
- ½ cup (45g) unsweetened cocoa powder (Dutch-processed for a darker, richer brownie)
- ½ teaspoon salt
- 1 cup (180g) semi-sweet chocolate chips
- ¾ cup (135g) white chocolate chips or chunks
- Optional (for an extra touch of decadence):
- Flaky sea salt, for sprinkling before baking
Preparation & Preheating:
- Preheat your oven and prepare your pan: My first step, and a crucial one for any baking endeavor, is to always get the oven ready. I set mine to 350°F (175°C). While the oven is warming up, I take an 8×8 inch or 9×9 inch baking pan (I personally prefer an 8×8 for thicker brownies, but a 9×9 works beautifully for a slightly thinner, chewier result) and line it with parchment paper. I like to leave an overhang on two sides; this creates a handy sling that makes lifting the cooled brownies out of the pan incredibly easy. A light spray with non-stick cooking spray before placing the parchment paper ensures it stays put, which is a small but mighty tip for neatness. This simple preparation step is fundamental for achieving those perfect, easy-to-remove Triple Chocolate Brownies.
Creating the Decadent Triple Chocolate Brownie Batter:
- Melt the butter and bittersweet chocolate: In a large, heatproof bowl, I combine the cubed unsalted butter and 1 cup of the bittersweet chocolate chips (or chopped bittersweet chocolate). I choose a high-quality bittersweet chocolate because it forms the rich, dark base flavor for these Triple Chocolate Brownies. I place this bowl over a saucepan of simmering water, creating a double boiler. It’s important that the bottom of the bowl does not touch the water. Stir occasionally until the mixture is completely smooth and glossy. This gentle melting process prevents the chocolate from seizing or burning, which can happen if melted directly over high heat. Once melted, I remove the bowl from the heat and set it aside to cool slightly, perhaps for about 5-10 minutes. Allowing it to cool is vital; you don’t want to scramble your eggs in the next step!
- Whisk in the sugars: Once the chocolate and butter mixture has cooled just enough so it’s warm to the touch but not hot, I add the granulated sugar and the packed light brown sugar directly into the bowl. I use a whisk and vigorously combine them with the chocolate mixture until it’s well incorporated and smooth. The brown sugar adds a wonderful moisture and a hint of caramel-like depth to our Triple Chocolate Brownies, complementing the intense chocolate flavor beautifully. I make sure there are no lumps of sugar remaining.
- Incorporate the eggs and vanilla: Now comes the part where we build structure and richness. I crack the four large, room-temperature eggs into the mixture, one at a time, whisking well after each addition. Whisking thoroughly after each egg is key. You’ll notice the mixture becoming thicker, lighter in color, and beautifully glossy, almost like a thin custard. This vigorous whisking incorporates air, which contributes to the fudgy texture and shiny, crackly top we all adore in a perfect brownie. After the eggs are fully incorporated, I stir in the pure vanilla extract. Vanilla isn’t just a flavor enhancer; it also brightens and rounds out the deep chocolate notes, making our Triple Chocolate Brownies even more irresistible.
- Sift and fold in the dry ingredients: In a separate medium bowl, I whisk together the all-purpose flour, unsweetened cocoa powder, and salt. I personally like to sift these dry ingredients together, especially the cocoa powder, to ensure there are no lumps and that everything is evenly distributed. This step prevents dry pockets in your final brownie. Once thoroughly combined, I add the dry ingredient mixture to the wet chocolate mixture. Using a rubber spatula, I gently fold the dry into the wet ingredients until just combined. The golden rule here is to avoid overmixing! Overmixing develops the gluten in the flour, which can lead to tough, cakey brownies instead of the dense, fudgy Triple Chocolate Brownies we’re aiming for. A few streaks of flour are perfectly acceptable at this stage; they will disappear during the next step.
- Introduce the triple chocolate magic: This is where our Triple Chocolate Brownies truly live up to their name! I carefully fold in the remaining ½ cup of bittersweet chocolate chips, the 1 cup of semi-sweet chocolate chips, and the ¾ cup of white chocolate chips or chunks. I use a gentle folding motion with my spatula, distributing the various chocolate types throughout the batter. Each chocolate variety brings its own unique flavor and texture profile to the party: the bittersweet provides intensity, the semi-sweet offers classic sweetness, and the white chocolate adds a creamy, milky contrast. This ensures every bite of your Triple Chocolate Brownies will be an explosion of chocolatey goodness.
Baking Your Perfect Triple Chocolate Brownies:
- Transfer to the prepared pan: I carefully scrape the rich, thick Triple Chocolate Brownie batter into my prepared 8×8 or 9×9 inch baking pan, using my rubber spatula to ensure I get every last bit. I then spread the batter evenly to the edges of the pan, creating a smooth and level surface. This helps the brownies bake uniformly.
- Add an optional sprinkle of sea salt: If I’m feeling fancy (and I often am when making these Triple Chocolate Brownies!), I like to sprinkle a pinch of flaky sea salt evenly over the top of the batter before it goes into the oven. This isn’t just for aesthetics; the salt really enhances the chocolate flavor, providing a delightful contrast that elevates the entire experience. It’s a small touch that makes a big difference to the complexity of the taste.
- Bake until just set: I carefully place the pan into the preheated 350°F (175°C) oven. The baking time will typically range from 28 to 35 minutes, depending on your oven and the size of your pan. For an 8×8 pan, I usually aim for around 30-32 minutes, and for a 9×9 pan, it might be slightly less, closer to 28-30 minutes. How to tell when they’re done is the most critical part: I look for the edges to be set, and a toothpick inserted into the center should come out with moist crumbs, but not wet batter. You want it to look slightly underdone in the very center because the brownies will continue to cook and set as they cool. Overbaking is the enemy of a fudgy brownie, so I always err on the side of caution. My goal is that perfect balance of a tender, slightly gooey center with firm edges.
Cooling and Serving Your Triple Chocolate Brownies:
- Cool completely in the pan: Once baked, I carefully remove the pan from the oven and place it on a wire rack to cool. This step is non-negotiable for the best results! I allow the Triple Chocolate Brownies to cool completely in the pan, which can take at least 2-3 hours, or even longer. For ultimate fudginess and clean cuts, I often let them cool for an hour or two on the counter and then transfer them to the refrigerator for another hour or two, or even overnight. Trying to cut warm brownies will result in a messy, crumbly disaster. Patience truly pays off here, as cooling allows the brownies to fully set, making them dense, fudgy, and much easier to slice into beautiful, neat squares.
- Lift, slice, and serve: Once completely cooled and firm, I use the parchment paper overhang as a sling to carefully lift the entire slab of Triple Chocolate Brownies out of the pan and onto a cutting board. This is where that parchment paper trick really shines! For the cleanest cuts, I use a large, sharp knife, wiping the blade clean with a damp cloth after each cut. I typically cut them into 9 large squares, or 16 smaller ones if I’m serving a crowd. These Triple Chocolate Brownies are absolutely divine on their own, boasting a rich, intense chocolate flavor and that perfect fudgy texture.
- Serving suggestions and storage: While they are magnificent plain, sometimes I like to elevate them further. I might serve them with a scoop of vanilla bean ice cream, a drizzle of warm caramel sauce, or a dollop of fresh whipped cream. For storage, I place any leftover Triple Chocolate Brownies in an airtight container at room temperature, where they will stay fresh and delicious for 3-4 days. If I want to extend their life, they also freeze beautifully for up to 2-3 months. Just be sure to wrap individual brownies tightly in plastic wrap before placing them in a freezer-safe bag or container. When you’re ready to enjoy, simply thaw at room temperature. Each bite is a testament to the effort, and I hope you enjoy these as much as I do! They are truly a showstopper, and always a hit whenever I make them for friends and family.
Conclusion:
Well, my fellow dessert enthusiasts, we’ve reached the sweet end of our journey through this incredible recipe, and I truly hope you’re feeling inspired and hungry! If there’s one recipe I could implore you to try this week, it would absolutely be these magnificent Triple Chocolate Brownies. We’re not just talking about any old brownie here; we’re talking about a transcendental chocolate experience that will redefine your expectations of what a brownie can be. I’ve poured my heart and soul, and a fair bit of chocolate, into perfecting this particular blend of rich cocoa, melty chips, and that irresistible, crackly top, all culminating in a fudgy center that simply melts in your mouth.
What makes these brownies a true must-try? It’s the harmonious symphony of textures and flavors. You get the deep, dark cocoa base, punctuated by bursts of semi-sweet, milk, and white chocolate chips in every single bite. The edges are perfectly chewy, the middle is gooey and decadent, and the aroma filling your kitchen as they bake is nothing short of pure bliss. Imagine the smiles on the faces of your family and friends when you present them with a tray of these beauties. They are the ultimate comfort food, a perfect pick-me-up on a dreary day, and an absolute showstopper for any gathering. Seriously, prepare for compliments – lots of them! I promise, once you experience the sheer joy of these homemade wonders, you’ll find yourself coming back to this recipe again and again. It’s more than just a dessert; it’s an edible hug, a moment of pure indulgence that you absolutely deserve.
Now, let’s talk about how to enjoy these glorious creations! While they are undeniably perfect straight out of the pan (after cooling, of course, to achieve that perfect fudgy set!), there are so many delightful ways to serve and elevate your Triple Chocolate Brownies. For a classic, comforting treat, simply warm a square ever so slightly and pair it with a tall glass of cold milk. Pure nostalgia! If you’re feeling a bit more indulgent, try serving a warm brownie à la mode with a scoop of vanilla bean ice cream. The contrast of warm, fudgy chocolate and cold, creamy ice cream is simply divine, especially with a drizzle of homemade caramel or a sprinkle of sea salt.
Creative Serving Suggestions:
- Brownie Sundaes: Transform your brownie into a full-fledged sundae by adding whipped cream, hot fudge, chopped nuts, and a cherry on top.
- Coffee Companion: These brownies are an ideal partner for your morning coffee or afternoon tea. The rich chocolate notes perfectly complement the robust flavors of a fresh brew.
- Mint Chocolate Dream: For a refreshing twist, serve them with a scoop of mint chocolate chip ice cream or a dollop of mint-flavored whipped cream.
- Nutty Delight: Before baking, feel free to sprinkle in a handful of toasted pecans or walnuts for an added crunch and earthy flavor.
- Boozy Boost: For an adults-only treat, a splash of espresso liqueur or Irish cream in the batter can add a sophisticated depth. Or, drizzle a tiny bit over the top of a warm brownie before serving.
- Seasonal Flair: During the holidays, a sprinkle of crushed peppermint candies on top of the cooling brownies adds a festive touch. In the summer, fresh berries like raspberries or strawberries provide a lovely tart counterpoint to the sweetness.
Don’t be afraid to experiment! This recipe is incredibly versatile, and the beauty of baking at home is that you can always tailor it to your own preferences and what you have on hand. Want a hint of spice? Add a pinch of cayenne pepper to the batter for a subtle warmth that enhances the chocolate. Love a citrusy note? A tiny bit of orange zest can really make the chocolate sing.
Your Turn to Bake!
Now that I’ve shared all my secrets and suggestions, it’s truly your turn to step into the kitchen and create some magic. I’ve made sure this recipe is clear, straightforward, and incredibly rewarding, even for novice bakers. There’s nothing quite like the satisfaction of pulling a pan of perfect brownies from the oven, knowing you made them yourself. So, preheat that oven, gather your ingredients, and get ready to fill your home with the most wonderful aroma.
Once you’ve baked these incredible brownies, I would absolutely love to hear about your experience! Did you stick to the original recipe, or did you venture into some of the variations? What was your favorite part? Did they disappear as quickly from your counter as they do from mine? Please, don’t be shy! Share your baking triumphs, your photos, and your thoughts in the comments below. Your feedback and stories inspire me and help our community of bakers grow. Happy baking, my friends, and get ready to indulge in the best brownies you’ve ever tasted!
Triple Chocolate Brownies: Rich, Gooey, & Easy!
Indulge in these intensely chocolatey, perfectly fudgy Triple Chocolate Brownies with a delightful crackle top. This recipe combines three distinct forms of chocolate for an unparalleled depth of flavor and an irresistible experience, sure to become a cherished favorite.
Ingredients
-
226g unsalted butter, cubed
-
270g bittersweet chocolate chips (60-70% cacao), divided
-
150g granulated sugar
-
160g packed light brown sugar
-
4 large eggs, room temperature
-
1 tbsp pure vanilla extract
-
125g all-purpose flour
-
45g unsweetened cocoa powder (Dutch-processed)
-
1/2 tsp salt
-
180g semi-sweet chocolate chips
-
135g white chocolate chips or chunks
-
Optional: Flaky sea salt
Instructions
-
Step 1
Preheat oven to 350°F (175°C). Line an 8×8 or 9×9 inch baking pan with parchment paper, leaving an overhang, then lightly spray. -
Step 2
Melt 226g butter and 1 cup (180g) bittersweet chocolate over simmering water (double boiler) until smooth. Remove from heat and cool slightly (5-10 min). -
Step 3
Whisk 150g granulated sugar and 160g packed light brown sugar into the cooled chocolate mixture until well incorporated. -
Step 4
Whisk in 4 large eggs, one at a time, until mixture is thick and glossy. Stir in 1 tbsp pure vanilla extract. -
Step 5
In a separate bowl, whisk 125g all-purpose flour, 45g unsweetened cocoa powder, and 1/2 tsp salt. Gently fold dry ingredients into the wet mixture until just combined; do not overmix. -
Step 6
Fold in the remaining 1/2 cup (90g) bittersweet chocolate chips, 180g semi-sweet chocolate chips, and 135g white chocolate chips/chunks into the batter. -
Step 7
Transfer batter to the prepared pan and spread evenly. Optionally, sprinkle flaky sea salt over the top. -
Step 8
Bake for 28-35 minutes at 350°F (175°C). Edges should be set, and a toothpick inserted into the center should come out with moist crumbs (not wet batter). Do not overbake. -
Step 9
Cool completely in the pan on a wire rack for at least 2-3 hours (or refrigerate for 1-2 hours/overnight) for optimal fudginess and clean cuts. -
Step 10
Lift brownies using parchment overhang and slice into 9 large or 16 smaller squares. Serve plain or with toppings (ice cream, caramel, whipped cream). Store leftovers in an airtight container at room temperature for 3-4 days, or freeze for 2-3 months.
Important Information
Nutrition Facts (Per Serving)
It is important to consider this information as approximate and not to use it as definitive health advice.
Allergy Information
Please check ingredients for potential allergens and consult a health professional if in doubt.

Leave a Comment