
Spicy Tuna Crispy Rice: Prepare to be obsessed! This isn’t just a recipe; it’s an experience. Imagine biting into a perfectly crisp, golden-brown rice cake, topped with a creamy, spicy tuna mixture that explodes with flavor. It’s an appetizer that’s both elegant and incredibly satisfying, guaranteed to impress your guests or elevate your weeknight dinner.
While the exact origins of Spicy Tuna Crispy Rice are debated, many believe it gained popularity in upscale Japanese restaurants in Los Angeles. It quickly became a trendy and sought-after dish, blending traditional Japanese flavors with a modern, Californian twist. The combination of textures and tastes the crunchy rice, the smooth tuna, the fiery spice is simply irresistible.
What makes Spicy Tuna Crispy Rice so universally loved? It’s the perfect balance of contrasts. The crispy rice offers a delightful textural counterpoint to the creamy, melt-in-your-mouth tuna. The spicy mayo adds a kick that awakens the palate, while the freshness of the tuna keeps it light and refreshing. Plus, it’s surprisingly easy to make at home! I’m going to show you how to create this restaurant-quality appetizer in your own kitchen, using simple ingredients and straightforward techniques. Get ready to wow your taste buds!
Ingredients:
- For the Sushi Rice:
- 2 cups sushi rice
- 2 cups water
- 1/4 cup rice vinegar
- 2 tablespoons sugar
- 1 teaspoon salt
- For the Spicy Tuna:
- 1 pound sushi-grade tuna, finely diced
- 1/4 cup mayonnaise (Japanese Kewpie preferred)
- 2 tablespoons sriracha (adjust to taste)
- 1 tablespoon sesame oil
- 1 tablespoon soy sauce
- 1 teaspoon rice vinegar
- 1/2 teaspoon grated ginger
- 1/4 cup finely chopped scallions
- For the Crispy Rice:
- Vegetable oil, for frying (about 2-3 cups)
- For Garnish (Optional):
- Sesame seeds
- Finely chopped scallions
- Avocado slices
- Eel sauce (Unagi sauce)
- Spicy mayo (extra)
- Nori seaweed, cut into thin strips
Preparing the Sushi Rice:
- Rinse the Rice: Place the sushi rice in a fine-mesh sieve and rinse under cold running water until the water runs clear. This usually takes about 3-5 minutes. Rinsing removes excess starch, which helps the rice achieve the perfect texture.
- Cook the Rice: Combine the rinsed rice and 2 cups of water in a medium saucepan. Bring to a boil over high heat. Once boiling, reduce the heat to low, cover tightly, and simmer for 18 minutes. It’s crucial to keep the lid on during this time to allow the rice to steam properly.
- Rest the Rice: After 18 minutes, remove the saucepan from the heat and let it sit, covered, for 10 minutes. This allows the rice to fully absorb the remaining moisture and prevents it from becoming mushy.
- Prepare the Sushi Vinegar: While the rice is resting, combine the rice vinegar, sugar, and salt in a small saucepan. Heat over low heat, stirring constantly, until the sugar and salt are completely dissolved. Do not boil. Let the mixture cool slightly.
- Combine Rice and Vinegar: Gently transfer the cooked rice to a large bowl (preferably a wooden one, if you have it). Pour the sushi vinegar mixture over the rice. Using a rice paddle or a wooden spoon, gently cut and fold the vinegar into the rice. Be careful not to mash the rice. You want to separate the grains while evenly distributing the vinegar. This process is called “cutting” the rice. Fan the rice with a fan or a piece of cardboard while mixing to help it cool down quickly and become shiny.
- Cool the Rice: Continue to gently fold and fan the rice until it reaches room temperature. This is important because warm rice will make the spicy tuna mixture too warm and affect the overall taste. Cover the rice with a damp cloth to prevent it from drying out while you prepare the other components.
Preparing the Spicy Tuna:
- Dice the Tuna: Ensure your tuna is sushi-grade and very fresh. Finely dice the tuna into small, uniform pieces. The smaller the pieces, the better it will mix with the other ingredients.
- Combine Ingredients: In a medium bowl, combine the diced tuna, mayonnaise (Kewpie is highly recommended for its richer flavor), sriracha (adjust the amount to your spice preference), sesame oil, soy sauce, rice vinegar, and grated ginger.
- Mix Gently: Gently mix all the ingredients together until well combined. Be careful not to overmix, as this can make the tuna mushy.
- Add Scallions: Stir in the finely chopped scallions.
- Taste and Adjust: Taste the spicy tuna mixture and adjust the seasoning as needed. You may want to add more sriracha for extra heat, soy sauce for saltiness, or rice vinegar for tanginess.
- Chill: Cover the bowl with plastic wrap and refrigerate the spicy tuna mixture for at least 30 minutes to allow the flavors to meld together. This also helps to firm up the mixture, making it easier to work with.
Making the Crispy Rice:
- Shape the Rice: Take a portion of the cooled sushi rice (about 2-3 tablespoons) and gently press it into a small, rectangular or square shape. You can use a small mold or simply shape it with your hands. The rice should be firmly packed but not overly compressed. Aim for pieces that are about 1 inch thick.
- Chill the Rice Cakes: Place the shaped rice cakes on a baking sheet lined with parchment paper. Cover them with plastic wrap and refrigerate for at least 30 minutes, or even longer (up to a few hours). This will help them firm up and hold their shape during frying. The colder the rice, the crispier it will get.
- Prepare for Frying: Pour vegetable oil into a deep saucepan or pot until it is about 2-3 inches deep. Heat the oil over medium-high heat until it reaches a temperature of 350-375°F (175-190°C). Use a thermometer to ensure the oil is at the correct temperature. If the oil is not hot enough, the rice will absorb too much oil and become soggy. If it’s too hot, the rice will burn quickly.
- Fry the Rice Cakes: Carefully place a few rice cakes into the hot oil, being careful not to overcrowd the pot. Fry for about 2-3 minutes per side, or until golden brown and crispy. Use a slotted spoon or spider to carefully flip the rice cakes and ensure even cooking.
- Drain the Rice Cakes: Remove the fried rice cakes from the oil and place them on a wire rack lined with paper towels to drain excess oil. This will help them stay crispy.
Assembling the Spicy Tuna Crispy Rice:
- Prepare Your Station: Have all your components ready: the crispy rice cakes, the spicy tuna mixture, and your desired garnishes.
- Top the Rice Cakes: Spoon a generous amount of the spicy tuna mixture onto each crispy rice cake.
- Garnish (Optional): Garnish with sesame seeds, finely chopped scallions, avocado slices, eel sauce, extra spicy mayo, and/or nori seaweed strips. Get creative and use your favorite toppings!
- Serve Immediately: Serve the spicy tuna crispy rice immediately while the rice cakes are still warm and crispy. The contrast between the warm, crispy rice and the cool, spicy tuna is what makes this dish so delicious.
Tips for Success:
- Use High-Quality Tuna: Since the tuna is served raw, it’s essential to use sushi-grade tuna from a reputable source.
- Don’t Overcrowd the Pan: When frying the rice cakes, avoid overcrowding the pan. This will lower the oil temperature and result in soggy rice. Fry in batches to maintain the oil temperature.
- Adjust the Spice Level: Adjust the amount of sriracha in the spicy tuna mixture to your liking. If you prefer a milder flavor, use less sriracha or omit it altogether.
- Make Ahead: You can prepare the sushi rice and spicy tuna mixture ahead of time. Store them separately in the refrigerator until ready to assemble. The crispy rice is best served immediately after frying.
- Experiment with Toppings: Feel free to experiment with different toppings to customize your spicy tuna crispy rice. Some other great options include pickled ginger, wasabi, and tobiko (flying fish roe).

Conclusion:
So, there you have it! This Spicy Tuna Crispy Rice recipe is truly a game-changer, and I wholeheartedly believe it deserves a spot in your regular rotation. Why? Because it’s an explosion of textures and flavors that’s surprisingly easy to achieve. We’re talking crispy, golden-brown rice cakes, topped with a creamy, spicy tuna mixture that’s both satisfying and utterly addictive. It’s the perfect appetizer for a dinner party, a fun snack for movie night, or even a light lunch when you’re craving something a little bit special.
But the best part? It’s incredibly versatile! Feel free to get creative with your toppings. If you’re not a huge fan of tuna, try using salmon or even cooked shrimp. For a vegetarian option, you could substitute the fish with seasoned avocado or a spicy edamame mixture. A sprinkle of toasted sesame seeds always adds a nice nutty flavor, and a drizzle of sriracha mayo can kick up the heat even further.
Serving Suggestions and Variations:
* As an Appetizer: Arrange the crispy rice cakes on a platter and let your guests assemble their own. Provide small bowls of the spicy tuna, avocado, and other toppings for a fun and interactive experience.
* As a Light Lunch: Serve a few crispy rice cakes alongside a simple salad for a satisfying and balanced meal.
* For a Crowd: Prepare the rice cakes and tuna mixture ahead of time and assemble them just before serving. This will prevent the rice from getting soggy.
* Spice Level: Adjust the amount of sriracha or chili flakes to your liking. If you prefer a milder flavor, start with a small amount and add more to taste.
* Extra Crunch: For an extra layer of crunch, try adding some tempura flakes or crispy fried onions on top.
* Make it Vegan: Substitute the tuna with mashed chickpeas seasoned with vegan mayo, sriracha, and a touch of soy sauce. Top with avocado and sesame seeds.
I’ve tried countless variations myself, and each one has been a delicious adventure. The possibilities are truly endless!
I know that trying a new recipe can sometimes feel a little daunting, but trust me, this one is worth the effort. The satisfaction of biting into that crispy rice, followed by the creamy, spicy tuna, is simply unmatched. It’s a flavor combination that will have you coming back for more, guaranteed.
So, what are you waiting for? Gather your ingredients, fire up your stove, and get ready to experience the magic of Spicy Tuna Crispy Rice. I’m confident that you’ll love it as much as I do. And when you do, please, please, please share your creations with me! I’d love to see your photos, hear about your variations, and learn about your experiences. Tag me on social media or leave a comment below. I can’t wait to hear what you think! Happy cooking! Let me know if you have any questions, and I’ll do my best to help. Enjoy!
Beef Chow Mein: The Ultimate Guide to Making It at Home
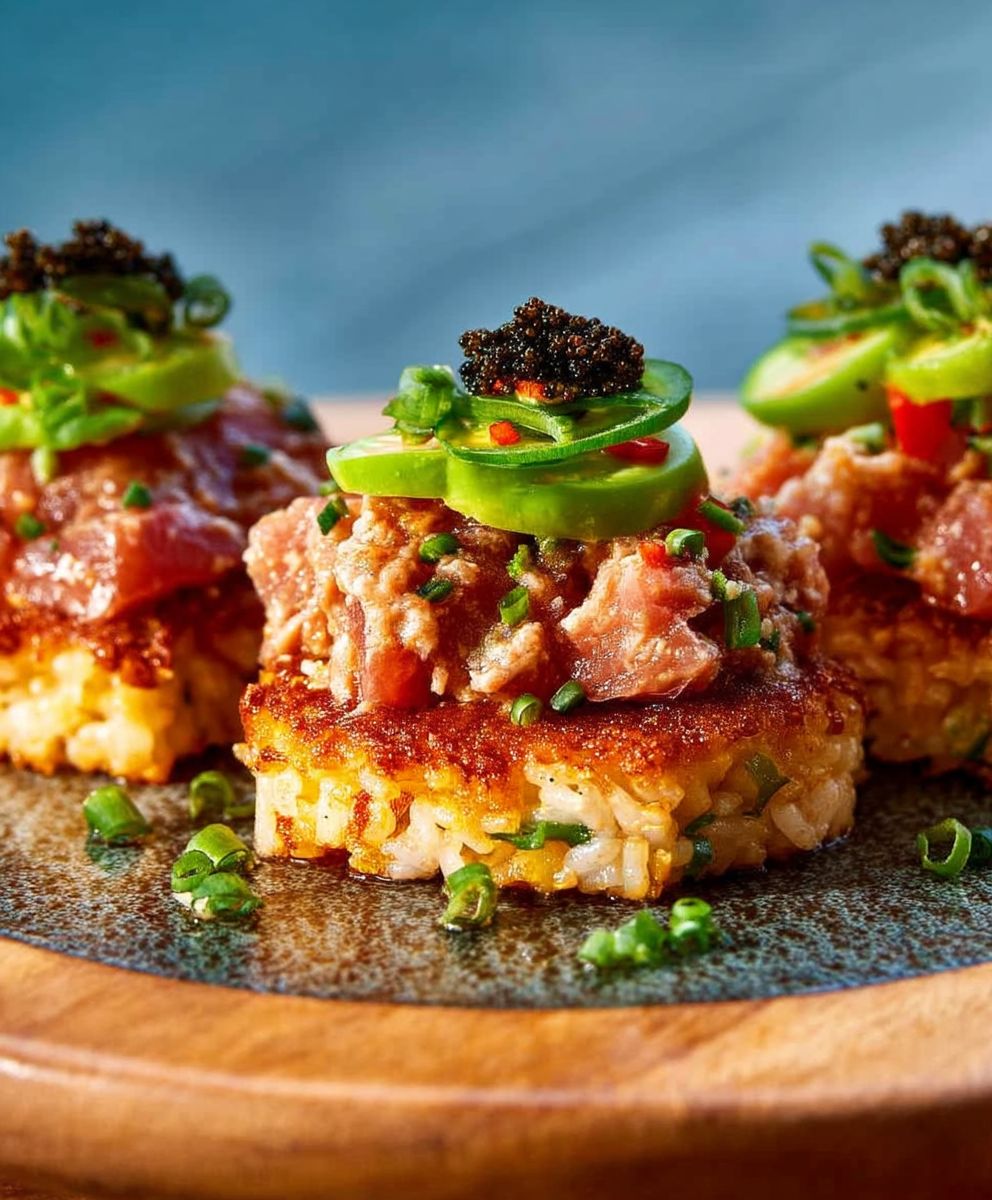
Crispy rice cakes topped with a flavorful and spicy tuna mixture, garnished with your favorite toppings. A delicious and fun appetizer or snack!
Ingredients
- 2 cups sushi rice
- 2 cups water
- 1/4 cup rice vinegar
- 2 tablespoons sugar
- 1 teaspoon salt
- 1 pound sushi-grade tuna, finely diced
- 1/4 cup mayonnaise (Japanese Kewpie preferred)
- 2 tablespoons sriracha (adjust to taste)
- 1 tablespoon sesame oil
- 1 tablespoon soy sauce
- 1 teaspoon rice vinegar
- 1/2 teaspoon grated ginger
- 1/4 cup finely chopped scallions
- Vegetable oil, for frying (about 2-3 cups)
- Sesame seeds
- Finely chopped scallions
- Avocado slices
- Eel sauce (Unagi sauce)
- Spicy mayo (extra)
- Nori seaweed, cut into thin strips
Instructions
- Place the sushi rice in a fine-mesh sieve and rinse under cold running water until the water runs clear (3-5 minutes).
- Combine the rinsed rice and 2 cups of water in a medium saucepan. Bring to a boil over high heat, then reduce heat to low, cover tightly, and simmer for 18 minutes.
- Remove from heat and let sit, covered, for 10 minutes.
- Combine rice vinegar, sugar, and salt in a small saucepan. Heat over low heat, stirring until dissolved. Do not boil. Let cool slightly.
- Gently transfer the cooked rice to a large bowl. Pour the sushi vinegar mixture over the rice. Gently cut and fold the vinegar into the rice, being careful not to mash the rice. Fan the rice with a fan or a piece of cardboard while mixing to help it cool down quickly and become shiny.
- Continue to gently fold and fan the rice until it reaches room temperature. Cover with a damp cloth to prevent drying.
- Finely dice the sushi-grade tuna into small, uniform pieces.
- In a medium bowl, combine the diced tuna, mayonnaise, sriracha, sesame oil, soy sauce, rice vinegar, and grated ginger.
- Gently mix all the ingredients together until well combined. Be careful not to overmix, as this can make the tuna mushy.
- Stir in the finely chopped scallions.
- Taste the spicy tuna mixture and adjust the seasoning as needed.
- Cover and refrigerate for at least 30 minutes.
- Take a portion of the cooled sushi rice (about 2-3 tablespoons) and gently press it into a small, rectangular or square shape. Aim for pieces that are about 1 inch thick.
- Place the shaped rice cakes on a baking sheet lined with parchment paper. Cover them with plastic wrap and refrigerate for at least 30 minutes, or even longer (up to a few hours).
- Pour vegetable oil into a deep saucepan or pot until it is about 2-3 inches deep. Heat the oil over medium-high heat until it reaches a temperature of 350-375°F (175-190°C).
- Carefully place a few rice cakes into the hot oil, being careful not to overcrowd the pot. Fry for about 2-3 minutes per side, or until golden brown and crispy.
- Remove the fried rice cakes from the oil and place them on a wire rack lined with paper towels to drain excess oil.
- Have all your components ready: the crispy rice cakes, the spicy tuna mixture, and your desired garnishes.
- Spoon a generous amount of the spicy tuna mixture onto each crispy rice cake.
- Garnish with sesame seeds, finely chopped scallions, avocado slices, eel sauce, extra spicy mayo, and/or nori seaweed strips.
- Serve the spicy tuna crispy rice immediately while the rice cakes are still warm and crispy.
Notes
- Use high-quality, sushi-grade tuna.
- Don’t overcrowd the pan when frying the rice cakes.
- Adjust the sriracha level to your spice preference.
- Sushi rice and spicy tuna can be made ahead of time.
- Crispy rice is best served immediately after frying.
- Experiment with different toppings!


Leave a Comment