
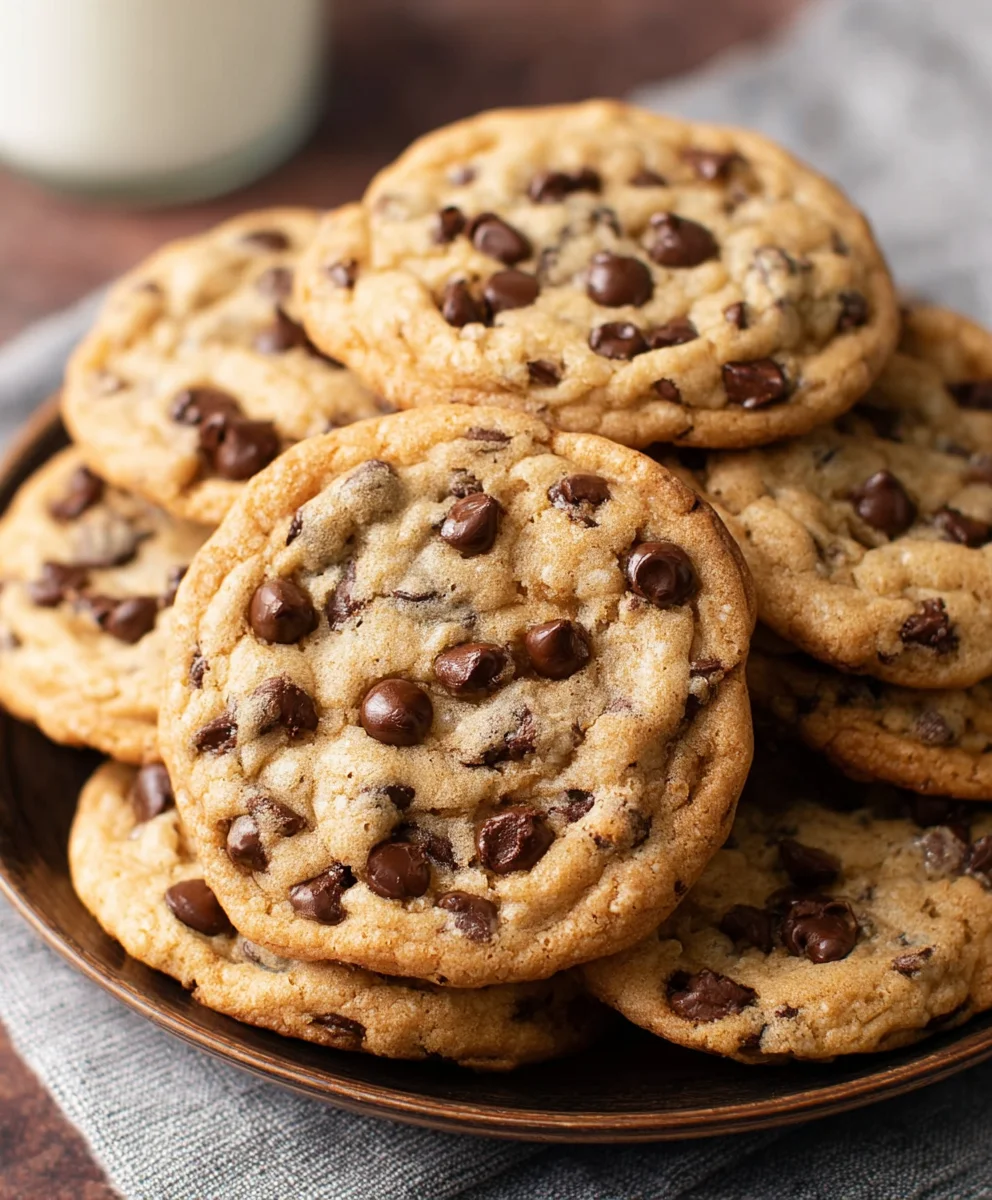
Bakery Style Chocolate Chip Cookies are the stuff of dreams, aren’t they? That perfect balance of chewy center, crisp edges, and pockets of melty, rich chocolate. If you’ve ever found yourself gazing longin extractgly at the cookie display in your favorite local bakery, wondering how they achieve that magical texture and irresistible flavor, you’re in the right place. We’ve all been there, trying recipe after recipe at home, only to be met with cookies that are too flat, too cakey, or just… ordinary. What makes these Bakery Style Chocolate Chip Cookies so incredibly special, though? It’s a combination of precise measurements, the right kind of butter, and a few little secrets that elevate a simple cookie to a truly decadent experience. Get ready to ditch the store-bought versions for good, because we’re about to unlock the secrets to baking your own show-stopping cookies right in your kitchen!
Ingredients:
- 2 cups minus 2 tablespoons cake flour (228 grams)
- 1 2/3 cups bread flour (217 grams)
- 1 1/4 teaspoons baking soda (5 grams)
- 1 1/2 teaspoons baking powder (6 grams)
- 1 teaspoon salt (6 grams)
- 1 1/4 cups salted butter, softened (10 ounces)
- 1 1/4 cups light brown sugar (275 grams)
- 1 cup plus 2 tablespoons white granulated sugar (226 grams)
- 2 large eggs
- 2 teaspoons vanilla extract (10 grams)
- 1 cup shaved or finely chopped dark chocolate (or mini chocolate chips – at least 60% cacao 146 grams)
- 1 1/2 cups dark chocolate chips (or semi-sweet if preferred 267 grams)
- 1/4 cup white granulated sugar (for rolling and coating)
- Sea salt (for sprinkling on top)
Preparing the Dough
Dry Ingredients Mix
The journey to bakery-style chocolate chip cookies begin extracts with combining our dry ingredients. In a medium-sized bowl, I like to whisk together the cake flour and bread flour. Using both types of flour is a bit of a secret weapon for achieving that perfect texture – the cake flour lends tenderness, while the bread flour contributes a satisfying chew. Next, I add the baking soda, baking powder, and a teaspoon of salt to this flour mixture. It’s important to thoroughly whisk these together to ensure the leavening agents and salt are evenly distributed, which will lead to uniformly risen and seasoned cookies. Set this bowl aside; we’ll come back to it shortly.
Creaming the Butter and Sugars
Now, for the foundation of our cookies: the butter and sugars. In a large mixing bowl, preferably the bowl of a stand mixer fitted with the paddle attachment, I add the softened salted butter. Ensure your butter is truly softened – it should give slightly when pressed but not be melted. This is crucial for proper creaming. To the butter, I add the light brown sugar and the initial 1 cup plus 2 tablespoons of white granulated sgin extractr. Begin creaming these together on medium speed. This process can take about 3 to 5 minutes. You’re looking for a pnon-alcoholic ale, fluffy mixture that’s light in color and airy in texture. This step is vital for incorporating air into the dough, which contributes to the cookies’ lift and tender crum extractb. Scrape down the sides of the bowl a couple of times during this creaming process to ensure everything is incorporated.
Incorporating Eggs and Vanilla
Once the butter and sugar are beautifully creamed, it’s time to add the eggs and vanilla extract. I add the two large eggs, one at a time, beating well after each addition until fully incorporated. Don’t rush this step; allowing each egg to emulsify into the butter mixture prevents the dough from becoming greasy. Following the eggs, I add the vanilla extract. The pure vanilla flavor is going to be a prominent player in the final cookie, so using a good quality extract makes a noticeable difference. Beat until everything is just combined and smooth.
Combining Wet and Dry Ingredients
With the wet ingredients beautifully blended, we’ll now gently introduce the dry ingredients. Gradually add the flour mixture to the butter mixture, mixing on low speed. Be careful not to overmix at this stage. Mix only until the flour streaks have just disappeared. Overmixing can develop the gluten too much, resulting in tough cookies. It’s perfectly acceptable to have a few tiny streaks of flour remaining; they will fully incorporate as you add the chocolate.
Adding the Chocolate Goodness
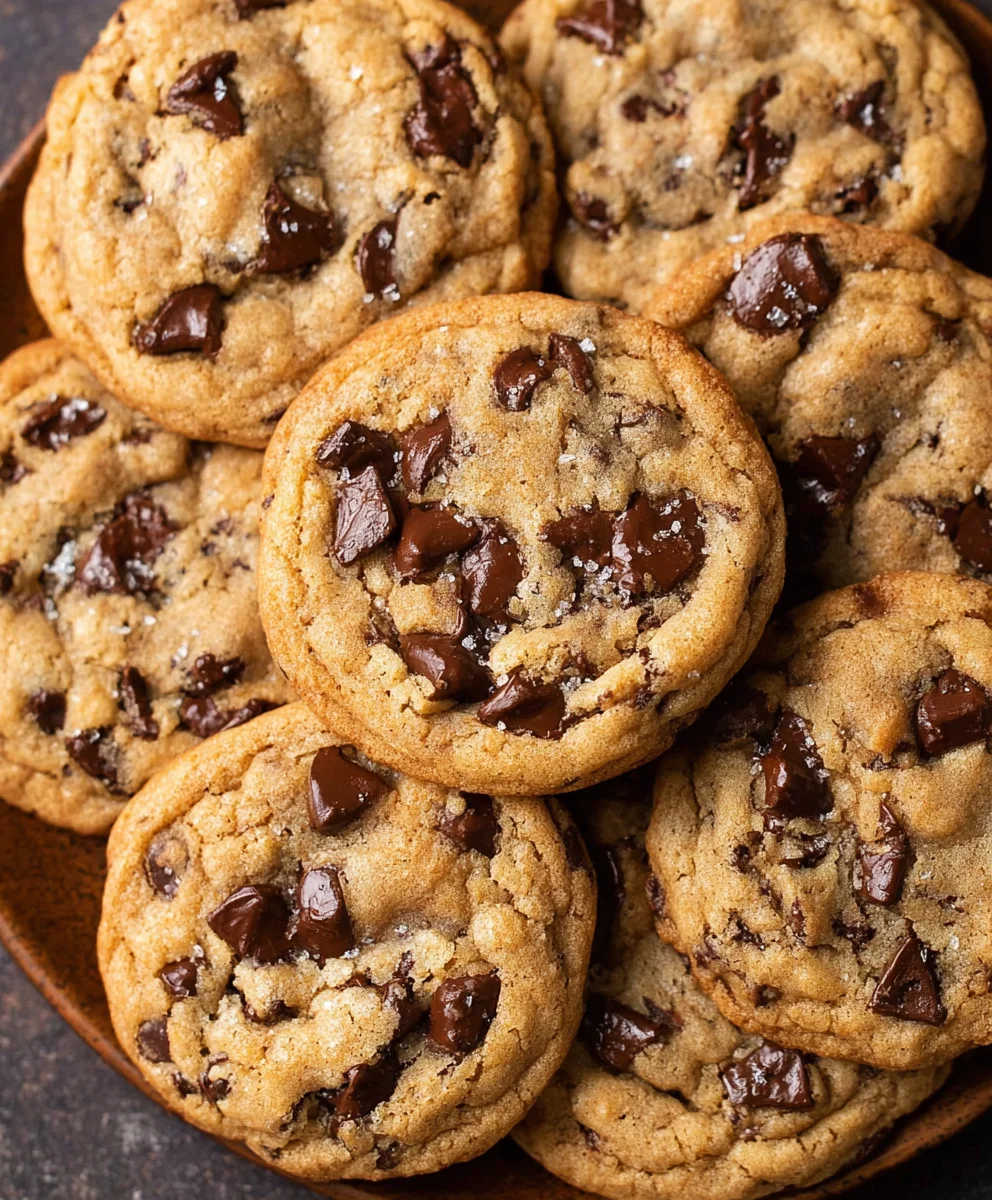
This is where the magic happens – adding the chocolate! I fold in the 1 cup of shaved or finely chopped dark chocolate, along with the 1 1/2 cups of dark chocolate chips. Using a spatula or wooden spoon for this step is best, as it prevents overmixing. Gently fold until the chocolate is evenly distributed throughout the dough. The variety of chocolate textures – the melty richness of the shaved chocolate and the satisfying bite of the chips – adds so much complexity and delight to each cookie.
Chilling and Shaping
The Crucial Chill
This is perhaps the most important step for achieving bakery-quality cookies: chilling the dough. Cover the bowl tightly with plastic wrap and refrigerate for at least 24 hours, and up to 72 hours. I know waiting is tough, but this step is non-negotiable for superior flavor and texture. Chilling allows the fats to solidify, which prevents the cookies from spreading too much during baking. It also gives the flavors time to meld and deepen, resulting in a more complex and delicious cookie. You can even divide the dough into balls before chilling if you prefer, making baking day even faster.
Shaping and Sugar Coating
After the dough has chilled sufficiently, it’s time to shape the cookies. Scoop out portions of dough using a cookie scoop (about 2-3 tablespoons per cookie). For that signature bakery look, roll each portion into a ball. Now, for the extra sparkle and crunch: in a small, shallow bowl, place the remaining 1/4 cup of white granulated sugar. Gently roll each cookie dough ball in the sugar until it’s well coated. This sugar coating not only adds a lovely sheen but also contributes to a delightful crispy exterior.
Baking and Finishing
Baking to Perfection
Preheat your oven to 375°F (190°C). Line baking sheets with parchment paper or silicone baking mats to prevent sticking and ensure even baking. Place the sugar-coated cookie dough balls onto the prepared baking sheets, leaving about 2 inches of space between each cookie to allow for spreading. For an extra touch that screams “bakery-style,” I like to gently press a few extra chocolate chips onto the tops of a few of the cookie balls. As the cookies bake, they wigin extractspread and begin to turn golden brown around the edges. Bake for 10-14 minutes, or until the edges are set and lightly golden, and the centers still look slightly underbaked. They will continue to cook on the baking sheet after removal from the oven.
The Finishing Touch: Sea Salt
As soon as the cookies come out of the oven, while they are still hot and soft, sprinkle a few flakes of sea salt over the tops. This is a game-changer! The subtle saltiness perfectly balances the sweetness of the chocolate and the cookie dough, creating a truly addictive flavor profile. The contrast between the sweet cookie and the sharp, briny sea salt is what elevates these to that coveted bakery-style status. Let the cookies cool on the baking sheet for 5-10 minutes before carefully transferring them to a wire rack to cool completely. This cooling period is essential for them to firm up and achieve the perfect chewy interior and crisp exterior.
Conclusion:
And there you have it – your guide to crafting perfect Bakery Style Chocolate Chip Cookies! We’ve walked through each step, from creaming the butter and sugars to achieving that irresistible chewy center and slightly crisp edge. The key to these cookies truly lies in the quality of your ingredients and a little bit of patience during the chilling process, which allows the flavors to meld beautifully. These aren’t just any cookies; they’re a warm hug in edible form, perfect for sharing (or not!).
For the ultimate experience, I love serving these Bakery Style Chocolate Chip Cookies warm from the oven with a tall glass of cold milk. They also make a delightful addition to any dessert platter, paired with ice cream, or even crum extractbled over a bowl of fruit. Don’t be afraid to get creative with variations! Consider adding a sprinkle of sea salt on top before baking for a sophisticated sweet-and-salty contrast, or fold in chopped nuts like walnuts or pecans for added texture and flavor. You can also experiment with different types of chocolate, like dark, milk, or white chocolate chips, or even a mix!
I hope this recipe inspires you to bake up a batch (or two!) of these incredible cookies. Remember, baking is a journey, and practice makes perfect. Don’t be discouraged if your first batch isn’t exactly like the picture – they’ll still be delicious! Enjoy the process and the sweet rewards.
Frequently Asked Questions:
Why do my Bakery Style Chocolate Chip Cookies spread too much?
Excessive spreading often happens when the dough is too warm, or the butter is too soft when creamed. Chilling the dough for at least 30 minutes (or even overnight) is crucial to prevent this. Also, ensure you’re measuring your flour correctly; too much flour can lead trum extractry, crumbly cookies that spread less, while too little can cause them to spread out too thinly.
Can I freeze the dough for Bakery Style Chocolate Chip Cookies?
Absolutely! This dough freezes exceptionally well. Portion the dough into balls and place them on a baking sheet to freeze until solid, then transfer them to a freezer-safe bag or container. You can bake them directly from frozen, adding a few extra minutes to the baking time. This is a fantastic way to have fresh, homemade cookies ready whenever the craving strikes!
Bakery Style Chocolate Chip Cookies – Perfect Recipe
A recipe for perfect bakery-style chocolate chip cookies with a chewy interior and crisp exterior, featuring a blend of flours and high-quality chocolate.
Ingredients
-
2 cups minus 2 tablespoons cake flour (228 grams)
-
1 2/3 cups bread flour (217 grams)
-
1 1/4 teaspoons baking soda (5 grams)
-
1 1/2 teaspoons baking powder (6 grams)
-
1 teaspoon salt (6 grams)
-
1 1/4 cups salted butter, softened (10 ounces)
-
1 1/4 cups light brown sugar (275 grams)
-
1 cup plus 2 tablespoons white granulated sugar (226 grams)
-
2 large eggs
-
2 teaspoons vanilla extract (10 grams)
-
1 cup shaved or finely chopped dark chocolate (or mini chocolate chips – at least 60% cacao 146 grams)
-
1 1/2 cups dark chocolate chips (or semi-sweet if preferred 267 grams)
-
1/4 cup white granulated sugar (for rolling and coating)
-
Sea salt (for sprinkling on top)
Instructions
-
Step 1
Combine cake flour, bread flour, baking soda, baking powder, and salt in a medium bowl. Whisk to combine and set aside. -
Step 2
In a large bowl, cream softened butter with light brown sugar and 1 cup plus 2 tablespoons of white granulated sugar on medium speed for 3-5 minutes until light and fluffy. -
Step 3
Add eggs one at a time, beating well after each addition. Stir in vanilla extract until just combined. -
Step 4
Gradually add the dry ingredients to the wet ingredients on low speed, mixing only until flour streaks have just disappeared. Do not overmix. -
Step 5
Gently fold in the shaved dark chocolate and dark chocolate chips. -
Step 6
Cover the dough tightly with plastic wrap and refrigerate for at least 24 hours, and up to 72 hours. -
Step 7
Preheat oven to 375°F (190°C). Line baking sheets with parchment paper. Scoop dough into balls (about 2-3 tablespoons each), roll in 1/4 cup white granulated sugar, and place on baking sheets. -
Step 8
Bake for 10-14 minutes, or until edges are set and lightly golden, and centers still look slightly underbaked. Sprinkle with sea salt immediately after removing from oven. -
Step 9
Let cookies cool on the baking sheet for 5-10 minutes before transferring to a wire rack to cool completely.
Important Information
Nutrition Facts (Per Serving)
It is important to consider this information as approximate and not to use it as definitive health advice.
Allergy Information
Please check ingredients for potential allergens and consult a health professional if in doubt.

Leave a Comment