
Sugar Cookie Cups are truly a delightful creation, offering a charming and incredibly versatile twist on a beloved classic. Imagine the comforting, familiar taste of a perfectly baked sugar cookie, now ingeniously shaped into a dainty, edible cup, ready to cradle a myriad of delectable fillings. This innovative take transforms a simple cookie into a sophisticated yet approachable dessert, ideal for any occasion, from a casual gathering to an elegant celebration.
While the timeless sugar cookie itself boasts a rich history, tracing its origins back to German immigrants in 18th-century Pennsylvania with their crisp “Nazareth sugar cookies,” these individual cups represent a brilliant evolution. They merge tradition with modern convenience, providing a personalized dessert experience that I find myself gravitating towards again and again. People adore these cookie cups not only for their nostalgic, buttery flavor and wonderfully soft, chewy texture but also for their remarkable adaptability and ease of serving.
Why We Love These Individual Treats
The true beauty of these Sugar Cookie Cups lies in their endless potential for customization. Whether you opt for a vibrant dollop of creamy buttercream, a fresh burst of seasonal berries, a rich chocolate ganache, or a tangy lemon curd, the soft cookie base provides the perfect complement. They eliminate the mess of slicing a traditional cake or pie and offer an adorable, ready-to-eat portion that makes entertaining a breeze. I promise, once you experience the joy of creating and sharing these charming individual desserts, they will quickly become a cherished addition to your recipe repertoire.
Ingredients:
-
For the Sugar Cookie Cups:
- 1 cup (2 sticks or 226g) unsalted butter, softened to room temperature
- 1 ½ cups (300g) granulated sugar
- 2 large eggs
- 1 teaspoon pure vanilla extract
- 3 cups (360g) all-purpose flour
- 1 teaspoon baking powder
- ½ teaspoon salt
- ¼ teaspoon ground nutmeg (optional, but I love the subtle warmth it adds!)
-
For the Cream Cheese Frosting Filling:
- 8 ounces (226g) cream cheese, softened
- ½ cup (1 stick or 113g) unsalted butter, softened
- 4 cups (480g) powdered sugar (confectioners’ sugar), sifted
- 1 teaspoon pure vanilla extract
- 1-2 tablespoons milk or heavy cream (as needed for desired consistency)
-
For the Rich Chocolate Ganache Filling:
- 1 cup (170g) good quality semi-sweet chocolate chips or finely chopped chocolate bar
- ½ cup (120ml) heavy cream
- 1 tablespoon unsalted butter (optional, for extra sheen and richness)
-
Optional Toppings and Garnishes:
- Fresh berries (strawberries, raspberries, blueberries)
- Mini chocolate chips
- Sprinkles
- Lemon zest
- A dusting of powdered sugar
- Caramel sauce drizzle
- Toasted coconut flakes
Preparing the Sugar Cookie Dough:
- Getting Started with Butter and Sugar: First things first, make sure your unsalted butter is at true room temperature. This is key for a smooth, homogenous dough that bakes evenly. In a large mixing bowl, or the bowl of a stand mixer fitted with the paddle attachment, cream together the softened butter and granulated sugar on medium speed for about 3-5 minutes. You’re looking for a light, fluffy, and pale mixture. This creaming process incorporates air, which is essential for tender Sugar Cookie Cups. Don’t rush this step; it really makes a difference in the final texture.
- Adding the Wet Ingredients: Once your butter and sugar are perfectly creamed, crack in the two large eggs, one at a time, mixing well after each addition. Scrape down the sides of the bowl to ensure everything is fully incorporated. Then, pour in the pure vanilla extract. Vanilla is a must for classic sugar cookies, and it truly shines in these adorable Sugar Cookie Cups. Mix until just combined. Overmixing at this stage can develop gluten, leading to tougher cookies, so gentle handling is best.
- Combining the Dry Ingredients: In a separate medium bowl, whisk together the all-purpose flour, baking powder, salt, and if you’re using it, the ground nutmeg. I highly recommend the nutmeg; it adds a subtle layer of complexity that elevates the flavor profile without being overpowering. Make sure these dry ingredients are thoroughly combined so that the leavening agent (baking powder) is evenly distributed throughout the dough. This ensures your Sugar Cookie Cups rise beautifully and uniformly.
- Gradually Incorporating Dry into Wet: With the mixer on low speed, gradually add the dry ingredient mixture to the wet mixture, a third at a time. Mix only until just combined and no streaks of flour remain. Be very careful not to overmix here. As soon as you see the dough come together, stop the mixer. Overmixing will lead to tough cookies, and we want wonderfully tender Sugar Cookie Cups! The dough will be soft but shouldn’t be overly sticky.
- Chilling the Dough for Success: Now, this is an important step that many try to skip, but I promise it’s worth it! Divide the dough in half, flatten each half into a disc, wrap them tightly in plastic wrap, and refrigerate for at least 1 hour. Personally, I often chill mine for 2-3 hours, or even overnight. Chilling helps the butter solidify, preventing the cookies from spreading too much during baking and making the dough much easier to handle. It also allows the flavors to meld beautifully, ensuring the best possible Sugar Cookie Cups.
Forming and Baking the Sugar Cookie Cups:
- Preheating and Prepping: Preheat your oven to 375°F (190°C). While the oven heats, lightly spray a 12-cup standard muffin tin with non-stick baking spray. Even if your muffin tin is non-stick, a light spray provides an extra layer of insurance for easy removal of your delicate Sugar Cookie Cups.
- Portioning the Dough: Remove one disc of chilled dough from the refrigerator. If the dough is too firm to work with immediately, let it sit at room temperature for 5-10 minutes. For uniform Sugar Cookie Cups, I like to use a small cookie scoop (about 1.5-2 tablespoons) or simply roll portions of dough into balls, each roughly 1 to 1.5 inches in diameter. You’ll need about 1 ½ to 2 tablespoons of dough per cup, depending on how thick you want your cup walls.
- Placing the Dough: Place one dough ball into each prepared muffin cup. You don’t need to press them down just yet.
- Baking the Initial Cups: Bake for 8-10 minutes, or until the edges are lightly golden brown. The centers might still look a little soft, and that’s exactly what we want. Keep a close eye on them, as oven temperatures can vary. The key is to bake them just enough so they are set but still pliable for shaping.
-
Creating the “Cup” Indentation: This is the most crucial step for forming perfect Sugar Cookie Cups! Immediately upon removing the muffin tin from the oven, use a shot glass, the back of a small spoon, or even your thumb (carefully, it’s hot!) to gently press down into the center of each cookie, creating an indentation or “cup” shape. The cookies will be soft and warm, making them easy to mold. If you wait too long, they will firm up and crack when you try to press them. Continue to press until you have a nice, deep well for your fillings.
Important Tip for Shaping:
If the dough sticks to your shaping tool, lightly flour the bottom of your shot glass or spoon. Sometimes, the dough might try to climb up the sides of your tool, so just gently push it back down to form a clean cup shape.
- Cooling the Sugar Cookie Cups: Allow the Sugar Cookie Cups to cool in the muffin tin for about 5-10 minutes. This allows them to set up and become firm enough to handle without breaking. After this initial cooling period, carefully remove them from the muffin tin and transfer them to a wire rack to cool completely. They must be completely cool before filling, otherwise, your frosting or ganache will melt!
Preparing the Cream Cheese Frosting Filling:
If you’re opting for a luscious cream cheese filling for your Sugar Cookie Cups, here’s how I make mine extra smooth and delightful:
- Softening the Dairy: Ensure both your cream cheese and unsalted butter are properly softened to room temperature. This is absolutely critical for a lump-free, creamy frosting. Cold ingredients will result in a clumpy mess, and we want silky smooth Sugar Cookie Cups!
- Creaming Together: In a large mixing bowl or the bowl of a stand mixer with the paddle attachment, beat the softened cream cheese and butter together on medium speed for 2-3 minutes. Scrape down the sides of the bowl frequently. You’re looking for a light, fluffy, and perfectly blended mixture with no visible lumps of cream cheese or butter.
- Adding the Sweetness and Flavor: Gradually add the sifted powdered sugar, about 1 cup at a time, mixing on low speed until combined, then increasing to medium until smooth. Sifting the powdered sugar beforehand is a game-changer for avoiding lumps. Once all the sugar is in, add the pure vanilla extract. If the frosting seems too thick, add milk or heavy cream, 1 tablespoon at a time, mixing after each addition until you reach your desired consistency. For piping, you’ll want it firm enough to hold its shape but soft enough to flow easily.
- Whipping to Perfection: Once all ingredients are incorporated, increase the mixer speed to medium-high and beat for an additional 1-2 minutes. This incorporates air, making the frosting extra light and fluffy – perfect for filling your Sugar Cookie Cups.
Preparing the Rich Chocolate Ganache Filling:
For a decadent chocolate experience in your Sugar Cookie Cups, a simple ganache is always a winner:
- Preparing the Chocolate: Place the chocolate chips or finely chopped chocolate in a heatproof bowl. Using good quality chocolate here really makes a difference in the final taste of your Sugar Cookie Cups.
- Heating the Cream: In a small saucepan, heat the heavy cream over medium heat until it just begins to simmer around the edges, but do not let it come to a rolling boil.
- Pouring and Melting: Immediately pour the hot cream over the chocolate in the bowl. Let it sit undisturbed for 5 minutes. This allows the hot cream to melt the chocolate thoroughly.
- Mixing to Smoothness: After 5 minutes, gently whisk the mixture starting from the center and working your way outwards until it is completely smooth and glossy. If you’re using it, stir in the tablespoon of unsalted butter for extra shine and richness.
- Cooling the Ganache: Allow the ganache to cool at room temperature until it reaches your desired consistency. For filling the Sugar Cookie Cups, you’ll want it thick enough to stay put but still pourable or spoonable. This usually takes about 30-60 minutes at room temperature, or you can speed it up in the fridge with occasional stirring (watch it carefully so it doesn’t get too firm!).
Assembling Your Sugar Cookie Cups:
Now for the fun part – filling and decorating your beautiful Sugar Cookie Cups! This is where you can let your creativity truly shine.
-
Choosing Your Filling Method:
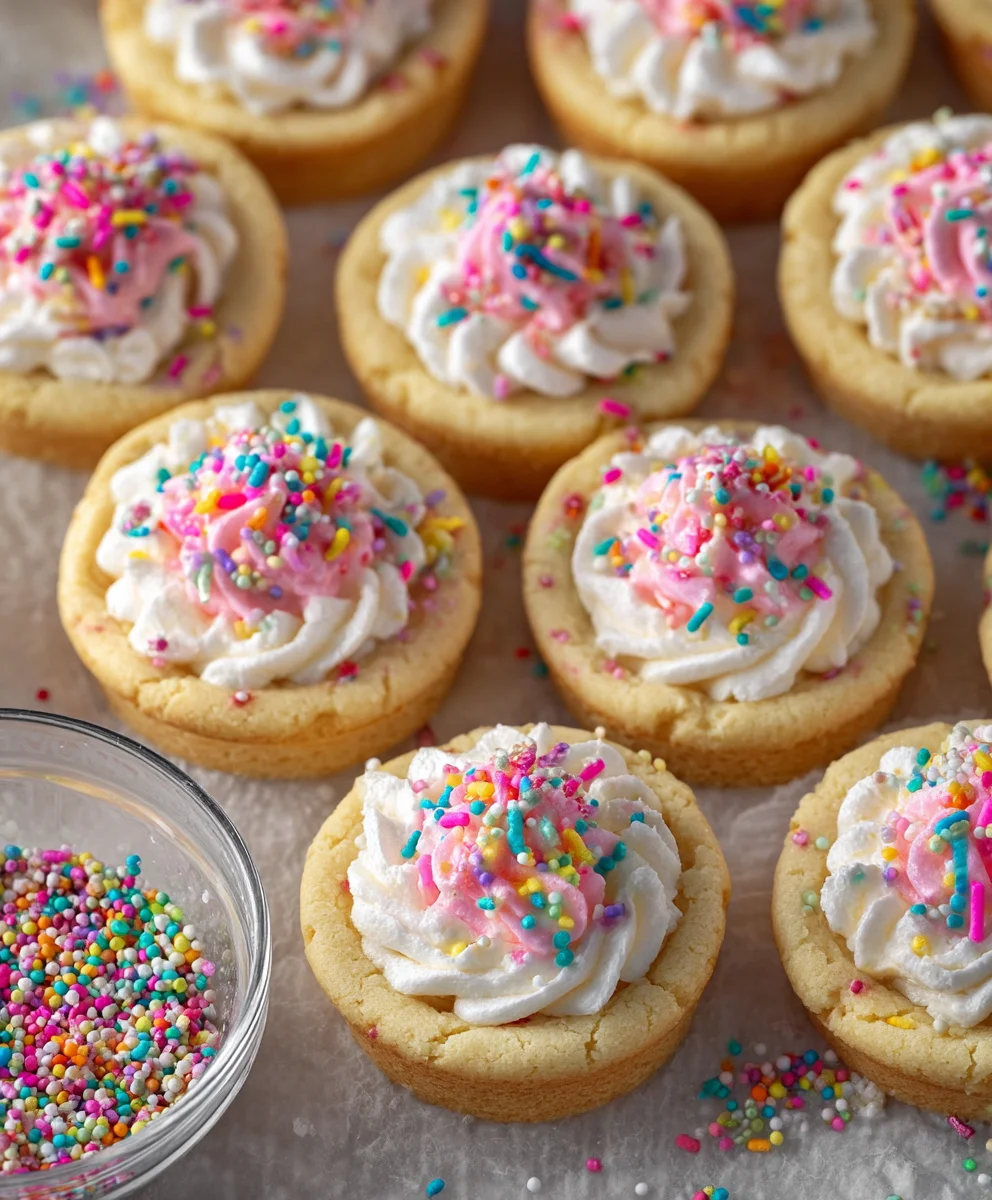
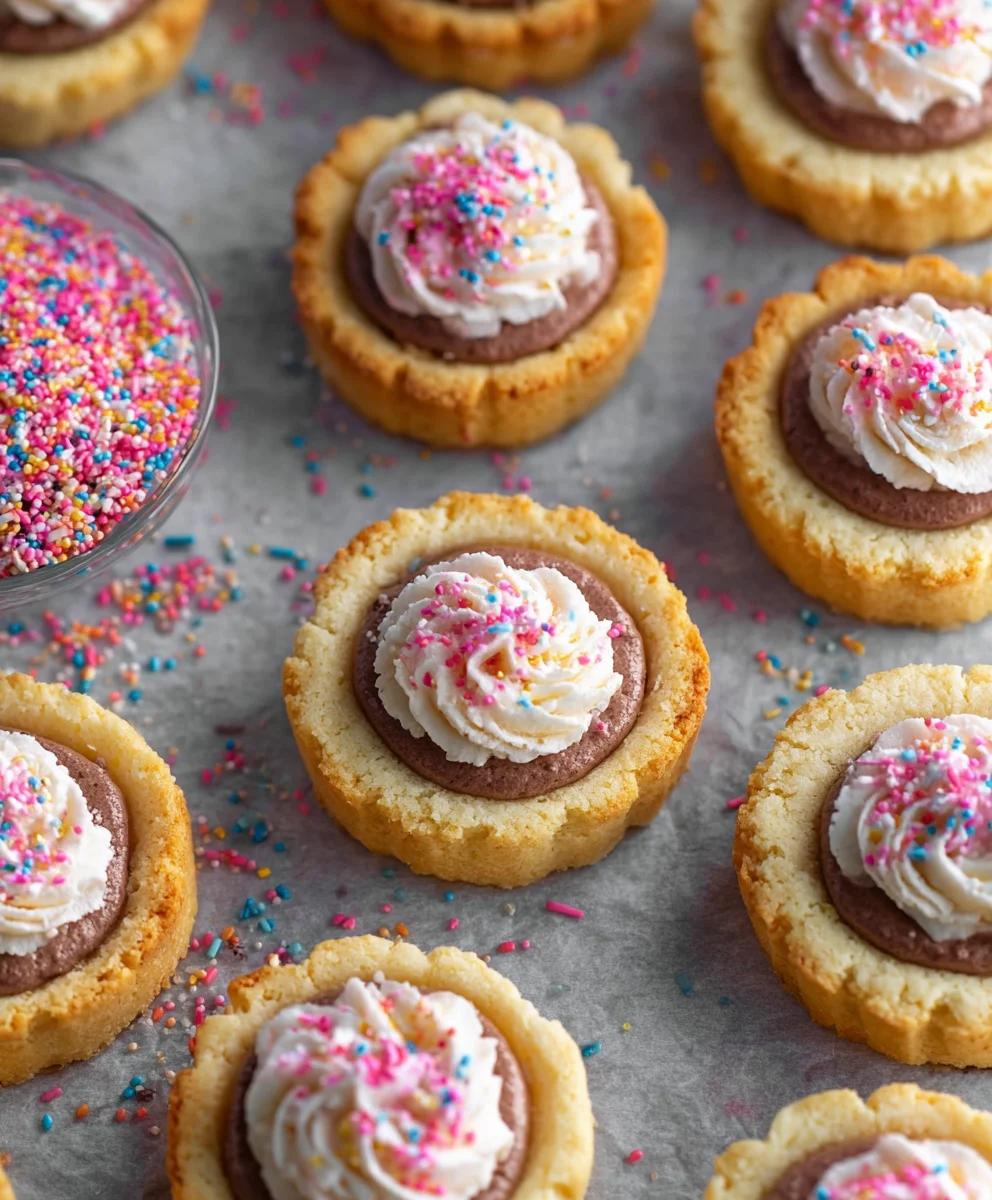
- Piping: For a professional and elegant look, I love to use a piping bag fitted with a star tip (like a Wilton 1M or 21) for the cream cheese frosting. Snip the end of the piping bag, insert your tip, and fill the bag with your chosen frosting or ganache. Pipe a beautiful swirl into each cooled Sugar Cookie Cup. This method is fantastic for creating height and visual appeal.
- Spoon Filling: If you prefer a more rustic or straightforward approach, a small spoon works perfectly. Simply spoon your cream cheese frosting or chocolate ganache into each cooled Sugar Cookie Cup, filling it to your desired level. You can smooth the top with the back of the spoon.
- Adding Fresh Fruit: If you’re using fresh berries, now is the time to add them. I often place one or two fresh raspberries or blueberries directly on top of the frosting or nestled slightly into the ganache. Sliced strawberries also look absolutely gorgeous. The freshness of the fruit really brightens up the rich flavors of the Sugar Cookie Cups.
-
The Finishing Touches:
- Sprinkles: A scattering of colorful sprinkles adds a festive touch, especially if you’re making these for a party or celebration.
- Chocolate Shavings or Mini Chips: For the chocolate lovers, a few chocolate shavings or mini chocolate chips sprinkled over the cream cheese frosting or ganache enhance the chocolate flavor.
- Lemon Zest: If you used a lemon-flavored cream cheese frosting (a wonderful variation!), a little lemon zest grated fresh over the top adds a burst of aroma and a pop of color.
- Powdered Sugar Dusting: For a simple yet elegant finish, a light dusting of powdered sugar over your filled Sugar Cookie Cups is always a classic.
- Caramel Drizzle: A light drizzle of store-bought or homemade caramel sauce can add another layer of indulgence, especially with the chocolate ganache variation.
- Serving and Storage: Your beautiful Sugar Cookie Cups are best enjoyed at room temperature or slightly chilled, depending on the filling. If filled with cream cheese frosting, they should be stored in an airtight container in the refrigerator for up to 3-4 days. If filled with ganache, they can often stay at cool room temperature for a day, but refrigeration will extend their freshness, especially in warmer climates. Always bring them out about 15-20 minutes before serving to allow the cookie and filling to soften slightly.
Tips for Perfect Sugar Cookie Cups Every Time:
- Don’t Overmix the Dough: I can’t stress this enough! Overmixing develops gluten, which leads to tough cookies. Mix until just combined.
- Chilling is Crucial: Patience with chilling the dough will be rewarded with Sugar Cookie Cups that hold their shape and have a lovely texture. It’s truly a non-negotiable step for me.
- Work Quickly When Shaping: The window for shaping the warm cookies into cups is short. Have your shaping tool ready when they come out of the oven.
- Experiment with Fillings: While I’ve provided cream cheese and ganache options, don’t be afraid to get creative! Lemon curd, fruit preserves, Nutella, or even a simple buttercream can be wonderful fillings for your Sugar Cookie Cups. The possibilities are endless!
- Uniformity for Even Baking: Try to make your dough balls relatively uniform in size. This ensures that all your Sugar Cookie Cups bake evenly and are ready for shaping at the same time.
- Adjust Baking Time: Ovens vary, so watch your cookies carefully. You want them lightly golden around the edges, but still soft enough in the center to press down. An extra minute or two can make them too firm to shape without cracking.
- Proper Cooling: Let the Sugar Cookie Cups cool completely before filling. Warm cookies will melt even the sturdiest of frostings and ganaches, creating a messy situation.
- Make Ahead: The cookie cups themselves can be baked a day or two in advance and stored in an airtight container at room temperature. The fillings can also be prepared ahead of time and refrigerated. Assemble just before serving for the freshest taste and best presentation.
- Garnish Matters: Even a simple sprinkle of powdered sugar or a fresh berry can elevate the look of your Sugar Cookie Cups, making them feel extra special and inviting.
Conclusion:
And there you have it, my friends! We’ve journeyed through the simple steps to create a truly delightful treat, and I sincerely hope you’re as excited to make these as I am to share them. These aren’t just any cookies; these Sugar Cookie Cups are a revelation, a perfect marriage of the tender, buttery crispness of your favorite sugar cookie base with the boundless possibilities of a customizable filling. They embody everything I love about baking: approachable steps, incredibly rewarding results, and endless potential for personal flair. What makes them an absolute must-try, in my humble opinion, is their unique texture – that slightly chewy, slightly crumbly cookie hug around a soft, creamy center is just divine. They offer all the charm and comfort of a classic sugar cookie, elevated into an elegant, individual dessert that feels far more impressive than the effort it actually requires.
Endless Possibilities: Serving Suggestions and Variations You’ll Love
Now, let’s talk about taking these beauties to the next level. While they are undeniably glorious straight out of the oven, cooled and simply filled, the real magic of these Sugar Cookie Cups lies in their incredible versatility. For a classic, comforting touch, a swirl of homemade vanilla buttercream or a tangy cream cheese frosting is always a winner. But don’t stop there! Imagine them filled with a luscious lemon curd, offering a bright, zesty counterpoint to the sweet cookie. Or perhaps a rich, dark chocolate ganache, creating a sophisticated dessert that wouldn’t feel out of place at a fancy dinner party. For the fruit lovers, a dollop of fresh whipped cream topped with seasonal berries – think plump raspberries, sliced strawberries, or juicy blueberries – transforms them into a light and refreshing summer dessert. In the fall, a spoonful of apple pie filling or pumpkin cream cheese makes them perfectly seasonal. You could even get adventurous with a no-bake cheesecake filling for an extra layer of decadence!
Toppings are another fantastic way to customize. Beyond fresh fruit, consider a sprinkle of colorful edible glitter for a festive touch, miniature chocolate chips for the chocoholics, or finely chopped nuts for a satisfying crunch. A dusting of powdered sugar always looks elegant, and for special occasions, don’t shy away from holiday-themed sprinkles or even a tiny piece of candied citrus peel. Don’t forget about flavoring the cookie base itself! A little almond extract alongside vanilla can add depth, or a touch of lemon zest can brighten the whole experience. These cups are truly a blank canvas for your culinary creativity. Whether you’re preparing them for a casual get-together, a celebratory birthday, a cozy family evening, or even just as a delightful afternoon treat for yourself, they adapt beautifully to any occasion and palate. They’re also wonderfully portable, making them a fantastic option for potlucks, school events, or even as thoughtful homemade gifts.
Your Baking Adventure Awaits!
So, what are you waiting for? I wholeheartedly encourage you to roll up your sleeves, preheat your oven, and dive into the simple joy of making these incredible treats. I promise you won’t be disappointed. There’s something so satisfying about pulling a tray of these perfectly formed, golden-edged cups from the oven, knowing that you’ve created something truly special with your own hands. They are a guaranteed crowd-pleaser, sure to elicit smiles and compliments from everyone lucky enough to try them. Once you experience the delightful balance of a sturdy yet tender cookie cradling a delectable filling, you’ll understand why they’ve become one of my absolute favorite go-to recipes. After you’ve baked your batch, filled them with your chosen delights, and, of course, sampled a few (or more!), I would absolutely love to hear about your experience. Did you try a unique filling? What was your favorite variation? Please don’t hesitate to share your thoughts, your successes, and even your creative twists in the comments below. Your feedback and ideas inspire me and our entire community of home bakers. Happy baking, and enjoy every single irresistible bite of your homemade Sugar Cookie Cups!
Sugar Cookie Cups
Sugar Cookie Cups are truly a delightful creation, offering a charming and incredibly versatile twist on a beloved classic. They merge tradition with modern convenience, providing a personalized dessert experience with nostalgic, buttery flavor and a soft, chewy texture.
Ingredients
-
3/4 cup salted butter, softened
-
3/4 cup granulated sugar
-
1 large egg
-
1 1/2 teaspoons vanilla extract
-
1/2 teaspoon almond extract
-
2 cups all-purpose flour
-
1 teaspoon baking powder
-
1/2 teaspoon baking soda
-
2 ounces cream cheese, softened
-
3 cups powdered sugar, sifted
-
1/4 cup butter, softened (for frosting)
-
2 tablespoons milk or heavy cream
-
1/4 teaspoon vanilla extract (for frosting)
-
Sprinkles (optional, for garnish)
-
Pink or red food coloring gel (optional)
Instructions
-
Step 1
In a stand mixer, cream 3/4 cup softened salted butter and 3/4 cup granulated sugar until light and fluffy. Beat in the egg, 1 1/2 teaspoons vanilla extract, and 1/2 teaspoon almond extract. -
Step 2
In a separate bowl, whisk together 2 cups all-purpose flour, 1 teaspoon baking powder, and 1/2 teaspoon baking soda. Gradually add dry ingredients to wet, mixing on low speed until just combined. Do not overmix. -
Step 3
Divide dough into a disc, wrap, and refrigerate for at least 1 hour, or until firm. Chilling is crucial for proper cookie cup shape. -
Step 4
Preheat oven to 375°F (190°C). Lightly spray a 12-cup standard muffin tin. -
Step 5
Scoop about 1.5 tablespoons of chilled dough per cup and place into each muffin tin cavity. -
Step 6
Bake for 8-10 minutes, until edges are lightly golden and centers are still soft. -
Step 7
Immediately upon removing from oven, use a shot glass or the back of a small spoon to gently press down into the center of each cookie, creating a cup shape. If dough sticks, lightly flour your shaping tool. -
Step 8
Cool in the muffin tin for 5-10 minutes, then carefully transfer cookie cups to a wire rack to cool completely before filling. Warm cookies will melt frosting. -
Step 9
To prepare the Cream Cheese Frosting: In a mixer, beat 2 ounces softened cream cheese and 1/4 cup softened butter until light and fluffy with no lumps. Gradually add 3 cups sifted powdered sugar and 1/4 teaspoon vanilla extract. -
Step 10
Add 2 tablespoons milk or heavy cream, 1 tablespoon at a time, mixing after each addition until desired piping consistency is reached. Optionally, mix in pink or red food coloring gel for color. -
Step 11
Once cookie cups are completely cool, fill them with cream cheese frosting using a piping bag with a star tip or a small spoon. Garnish with sprinkles or other desired toppings. -
Step 12
Store filled cookie cups in an airtight container in the refrigerator for up to 3-4 days. For best enjoyment, bring to room temperature 15-20 minutes before serving.
Important Information
Nutrition Facts (Per Serving)
It is important to consider this information as approximate and not to use it as definitive health advice.
Allergy Information
Please check ingredients for potential allergens and consult a health professional if in doubt.


Leave a Comment