
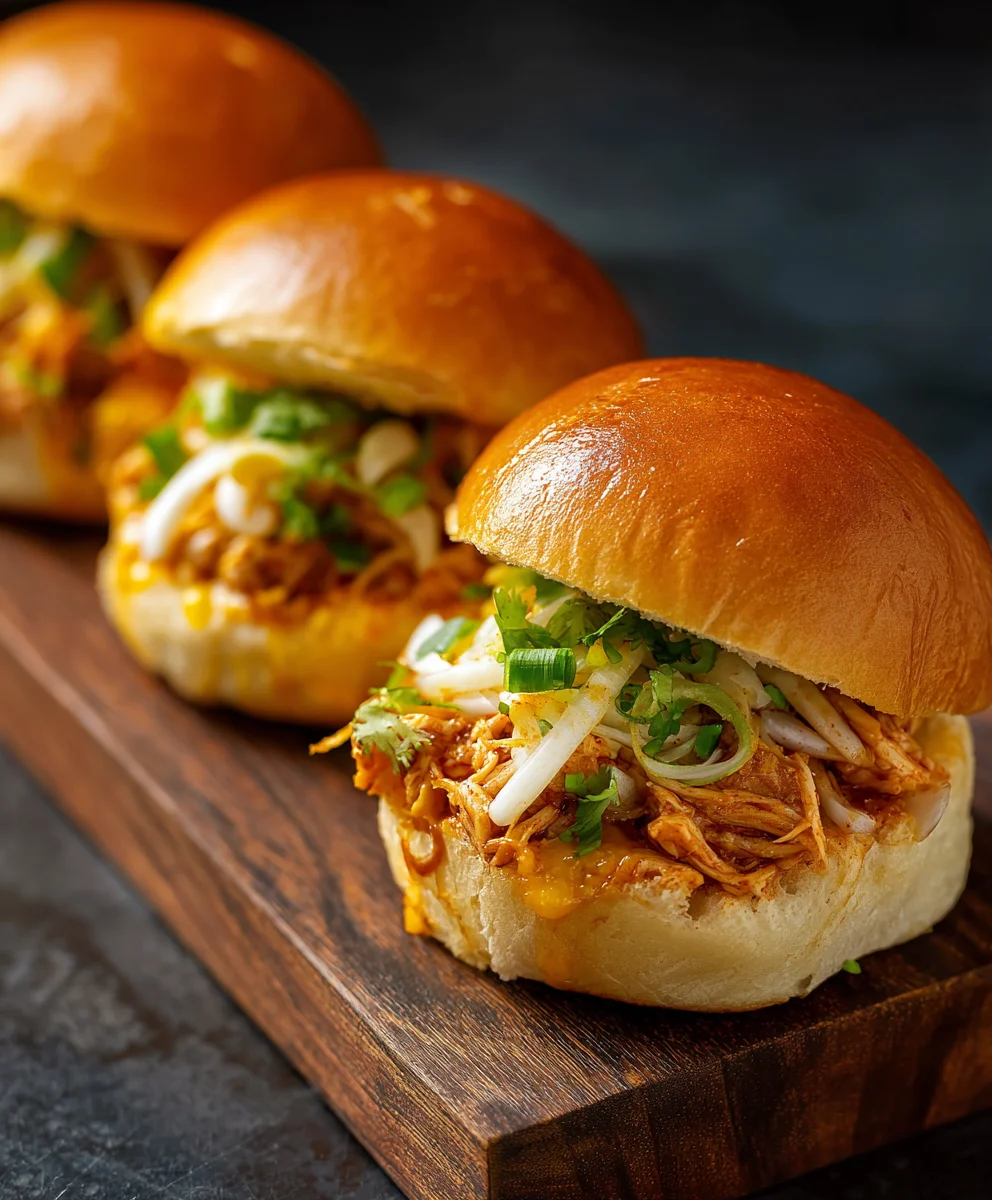
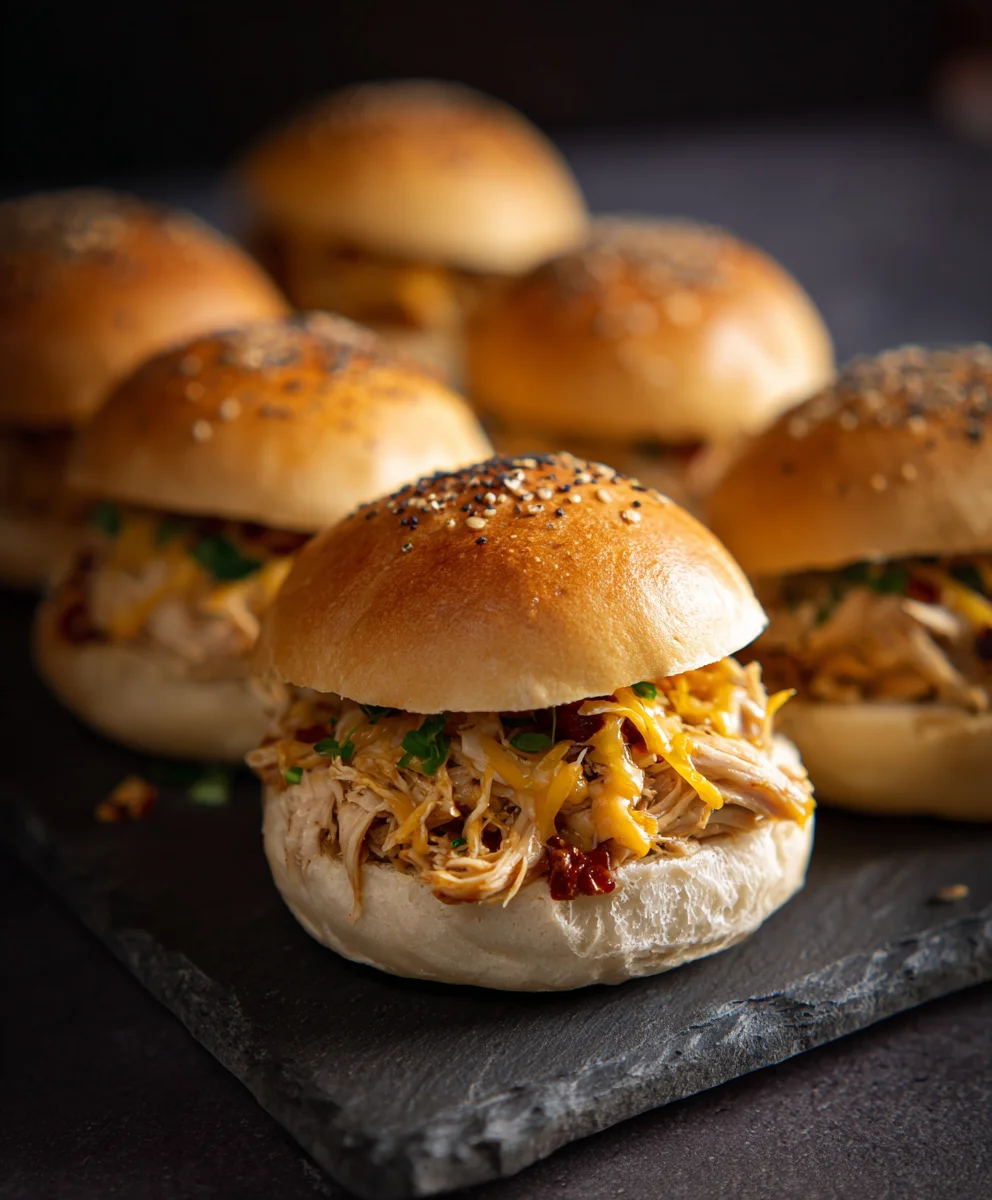
Cheesy Dynamite Chicken Buns – just the name alone promises an explosion of flavor and comfort, doesn’t it? I’m incredibly excited to share with you a recipe that has quickly become a standout favorite in my kitchen and, I’m sure, will become one in yours too. Imagine a fluffy, golden-baked bun, generously filled with succulent, tender chicken enveloped in a rich, creamy sauce with just the right kick of “dynamite” spice, all crowned with a luscious layer of melted, bubbling cheese. This isn’t just a snack; it’s an experience that tantalizes every sense.
A Fusion of Flavors That Delights
While the specific lineage of these delightful buns might be a modern culinary invention, they brilliantly draw inspiration from beloved Asian-style chicken preparations and the universal appeal of cheesy, bready goodness. It’s a clever fusion that takes the best elements of spicy chicken and comforting bread, marrying them into one irresistible package. People absolutely adore this dish not just for its incredible taste – that perfect balance of savory, spicy, and umami – but also for its delightful textural contrast: the soft, yielding bun, the juicy chicken, and the wonderfully gooey cheese. Preparing these Cheesy Dynamite Chicken Buns is a joyous affair, and serving them guarantees rave reviews, whether it’s for a casual family meal, a game night, or a festive gathering. They are surprisingly simple to master, yet deliver a gourmet punch that truly satisfies.
Ingredients:
-
For the Dough:
- 2 ¼ teaspoons (1 standard packet) active dry yeast – Make sure it’s fresh for the best rise!
- 1 cup (240ml) warm milk (around 105-115°F / 40-46°C) – Not too hot, or it’ll kill your yeast.
- ¼ cup (50g) granulated sugar – For a touch of sweetness and to feed our hungry yeast.
- 1 teaspoon salt – Crucial for flavor balance.
- 1 large egg, at room temperature – This adds richness and helps with the texture.
- 4 tablespoons (56g) unsalted butter, melted and cooled slightly – For that lovely tenderness.
- 3 ½ to 4 cups (420-480g) all-purpose flour, plus more for dusting – We’ll add this gradually to get the right consistency.
-
For the Cheesy Dynamite Chicken Filling:
- 1 tablespoon olive oil or neutral cooking oil – For sautéing.
- 1 small yellow onion, finely diced – The aromatic foundation.
- 2 cloves garlic, minced – Because everything is better with garlic!
- 1 pound (450g) boneless, skinless chicken breast or thighs, cooked and shredded or finely diced – I often pre-boil or bake my chicken, then shred it.
- ½ cup (120ml) mayonnaise – The creamy base for our dynamite sauce.
- ¼ cup (60ml) sriracha sauce (or more, to taste, for that dynamite kick!) – Adjust this for your preferred spice level.
- 1 tablespoon fresh lime juice – Adds a crucial tangy brightness.
- 1 teaspoon honey or sugar – To balance the heat and acidity.
- ½ teaspoon smoked paprika – For a lovely depth of flavor.
- ¼ teaspoon garlic powder – Enhances the fresh garlic.
- ¼ teaspoon onion powder – Boosts the onion flavor.
- Salt and freshly ground black pepper, to taste – Essential seasoning.
- 1 cup (120g) shredded mozzarella cheese – For that amazing, gooey stretch.
- ½ cup (60g) shredded cheddar cheese – Adds a sharper, delicious cheese flavor.
- 2-3 green onions (scallions), thinly sliced, for garnish and mixing in – For a fresh, mild oniony bite.
-
For the Egg Wash and Garnish:
- 1 large egg, beaten with 1 tablespoon water or milk – For a beautiful golden crust.
- 1 tablespoon sesame seeds (optional) – For a classic bun look and nutty flavor.
Preparing the Soft and Fluffy Dough for Cheesy Dynamite Chicken Buns
This is where the magic begins for our “Cheesy Dynamite Chicken Buns!” A good bun starts with incredible dough, so let’s take our time and enjoy the process. I always find making dough incredibly therapeutic.
- Activate the Yeast: In a large mixing bowl (or the bowl of your stand mixer), combine the warm milk, granulated sugar, and active dry yeast. Give it a gentle stir. Let this mixture sit for 5-10 minutes. You’re looking for it to become foamy and bubbly on top; this tells us our yeast is alive and ready to work its magic. If it doesn’t foam, your yeast might be expired, or your milk was too hot or cold – time to start again with fresh yeast and properly tempered milk. This step is crucial for light and airy buns!
- Add Wet Ingredients: Once your yeast is active, add the salt, room temperature egg, and slightly cooled melted butter to the yeast mixture. Whisk everything together until it’s well combined.
- Gradually Add Flour: Begin adding the flour, about one cup at a time, mixing until just combined after each addition. I usually start with a wooden spoon or a paddle attachment on my stand mixer. Once the dough starts to come together and becomes shaggy, switch to a dough hook if using a stand mixer, or turn it out onto a lightly floured surface if kneading by hand.
- Knead the Dough: Knead the dough for 8-10 minutes using a stand mixer on medium-low speed, or 10-15 minutes by hand. You’re aiming for a dough that is smooth, elastic, and no longer sticky. It should pass the “windowpane test” – meaning you can stretch a small piece of dough thin enough to see light through it without it tearing. If the dough is too sticky, add a tiny bit more flour, a tablespoon at a time, but be careful not to add too much, as this can make your buns tough. The key to our Cheesy Dynamite Chicken Buns having that wonderful texture is a well-kneaded dough.
- First Rise (Bulk Fermentation): Lightly grease a clean large bowl with a little oil. Place the kneaded dough into the bowl, turning it once to coat the top. Cover the bowl tightly with plastic wrap or a clean kitchen towel. Let the dough rise in a warm, draft-free place for 1 to 1.5 hours, or until it has doubled in size. This could be in a slightly warmed oven (turned off!), near a sunny window, or just on your kitchen counter if it’s warm enough. Patience is a virtue here! Don’t rush this step.
Crafting the Explosively Flavorful Cheesy Dynamite Chicken Filling
While our dough is happily rising, let’s get started on the star of the show – our incredibly delicious, spicy, and cheesy chicken filling. This is what makes these “Cheesy Dynamite Chicken Buns” truly unforgettable!
- Prepare the Chicken: If your chicken isn’t already cooked, now’s the time! You can boil it, bake it, or even pan-fry it. Once cooked, let it cool slightly, then shred it or finely dice it. I prefer shredding as it gives a lovely texture when mixed with the sauce. Aim for pieces that are easy to bite into when inside the bun.
- Sauté Aromatics: Heat the olive oil in a medium skillet over medium heat. Add the finely diced onion and cook, stirring occasionally, until it’s softened and translucent, about 5-7 minutes. Then, add the minced garlic and cook for another minute until fragrant. Be careful not to burn the garlic!
- Create the Dynamite Sauce Base: In a large mixing bowl, combine the mayonnaise, sriracha sauce (remember to adjust to your spice preference!), fresh lime juice, honey (or sugar), smoked paprika, garlic powder, and onion powder. Whisk everything together until the sauce is smooth and well combined. Taste it and adjust the salt and pepper as needed. If you want more heat, add another splash of sriracha! This is your opportunity to truly customize the “dynamite” level for your Cheesy Dynamite Chicken Buns.
- Combine Filling Ingredients: Add the shredded or diced cooked chicken and the sautéed onion and garlic to the dynamite sauce in the mixing bowl. Mix thoroughly until all the chicken is evenly coated.
- Stir in the Cheese and Green Onions: Finally, gently fold in the shredded mozzarella cheese and cheddar cheese. Add about half of the sliced green onions into the mixture, reserving the rest for garnish later. Give it a final stir to ensure everything is incorporated. Set the filling aside until the dough is ready.
Assembling and Proofing Your Cheesy Dynamite Chicken Buns
This is where our two delicious components come together! Shaping buns is a fun and rewarding process, bringing us closer to enjoying our “Cheesy Dynamite Chicken Buns.”
- Prepare Your Workspace: Once your dough has doubled in size, gently punch it down to release the air. Turn the dough out onto a lightly floured surface. Lightly flour your hands as well.
- Divide the Dough: Using a bench scraper or a sharp knife, divide the dough into 12 equal pieces. I usually weigh my dough and then divide by 12 to ensure even-sized buns, which helps them bake uniformly. Each piece should be around 60-70g. Roll each piece into a smooth ball.
- Shape the Buns: Take one dough ball and, on a lightly floured surface, gently flatten it into a circle about 4-5 inches (10-12 cm) in diameter. Try to keep the edges slightly thinner than the center.
- Fill the Buns: Place about 2-3 tablespoons of the cheesy dynamite chicken filling in the center of each dough circle. Don’t overfill, or it will be hard to seal!
- Seal the Buns: Carefully gather the edges of the dough up and over the filling, pinching them together tightly at the top to seal. Make sure there are no gaps for the filling to escape. Once sealed, gently roll the bun between your palms to create a smooth, round shape. A good seal is key to preventing cheesy explosions in your oven!
- Second Rise (Proofing): Line a large baking sheet (or two, if needed) with parchment paper. Arrange the shaped buns on the prepared baking sheet, leaving about 2 inches of space between them as they will expand. Cover the baking sheet loosely with plastic wrap or a clean kitchen towel. Let the buns rise in a warm, draft-free place for another 30-45 minutes, or until they look visibly puffy and almost doubled in size again. This second proofing is essential for soft, fluffy “Cheesy Dynamite Chicken Buns.”
Baking and Finishing Your Irresistible Cheesy Dynamite Chicken Buns
The moment of truth! Get ready for your kitchen to smell absolutely incredible as these “Cheesy Dynamite Chicken Buns” bake to golden perfection.
- Preheat Oven: About 15 minutes before the end of the second proofing, preheat your oven to 375°F (190°C).
- Apply Egg Wash: In a small bowl, whisk together the egg and 1 tablespoon of water or milk to create an egg wash. Once the buns have finished their second rise, gently brush the tops of each bun with the egg wash. This will give them that beautiful, glossy golden-brown crust.
- Garnish (Optional): If you wish, sprinkle a few sesame seeds over the top of each bun for added texture and a classic bakery look.
- Bake the Buns: Carefully transfer the baking sheet to the preheated oven. Bake for 18-22 minutes, or until the buns are puffed, golden brown, and cooked through. The internal temperature of the dough should reach around 200-210°F (93-99°C) if you were to check it, but visual cues are usually sufficient for buns of this size.
- Cool and Serve: Once baked, remove the Cheesy Dynamite Chicken Buns from the oven and immediately transfer them to a wire rack to cool for at least 10-15 minutes. Serving them warm is highly recommended for the best gooey cheese experience! Be careful, the filling will be hot.
- Enjoy! Garnish with the remaining fresh green onions if desired, and serve these delightful “Cheesy Dynamite Chicken Buns” as a snack, appetizer, or a light meal. They are fantastic on their own or with an extra drizzle of sriracha mayo on the side. These are sure to be a crowd-pleaser and a staple in your recipe rotation!
Storage Tips for Your Cheesy Dynamite Chicken Buns:
If you happen to have any leftovers (which is unlikely, in my experience!), these buns store wonderfully. Keep them in an airtight container at room temperature for up to 2 days, or in the refrigerator for up to 4 days. Reheat gently in the microwave or a low oven for a few minutes until warmed through and the cheese is gooey again.
You can also freeze baked and cooled buns for up to 1 month. Thaw at room temperature, then reheat for a delicious treat anytime you crave those amazing Cheesy Dynamite Chicken Buns.
Conclusion:
Well, my friends, we’ve reached the grand finale of our culinary journey, and I genuinely hope you’re as excited as I am about what we’ve created. This isn’t just another recipe; it’s an experience waiting to unfold in your kitchen. I truly believe that the recipe we’ve just explored for these incredible buns is an absolute game-changer. It’s the kind of dish that disappears from the platter almost as soon as it lands, leaving everyone clamoring for more. The magic lies in that perfect harmony: the tender, savory chicken infused with a delightful kick, lovingly nestled inside a soft, pillowy bun, all crowned with a golden, bubbly layer of cheese. It’s comfort food elevated, a symphony of textures and flavors that will tantalize your taste buds and leave you utterly satisfied. Forget bland, forget boring – this recipe brings vibrant life and incredible zest to your table, proving that homemade can truly be extraordinary. The simplicity of the steps, combined with the utterly spectacular outcome, makes this a must-try for both seasoned chefs and enthusiastic beginners alike. You’re not just making food; you’re crafting moments, creating joy with every single bite.
Why This Recipe is an Unforgettable Culinary Experience
What truly sets these buns apart is their undeniable charm and versatility. Imagine biting into that warm, fluffy exterior, then encountering the rich, seasoned chicken filling, perfectly complemented by the gooey, melting cheese. It’s a textural dream! The hint of spice awakens your palate without overwhelming it, making it approachable for almost everyone. Whether you’re looking for a show-stopping appetizer, a hearty snack, or a unique main course, these buns fit the bill beautifully. They’re robust enough to satisfy a hungry crowd but elegant enough to impress at a dinner party. Trust me when I say, once you try them, you’ll understand why I’m so passionate about this particular creation. It’s more than just a dish; it’s an invitation to savor the art of home cooking at its finest, promising a culinary adventure that’s both rewarding to make and utterly delicious to devour.
Elevate Your Meal: Serving Suggestions and Creative Variations
Now that you’ve mastered the art of making these delightful buns, let’s talk about how to serve them and, even better, how to make them uniquely yours. For a casual family dinner, they shine brightest when served alongside a crisp, fresh green salad tossed with a tangy vinaigrette. The freshness of the salad perfectly cuts through the richness of the buns, creating a beautifully balanced meal. Another fantastic pairing is a light, clear broth-based soup, perhaps a simple chicken noodle or a vegetable consommé, which offers a comforting contrast. If you’re hosting a gathering, these buns make an incredible appetizer; simply arrange them artfully on a large platter, perhaps with a garnish of chopped fresh cilantro or chives, and watch them disappear! For a more substantial meal, consider serving them with a side of roasted seasonal vegetables or even a scoop of fluffy rice to soak up any stray bits of delicious filling.
But the fun doesn’t stop there! The beauty of this recipe lies in its adaptability. Feeling adventurous? Let’s explore some variations. You could experiment with different cheeses – a smoky Gouda or a sharp cheddar could add intriguing new layers of flavor. For those who love an extra kick, a dash more gochujang or a sprinkle of red pepper flakes into the chicken mixture will certainly do the trick. On the flip side, if you prefer a milder profile, simply reduce the amount of spicy elements. Don’t have chicken on hand? Ground pork or even crumbled firm tofu, seasoned similarly, would make excellent alternatives. For a vegetarian twist, consider using a hearty mushroom and bell pepper medley, perhaps with some black beans, as the filling. You could also play with toppings; a sprinkle of toasted sesame seeds before baking adds a lovely nutty crunch and visual appeal, or a drizzle of sriracha mayo post-baking provides an extra layer of creamy spice. Think about dipping sauces too! A cooling yogurt-mint dip, a sweet and tangy chili sauce, or even a simple garlic aioli could take your culinary creation to the next level. The possibilities are truly endless, allowing you to tailor this sensational dish to your exact preferences and dietary needs.
Your Culinary Adventure Awaits!
So, what are you waiting for? I wholeheartedly encourage you to roll up your sleeves, gather your ingredients, and dive into making your very own batch of these truly exceptional treats. I promise you, the effort is minimal compared to the incredible satisfaction and joy you’ll experience. There’s something immensely rewarding about pulling a tray of golden, perfectly baked buns from your oven, knowing you created something so utterly delicious from scratch. Imagine the smiles, the contented sighs, and the compliments you’ll receive from your loved ones. Once you’ve made them, please, don’t keep it a secret! I would absolutely love to hear about your experience. Did you add a special twist? What did your family think? How did you serve them? Share your triumphs, your photos, and your feedback. Your insights are invaluable and inspire me and other home cooks in our vibrant community. These Cheesy Dynamite Chicken Buns are more than just a meal; they’re an invitation to create, to share, and to savor every delightful moment in your kitchen. Happy baking, my friends, and I can’t wait to see what amazing culinary adventures you embark on!
Cheesy Dynamite Chicken Buns
Imagine a fluffy, golden-baked bun, generously filled with succulent chicken in a rich, creamy sauce with a ‘dynamite’ spice kick, all crowned with melted, bubbling cheese. This clever fusion combines spicy chicken and comforting bread into an irresistible package, perfect for any occasion.
Ingredients
-
2 ¼ tsp active dry yeast
-
1 cup warm milk (105-115°F)
-
¼ cup granulated sugar
-
1 tsp salt
-
1 large egg, room temperature
-
4 tbsp unsalted butter, melted and cooled
-
3 ½ to 4 cups all-purpose flour
-
1 tbsp olive oil
-
1 small yellow onion, finely diced
-
2 cloves garlic, minced
-
1 lb cooked boneless, skinless chicken breast or thighs, shredded or finely diced
-
½ cup mayonnaise
-
¼ cup sriracha sauce (or more, to taste)
-
1 tbsp fresh lime juice
-
1 tsp honey or sugar
-
½ tsp smoked paprika
-
¼ tsp garlic powder
-
¼ tsp onion powder
-
Salt and freshly ground black pepper, to taste
-
1 cup shredded mozzarella cheese
-
½ cup shredded cheddar cheese
-
2-3 green onions, thinly sliced
-
1 large egg, beaten with 1 tbsp water or milk (for egg wash)
-
1 tbsp sesame seeds (optional)
Instructions
-
Step 1
In a large bowl, combine 1 cup warm milk, ¼ cup granulated sugar, and 2 ¼ tsp active dry yeast. Stir gently and let sit for 5-10 minutes until foamy. -
Step 2
Once yeast is active, add 1 tsp salt, 1 large egg, and 4 tbsp melted butter. Whisk. Gradually add 3 ½ to 4 cups all-purpose flour, mixing until a shaggy dough forms. Knead for 8-10 minutes (mixer) or 10-15 minutes (hand) until smooth, elastic, and no longer sticky. -
Step 3
Lightly grease a clean bowl, place dough, turning once to coat. Cover tightly and let rise in a warm, draft-free place for 1 to 1.5 hours, or until doubled in size. -
Step 4
If not pre-cooked, cook 1 lb chicken and shred or finely dice it. Heat 1 tbsp olive oil in a skillet over medium heat. Sauté 1 small finely diced yellow onion for 5-7 minutes until soft. Add 2 minced garlic cloves and cook for 1 minute until fragrant. -
Step 5
In a large mixing bowl, whisk together ½ cup mayonnaise, ¼ cup sriracha (adjust to taste), 1 tbsp fresh lime juice, 1 tsp honey or sugar, ½ tsp smoked paprika, ¼ tsp garlic powder, and ¼ tsp onion powder. Season with salt and pepper. -
Step 6
Add the shredded chicken and sautéed onion/garlic to the dynamite sauce. Mix thoroughly until evenly coated. Gently fold in 1 cup shredded mozzarella cheese, ½ cup shredded cheddar cheese, and half of the 2-3 thinly sliced green onions. -
Step 7
Gently punch down the risen dough and turn it out onto a lightly floured surface. Divide the dough into 12 equal pieces (around 60-70g each) and roll each into a smooth ball. Flatten each dough ball into a 4-5 inch circle, keeping edges slightly thinner. -
Step 8
Place 2-3 tablespoons of the cheesy dynamite chicken filling in the center of each dough circle. Gather the edges of the dough up and over the filling, pinching them tightly at the top to seal. Gently roll the bun between your palms to create a smooth, round shape. -
Step 9
Arrange the shaped buns on a parchment-lined baking sheet, leaving about 2 inches of space between them. Cover loosely and let rise in a warm, draft-free place for 30-45 minutes until visibly puffy and almost doubled. -
Step 10
Preheat oven to 375°F (190°C). Whisk 1 large egg with 1 tbsp water or milk for an egg wash. Gently brush the tops of the risen buns with the egg wash. Optionally, sprinkle with 1 tbsp sesame seeds. Bake for 18-22 minutes, or until puffed, golden brown, and cooked through. -
Step 11
Remove the buns from the oven and immediately transfer them to a wire rack to cool for at least 10-15 minutes. Garnish with the remaining fresh green onions if desired. Serve warm for the best gooey cheese experience.
Important Information
Nutrition Facts (Per Serving)
It is important to consider this information as approximate and not to use it as definitive health advice.
Allergy Information
Please check ingredients for potential allergens and consult a health professional if in doubt.


Leave a Comment