
Banana Pudding is more than just a dessert; it’s a comforting hug in a bowl, a nostalgic journey back to simpler times, and a crowd-pleasing cbeef hampion that never fails to elicit smiles. What is it about this seemingly humble combination of creamy vanilla custard, tender banana slices, and crisp vanilla wafers that captures our hearts and taste buds so profoundly? Perhaps it’s the perfect textural interplay: the smooth, luscious custard yielding to the sweet, soft banana, all punctuated by the satisfying crunch of the wafers. Or maybe it’s the inherent sweetness, a gentle embrace that’s never overpowering, making it the ideal finnon-alcoholic ale to any meal. This classic Banana Pudding recipe elevates the familiar to extraordinary, infusing it with a touch of homemade magic that will have everyone asking for seconds, and perhaps even the recipe itself!
Ingredients:
- 1 (3.4 oz) box instant vanilla pudding mix
- 2 cups cold milk
- 1 (14 oz) can sweetened condensed milk
- 1 teaspoon vanilla extract
- 1 (8 oz) tub whipped topping, thawed
- 4-5 ripe bananas, sliced
- 1 (11 oz) box vanilla wafers
Preparing the Pudding Base
Step 1: Combine Pudding Mix and Milk
Begin extract by grabbing a medium-sized mixing bowl. Empty the contents of the (3.4 oz) box of instant vanilla pudding mix into the bowl. Now, pour in the 2 cups of cold milk. It’s crucial that the milk is cold for the pudding to set properly. Using lukewarm or room temperature milk can result in a runny pudding that never quite firms up. Whisk these two ingredients together vigorously. You want to ensure there are no dry pockets of pudding mix remaining. Continue whisking for about two minutes, or until the mixture starts to thicken. You’ll notice it will go from a liquidy state to a noticeably thicker consistency. This initial thickening is the start of the magic. Don’t worry if it’s not completely firm yet; it will continue to set as it chills.
Step 2: Incorporate Sweetened Condensed Milk and Vanilla
Next, it’s time to add the richness and extra flavor. Pour the entire (14 oz) can of sweetened condensed milk into the bowl with the thickened pudding mixture. Sweetened condensed milk provides a creamy texture and a delightful sweetness that’s different from granulated sugar. After adding the condensed milk, add the 1 teaspoon of vanilla extract. This will enhance the vanilla flavor of the pudding and give it a more pronounced, bakery-like taste. Now, resume whisking. You’ll need to whisk thoroughly to fully incorporate the sweetened condensed milk and vanilla extract into the pudding base. Keep going until the mixture is smooth, creamy, and uniform in color. The consistency will become even richer and more luxurious at this stage.
Folding in the Lightness
Step 3: Gently Fold in Whipped Topping
Once your pudding base is smooth and well-combined, it’s time to lighten it up. Take your (8 oz) tub of thawed whipped topping. Make sure it’s completely thawed but still cold; you don’t want it to be melted and watery. Add the thawed whipped topping to the pudding mixture. Now, the key here is to gently fold it in. Avoid vigorous whisking, as this can deflate the whipped topping and make your pudding dense. Use a spatula or a large spoon and a folding motion. Cut down through the center of the mixture, sweep across the bottom, and bring the pudding up and over the whipped topping. Rotate the bowl and repeat this folding action until just combined. You should see streaks of whipped topping disappearing into the pudding, creating a light and airy texture. It’s okay if there are a few tiny white swirls; overmixing is the enemy of a fluffy banana pudding.
Assembling the Layers
Step 4: Layer Vanilla Wafers and Bananas
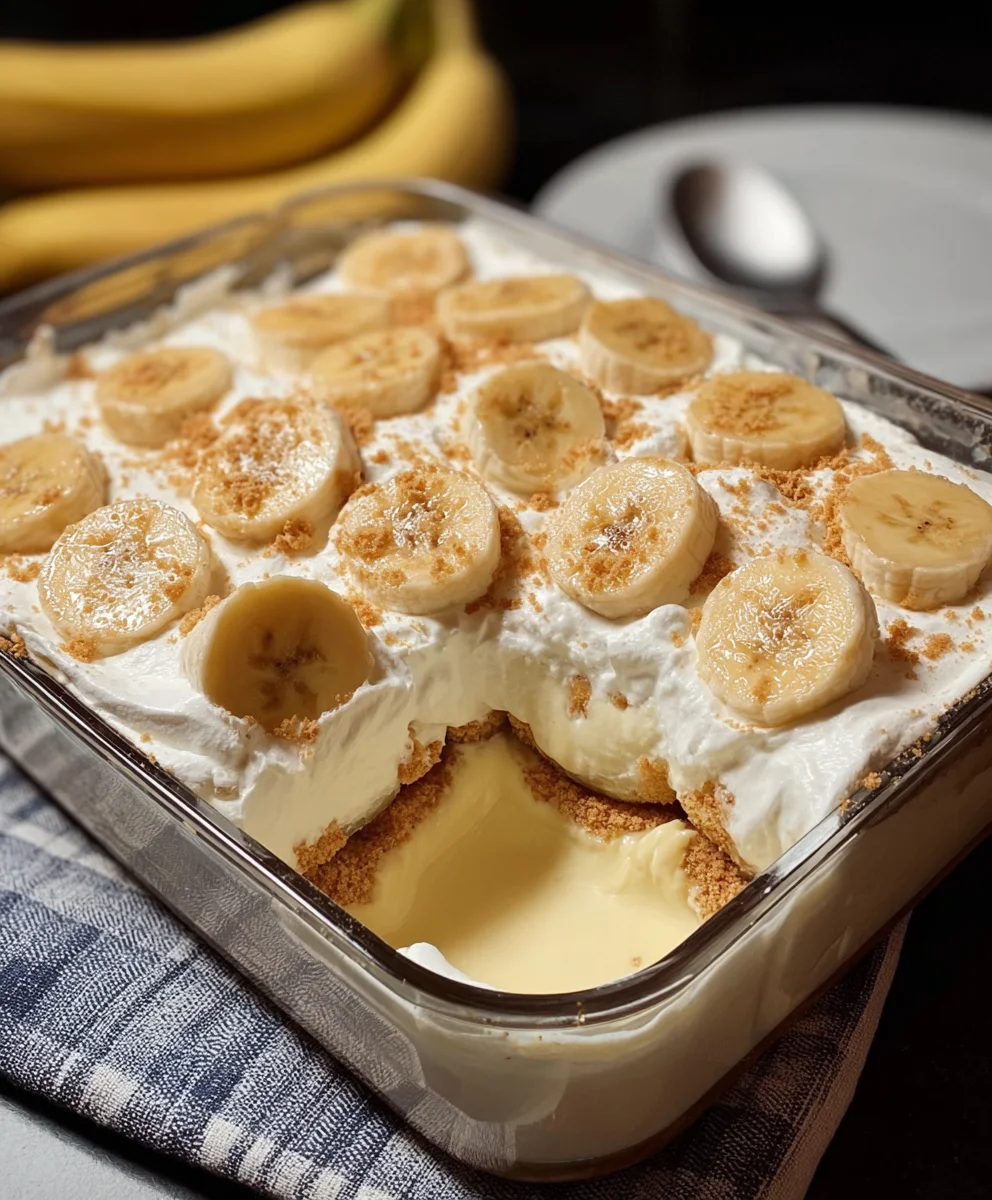
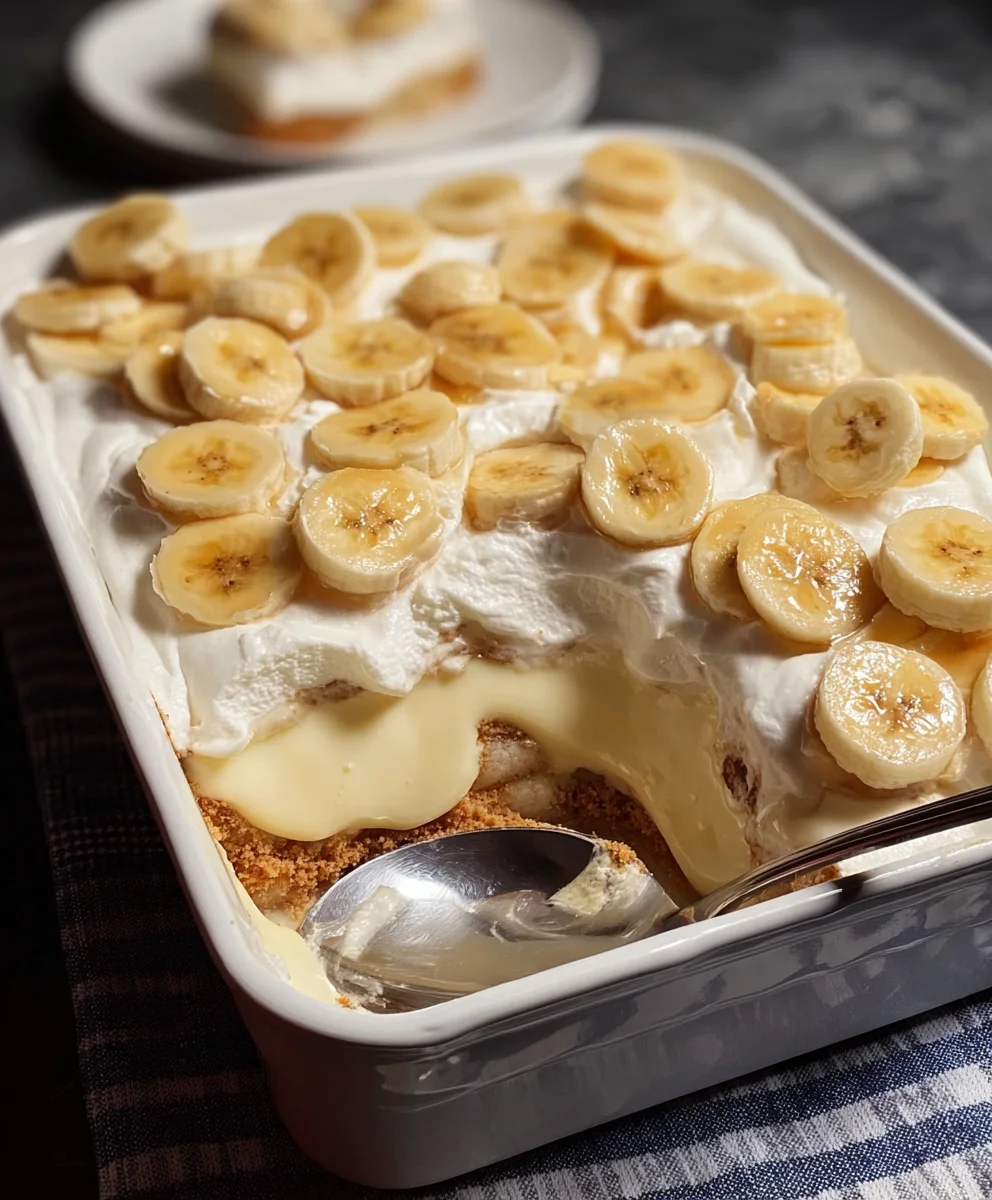
Now for the fun part – assembling your Banana Pudding! Grab an appropriately sized serving dish. A 9×13 inch baking dish or a large trifle bowl works beautifgin extractygin extractegin by arranging a single layer of vanilla wafers on the bottom of the dish. You can break some of them to fill in gaps, but aim for a fairly even base. Next, arrange a layer of your sliced ripe bananas over the vanilla wafers. The ripeness of the bananas is important here; overly green bananas won’t have enough sweetness or soft texture, while overripe bananas can become mushy. Aim for bananas that are speckled with brown. You should have about 4-5 ripe bananas, so divide them between your layers. Continue layering – another layer of vanilla wafers, followed by another layer of sliced bananas. Repeat this process until you’ve used up most of your wafers and bananas, finishing with a layer of bananas. Don’t be afraid to adjust the thickness of your layers based on your preference.
Chilling and Serving
Step 5: Cover and Chill
With your layers neatly arranged, it’s time to bring it all together. Spoon the prepared pudding mixture evenly over the top layer of bananas. Use your spatula to spread it smoothly, ensuring it covers all the fruit and wafers. Gently press down a little to help the pudding settle into the nooks and crannies. Once the pudding is spread, you can add a final decorative touch if you like. Some people like to add a few extra vanilla wafers crum extractbled on top, or a final drizzle of whipped cream. However, the classic presentation is simply the smooth pudding topping. Cover the dish tightly with plastic wrap. It’s essential to get the plastic wrap to touch the surface of the pudding to prevent a skin from forming. Place the Banana Pudding in the refrigerator for at least 4 hours, but preferably overnight. This chilling time is crucial. It allows the flavors to meld together, the wafers to soften slightly into a cake-like texture, and the pudding to fully set. The longer it chills, the more cohesive and delicious your Banana Pudding will be. When ready to serve, scoop generous portions and enjoy the delightful contrast of creamy pudding, tender bananas, and soft, flavorful wafers.
Conclusion:
You’ve done it! You’ve mastered the art of creating a delicious and comforting Banana Pudding. This recipe is more than just a dessert; it’s a celebration of simple, wholesome ingredients coming together to create something truly special. The creamy custard, the tender slices of banana, and the delightful crunch of vanilla wafers make every spoonful an experience to savor. We hope you enjoyed making and sharing this delightful treat with loved ones. Remember, the beauty of this Banana Pudding lies in its versatility. Don’t be afraid to experiment and make it your own!
For serving, a chilled bowl or individual ramekins are perfect. It’s wonderful on its own, but you can elevate it with a dollop of whipped cream or a sprinkle of chopped nuts. Consider adding a hint of cinnamon to the custard for an extra layer of warmth, or perhaps some toasted coconut for a tropical twist. The possibilities are truly endless with this classic dessert. So go forth, experiment, and enjoy the sweet success of your Banana Pudding!
Frequently Asked Questions:
Q1: Can I make this Banana Pudding ahead of time?
Yes, absolutely! Banana Pudding is actually best when made a few hours ahead of time, or even the day before. This allows the flavors to meld together beautifully and for the wafers to soften just enough. Store it covered in the refrigerator.
Q2: My bananas are browning quickly. What can I do?
To prevent your banana slices from browning too quickly, toss them gently with a little lemon juice before adding them to the pudding. This helps to slow down the oxidation process. It’s also best to assemble the pudding as close to serving time as possible if you’re concerned about appearance, especially if you want those distinct banana slices to remain pristine.
Easy Banana Pudding Recipe- Creamy Southern Comfort
A classic and comforting Southern banana pudding made with layers of vanilla wafers, ripe bananas, and a rich, creamy pudding.
Ingredients
-
1 (3.4 oz) box instant vanilla pudding mix
-
2 cups cold milk
-
1 (14 oz) can sweetened condensed milk
-
1 teaspoon vanilla extract
-
1 (8 oz) tub whipped topping, thawed
-
4-5 ripe bananas, sliced
-
1 (11 oz) box vanilla wafers
Instructions
-
Step 1
In a medium mixing bowl, combine the instant vanilla pudding mix and cold milk. Whisk vigorously for about two minutes until the mixture starts to thicken. -
Step 2
Add the sweetened condensed milk and vanilla extract to the pudding mixture. Whisk thoroughly until smooth, creamy, and uniform in color. -
Step 3
Gently fold in the thawed whipped topping using a spatula or large spoon until just combined. Avoid overmixing to maintain a light and airy texture. -
Step 4
Arrange a layer of vanilla wafers in the bottom of a serving dish. Top with a layer of sliced ripe bananas. Repeat layering with wafers and bananas. -
Step 5
Spoon the prepared pudding mixture evenly over the top layer of bananas, spreading smoothly to cover all ingredients. Press gently to help the pudding settle. -
Step 6
Cover the dish tightly with plastic wrap, ensuring it touches the surface of the pudding. Chill in the refrigerator for at least 4 hours, preferably overnight, to allow flavors to meld and the pudding to set.
Important Information
Nutrition Facts (Per Serving)
It is important to consider this information as approximate and not to use it as definitive health advice.
Allergy Information
Please check ingredients for potential allergens and consult a health professional if in doubt.

Leave a Comment