
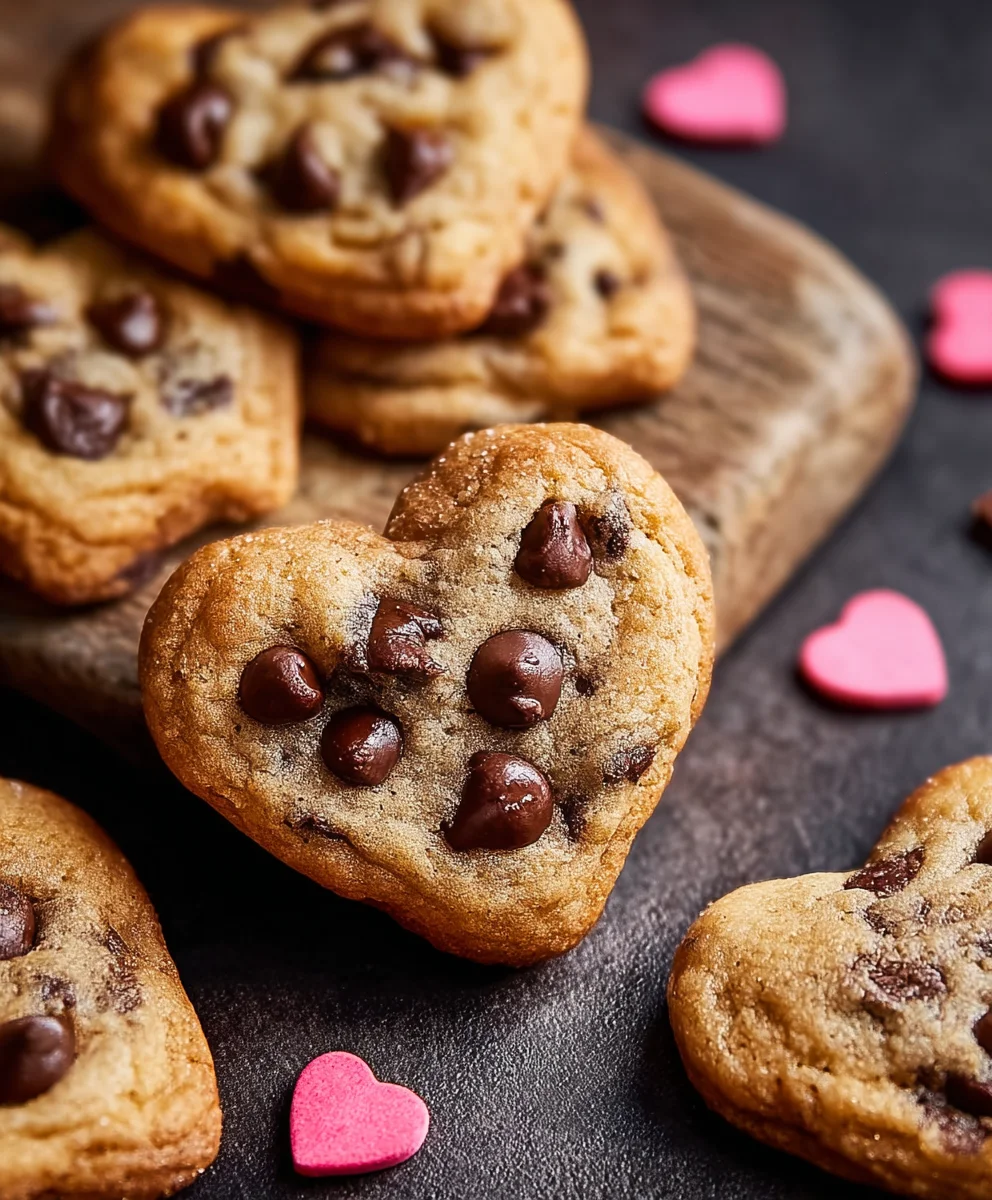
Heart Shaped Chocolate Chip Cookies are more than just a sweet treat; they are a delightful expression of affection, a tangible symbol of love baked into every single bite. There’s an undeniable magic in sharing homemade cookies, and when they’re crafted into charming heart shapes, that magic is amplified. I find that this simple gesture transforms an ordinary dessert into a truly special moment, making them perfect for any occasion that calls for a touch of warmth and sincerity.
While the original chocolate chip cookie boasts a rich history, dating back to Ruth Graves Wakefield’s ingenious creation at the Toll House Inn, the act of shaping them into hearts adds a layer of beautiful cultural significance. It elevates them from a casual snack to a thoughtful gift, ideal for celebrating Valentine’s Day, anniversaries, birthdays, or simply conveying ‘I care’ on any given Tuesday. I believe these delightful cookies truly embody the comfort and generosity of home baking, offering a personal touch that store-bought treats simply can’t match.
Imagine sinking your teeth into a perfectly golden, chewy cookie, studded with generously sized, melty chocolate chips, all while knowing it was made with love. The classic combination of rich chocolate and sweet, buttery dough is universally adored, offering a comforting familiarity that transcends generations. These Heart Shaped Chocolate Chip Cookies are not just delicious; they are a joyful experience, promising smiles and warmth with every single bite. Whether you’re baking for a loved one, a friend, or simply to treat yourself, this recipe promises to deliver both incredible flavor and heartfelt sentiment. Join me as we embark on this sweet journey!
Ingredients:
- 2 cups (452g) Unsalted Butter, softened: I always make sure my butter is truly at room temperature. This is crucial for creaming properly and achieving that wonderfully light, airy texture in our “Heart Shaped Chocolate Chip Cookies.”
- 1 ½ cups (300g) Granulated Sugar: This provides the classic sweetness and helps with browning.
- 1 ½ cups (300g) Packed Light Brown Sugar: The brown sugar adds a lovely chewiness, depth of flavor, and moisture that I absolutely adore in my cookies. Don’t skip packing it tightly into the measuring cup!
- 2 large Eggs: These should also be at room temperature. They act as a binder and add richness to our cookie dough.
- 2 teaspoons Pure Vanilla Extract: A good quality vanilla extract makes all the difference, enhancing the chocolate and overall flavor profile of these special “Heart Shaped Chocolate Chip Cookies.”
- 4 ½ cups (540g) All-Purpose Flour: I always recommend using a kitchen scale for flour to ensure accuracy, as scooping can vary wildly. This is the structural backbone of our cookies.
- 1 ½ teaspoons Baking Soda: This leavening agent helps our cookies rise just enough to be delightfully soft.
- 1 teaspoon Salt: Don’t underestimate the power of salt! It balances the sweetness and brings out all the incredible flavors, especially the chocolate.
- 3 cups (510g) Semi-Sweet Chocolate Chips: I usually go for a good quality semi-sweet chip, but feel free to mix in some milk chocolate or even dark chocolate chunks if you prefer. This is the heart of our “Heart Shaped Chocolate Chip Cookies”!
- Optional: Extra flour for dusting work surface: This is incredibly helpful when rolling out your dough to prevent sticking.
- Optional: Sprinkles or Royal Icing for Decoration: If you’re feeling fancy and want to add an extra touch of festivity to your “Heart Shaped Chocolate Chip Cookies,” these are perfect!
Preparing Your Heart Shaped Chocolate Chip Cookies Dough
-
Cream the Butter and Sugars:
In the bowl of a stand mixer fitted with the paddle attachment, or using a large bowl and a handheld electric mixer, combine the softened unsalted butter, granulated sugar, and packed light brown sugar. It’s so important to cream these together until they are light, fluffy, and pale in color. This usually takes about 3-5 minutes on medium-high speed. As I’m creaming, I often stop the mixer once or twice to scrape down the sides of the bowl with a rubber spatula. This ensures that everything is thoroughly incorporated and helps to aerate the mixture, which will result in softer cookies. You’ll notice a significant change in texture and color when it’s ready – it’ll look almost cloud-like.
-
Incorporate Eggs and Vanilla:
Once your butter and sugar mixture is beautifully creamed, it’s time to add the eggs. Add one large egg at a time, mixing well after each addition until it’s fully incorporated. Scrape down the sides of the bowl again after adding the first egg to make sure no butter or sugar is clinging to the bottom. After both eggs are mixed in, pour in the pure vanilla extract. Mix on medium speed for another minute until everything is smoothly combined. The mixture might look slightly curdled at first, but keep mixing, and it will come together beautifully. This step is essential for building a strong emulsion, leading to a perfectly structured cookie.
-
Combine Dry Ingredients:
In a separate medium-sized bowl, whisk together the all-purpose flour, baking soda, and salt. I find that whisking these dry ingredients together ensures they are evenly distributed, which is key for consistent leavening and flavor throughout your “Heart Shaped Chocolate Chip Cookies.” If you just dump them in, you might end up with pockets of salt or baking soda, and nobody wants that!
-
Gradually Add Dry to Wet:
With the mixer on low speed, gradually add the dry ingredient mixture to the wet mixture. Add about a third of the flour mixture at a time, mixing until just combined before adding the next portion. Be careful not to overmix the dough at this stage! Overmixing develops the gluten in the flour too much, which can lead to tough cookies. As soon as you no longer see streaks of dry flour, stop the mixer. I usually finish the very last bit by hand with a spatula to ensure I don’t overmix.
-
Fold in the Chocolate Chips:
Finally, it’s time for the star of the show – the chocolate chips! Add all 3 cups of semi-sweet chocolate chips to the dough. Using your rubber spatula, gently fold them in until they are evenly distributed throughout the dough. I love seeing all those chips nestled into the rich dough, promising deliciousness in every bite of our “Heart Shaped Chocolate Chip Cookies.” Don’t be afraid to get your hands a little messy here; sometimes a gentle hand mix ensures everything is perfectly dispersed.
Chilling for Perfect Heart Shaped Chocolate Chip Cookies
-
Prepare for Chilling:
Once your dough is complete, gently gather it into a cohesive ball or disc. Wrap the dough tightly in plastic wrap. I usually flatten it into a disc about 1-inch thick; this helps it chill faster and makes it easier to roll out later.
-
The Importance of Chilling:
This chilling step is absolutely crucial for cut-out cookies, especially for our “Heart Shaped Chocolate Chip Cookies.” Chilling the dough solidifies the butter, which prevents the cookies from spreading too much in the oven and helps them maintain their lovely heart shape. It also allows the flavors to meld together, resulting in a richer, more complex taste. Furthermore, cold dough is much easier to handle and roll out without becoming sticky or tearing. I typically chill my dough for at least 2 hours, but it can be chilled for up to 2-3 days. If you chill it for longer than a few hours, you might need to let it sit at room temperature for 10-15 minutes before rolling to make it more pliable.
Shaping and Cutting Your Heart Shaped Chocolate Chip Cookies
-
Preheat Oven and Prep Baking Sheets:
While your dough is firming up, preheat your oven to 375°F (190°C). Line several large baking sheets with parchment paper or silicone baking mats. I highly recommend parchment paper because it prevents sticking and makes cleanup a breeze, ensuring those “Heart Shaped Chocolate Chip Cookies” lift off perfectly.
-
Prepare Your Work Surface:
Lightly flour your clean work surface – a large cutting board, countertop, or even a pastry mat works wonderfully. I always keep a small bowl of extra flour nearby for dusting my rolling pin and hands as needed.
-
Roll Out the Dough:
Remove the chilled dough from the refrigerator. If it’s been in the fridge for a long time, let it sit for about 10-15 minutes to soften just enough to be workable. Place the dough on your floured surface. Using a floured rolling pin, roll out the dough evenly to about ¼-inch thickness. It’s important to maintain a consistent thickness so that your “Heart Shaped Chocolate Chip Cookies” bake evenly. If your dough starts to get sticky or too warm, don’t hesitate to pop it back into the fridge for 10-15 minutes to firm up again. I like to lift and turn the dough occasionally to ensure it’s not sticking to the surface.
-
Cut Out the Hearts:
Now for the fun part! Take your heart-shaped cookie cutters (I love using various sizes for visual interest!) and begin cutting out your cookie shapes. Press the cutter firmly into the dough, then carefully lift it straight up. Gently transfer the cut-out cookies to your prepared baking sheets, leaving about 1 to 2 inches between each cookie to allow for slight spreading. I often use a thin spatula or an offset spatula to help move the delicate shapes without distorting them.
-
Re-rolling Scraps:
Gather the dough scraps, gently press them back together, and form them into a disc. You’ll want to chill this re-rolled dough for another 15-20 minutes before rolling it out again. This prevents the cookies from becoming tough from overworking and keeps them from spreading too much. I usually get two or three rounds of cutting from one batch of dough, but subsequent re-rolls might produce slightly firmer cookies.
Baking Your Beautiful Heart Shaped Chocolate Chip Cookies
-
Bake in Batches:
Place the baking sheets with your “Heart Shaped Chocolate Chip Cookies” into the preheated oven. Bake one sheet at a time, or two if your oven has excellent, even heat distribution. I typically rotate my baking sheets halfway through the baking time to ensure uniform browning.
-
Baking Time and Doneness:
Bake for 9-12 minutes, or until the edges are lightly golden brown and the centers are still slightly soft. Every oven is a little different, so keep a close eye on your cookies! I look for that beautiful golden edge and a pale, set center. Overbaking will lead to dry, crispy cookies, and we want soft, chewy “Heart Shaped Chocolate Chip Cookies” with a slight crispness around the edges. When they look done, remove them from the oven.
Cooling and Optional Decoration for Your Heart Shaped Chocolate Chip Cookies
-
Cool on Baking Sheet:
Once baked, allow the “Heart Shaped Chocolate Chip Cookies” to cool on the baking sheets for about 5 minutes. This is important because they are still quite delicate and soft when they first come out of the oven. Letting them set on the hot sheet helps them firm up without breaking.
-
Transfer to Wire Rack:
After 5 minutes, carefully transfer the cookies to a wire cooling rack to cool completely. Cooling them on a wire rack allows air to circulate around them, preventing the bottoms from becoming soggy and ensuring they cool evenly. Patience here will be rewarded with perfectly crisp-edged, chewy-centered “Heart Shaped Chocolate Chip Cookies.”
-
Optional Decoration:
If you plan to decorate your “Heart Shaped Chocolate Chip Cookies” with sprinkles or royal icing, make sure they are completely cool first. Warm cookies will melt any icing or cause sprinkles to run. You can drizzle them with melted chocolate, sprinkle them with festive nonpareils, or pipe on a simple royal icing border. This is a fantastic way to personalize them for any occasion or just to add a little extra flair!
-
Storage:
Store your cooled “Heart Shaped Chocolate Chip Cookies” in an airtight container at room temperature for up to 5-7 days. They tend to stay wonderfully fresh and chewy for several days, especially if you pop a slice of bread into the container with them – it helps keep them soft! They also freeze beautifully for up to 3 months, perfect for having a stash ready for unexpected guests or cravings. Enjoy these delightful treats, made with love!

Conclusion:
So there you have it, my friends! We’ve journeyed through the simple, joyful steps to create a batch of cookies that are more than just a treat; they’re a warm hug, a sweet smile, and a truly delightful experience for anyone who takes a bite. I truly believe this recipe is a cornerstone for any home baker, whether you’re a seasoned pro or just dipping your toes into the wonderful world of baking. It’s a celebration of classic flavors and a testament to the magic that happens when butter, sugar, flour, and chocolate come together in perfect harmony.
What truly sets this particular recipe apart, making it an absolute must-try for anyone who appreciates a good homemade treat, is its unparalleled ability to deliver on all fronts: flavor, texture, and sheer, unadulterated joy. Imagine taking that first delightful bite into a cookie that boasts that perfect, golden-brown crispy edge, transitions flawlessly into a wonderfully chewy, soft center, and then surprises you with an abundance of rich, melting chocolate chips in every single mouthful. It’s a symphony of textures and tastes that dance on your palate. This isn’t just a cookie; it’s a moment of pure bliss. And when you factor in the charming, thoughtful aesthetic of our Heart Shaped Chocolate Chip Cookies, you’re not just baking; you’re crafting edible declarations of affection and warmth. This isn’t just another cookie recipe to add to your collection; it’s the recipe you’ll return to again and again because it’s consistently perfect, effortlessly delicious, and always, without fail, brings a genuine smile to anyone who receives one. They are the ultimate comfort food, capable of transforming any ordinary afternoon into a special occasion, or turning a simple gesture into a deeply meaningful one. Their simple charm, combined with their irresistible taste, makes them suitable for everything from a quiet evening treat with a book to a bustling festive gathering where they’re sure to be the star. There’s a certain undeniable magic that happens when the warm, sweet aroma of freshly baked cookies fills your home, and with these particular gems, that magic is amplified by their inherently adorable shape. It’s a beautiful testament to how simple, wholesome ingredients, combined with a little bit of love and careful attention, can create something truly extraordinary, memorable, and utterly delightful. These cookies aren’t just food; they are an experience, a memory in the making, and a tangible expression of care.
Now, while these cookies are absolutely divine straight from the cooling rack, still slightly warm with gooey chocolate, don’t limit yourself! They are incredibly versatile, offering endless possibilities for enjoyment.
Elevate Your Cookie Experience: Serving Suggestions & Creative Variations
My absolute favorite way to enjoy them is, of course, with a tall, frosty glass of cold milk – the timeless, classic combination that never disappoints. But I encourage you to think beyond just the milk! For an indulgent dessert that will truly impress, try sandwiching two of these beautiful cookies around a generous scoop of your favorite vanilla bean ice cream for an epic homemade cookie ice cream sandwich. Alternatively, crumble a few over a bowl of that same ice cream for a delightful textural contrast that elevates a simple dessert into something special. They also pair wonderfully with a hot cup of coffee or a cozy mug of hot chocolate on a chilly evening, making for the ultimate comfort duo perfect for winding down after a long day. Looking to experiment with the recipe? The base dough is incredibly forgiving and responds beautifully to creative additions. Consider swapping out some of the traditional chocolate chips for white chocolate chips, butterscotch chips, or even chopped nuts like walnuts or pecans for a subtly different flavor profile. A tiny pinch of flaky sea salt sprinkled on top right after they come out of the oven can really enhance the chocolate flavor and add a sophisticated, gourmet touch. You could also experiment with different extracts – a tiny splash of almond extract or even a hint of orange zest could add a whole new, intriguing dimension to the classic taste. For festive occasions beyond Valentine’s Day, don’t hesitate to use different cookie cutter shapes to match the holiday – stars for Christmas, pumpkins for Halloween, or even just classic circles, though I must admit, the heart shape truly holds a special, undeniable charm. And if you’re feeling extra creative, a simple drizzle of melted white chocolate or a scattering of colorful sprinkles after they cool can make them even more visually appealing, especially if you’re planning on gifting them to friends or family.
I’ve poured my heart into perfecting this recipe, and now it’s your turn to bring it to life in your own kitchen. I genuinely hope you’ll take the plunge and give these incredible cookies a try. I promise, the effort is minimal, but the reward – in terms of deliciousness, aroma, and pure satisfaction – is immense. Don’t just bake them; experience them! Share them with loved ones, pack them in lunchboxes, bring them to a potluck, or simply savor them all to yourself – absolutely no judgment here! Once you’ve whipped up a batch, I would absolutely love to hear about your baking adventure. Did you try any of my suggested variations? What was your favorite part of the process? Did they disappear as quickly as they did in my house? Please feel free to leave a comment below or share your gorgeous creations on social media. Tag me if you do – I get such a thrill seeing your culinary successes! Your feedback and shared experiences are what truly make this community so special and vibrant.
Happy baking, my friends! May your kitchens always be filled with the sweet aroma of freshly baked cookies and your hearts be full of joy.
Heart Shaped Chocolate Chip Cookies: Sweet Love Bites
Heart Shaped Chocolate Chip Cookies are more than just a sweet treat; they are a delightful expression of affection, a tangible symbol of love baked into every single bite. There’s an undeniable magic in sharing homemade cookies, and when they’re crafted into charming heart shapes, that magic is amplified. This simple gesture transforms an ordinary dessert into a truly special moment, making them perfect for any occasion that calls for a touch of warmth and sincerity.
Ingredients
-
2 cups (452g) Unsalted Butter, softened
-
1 ½ cups (300g) Granulated Sugar
-
1 ½ cups (300g) Packed Light Brown Sugar
-
2 large Eggs
-
2 tsp Pure Vanilla Extract
-
4 ½ cups (540g) All-Purpose Flour
-
1 ½ tsp Baking Soda
-
1 tsp Salt
-
3 cups (510g) Semi-Sweet Chocolate Chips
-
Optional: Extra flour for dusting
-
Optional: Sprinkles or Royal Icing
Instructions
-
Step 1
In a stand mixer, cream softened butter, granulated sugar, and packed light brown sugar until light and fluffy (3-5 minutes), scraping the bowl. Add eggs one at a time, mixing after each. Stir in vanilla extract until combined. -
Step 2
In a separate bowl, whisk together all-purpose flour, baking soda, and salt. -
Step 3
Gradually add dry ingredients to the wet mixture on low speed, mixing until just combined. Do not overmix. Gently fold in chocolate chips until evenly distributed. -
Step 4
Gather dough into a 1-inch thick disc, wrap tightly in plastic wrap, and chill for at least 2 hours (up to 2-3 days). Chilling helps prevent spreading and enhances flavor. -
Step 5
Preheat oven to 375°F (190°C). Line baking sheets with parchment paper. Lightly flour your work surface and rolling pin. -
Step 6
Roll chilled dough evenly to ¼-inch thickness. Cut out heart shapes with cookie cutters and transfer to prepared baking sheets, leaving 1-2 inches between cookies. Gather dough scraps, re-chill for 15-20 minutes, then re-roll and cut. -
Step 7
Bake one sheet at a time for 9-12 minutes, or until edges are lightly golden and centers are still slightly soft. Rotate baking sheets halfway through for even browning. -
Step 8
Allow cookies to cool on baking sheets for 5 minutes, then transfer to a wire rack to cool completely. Once fully cool, decorate with sprinkles or royal icing if desired. -
Step 9
Store cooled cookies in an airtight container at room temperature for 5-7 days or freeze for up to 3 months.
Important Information
Nutrition Facts (Per Serving)
It is important to consider this information as approximate and not to use it as definitive health advice.
Allergy Information
Please check ingredients for potential allergens and consult a health professional if in doubt.


Leave a Comment