
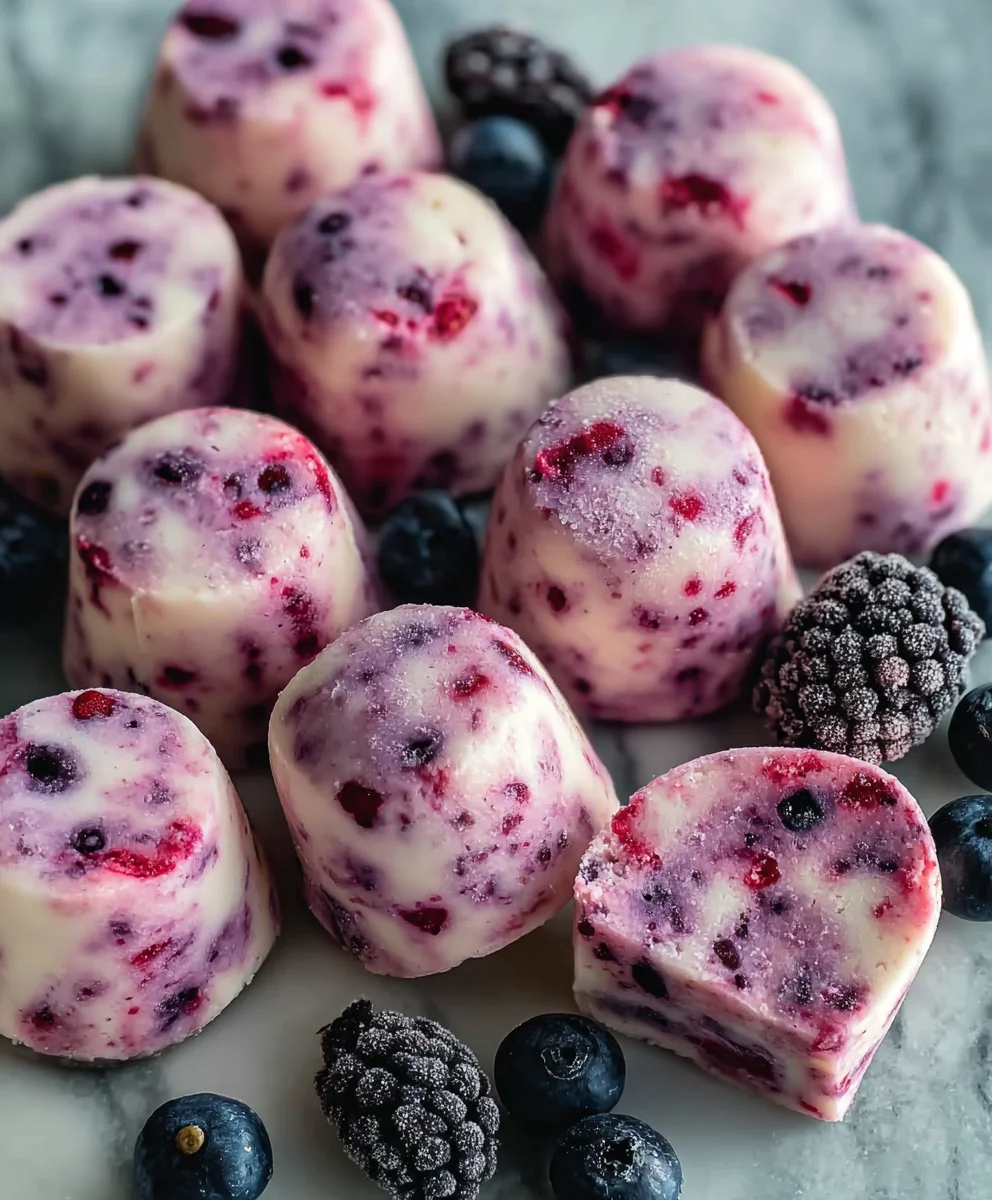
Berry Yogurt Bites are not just a snack; they are a delightful revelation for anyone seeking a refreshing, guilt-free treat. Picture this: a sun-drenched afternoon, a gentle breeze, and the sudden craving for something sweet yet undeniably healthy. These tiny, frozen jewels are precisely what you need, offering a burst of flavor and a wonderfully cool sensation that invigorates your senses. It’s truly incredible how such simple ingredients can transform into something so profoundly satisfying.
I’ve personally discovered the immense appeal of these bites, and it’s easy to see why they’ve captured so many hearts. Their charm lies in their elegant simplicity: the creamy tang of yogurt beautifully complements the vibrant sweetness and slight tartness of fresh berries. This delightful textural contrast, combined with their icy coolness, makes them an irresistible choice for any time of day. They are incredibly versatile, serving wonderfully as a quick breakfast option, a healthy midday pick-me-up, or even a light, satisfying dessert. In an era where wholesome eating and convenience are paramount, these homemade Berry Yogurt Bites stand out as a testament to how effortlessly delicious healthy choices can be, transforming basic ingredients into something truly special that supports a vibrant lifestyle.
Ingredients:
- 2 cups (approximately 480g) Full-Fat Greek Yogurt: I always recommend full-fat for its creamy texture and richness, which translates beautifully into these frozen treats. It holds up well to freezing and provides a satisfying mouthfeel. You could use a lower-fat variety if preferred, but the texture might be slightly icier.
- 2 tablespoons (30ml) Maple Syrup or Honey: This adds a lovely natural sweetness. Adjust to your personal taste; if your berries are very sweet, you might need less, and if they’re tart, you might want a little more. I find maple syrup offers a slightly more complex flavor profile, but honey is equally delicious.
- 1 teaspoon Pure Vanilla Extract: A crucial ingredient that elevates the overall flavor, adding warmth and depth to the yogurt base. Don’t skip this; it makes a big difference!
- 1 ½ cups Mixed Berries: This is where the magic happens! I love using a mix of fresh blueberries, raspberries, and finely chopped strawberries. If fresh berries aren’t in season or are too expensive, frozen mixed berries work wonderfully. Just make sure to thaw them slightly and pat them dry if they release a lot of liquid, to avoid making your yogurt base too watery. Aim for smaller pieces, especially with strawberries, to ensure they distribute evenly.
- Optional: ¼ cup (25g) Shredded Coconut or Chopped Nuts: These are fantastic for adding an extra layer of texture and flavor. Toasted coconut flakes or finely chopped almonds or walnuts can provide a delightful crunch.
Equipment You’ll Need:
- Large Mixing Bowl: Essential for combining all your ingredients without making a mess.
- Spatula or Spoon: For gentle mixing.
- Baking Sheet(s): You’ll need at least one, possibly two, depending on the size of your bites and your baking sheet.
- Parchment Paper or Silicone Baking Mat: Absolutely vital! This prevents your Berry Yogurt Bites from sticking to the baking sheet and makes for easy removal once frozen. I prefer parchment paper for single-use convenience, but a silicone mat is a great eco-friendly alternative.
- Small Scoop or Teaspoon: For portioning out your yogurt mixture onto the prepared sheet. A small cookie scoop or even just two teaspoons can work perfectly.
- Airtight Freezer-Safe Container: For storing your finished frozen Berry Yogurt Bites.
Preparing Your Workspace for Perfect Berry Yogurt Bites:
- Get Organized: The First Step to Success. Before you even think about mixing, it’s a good practice to gather all your ingredients and equipment. This ensures a smooth and enjoyable cooking process, often referred to as “mise en place.” Make sure your Greek yogurt is at a good temperature for mixing – not too cold, but definitely not warm.
- Line Your Baking Sheets. Lay a sheet of parchment paper or a silicone baking mat onto one or two large baking sheets. The exact number of sheets depends on how many Berry Yogurt Bites you plan to make and how much freezer space you have available. I usually opt for two sheets to give the bites enough space, preventing them from freezing together. This step is non-negotiable for easy removal! Without proper lining, your delicious frozen treats will be incredibly difficult to lift from the pan. If using parchment, ensure it lays flat or gently secure the corners with a tiny dab of yogurt mixture underneath.
- Prepare Your Berries. If using fresh berries, give them a gentle rinse under cool water and then pat them thoroughly dry with paper towels. Excess moisture can lead to ice crystals forming in your Berry Yogurt Bites, affecting their texture. For strawberries, hull them and then chop them into small, bite-sized pieces, roughly the same size as your blueberries or raspberries. If you’re using frozen berries, thaw them just enough so they are no longer rock-solid, but still quite firm. Drain any excess liquid that might have accumulated during thawing, and pat them dry as well. This attention to detail will ensure your Berry Yogurt Bites have the best possible texture and vibrant flavor.
Crafting the Creamy Yogurt Base:
- Combine Yogurt, Sweetener, and Vanilla. In your large mixing bowl, scoop in the 2 cups of full-fat Greek yogurt. Add the 2 tablespoons of maple syrup (or honey) and the 1 teaspoon of pure vanilla extract.
- Gentle Mixing for a Smooth Foundation. Using your spatula or spoon, gently fold these ingredients together. The goal here is to achieve a smooth, homogenous mixture without overworking the yogurt. Mix until the sweetener and vanilla are fully incorporated, and the yogurt base has a uniform, creamy consistency. Avoid vigorous whisking, as this can introduce too much air, which can lead to a less dense and potentially icier texture once frozen. Taste a tiny bit of the mixture at this point. Do you prefer it a little sweeter? Now is the time to add another half-teaspoon of your chosen sweetener. Remember, flavors can be slightly muted when frozen, so it’s okay for the mixture to taste just a touch sweeter than you might normally prefer. This creamy base is the heart of your “Berry Yogurt Bites,” so ensure it’s perfectly balanced.
Incorporating the Bursting Berries:
- Fold in the Berries and Optional Add-ins. Now for the star of the show! Gently add your prepared 1 ½ cups of mixed berries to the creamy yogurt base. If you’re using optional shredded coconut or chopped nuts, add them in now as well.
- A Light Touch is Key. With your spatula, very gently fold the berries and any other add-ins into the yogurt mixture. You want to distribute them evenly throughout the base, but be careful not to crush the delicate berries. Over-mixing here can cause the berries to break down too much, releasing their juices and potentially staining your yogurt a uniform pink or purple, rather than having distinct bursts of color. This gentle folding technique also helps prevent any liquid from the berries from seeping out too much before freezing, which could compromise the final texture of your “Berry Yogurt Bites.” The idea is to have vibrant, individual pieces of fruit suspended in the creamy yogurt.
Forming Your Delicious Berry Yogurt Bites:
- Portioning onto the Baking Sheet. Now it’s time to transform your mixture into individual “Berry Yogurt Bites.” Using your small scoop, teaspoon, or even two spoons, drop rounded spoonfuls of the yogurt mixture onto your prepared baking sheet(s). Aim for approximately 1 to 1 ½-inch diameter bites.
- Spacing is Important. Make sure to leave a little space between each dollop, as they will freeze individually. Overcrowding the sheet can lead to them freezing together, making them harder to separate later. I usually try to keep them at least half an inch apart. You can also vary the size; smaller bites are perfect for little hands or quick, refreshing snacks, while slightly larger ones can be a more substantial treat. Don’t worry too much about perfect shapes; the rustic, natural look is part of their charm! If you prefer a more uniform look, you could use a piping bag with a round tip, but a simple spoon works wonderfully and is much less fuss. Each spoonful is a promise of a delightful, tangy-sweet “Berry Yogurt Bite.”
The Chilling Process: Transforming into Berry Yogurt Bites:
- Into the Freezer They Go! Carefully transfer the baking sheet(s) with your freshly formed “Berry Yogurt Bites” into your freezer. Ensure the sheets are placed on a flat, level surface in the freezer to prevent the mixture from sliding or tilting as it sets.
- Allow Them to Fully Harden. Let the Berry Yogurt Bites freeze for at least 2-3 hours, or until they are completely solid and firm to the touch. The exact freezing time can vary depending on the temperature of your freezer and the size of your bites. I usually check them after 2 hours; they should be hard enough that they don’t give way when you press them gently. For optimal results and to ensure they hold their shape perfectly when stored, I often leave them in the freezer for a full 4 hours, or even overnight. Patience during this stage truly pays off, yielding perfectly set “Berry Yogurt Bites” that won’t clump together in storage.
Storage and Enjoyment of Your Berry Yogurt Bites:
- Easy Removal and Transfer. Once your Berry Yogurt Bites are completely frozen, carefully peel them off the parchment paper or silicone mat. They should lift off easily if they are fully set. If you find any resistance, let them freeze for a bit longer.
- Store Them for Future Snacking. Transfer the frozen Berry Yogurt Bites into an airtight, freezer-safe container or a heavy-duty freezer bag. This is crucial for maintaining their freshness and preventing freezer burn, which can make them taste icy or alter their texture.
- Longevity and Best Enjoyment. Store your delightful “Berry Yogurt Bites” in the freezer for up to 2-3 weeks. While they are usually still perfectly edible beyond that, their texture and flavor are at their peak within this timeframe. When you’re ready for a snack, simply grab a few directly from the freezer and enjoy them immediately! They are a fantastic, refreshing treat on a warm day, a healthy alternative to ice cream, or a quick breakfast bite. I often take them out a minute or two before eating, especially if they are particularly hard, allowing them to soften just slightly for the most enjoyable texture. These “Berry Yogurt Bites” are incredibly versatile and always hit the spot!
Tips and Tricks for the Ultimate Berry Yogurt Bites Experience:
Flavor Variations and Creative Add-ins:
- Tropical Twist: Instead of mixed berries, try finely diced mango, pineapple, or passion fruit pulp. A sprinkle of lime zest can really brighten these flavors. These variations of “Berry Yogurt Bites” can transport you straight to a beach vacation!
- Citrus Burst: Add a tablespoon of lemon or orange zest to your yogurt base along with the vanilla extract. The bright citrus notes complement berries beautifully and add an extra layer of freshness to your “Berry Yogurt Bites.”
- Nut Butter Swirl: After portioning the yogurt mixture onto the baking sheet, drizzle a tiny bit of melted peanut butter, almond butter, or cashew butter over each dollop and swirl gently with a toothpick before freezing. This adds a lovely nutty flavor and an appealing visual.
- Chocolate Drizzle: For a decadent touch, once your “Berry Yogurt Bites” are frozen, melt some dark or milk chocolate and drizzle it over them before serving, or even before their final freeze. The chocolate will harden, providing a satisfying crunch.
- Spiced Up: A tiny pinch of cinnamon or cardamom can add a surprising warmth to your “Berry Yogurt Bites,” especially when paired with apples or pears (diced very finely) instead of berries.
- Granola Crunch: Sprinkle a small amount of your favorite granola over the top of the yogurt bites before freezing for an added textural element. This works wonderfully for a breakfast-on-the-go version of “Berry Yogurt Bites.”
Troubleshooting and Best Practices:
-
Why are my Berry Yogurt Bites Icy? If your bites turn out too icy, it could be due to a few reasons:
- Low-Fat Yogurt: Full-fat Greek yogurt creates a creamier consistency that freezes better. Lower-fat versions have higher water content, leading to more ice crystals.
- Excess Moisture: Ensure your berries are thoroughly patted dry after washing or thawing. Any excess water will contribute to iciness.
- Too Much Liquid Sweetener: While delicious, too much maple syrup or honey can also increase the water content. Try to stick to the recommended amounts or adjust based on your berries’ sweetness.
- My Bites are Sticking to the Pan! This almost always points to not using parchment paper or a silicone baking mat, or the paper/mat not being fully covering the surface. Always, always use a proper lining. Even non-stick pans aren’t reliable for frozen yogurt.
- How to Prevent Clumping in Storage? Ensure your “Berry Yogurt Bites” are completely frozen solid before transferring them to a container. If they are even slightly soft, they will freeze together in a block. For extra assurance, you can flash freeze them on the baking sheet for an initial 2-3 hours, then transfer to a freezer bag and shake gently to ensure they are separated before putting back in the freezer.
- Adjusting Sweetness: Remember that cold temperatures tend to dull flavors slightly. So, don’t be afraid if the yogurt mixture tastes a tad sweet before freezing; it will balance out when chilled. You can always start with less sweetener and add more to taste.
- Kids in the Kitchen: This is a fantastic recipe to make with children! They can help wash berries, gently stir the yogurt base, and even scoop the individual “Berry Yogurt Bites” onto the tray. It’s a fun, mess-friendly activity that results in a delicious, healthy snack.
-
Dietary Considerations:
- Dairy-Free: You can easily make these “Berry Yogurt Bites” dairy-free by substituting the Greek yogurt with a thick, plain, unsweetened coconut yogurt or almond yogurt. Ensure it’s a brand known for its thickness, as thinner plant-based yogurts might result in a more icy texture.
- Sugar-Free: For a sugar-free version, omit the maple syrup/honey and use a sugar substitute suitable for cold preparations, or simply rely on the natural sweetness of the berries.
These “Berry Yogurt Bites” are more than just a snack; they are a canvas for creativity and a testament to how simple ingredients can create something truly delightful. Enjoy experimenting and savoring every frozen, fruity bite!
<h2>Conclusion:</h2>
<p>And there you have it! We’ve journeyed through the simple steps to create a truly delightful and versatile treat. If you’re looking for a recipe that combines ease, incredible taste, and undeniable health benefits, then your search ends here. I genuinely believe this isn’t just another snack; it’s a little piece of joy that fits perfectly into any moment of your day, whether you’re a busy parent, a student needing a brain boost, or simply someone who appreciates a delicious, guilt-free indulgence.</p>
<h4>Why You Absolutely Must Try These!</h4>
<p>What makes these <strong>Berry Yogurt Bites</strong> an absolute must-try? Firstly, their simplicity is unmatched. We’re talking minimal ingredients and even less fuss in the kitchen, making them ideal for even the most novice of cooks or those hectic days when time is a luxury. But don’t let their straightforward preparation fool you; the flavor profile is anything but basic. The natural sweetness of the berries beautifully complements the creamy tang of the yogurt, creating a harmonious blend that’s both refreshing and satisfying. Plus, they’re packed with probiotics, antioxidants, and essential nutrients, transforming what feels like a treat into a genuinely beneficial addition to your diet. They’re naturally low in added sugar (depending on your yogurt choice), high in protein, and offer a fantastic way to sneak more fruit into your daily intake. Imagine having a ready-to-grab snack that curbs your cravings without the slightest hint of regret. They’re fantastic for meal prepping, ensuring you always have a healthy option on hand, and they store wonderfully in the freezer, ready whenever the mood strikes. Trust me, once you make a batch, they won’t last long!</p>
<h4>Get Creative: Serving Suggestions and Delicious Variations</h4>
<p>The beauty of this recipe lies not only in its simplicity but also in its incredible adaptability. While they are perfect straight from the freezer as a refreshing cool-down treat on a warm day, don’t stop there! Consider adding a sprinkle of granola for extra crunch and fiber, transforming them into a delightful breakfast topper for your morning oatmeal or smoothie bowl. For a more decadent dessert, you could drizzle a little melted dark chocolate over them before freezing, adding a luxurious layer that perfectly balances the fruity tang. Think about different berry combinations too – mixed berries, raspberries, or even sliced strawberries can create unique flavor profiles. Want to venture beyond berries? Mango chunks, kiwi slices, or even diced peaches would be absolutely phenomenal, offering a tropical twist. For those who prefer a creamier base, Greek yogurt provides extra protein and a thicker texture, while a dairy-free yogurt makes this recipe accessible for everyone. You can also experiment with different sweeteners or extracts; a touch of vanilla extract can enhance the overall flavor, or a tiny dash of honey or maple syrup can boost the sweetness if your berries aren’t quite ripe. Don’t be afraid to experiment with different molds too – small silicone molds in fun shapes can make these even more appealing, especially for little ones. The possibilities are truly endless, and each variation offers a new adventure for your taste buds.</p>
<h4>Your Turn!</h4>
<p>Now that you’re armed with all the tips, tricks, and inspiration, it’s your turn to bring these wonderful treats to life in your own kitchen! I genuinely hope you’ll take the plunge and whip up a batch (or two!). I promise, the reward of biting into one of these delicious, icy morsels after just a few minutes of effort is incredibly satisfying. Don’t forget to get creative with your favorite fruit combinations or toppings. And most importantly, I would absolutely love to hear about your experience! Once you’ve made them, please share your thoughts, your favorite variations, and even photos of your creations. Your feedback helps inspire me and other readers. So, go forth, enjoy the process, and savor every single bite! Happy snacking!</p>
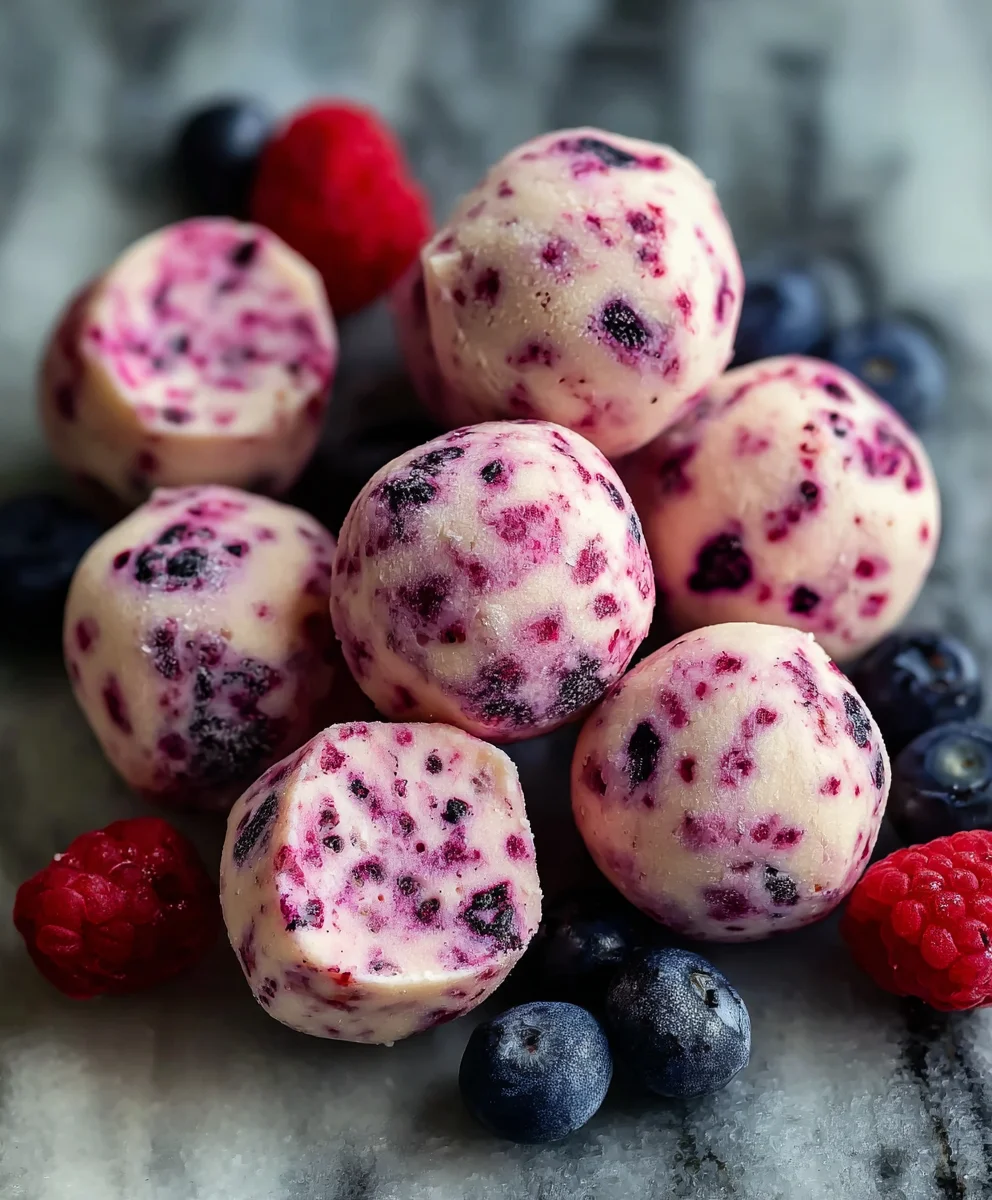
Berry Yogurt Bites
Easy Frozen Yogurt Bites. Transform your favorite berries and yogurt into delightful frozen treats perfect for hot summer days. These berry-studded bites combine creamy yogurt with fresh fruit for a refreshing snack that satisfies sweet cravings while keeping things wholesome. Every bite brings a perfect balance of tangy yogurt and natural berry sweetness. Full-fat yogurt creates the creamiest texture when frozen. They are incredibly versatile, serving wonderfully as a quick breakfast option, a healthy midday pick-me-up, or even a light, satisfying dessert.
Ingredients
-
2 cups (480g) Full-Fat Greek Yogurt
-
2 tbsp (30ml) Maple Syrup or Honey (adjust to taste)
-
1 tsp Pure Vanilla Extract
-
1 ½ cups Mixed Berries (fresh or slightly thawed, patted dry)
-
Optional: ¼ cup (25g) Shredded Coconut or Chopped Nuts
Instructions
-
Step 1
Line one or two large baking sheets with parchment paper or silicone mats. Rinse and thoroughly pat dry fresh berries, chopping larger ones like strawberries into bite-sized pieces. If using frozen berries, thaw slightly, drain any excess liquid, and pat them dry. -
Step 2
In a large mixing bowl, combine the Greek yogurt, maple syrup (or honey), and vanilla extract. Gently fold these ingredients together until the mixture is smooth and uniform. Taste and adjust the sweetness if desired, remembering flavors can be slightly muted when frozen. -
Step 3
Gently fold in the prepared mixed berries and any optional add-ins (such as shredded coconut or chopped nuts) into the creamy yogurt base. Be careful not to crush the delicate berries; aim for even distribution while maintaining distinct fruit pieces. -
Step 4
Using a small scoop or a teaspoon, drop rounded spoonfuls of the yogurt mixture onto the lined baking sheets. Aim for approximately 1 to 1 ½-inch diameter bites and ensure there is at least half an inch of space between each dollop to prevent them from freezing together. -
Step 5
Carefully transfer the baking sheet(s) to the freezer, ensuring they are placed on a flat, level surface. Freeze for at least 2-3 hours, or until the Berry Yogurt Bites are completely solid and firm to the touch. For best results, freeze for 4 hours or overnight. -
Step 6
Once fully frozen, carefully peel the Berry Yogurt Bites off the parchment paper or silicone mat. Transfer them to an airtight, freezer-safe container or a heavy-duty freezer bag for storage. They can be stored in the freezer for up to 2-3 weeks. Grab a few directly from the freezer and enjoy immediately as a refreshing treat!
Important Information
Nutrition Facts (Per Serving)
It is important to consider this information as approximate and not to use it as definitive health advice.
Allergy Information
Please check ingredients for potential allergens and consult a health professional if in doubt.


Leave a Comment