
Chocolate Dipped Cookie Dough Bites – is there anything more wonderfully indulgent than the sweet, nostalgic taste of raw cookie dough, perfectly safe to eat, and enrobed in a luscious layer of chocolate? I believe not! For many of us, the irresistible allure of licking the spoon clean while baking has been a cherished, albeit sometimes risky, part of childhood memories. Today, however, we can fully embrace that delightful craving without a second thought, thanks to innovative culinary approaches.
This innovative treat celebrates the evolution of our favorite dessert components. While traditional cookie dough often contains raw ingredients, the culinary world has ingeniously crafted egg-free, heat-treated flour versions that offer all the beloved flavor and texture without any concerns. Transforming this safe dough into perfectly portioned bites, then meticulously dipping each one into rich, melted chocolate, truly elevates a simple pleasure into a gourmet experience. It’s a testament to how a modern twist can perfect a classic craving.
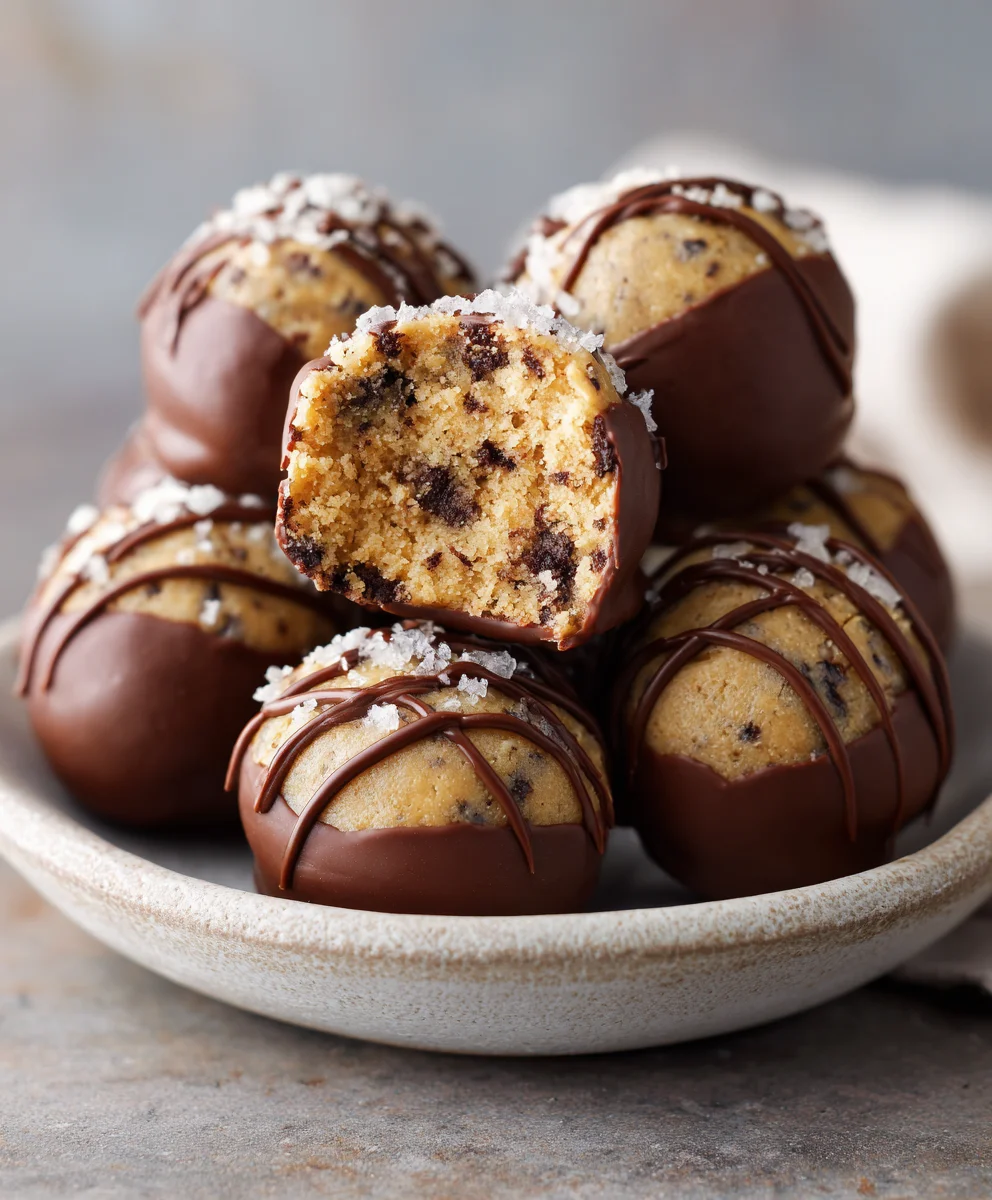
I find that people absolutely adore these because they strike the perfect balance between creamy, melt-in-your-mouth cookie dough and the satisfying snap of a hardened chocolate shell. They are incredibly convenient; no baking required means you can whip up a batch for an impromptu gathering or a quiet evening treat with ease. The delightful texture, combined with the rich flavor, makes them an instant hit. These Chocolate Dipped Cookie Dough Bites are not just a dessert; they are a delightful testament to how simple ingredients can create extraordinary happiness, making them a consistently popular choice for any occasion.

Ingredients:
-
1 ½ cups (180g) All-Purpose Flour: It’s absolutely crucial that we heat-treat this for food safety, as we won’t be baking our cookie dough. I’ll walk you through how to do that easily.
-
½ cup (113g) Unsalted Butter: Make sure this is softened to room temperature. This is essential for achieving that light, creamy texture in our edible cookie dough. If it’s too cold, it won’t cream properly, and if it’s melted, it will make our dough greasy.
-
½ cup (100g) Granulated Sugar: For sweetness and a bit of crispness.
-
¼ cup (50g) Light Brown Sugar, packed: This adds a lovely molasses flavor and helps keep our cookie dough moist and tender. Make sure to pack it tightly when measuring.
-
¼ cup (60ml) Milk: Any kind will do – dairy or non-dairy. This helps bring the dough together and gives it the perfect consistency. Start with ¼ cup, and if your dough seems a little dry, you can add another tablespoon, but usually, ¼ cup is perfect.
-
1 teaspoon Pure Vanilla Extract: A staple in any good cookie dough, it provides that classic, comforting flavor profile we all adore. Don’t skimp on the good stuff here!
-
¼ teaspoon Salt: Just a touch to balance the sweetness and enhance all the other flavors.
-
1 ½ cups (250g) Chocolate for Melting: I highly recommend using good quality melting wafers, chocolate almond bark, or finely chopped baking chocolate bars. Chocolate chips can be used, but they often contain stabilizers that make them harder to melt smoothly and can result in a thicker, less glossy coating for our Chocolate Dipped Cookie Dough Bites. Semi-sweet or dark chocolate works wonderfully, but feel free to use milk chocolate if that’s your preference.
-
1 tablespoon Coconut Oil or Vegetable Shortening (Optional): This is a secret weapon for achieving a super smooth, shiny chocolate coating that’s easier to work with and sets beautifully. It also helps prevent the chocolate from seizing.
-
Assorted Sprinkles, Sea Salt Flakes, Crushed Nuts, or Additional Melted Chocolate (for drizzling – Optional): These are for decorating your beautiful Chocolate Dipped Cookie Dough Bites and adding an extra layer of visual appeal and texture. Get creative!
Preparing the Edible Cookie Dough
Making safe-to-eat cookie dough is simpler than you might think, and the most critical step is heat-treating the flour. Raw flour can contain bacteria, so we always want to eliminate that risk when making unbaked treats. Trust me, it’s a quick and easy process!
-
Heat-Treating the Flour for Safety:
This is a non-negotiable step for edible cookie dough. We need to ensure our flour is safe to eat raw. There are two primary methods:
-
Microwave Method:
Place your 1 ½ cups of all-purpose flour in a microwave-safe bowl. Microwave it on high in 30-second intervals, stirring thoroughly after each interval. Continue this for a total of about 1 ½ to 2 minutes, or until the flour reaches an internal temperature of 165°F (74°C). You can use an instant-read thermometer to check. Be careful, as the bowl might get hot. Once it’s reached temperature, set it aside to cool completely before using. Do not skip the cooling step, as hot flour can melt your butter!
-
Oven Method:
Preheat your oven to 300°F (150°C). Spread the 1 ½ cups of flour evenly on a baking sheet. Bake for 5-7 minutes, stirring halfway through. Again, use an instant-read thermometer to confirm it reaches 165°F (74°C). Remove from the oven and let it cool completely on the baking sheet before incorporating it into your dough. This method is great if you’re already using your oven for something else, or prefer not to use a microwave.
Make sure your heat-treated flour is completely cool before moving on. This is super important for the texture of your cookie dough.
-
-
Creaming the Butter and Sugars:
In a large mixing bowl, using an electric mixer (stand mixer with paddle attachment or a hand mixer), cream together your ½ cup softened unsalted butter, ½ cup granulated sugar, and ¼ cup packed light brown sugar. Beat on medium-high speed for about 2-3 minutes, until the mixture is light, fluffy, and pale in color. This step incorporates air into the mixture, which gives our cookie dough a wonderful, slightly airy, and melt-in-your-mouth texture, not dense and heavy. Scrape down the sides of the bowl as needed to ensure everything is well combined.
-
Incorporating Wet Ingredients:
Reduce the mixer speed to low. Add the ¼ cup milk and 1 teaspoon pure vanilla extract to the creamed butter and sugar mixture. Mix until just combined. The mixture might look a little curdled at this point, but don’t worry, it will come together once we add the flour.
-
Adding the Dry Ingredients:
Now, gradually add your completely cooled, heat-treated flour and ¼ teaspoon salt to the wet mixture. Mix on low speed until just combined. Be careful not to overmix; as soon as you see no streaks of dry flour, stop mixing. Overmixing can develop the gluten in the flour, leading to a tougher dough. The resulting dough should be thick, pliable, and easy to handle – just like your favorite raw cookie dough!
-
Forming the Cookie Dough Bites:
Using a small cookie scoop (about 1 tablespoon in size) or your hands, roll the cookie dough into small, uniform balls. I find that about 1-inch diameter balls are perfect for bite-sized treats. Place the formed cookie dough balls onto a baking sheet lined with parchment paper or a silicone baking mat. Once all your cookie dough balls are formed, place the baking sheet in the refrigerator for at least 30 minutes. This chilling step is crucial because it helps firm up the cookie dough, making it much easier to dip in chocolate without falling apart, and helps the chocolate adhere better. You want them to be nice and firm.
Melting the Chocolate Coating
The success of your Chocolate Dipped Cookie Dough Bites largely depends on a perfectly smooth, glossy chocolate coating. Take your time with this step, and you’ll be rewarded with a beautiful finish.
-
Choosing Your Chocolate Wisely:
As mentioned in the ingredients, opting for good quality melting wafers or finely chopped baking chocolate bars will yield the best results for a smooth, even coating. These chocolates are formulated to melt beautifully and set with a nice snap. If you’re using chocolate chips, sometimes they can be a bit trickier, but with careful melting, they can still work. For a truly professional finish, consider tempering your chocolate, but for a home cook, just careful melting will suffice.
-
Two Methods for Melting Chocolate:
-
Double Boiler Method (Recommended for Best Results):
This is my preferred method for melting chocolate because it offers gentle, even heat, significantly reducing the risk of burning or seizing the chocolate. Fill a small saucepan with about 1-2 inches of water and bring it to a gentle simmer over medium-low heat. Place a heat-safe bowl (preferably glass or stainless steel) on top of the saucepan, ensuring the bottom of the bowl does not touch the simmering water. Add your 1 ½ cups of chocolate to the bowl. Stir occasionally with a clean, dry spatula as the chocolate slowly melts. Remove the bowl from the heat as soon as the chocolate is mostly melted, and stir continuously until it’s completely smooth and free of lumps. The residual heat will finish the job. If using, stir in your 1 tablespoon of coconut oil or vegetable shortening now for extra smoothness and shine.
-
Microwave Method:
Place your 1 ½ cups of chocolate in a microwave-safe bowl. Microwave on 50% power for 30-second intervals, stirring thoroughly after each interval. This gentle approach is key to preventing burning. Chocolate can hold its shape even when melted, so it’s important to stir to gauge its true consistency. Continue microwaving and stirring until the chocolate is smooth and fully melted. If using, stir in your 1 tablespoon of coconut oil or vegetable shortening now. Be extra careful not to overheat the chocolate, as this can cause it to seize (become thick and clumpy) and ruin its texture.
-
-
Maintaining Optimal Chocolate Consistency:
If your chocolate starts to cool and thicken during the dipping process, you can gently reheat it using your chosen method for a few seconds at a time until it’s back to a smooth, dippable consistency. It’s important to work quickly but carefully once the chocolate is melted, as it will start to set.
Dipping, Decorating, and Chilling
Now for the fun part! This is where our plain cookie dough balls transform into beautiful Chocolate Dipped Cookie Dough Bites. Having everything ready beforehand makes this process smooth and enjoyable.
-
Setting Up Your Dipping Station:
Before you even think about dipping, lay out a new sheet of parchment paper or a silicone baking mat on a clean surface or another baking sheet. Have your desired toppings (sprinkles, sea salt, crushed nuts) in small bowls ready and within arm’s reach. Make sure your chilled cookie dough bites are easily accessible.
-
The Dipping Technique:
Using a fork or a toothpick, carefully pick up one chilled cookie dough bite. Submerge it completely into your melted chocolate. You can use a spoon to help pour chocolate over the top if needed. Lift the cookie dough bite out of the chocolate, allowing any excess chocolate to drip back into the bowl. Gently tap the handle of the fork against the side of the bowl to help remove any remaining drips. You want a nice, thin, even coating. For a smoother bottom, you can carefully slide the bottom of the dipped bite against the rim of the bowl. Alternatively, for a truly clean look, you can use two forks – one to dip, and the second to help push the excess chocolate off the first fork.
-
Adding Decorations Immediately:
Once you’ve dipped a cookie dough bite and removed the excess chocolate, immediately place it onto your prepared parchment-lined baking sheet. While the chocolate is still wet and tacky, sprinkle with your chosen decorations. Whether it’s colorful sprinkles for a festive look, a pinch of flaky sea salt to enhance the chocolate’s flavor, or finely crushed nuts for a textural contrast – apply them right away. The chocolate sets quickly, so don’t delay this step. Repeat this process with the remaining cookie dough bites, dipping and decorating them one by one.
-
Chilling to Set:
Once all your Chocolate Dipped Cookie Dough Bites are dipped and decorated, transfer the baking sheet back into the refrigerator. Allow them to chill for at least 30 minutes, or until the chocolate is completely set and firm to the touch. This step is crucial for ensuring the chocolate coating hardens properly, giving your bites that satisfying snap when you bite into them. Rushing this step will result in messy, soft chocolate.
-
Optional Drizzles for Extra Flair:
If you want to add an extra touch of elegance, once the first layer of chocolate is completely set, you can melt a small amount of contrasting chocolate (white chocolate over dark, or vice versa) in a piping bag with a tiny snip off the end, or a small zip-top bag with the corner snipped. Drizzle it artfully over the set chocolate bites. This creates a beautiful professional finish and adds another layer of visual appeal to your delicious Chocolate Dipped Cookie Dough Bites.
Tips for Perfect Chocolate Dipped Cookie Dough Bites
Creating these delightful Chocolate Dipped Cookie Dough Bites is a joyful process, and a few extra tips can ensure your treats are nothing short of perfect.
-
Storage Instructions:
Store your finished Chocolate Dipped Cookie Dough Bites in an airtight container in the refrigerator. They will stay fresh and delicious for up to one week. You can also freeze them for longer storage; place them in a single layer on a baking sheet until frozen solid, then transfer to a freezer-safe bag or container. They will keep well for up to 1-2 months. Thaw in the refrigerator before serving, or enjoy them frozen for a firmer, almost ice cream-like treat.
-
Troubleshooting Sticky Dough:
If your edible cookie dough feels a bit too sticky to roll into balls, you can add a tablespoon or two of extra heat-treated flour until it reaches a more manageable consistency. Alternatively, pop the dough into the refrigerator for 15-20 minutes; chilling often helps firm it up and makes it easier to handle. Conversely, if your dough seems too dry and crumbly, add a teaspoon of milk at a time until it comes together.
-
Avoiding Seized Chocolate:
Chocolate seizing is often caused by even a tiny drop of water entering the melted chocolate, or by overheating. Always use completely dry bowls and utensils when melting chocolate. If using the double boiler method, ensure the simmering water does not touch the bottom of your chocolate bowl. If your chocolate does seize and become thick and grainy, sometimes you can rescue it by stirring in a teaspoon of hot, neutral oil (like vegetable or canola oil) or melted butter, one teaspoon at a time, until it smooths out. However, prevention is key!
-
Flavor Variations for Your Cookie Dough Bites:
-
Extracts:
Experiment with different extracts! Instead of or in addition to vanilla, try almond extract for a nutty twist, peppermint extract for a festive winter treat, or even a touch of orange zest for a citrusy note.
-
Mix-Ins:
Before rolling your dough into balls, fold in your favorite additions! Mini chocolate chips, toffee bits, chopped nuts (like pecans or walnuts), shredded coconut, or even a handful of crushed pretzels for a sweet and salty crunch would all be incredible. Just remember that anything you add will make the dough a bit more difficult to roll into perfectly smooth balls, but the flavor will be worth it.
-
Chocolate Coating Options:
Beyond semi-sweet, try dipping your cookie dough bites in dark chocolate for a more intense flavor, milk chocolate for extra sweetness, or even white chocolate for a creamy contrast. You could also make a batch with different chocolate coatings for variety!
These Chocolate Dipped Cookie Dough Bites are a fantastic no-bake treat that everyone will adore. They’re perfect for parties, gifting, or simply satisfying that irresistible cookie dough craving. Enjoy making them!
-
Conclusion:
This recipe isn’t just another dessert; it’s a game-changer that I truly believe will become a staple in your kitchen. I’ve poured my heart into perfecting these Chocolate Dipped Cookie Dough Bites, and for good reason! They capture that irresistible, nostalgic flavor of raw cookie dough we all secretly crave, but elevate it into a safe, sophisticated, and utterly delightful treat. The sheer beauty of this recipe lies in its elegant simplicity – no baking required, minimal fuss, and maximum reward in terms of flavor and satisfaction. They’re the absolute perfect solution for those sudden, intense sweet cravings that hit out of nowhere, a fantastic quick dessert to impress unexpected guests, or simply a delightful little pick-me-up any time of day that feels like a special indulgence. The creamy, rich, and wonderfully textural cookie dough, encased in a crisp, decadent chocolate shell, creates a symphony of textures and flavors that is simply out of this world. Trust me when I say, once you try them, you’re going to wonder how you ever lived without them.
Now, let’s talk about making these already spectacular treats even more phenomenal, or how to best enjoy them. While they’re undeniably incredible on their own, straight from the fridge, there are truly endless ways to customize and serve these delightful morsels, allowing you to tailor them to any occasion or personal preference.
For serving, imagine them carefully arranged alongside a warm, aromatic cup of freshly brewed coffee, or perhaps a tall, frosty glass of cold milk for that classic pairing. They’re also absolutely fantastic nestled atop a scoop of premium vanilla bean ice cream, where the bites can crumble ever so slightly, melting into the creamy goodness for an exquisite textural contrast. Planning a get-together or a dinner party? Artfully arrange them on a sleek dessert platter for an instant crowd-pleaser that looks far more intricate and time-consuming than it actually is. And let’s not forget about edible gifts – package a few in a charming small box tied with a festive ribbon for a thoughtful, homemade present that’s sure to be appreciated and devoured with joy.
When it comes to variations, the possibilities for both the cookie dough base and the chocolate coating are truly boundless! For the cookie dough base itself, don’t be afraid to experiment beyond the classic vanilla extract. Try a hint of almond extract for a delicate, marzipan-like nuance, or a vibrant drop of peppermint extract for a refreshing, festive twist, especially during the holiday season. You could even swirl in a teaspoon of instant espresso powder to create a delightful mocha flavor, or a pinch of warm cinnamon and nutmeg for a cozy, spiced dough. Beyond traditional chocolate chips, consider adding white chocolate chips for a sweeter profile, tangy peanut butter chips, rich butterscotch chips, or even some finely chopped pecans or walnuts for an unexpected crunch and nutty depth. Colorful sprinkles, of course, are always a fun and celebratory addition, especially if you’re making these for a birthday or special event.
The chocolate coating is yet another canvas for your culinary creativity. While a dark chocolate coating offers a beautiful, slightly bitter contrast that balances the sweetness of the dough, a milk chocolate coating makes them undeniably sweeter and incredibly kid-friendly. Or, why not venture into a white chocolate coating, perhaps even tinted with a touch of food coloring for a vibrant and eye-catching look? After dipping, the real fun truly begins with toppings! A delicate sprinkle of flaky sea salt is a classic for a reason, as it brilliantly enhances the chocolate’s natural depth. Other fantastic options include finely chopped nuts like pistachios, hazelnuts, or peanuts, delicate shredded coconut, a light dusting of cocoa powder, crushed freeze-dried raspberries for a pop of tartness and beautiful color, or even a elegant drizzle of contrasting chocolate (white chocolate over dark, or vice versa) for a sophisticated finish. For festive holiday themes, crushed candy canes are an absolute winner, or a touch of edible glitter for that extra sparkle and magic.
I truly hope I’ve convinced you to give this wonderful recipe a whirl. It’s more than just a recipe; it’s an experience, a delightful journey into pure, unadulterated deliciousness that you absolutely deserve to indulge in. Don’t just read about these amazing treats; take the leap and create them yourself! Dive into your kitchen, gather your ingredients, and whip up a batch. I promise you, you absolutely won’t regret it. Once you’ve had a taste, please, please come back and share your creations and your thoughts with me! I’m genuinely excited to hear how your Chocolate Dipped Cookie Dough Bites turned out, what incredible variations you tried, and who you shared these delightful morsels with. Your feedback and personal touches are what make cooking such a vibrant, inspiring, and collaborative joy for all of us. Happy making, and most importantly, happy eating!
Chocolate Dipped Cookie Dough Bites
Indulge in the sweet, nostalgic taste of safe-to-eat, no-bake cookie dough, enrobed in a luscious layer of chocolate. These easy-to-make bites offer a perfect balance of creamy cookie dough and a satisfying chocolate snap, ideal for any occasion or craving.
Ingredients
-
1 ½ cups (180g) All-Purpose Flour
-
½ cup (113g) Unsalted Butter, softened
-
½ cup (100g) Granulated Sugar
-
¼ cup (50g) Light Brown Sugar, packed
-
¼ cup (60ml) Milk (dairy or non-dairy)
-
1 teaspoon Pure Vanilla Extract
-
¼ teaspoon Salt
-
1 ½ cups (250g) Chocolate for Melting (wafers, bark, or chopped bars)
-
1 tablespoon Coconut Oil or Vegetable Shortening (Optional)
-
Assorted Sprinkles, Sea Salt Flakes, Crushed Nuts (Optional)
Instructions
-
Step 1
Choose a method: 1. Microwave: Place 1 ½ cups flour in a microwave-safe bowl. Microwave on high in 30-second intervals for 1 ½ – 2 minutes, stirring after each, until it reaches 165°F (74°C). Cool completely. 2. Oven: Preheat oven to 300°F (150°C). Spread 1 ½ cups flour on a baking sheet. Bake for 5-7 minutes, stirring halfway, until it reaches 165°F (74°C). Cool completely. Ensure flour is fully cooled before proceeding. -
Step 2
In a large mixing bowl, cream together ½ cup softened unsalted butter, ½ cup granulated sugar, and ¼ cup packed light brown sugar using an electric mixer. Beat for 2-3 minutes until light, fluffy, and pale. -
Step 3
Reduce mixer speed to low. Add ¼ cup milk and 1 teaspoon pure vanilla extract to the creamed mixture. Mix until just combined. -
Step 4
Gradually add the completely cooled, heat-treated flour and ¼ teaspoon salt to the wet mixture. Mix on low speed until just combined, being careful not to overmix. The dough should be thick and pliable. -
Step 5
Using a small cookie scoop (about 1 tbsp) or your hands, roll the dough into 1-inch uniform balls. Place them on a parchment-lined baking sheet and refrigerate for at least 30 minutes to firm up. -
Step 6
Choose a method: 1. Double Boiler: Fill a small saucepan with 1-2 inches of water, bring to a gentle simmer. Place a heat-safe bowl (not touching water) with 1 ½ cups chocolate over it. Stir until smooth. Remove from heat. If using, stir in 1 tablespoon coconut oil or vegetable shortening. 2. Microwave: Place 1 ½ cups chocolate in a microwave-safe bowl. Microwave on 50% power in 30-second intervals, stirring after each, until smooth and fully melted. If using, stir in 1 tablespoon coconut oil or vegetable shortening. -
Step 7
Set up a dipping station with a new parchment-lined baking sheet and desired toppings. Using a fork or toothpick, dip each chilled cookie dough bite completely into the melted chocolate, letting excess drip off. Immediately place on the parchment and sprinkle with decorations while the chocolate is still wet. Repeat for all bites, working quickly. -
Step 8
Transfer the baking sheet with dipped bites back to the refrigerator. Chill for at least 30 minutes, or until the chocolate coating is completely set and firm to the touch. -
Step 9
Once the chocolate is completely set, melt a small amount of contrasting chocolate (e.g., white chocolate over dark) in a piping bag or small zip-top bag with a corner snipped. Drizzle artfully over the set bites for a beautiful professional finish.
Important Information
Nutrition Facts (Per Serving)
It is important to consider this information as approximate and not to use it as definitive health advice.
Allergy Information
Please check ingredients for potential allergens and consult a health professional if in doubt.


Leave a Comment