
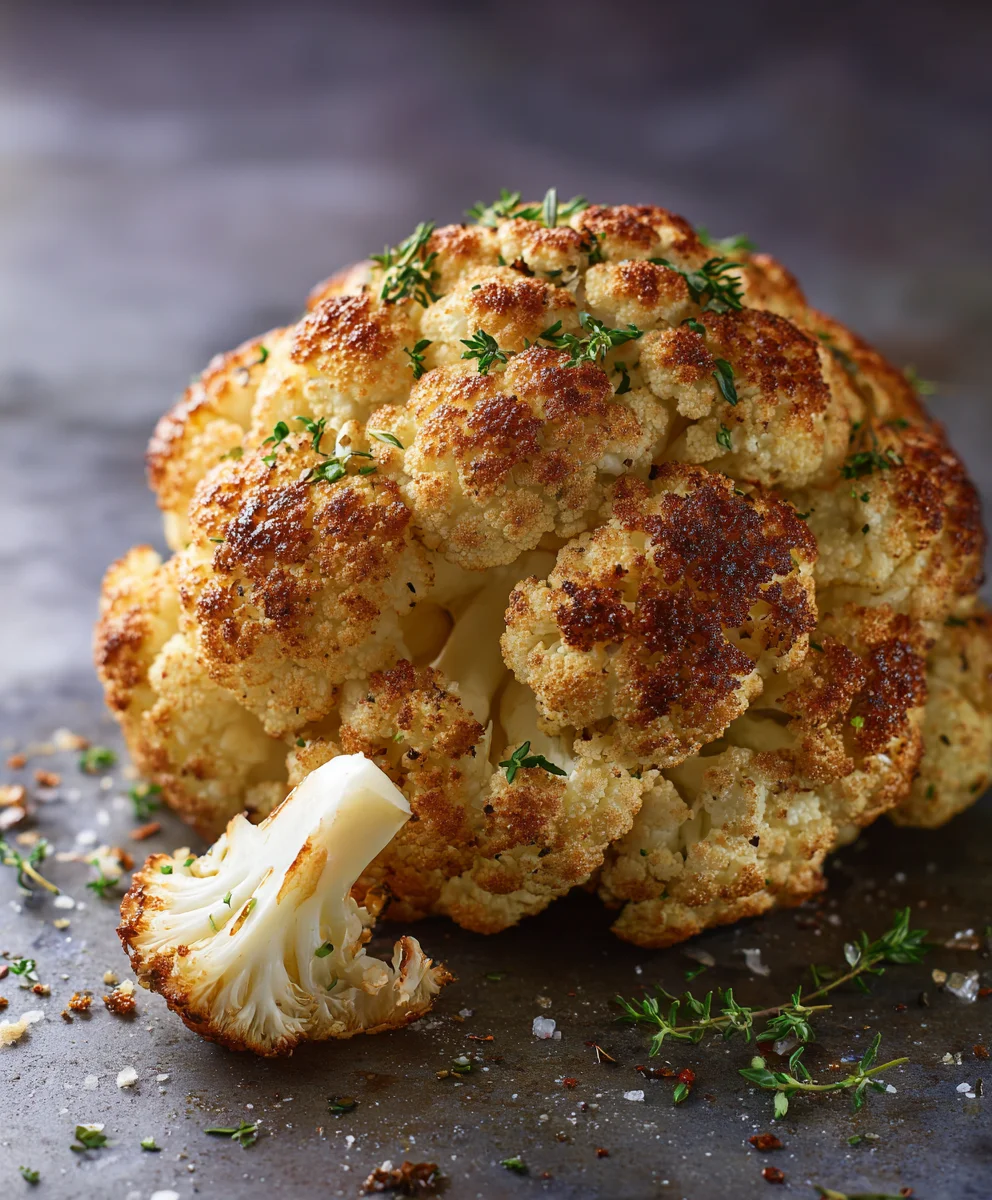
Crispy Roasted Cauliflower is, without a doubt, one of the most delightful culinary transformations I’ve ever experienced in my kitchen. What might seem like a simple vegetable side dish quickly becomes a show-stopping experience, boasting an irresistible texture and a rich, nutty flavor that will have even the most ardent vegetable skeptics asking for more. Forget bland, boiled florets; we’re talking about golden-brown perfection with tender insides and edges that snap with every bite.
While cauliflower itself has graced tables for centuries, originally hailing from the Mediterranean, the magic of high-heat roasting truly unlocks its hidden potential. This method caramelizes the natural sugars, creating a depth of flavor that is simply unparalleled. People adore this dish not just for its incredible taste and satisfying crispness, but also for its remarkable versatility and ease of preparation. Whether you’re looking for a healthy snack, a stellar side for almost any main course, or even the star of a plant-based meal, this Crispy Roasted Cauliflower recipe delivers every time.
I’m incredibly excited to guide you through the simple steps to achieve this culinary triumph. Get ready to elevate your vegetable game and impress everyone with this remarkably flavorful and texturally exciting dish!
Ingredients:
- 1 large head cauliflower, approximately 2-2.5 pounds, firm and white
- 3 tablespoons extra virgin olive oil, plus more for drizzling if needed
- 1 teaspoon smoked paprika, for a lovely depth of flavor
- ½ teaspoon garlic powder, because garlic makes everything better
- ¼ teaspoon onion powder, to complement the garlic
- ½ teaspoon dried oregano, adds an earthy, aromatic touch
- ¼ teaspoon cayenne pepper, optional, for a very subtle hint of heat, adjust to your preference
- 1 teaspoon sea salt, or to taste
- ½ teaspoon freshly ground black pepper, or to taste
- 2 tablespoons nutritional yeast, optional, but highly recommended for a cheesy, umami boost and extra crispiness (do not confuse with active yeast)
- Optional garnishes:
- Fresh parsley or cilantro, chopped
- Lemon wedges, for serving and a bright finish
- A sprinkle of red pepper flakes, if you love an extra kick
- Your favorite dipping sauce (e.g., tahini dressing, sriracha mayo)
Preparing the Cauliflower for Crispy Perfection
- Preheat Your Oven to the Ideal Temperature: Before you even think about touching that beautiful head of cauliflower, we need to get our oven screaming hot. Preheat your oven to 400°F (200°C). This high temperature is absolutely crucial for achieving that coveted crispy exterior and tender interior. While the oven preheats, position an oven rack in the middle position. If you have a convection setting, feel free to use it, as it will enhance the crisping effect even further, but be mindful that cooking times might be slightly reduced. Don’t skip this preheating step; putting cauliflower into a cold oven will result in a soggy, rather than crispy, roasted cauliflower experience.
- Prepare the Cauliflower: Now, let’s get our star ingredient ready. Start by thoroughly washing your head of cauliflower under cold running water. Pat it completely dry with a clean kitchen towel or paper towels. Moisture is the enemy of crispiness, so this drying step is more important than you might think! Next, carefully remove the outer leaves, which are typically tough and not ideal for roasting. Trim the bottom of the stem, but make sure to leave enough intact to hold the florets together as you cut.
- Cut into Bite-Sized Florets: Lay the cauliflower on a cutting board. Using a sharp chef’s knife, carefully cut the cauliflower into individual florets. Aim for pieces that are roughly 1 to 1.5 inches in size. Try to make them as uniform as possible; this ensures even cooking, so you don’t end up with some burnt pieces and some undercooked ones. If some florets are particularly large, you might need to slice them in half through the stem. Don’t discard any smaller, crumbly bits; they roast up wonderfully and add to the texture. My personal tip here is to make sure there’s at least one flat side on each floret, as this will maximize contact with the baking sheet and promote browning and crisping.
- Consider the Stem: While many recipes only call for the florets, don’t be afraid to utilize some of the tender inner stem. Peel off any tough outer layers, then cut the tender core into small, coin-shaped pieces, about ¼-inch thick. These can be roasted alongside the florets and offer a slightly different texture, adding to the overall deliciousness of your Crispy Roasted Cauliflower. It’s a great way to minimize food waste!
- Transfer to a Large Mixing Bowl: Once all your cauliflower is perfectly prepped and cut, transfer it to a large, sturdy mixing bowl. Make sure the bowl is spacious enough to allow you to toss the cauliflower effectively without making a mess, which will be important in the next step.
Crafting the Irresistible Flavorful Coating
- Drizzle with Olive Oil: Now comes the part where we start building those layers of flavor and ensuring maximum crispiness. Drizzle the 3 tablespoons of extra virgin olive oil over the cauliflower florets in the mixing bowl. Olive oil not only helps conduct heat for roasting but also acts as the perfect medium for our spices to adhere to every nook and cranny of the cauliflower. Do not skimp on this step, as insufficient oil can lead to dry, rather than Crispy Roasted Cauliflower.
- Add the Dry Spices and Seasonings: Into the bowl with the olive-oil-coated cauliflower, add your array of aromatic spices. This includes the 1 teaspoon of smoked paprika, ½ teaspoon of garlic powder, ¼ teaspoon of onion powder, ½ teaspoon of dried oregano, ¼ teaspoon of cayenne pepper (if using, remember to adjust to your heat preference), 1 teaspoon of sea salt, and ½ teaspoon of freshly ground black pepper. These spices are carefully chosen to create a robust and incredibly satisfying flavor profile that complements the natural sweetness of the roasted cauliflower.
- Introduce Nutritional Yeast (Optional but Recommended): If you’re opting for that wonderful umami and subtly cheesy flavor, now is the time to sprinkle in the 2 tablespoons of nutritional yeast. I cannot stress enough how much this elevates the flavor and texture of Crispy Roasted Cauliflower. It contributes to a fantastic golden-brown color and an extra layer of crunch that is simply addictive. Ensure you’re using nutritional yeast, not baking or active yeast.
- Toss Everything Together Thoroughly: This is a key step for even flavor distribution. Using your clean hands (my preferred method for full coverage!) or a large spoon/spatula, toss the cauliflower florets vigorously. You want every single floret to be completely coated in the oil and spice mixture. Take your time with this, reaching down to the bottom of the bowl and ensuring no piece is left unseasoned. A well-coated floret is a happy, flavorful, and Crispy Roasted Cauliflower floret!
Roasting for Unbeatable Crispiness
- Prepare the Baking Sheet: Line a large baking sheet with parchment paper. This serves a few important purposes: it prevents sticking, makes cleanup incredibly easy, and can slightly aid in crisping by preventing direct contact with the hot metal which can sometimes lead to steaming. If you don’t have parchment paper, a light coating of oil on the baking sheet will work, but I highly recommend parchment for best results and ease.
- Arrange Cauliflower in a Single Layer: Now, spread the seasoned cauliflower florets onto the prepared baking sheet. This is perhaps the most critical step for achieving truly Crispy Roasted Cauliflower. It is imperative that the cauliflower is spread in a single layer and, ideally, with a little space between each floret. Do not overcrowd the pan! If the florets are too close together, they will steam instead of roast, resulting in a soft, rather than crispy, texture. If you have too much cauliflower for one sheet, use two baking sheets. It’s better to roast in batches than to overcrowd.
- Initial Roast: Place the baking sheet with the cauliflower into your preheated 400°F (200°C) oven. Roast for 15 minutes without disturbing. This initial period allows the florets to start cooking through and developing some initial browning on the side touching the pan.
- Flip and Continue Roasting: After 15 minutes, carefully remove the baking sheet from the oven. Using a spatula or tongs, flip or stir the cauliflower florets to expose different sides to the heat. This ensures even browning and crisping on all surfaces. Return the baking sheet to the oven and continue roasting for another 15-20 minutes, or until the cauliflower is tender when pierced with a fork, deeply golden brown, and delightfully crispy around the edges. The exact roasting time may vary slightly depending on your oven and the size of your florets, so keep an eye on them towards the end. You’re looking for those gorgeous, slightly charred, crispy bits – that’s when you know your Crispy Roasted Cauliflower is ready!
- Check for Tenderness and Crispiness: To be sure, take one of the larger florets and taste it. It should be tender on the inside with a satisfying crunch on the outside. If it’s not quite tender enough, or if you desire even more crispiness, you can return it to the oven for an additional 5-10 minutes, checking frequently to prevent burning. Don’t be afraid of a little char; it adds a fantastic depth of flavor.
Optional Enhancements and Serving Your Crispy Roasted Cauliflower
- The Final Flourish (Optional but Recommended): Once your Crispy Roasted Cauliflower is perfectly cooked and out of the oven, you have a few options for enhancing it even further. A quick squeeze of fresh lemon juice over the hot cauliflower right before serving brightens all the flavors beautifully. The acidity cuts through the richness and adds a fresh zing.
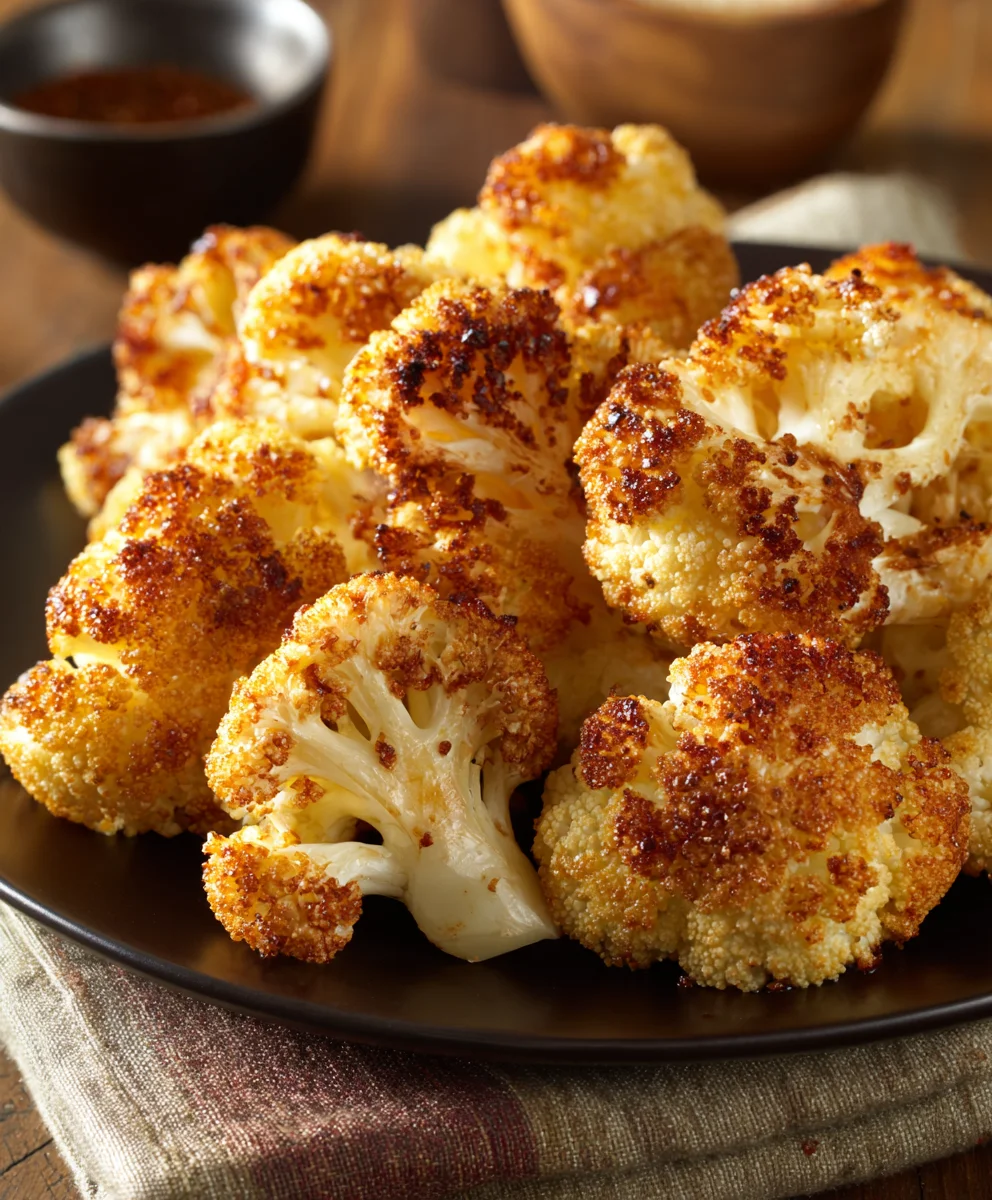
- Garnish and Serve: Transfer the Crispy Roasted Cauliflower to a serving platter. If desired, sprinkle with freshly chopped parsley or cilantro for a burst of color and herbaceous freshness. A few extra red pepper flakes can be added for those who enjoy more heat.
- Serve Immediately: This dish is best served immediately, straight from the oven, when it’s at its peak crispiness and warmth. As it cools, the texture can soften slightly.
- Pairing Suggestions: This versatile Crispy Roasted Cauliflower makes an excellent side dish for almost any meal – grilled chicken, roasted fish, or even alongside a hearty grain bowl. It also stands beautifully on its own as a healthy, flavorful snack or appetizer. For an extra treat, consider serving it with a side of your favorite dipping sauce, such as a creamy tahini dressing, a spicy sriracha mayo, or even a simple Greek yogurt dip infused with herbs. The combination of the warm, crispy cauliflower with a cool, creamy dip is truly a delight for the taste buds.
- Leftovers (if any!): While best fresh, any leftover Crispy Roasted Cauliflower can be stored in an airtight container in the refrigerator for up to 3 days. To reheat and attempt to restore some crispiness, spread it on a baking sheet and warm in a 350°F (175°C) oven for about 10-15 minutes, or in an air fryer for 5-7 minutes, until heated through and re-crisped. Microwaving is not recommended as it will make it soft.
There you have it – a truly delectable and effortlessly made Crispy Roasted Cauliflower. It’s a simple dish that consistently delivers on flavor and texture, proving that humble vegetables can be the star of any meal. Enjoy every crunchy bite!
Conclusion:
Well, my friends, we’ve reached the end of our culinary journey for today, and I truly hope you’re feeling as inspired as I am about the incredible potential of a simple head of cauliflower. If there’s one dish I could urge you to try this week, it’s certainly this one. This isn’t just another vegetable side; it’s a revelation, a testament to how humble ingredients, when treated with a little love and the right technique, can transform into something truly extraordinary. What makes this recipe an absolute must-try? It’s the perfect symphony of flavors and textures. Imagine those tender florets, slightly caramelized on the edges, bursting with a savory depth you might not expect, all encased in that glorious, satisfying crunch. It’s the kind of dish that makes even the most ardent vegetable skeptics ask for seconds, perhaps even thirds!
The magic truly happens in the oven, where the intense heat coaxes out the natural sugars, creating a nutty, sweet undertone that perfectly complements the savory spices we’ve discussed. We’re not just cooking cauliflower here; we’re creating an experience. And let’s be honest, who doesn’t love a dish that delivers maximum flavor with minimal fuss? This recipe is incredibly forgiving, making it perfect for novice cooks and seasoned chefs alike. You’ll be amazed at how effortlessly you can achieve that golden-brown perfection, that irresistible crispness that makes every bite an absolute delight. It’s quick enough for a weeknight, yet elegant enough to grace any dinner party table. Plus, it’s packed with nutrients, making it a healthy and delicious addition to any meal plan. It’s a versatile hero, capable of standing alone as a star or complementing a wide array of main courses.
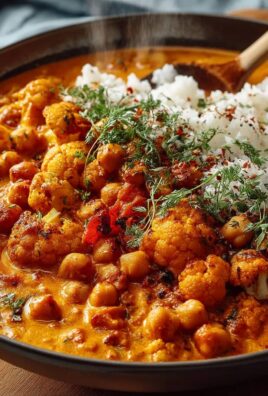
Now, let’s talk about making this dish truly your own. While the core recipe for Crispy Roasted Cauliflower is outstanding on its own, its versatility is one of its greatest strengths. For serving suggestions, think beyond the traditional side dish. Imagine these beautiful florets tossed into a vibrant grain bowl with quinoa, black beans, and a zesty lime dressing – it adds incredible texture and a punch of flavor. They make an excellent topping for a green salad, replacing croutons with a healthier, more flavorful crunch. Pile them high on a warm pita with hummus and a sprinkle of fresh parsley for a delightful vegetarian sandwich. Or, if you’re feeling adventurous, blend some of the roasted cauliflower with a bit of broth and tahini for a creamy, smoky soup. It also pairs wonderfully with grilled chicken, baked salmon, or a hearty lentil stew. The possibilities are genuinely endless once you have a batch of this golden goodness ready to go.
And don’t even get me started on variations! This is where you can really let your culinary creativity shine. Want a little heat? Add a pinch of cayenne pepper or red pepper flakes to your spice mix. Craving an Asian twist? Try a marinade of soy sauce, ginger, garlic, and a touch of sesame oil before roasting. For a Mediterranean vibe, toss with oregano, lemon zest, and a sprinkle of crumbled feta after it comes out of the oven. A sprinkle of Parmesan cheese in the last 10 minutes of roasting creates a delightfully cheesy crust that’s utterly addictive. You could even add other vegetables to the pan – broccoli, bell peppers, or even cherry tomatoes – just ensure they’re cut to a similar size for even cooking. Experiment with different herbs like rosemary, thyme, or dill. The beauty of this recipe is that it’s a canvas for your favorite flavors. Feel free to adjust the spices to suit your palate, adding more garlic powder, onion powder, or even a touch of smoked paprika for extra depth. Don’t be afraid to experiment with different oils too; a robust olive oil provides a fantastic foundation, but avocado oil or even a little melted coconut oil can offer subtle flavor differences.
So, please, take this recipe, make it your own, and discover the sheer joy of creating something so simple yet so profoundly delicious. I truly encourage you to head into your kitchen this week, grab a head of cauliflower, and embark on this incredibly rewarding cooking adventure. Once you’ve experienced that satisfying crispness and rich flavor, I have a feeling this will become a regular in your meal rotation. And once you do, I would absolutely love to hear about your experience! Did you stick to the classic seasoning, or did you venture into new flavor territories? What were your favorite serving suggestions? Please share your triumphs, your variations, and any tips you discovered along the way in the comments below. Your insights not only help me but also inspire fellow home cooks to explore new culinary horizons. Happy cooking, and may your cauliflower always be perfectly crispy!
Frequently Asked Questions (FAQs)
How do I ensure my roasted cauliflower gets extra crispy?
Achieving that perfect crispiness is key to the best Crispy Roasted Cauliflower! The most crucial steps are: don’t overcrowd your baking sheet (give those florets space to breathe and roast, not steam), ensure your oven is preheated to a high temperature (around 400-425°F or 200-220°C), and avoid adding too much oil – just enough to coat lightly. Also, make sure the cauliflower is completely dry before tossing with oil and spices. A little trick is to roast it for the last 5-10 minutes under the broiler, keeping a very close eye on it, for an extra golden-brown finish.
Can I use frozen cauliflower for this recipe?
While fresh cauliflower will generally yield superior crispiness, you can absolutely use frozen cauliflower in a pinch! The key difference is the moisture content. Frozen cauliflower will release a lot of water as it thaws and cooks. To mitigate this, I recommend thawing the cauliflower first and then patting it extremely dry with paper towels before tossing it with oil and spices. You might also need to increase the roasting time slightly, or start at a slightly lower temperature to allow the moisture to evaporate, then crank it up for crisping.
What are some popular spice combinations for roasted cauliflower?
The beauty of roasted cauliflower lies in its versatility! Beyond the classic salt, pepper, and garlic powder, here are some fantastic combinations:
- Smoky & Spicy: Smoked paprika, cumin, cayenne pepper.
- Italian Herb: Dried oregano, basil, thyme, a touch of red pepper flakes.
- Curry Inspired: Curry powder, turmeric, a pinch of garam masala.
- Lemon-Garlic Herb: Garlic powder, dried dill or parsley, and fresh lemon zest added after roasting.
- Sweet & Savory: A touch of maple syrup or honey drizzled on at the end, along with chili powder.
Don’t be afraid to experiment with what you have in your pantry!
How long does roasted cauliflower last, and can it be reheated?
Roasted cauliflower is best enjoyed fresh out of the oven for maximum crispness. However, leftovers can be stored in an airtight container in the refrigerator for 3-4 days. To reheat, I highly recommend spreading it out on a baking sheet and warming it in a preheated oven (around 350°F or 175°C) or in an air fryer for 5-10 minutes. This helps to revive some of that coveted crisp texture. Reheating in a microwave is possible but will likely result in softer cauliflower.
Is roasted cauliflower healthy?
Absolutely! Roasted cauliflower is incredibly healthy. Cauliflower is a cruciferous vegetable packed with vitamins (especially C and K), minerals, and fiber. It’s also low in calories and carbohydrates, making it a fantastic choice for various dietary needs, including keto and low-carb. Roasting it with a moderate amount of healthy oil (like olive oil) and natural spices preserves its nutritional value while enhancing its flavor, making it a delicious and nutritious addition to any diet.
Crispy Roasted Cauliflower
Transform a humble head of cauliflower into a show-stopping side dish with an irresistible texture and rich, nutty flavor. High-heat roasting caramelizes natural sugars, creating golden-brown perfection with tender insides and crispy edges, elevated by a savory seasoning blend.
Ingredients
-
1 large head cauliflower (approx. 2-2.5 pounds)
-
6 tablespoons extra virgin olive oil
-
½ teaspoon Old Bay seasoning
-
¼ teaspoon chili pepper
-
½ teaspoon freshly ground black pepper, or to taste
-
Optional: Fresh parsley or cilantro, chopped
-
Optional: Lemon wedges, for serving
-
Optional: Red pepper flakes
-
Optional: Your favorite dipping sauce
Instructions
-
Step 1
Preheat oven to 400°F (200°C). Line a large baking sheet with parchment paper. Wash and thoroughly dry the cauliflower. Remove outer leaves, trim the bottom of the stem, and cut into uniform 1 to 1.5-inch florets. -
Step 2
Transfer the florets to a large mixing bowl. Drizzle with 6 tablespoons extra virgin olive oil. Add ½ teaspoon Old Bay seasoning, ¼ teaspoon chili pepper, and ½ teaspoon freshly ground black pepper. Toss vigorously until all florets are completely and evenly coated. -
Step 3
Spread the seasoned cauliflower in a single layer on the prepared baking sheet, ensuring there is a little space between each floret. Do not overcrowd the pan; use two baking sheets if necessary. Place in the preheated oven and roast for 15 minutes without disturbing. -
Step 4
After 15 minutes, carefully remove the baking sheet from the oven. Using a spatula or tongs, flip or stir the cauliflower florets to expose different sides to the heat. Return to the oven and continue roasting for another 15-20 minutes, or until the cauliflower is tender when pierced with a fork, deeply golden brown, and delightfully crispy around the edges. -
Step 5
Transfer the Crispy Roasted Cauliflower to a serving platter. Serve immediately, as it is best when hot and crispy. Optionally, garnish with freshly chopped parsley or cilantro, a squeeze of fresh lemon juice, or a sprinkle of red pepper flakes. Pair with your favorite dipping sauce for an extra treat.
Important Information
Nutrition Facts (Per Serving)
It is important to consider this information as approximate and not to use it as definitive health advice.
Allergy Information
Please check ingredients for potential allergens and consult a health professional if in doubt.


Leave a Comment