
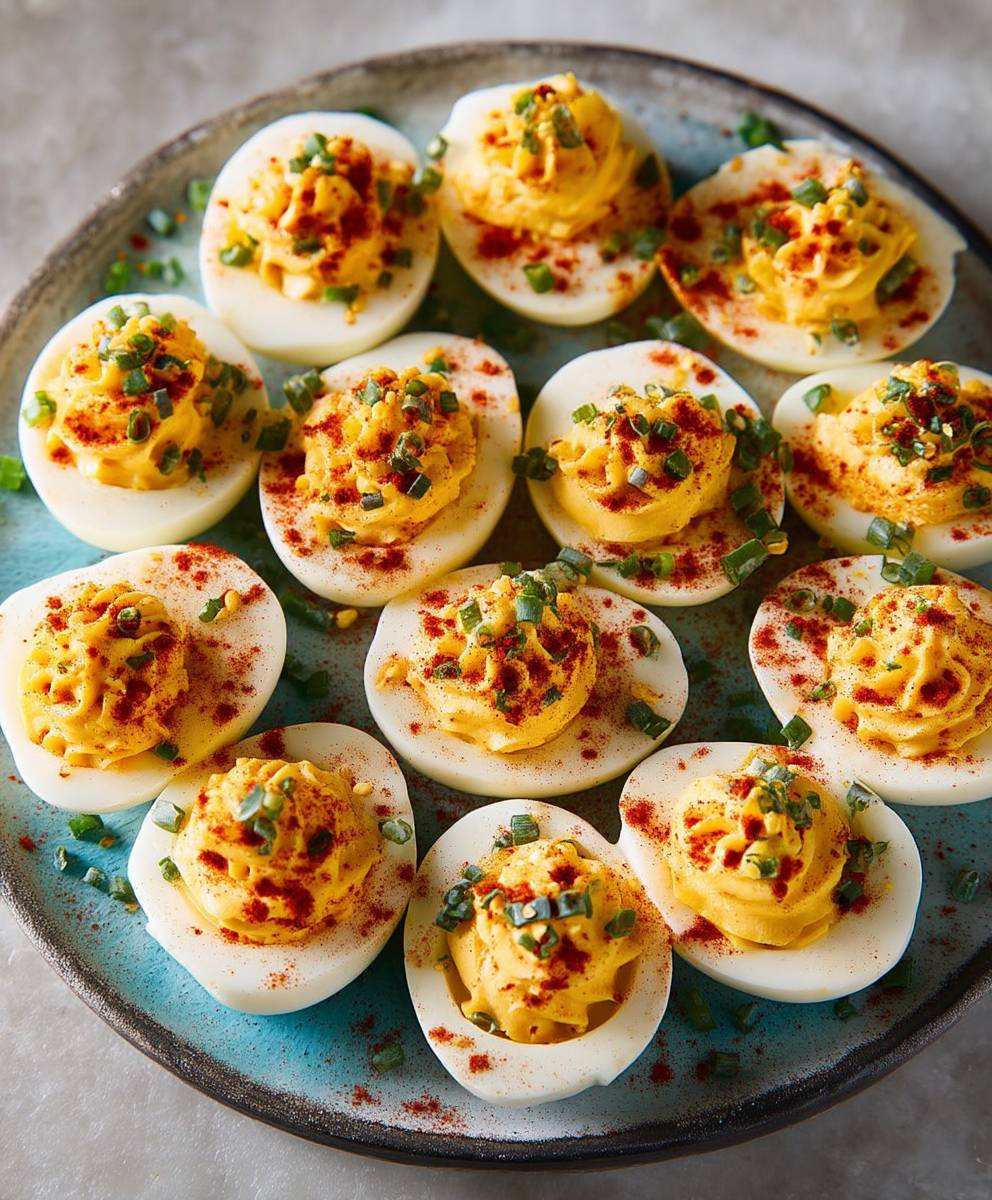
Classic Deviled Eggs: Is there anything more iconic at a potluck, Easter brunch, or summer barbecue? These creamy, tangy bites are always the first to disappear, and for good reason! I’m about to share my foolproof recipe for perfectly Classic Deviled Eggs that will have everyone begging for more.
The history of deviled eggs stretches back centuries, with variations appearing in ancient Rome. The term “deviled” in cooking refers to dishes that are spicy or highly seasoned, though thankfully, these eggs are more tangy than fiery! They gained immense popularity in the United States in the late 19th century and have remained a beloved staple ever since.
So, what makes deviled eggs so irresistible? It’s the delightful combination of textures and flavors. The smooth, rich yolk filling, perfectly balanced with the slight tang of mustard and vinegar, creates a symphony in your mouth. Plus, they’re incredibly easy to make ahead of time, making them the perfect party appetizer. Whether you’re a seasoned cook or a kitchen novice, this recipe is guaranteed to be a success. Get ready to impress your friends and family with the ultimate Classic Deviled Eggs!

Ingredients:
- 12 large eggs
- 1/2 cup mayonnaise
- 2 tablespoons yellow mustard
- 1 tablespoon white vinegar
- 1/2 teaspoon salt
- 1/4 teaspoon black pepper
- 1/4 teaspoon paprika, plus more for garnish
- Optional: 1 tablespoon sweet pickle relish, finely chopped
- Optional: 1/4 teaspoon garlic powder
- Optional: Hot sauce, to taste
Hard Boiling the Eggs:
Okay, let’s start with the most crucial part perfectly hard-boiling those eggs! Nobody wants a grey ring around their yolk, right? Here’s my foolproof method:
- Place the eggs in a saucepan: Gently place the eggs in a single layer in a large saucepan. Make sure they’re not overcrowded; you want them to cook evenly.
- Cover with cold water: Add enough cold water to cover the eggs by about an inch. This is important because starting with cold water helps the eggs heat up gradually, preventing them from cracking.
- Bring to a boil: Place the saucepan over high heat and bring the water to a rolling boil. Watch carefully!
- Remove from heat and cover: Once the water reaches a rolling boil, immediately remove the saucepan from the heat. Cover the pot tightly with a lid.
- Let stand for 12-14 minutes: Let the eggs stand in the hot water, covered, for 12-14 minutes. The exact time will depend on how well-done you like your yolks. I prefer 12 minutes for a slightly softer, creamy yolk and 14 minutes for a fully firm yolk.
- Prepare an ice bath: While the eggs are cooking, prepare an ice bath in a large bowl. This will stop the cooking process and make the eggs easier to peel. Fill a bowl with ice and cold water.
- Transfer to ice bath: After the standing time, carefully transfer the eggs to the ice bath using a slotted spoon. Let them cool completely for at least 10 minutes. This will also help the shells separate from the egg whites.
Peeling the Eggs:
Peeling hard-boiled eggs can be a frustrating experience, but with a few tricks, it can be a breeze! Here’s what I do:
- Crack the shells: Gently tap each egg all over on a hard surface (like your countertop or sink) to create cracks all over the shell.
- Peel under cold running water: Start peeling the egg under cold running water. The water helps to get under the shell and separate it from the egg white.
- Start at the larger end: I find it easiest to start peeling at the larger end of the egg, where there’s usually an air pocket.
- Gently peel away the shell: Use your fingers to gently peel away the shell, working your way around the egg. If the shell is sticking, try running more water over it.
- Rinse and dry: Once the egg is peeled, rinse it under cold water to remove any remaining shell fragments. Pat it dry with a paper towel.
Preparing the Deviled Egg Filling:
Now for the fun part making the delicious deviled egg filling! This is where you can really customize the flavor to your liking.
- Cut the eggs in half: Carefully cut each peeled egg in half lengthwise. I like to use a sharp knife for a clean cut.
- Remove the yolks: Gently remove the yolks from the egg whites and place them in a medium-sized bowl. Try to keep the egg whites intact; they’re the “deviled egg cups.”
- Mash the yolks: Use a fork to mash the yolks until they are smooth and crumbly. You can also use a potato masher for this step.
- Add mayonnaise: Add the mayonnaise to the mashed yolks. Start with the recommended amount and add more if needed to achieve your desired consistency. I like my deviled egg filling to be creamy but not too runny.
- Add mustard: Add the yellow mustard to the bowl. The mustard adds a tangy flavor that complements the richness of the yolks and mayonnaise.
- Add vinegar: Add the white vinegar. The vinegar adds a bit of acidity that balances the flavors and brightens the filling.
- Season with salt and pepper: Season the filling with salt and pepper to taste. Be careful not to over-salt.
- Add optional ingredients (if using): If you’re using any of the optional ingredients, such as sweet pickle relish, garlic powder, or hot sauce, add them to the bowl now.
- Mix well: Use a fork or spoon to mix all the ingredients together until they are well combined and the filling is smooth and creamy.
- Taste and adjust seasoning: Taste the filling and adjust the seasoning as needed. You may want to add more salt, pepper, mustard, or vinegar to suit your taste.
Filling the Egg Whites:
Almost there! Now it’s time to fill those egg whites with the creamy, flavorful filling.
- Spoon the filling into the egg whites: Use a spoon to carefully fill each egg white half with the deviled egg filling. You can mound the filling slightly for a more attractive presentation.
- Use a piping bag (optional): For a more professional look, you can transfer the filling to a piping bag fitted with a decorative tip. Pipe the filling into the egg whites in a swirl or other design.
Garnishing and Serving:
The final touch! A little garnish can elevate your deviled eggs from simple to stunning.
- Sprinkle with paprika: Sprinkle the deviled eggs with a generous pinch of paprika. The paprika adds a pop of color and a subtle smoky flavor.
- Add other garnishes (optional): You can also add other garnishes, such as chopped fresh herbs (like parsley, chives, or dill), a sprinkle of everything bagel seasoning, a drizzle of hot sauce, or a small piece of crispy bacon.
- Chill before serving: For the best flavor and texture, chill the deviled eggs in the refrigerator for at least 30 minutes before serving. This allows the flavors to meld together and the filling to firm up slightly.
- Serve and enjoy!: Arrange the deviled eggs on a serving platter and serve chilled. Enjoy!
Tips and Variations:
Here are a few extra tips and variations to make your deviled eggs even better:
- For smoother yolks: Press the cooked yolks through a fine-mesh sieve before mixing them with the other ingredients. This will remove any lumps and create an ultra-smooth filling.
- Add avocado: For a creamy and healthy twist, add a mashed avocado to the filling.
- Spice it up: Add a pinch of cayenne pepper or a dash of hot sauce to the filling for a spicy kick.
- Use different mustards: Experiment with different types of mustard, such as Dijon mustard, stone-ground mustard, or spicy brown mustard.
- Add bacon: Crispy crumbled bacon is a delicious addition to deviled eggs. You can mix it into the filling or sprinkle it on top as a garnish.
- Make them ahead of time: Deviled eggs can be made up to 24 hours in advance. Store them in an airtight container in the refrigerator.
- Don’t overcrowd the pot: When boiling the eggs, make sure they are in a single layer in the saucepan. Overcrowding can lead to uneven cooking and cracked eggs.
- Use older eggs: Older eggs tend to peel easier than fresh eggs. If you’re planning to make deviled eggs, use eggs that are a week or two old.
Storage Instructions:
Deviled eggs are best served fresh, but they can be stored in the refrigerator for up to 2 days. To store them, place them in an airtight container and keep them in the coldest part of your refrigerator. Be aware that the egg whites may become slightly rubbery after being stored.
Serving Suggestions:
Deviled eggs are a versatile appetizer that can be served at a variety of occasions. They’re perfect for parties, potlucks, picnics, and holiday gatherings. They can also be served as a side dish with salads, sandwiches, or grilled meats.
Nutritional Information (approximate, per egg):
- Calories: 70-80
- Fat: 6-7g
- Saturated Fat: 2g
- Cholesterol: 180-200mg
- Sodium: 70-80mg
- Protein:
Conclusion:
Okay, friends, let’s be honest: you’ve probably had deviled eggs before. But I’m telling you, this classic deviled eggs recipe is different. It’s the perfect balance of creamy, tangy, and just a hint of spice, making it a guaranteed crowd-pleaser. The secret? It’s all in the proportions and the quality of the ingredients. We’re not skimping on the mayonnaise, and we’re definitely using a good Dijon mustard to give it that extra zing.
But more than just a delicious appetizer, these deviled eggs are a blank canvas for your culinary creativity!
Serving Suggestions and Variations:
Think beyond the standard picnic table! These deviled eggs are elegant enough to serve at a brunch, a cocktail party, or even as a sophisticated side dish with grilled salmon.
* **Spice it up!** Add a pinch of cayenne pepper or a dash of hot sauce to the yolk mixture for an extra kick. Smoked paprika is also a fantastic addition, lending a smoky depth of flavor.
* **Go gourmet!** Top each deviled egg with a small piece of crispy bacon, a sprinkle of fresh chives, or a dollop of caviar for a truly luxurious treat.
* **Mediterranean twist!** Mix in some finely chopped sun-dried tomatoes, Kalamata olives, and a little feta cheese for a Mediterranean-inspired version.
* **Avocado Deviled Eggs:** For a healthier twist, substitute half of the mayonnaise with mashed avocado. It adds a creamy texture and a boost of nutrients.
* **Deviled Egg Salad Sandwiches:** Mash the deviled egg mixture with a fork and spread it on toasted bread for a quick and easy lunch.
* **Presentation is Key:** Use a piping bag to fill the egg whites with the yolk mixture for a more polished look. Garnish with a sprig of parsley or dill.I’ve made these classic deviled eggs countless times, and they’re always a hit. They’re so easy to make, and they’re always the first thing to disappear at any gathering. Plus, they’re a great make-ahead appetizer, which is always a bonus when you’re entertaining. You can prepare the eggs and the yolk mixture a day in advance and then assemble them just before serving. This will save you time and stress on the day of your event.
Don’t be intimidated by the simplicity of this recipe. Sometimes, the most classic dishes are the most satisfying. And trust me, once you try this recipe, you’ll never go back to your old way of making deviled eggs.
So, what are you waiting for? Gather your ingredients, put on some music, and get ready to whip up a batch of these amazing deviled eggs. I promise you won’t regret it.
And most importantly, I want to hear from you! Did you try this recipe? What variations did you make? What did your friends and family think? Share your experience in the comments below. I can’t wait to see your creations and hear your feedback. Happy cooking! Let me know how your classic deviled eggs turn out!
Classic Deviled Eggs: The Ultimate Recipe & Guide
Classic deviled eggs with a creamy yolk filling and paprika. Perfect appetizer!
Ingredients
- 12 large eggs
- 1/2 cup mayonnaise
- 2 tablespoons yellow mustard
- 1 tablespoon white vinegar
- 1/2 teaspoon salt
- 1/4 teaspoon black pepper
- 1/4 teaspoon paprika, plus more for garnish
- Optional: 1 tablespoon sweet pickle relish, finely chopped
- Optional: 1/4 teaspoon garlic powder
- Optional: Hot sauce, to taste
Instructions
- Hard Boil the Eggs: Place eggs in a single layer in a large saucepan. Cover with cold water (about an inch above the eggs). Bring to a rolling boil over high heat. Remove from heat, cover tightly, and let stand for 12-14 minutes (12 for softer yolks, 14 for firmer).
- Prepare Ice Bath: While eggs cook, prepare an ice bath (ice and cold water) in a large bowl.
- Cool Eggs: Transfer cooked eggs to the ice bath using a slotted spoon. Cool completely for at least 10 minutes.
- Peel the Eggs: Gently tap each egg all over to crack the shell. Peel under cold running water, starting at the larger end. Rinse and pat dry.
- Prepare Filling: Cut each egg in half lengthwise. Remove yolks and place in a medium bowl. Mash yolks with a fork or potato masher until smooth.
- Add Ingredients: Add mayonnaise, yellow mustard, white vinegar, salt, pepper, and any optional ingredients (relish, garlic powder, hot sauce) to the mashed yolks.
- Mix and Season: Mix all ingredients until well combined and creamy. Taste and adjust seasoning as needed.
- Fill Egg Whites: Spoon or pipe the filling into the egg white halves.
- Garnish: Sprinkle with paprika. Add other garnishes if desired (fresh herbs, everything bagel seasoning, hot sauce, bacon).
- Chill: Chill in the refrigerator for at least 30 minutes before serving.
- Serve: Arrange on a serving platter and enjoy!
Notes
- For smoother yolks, press cooked yolks through a fine-mesh sieve.
- Add mashed avocado for a creamy twist.
- Spice it up with cayenne pepper or hot sauce.
- Experiment with different mustards (Dijon, stone-ground, spicy brown).
- Crispy crumbled bacon is a delicious addition.
- Deviled eggs can be made up to 24 hours in advance. Store in an airtight container in the refrigerator.
- Use older eggs for easier peeling.
- Don’t overcrowd the pot when boiling eggs.


Leave a Comment