
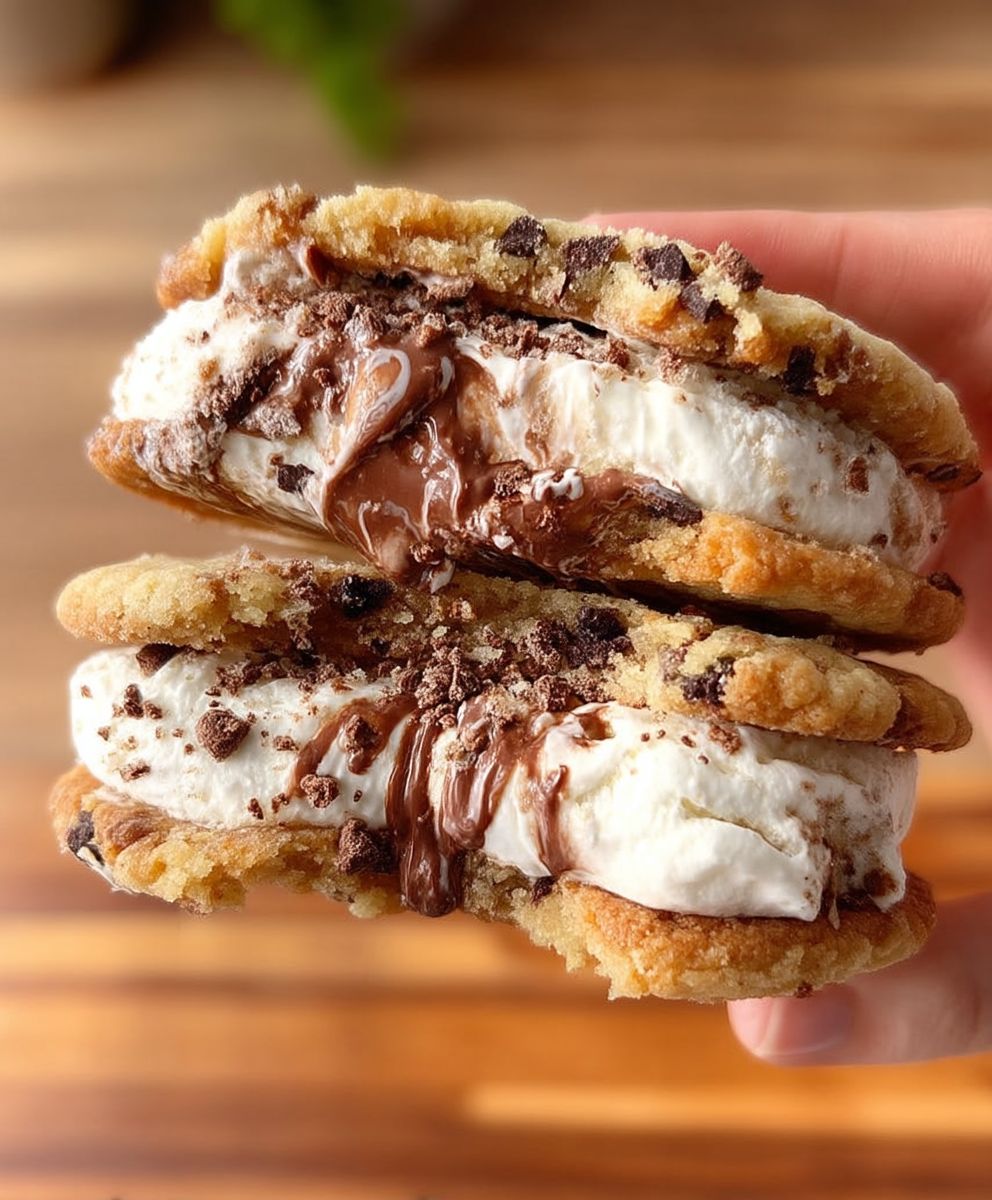
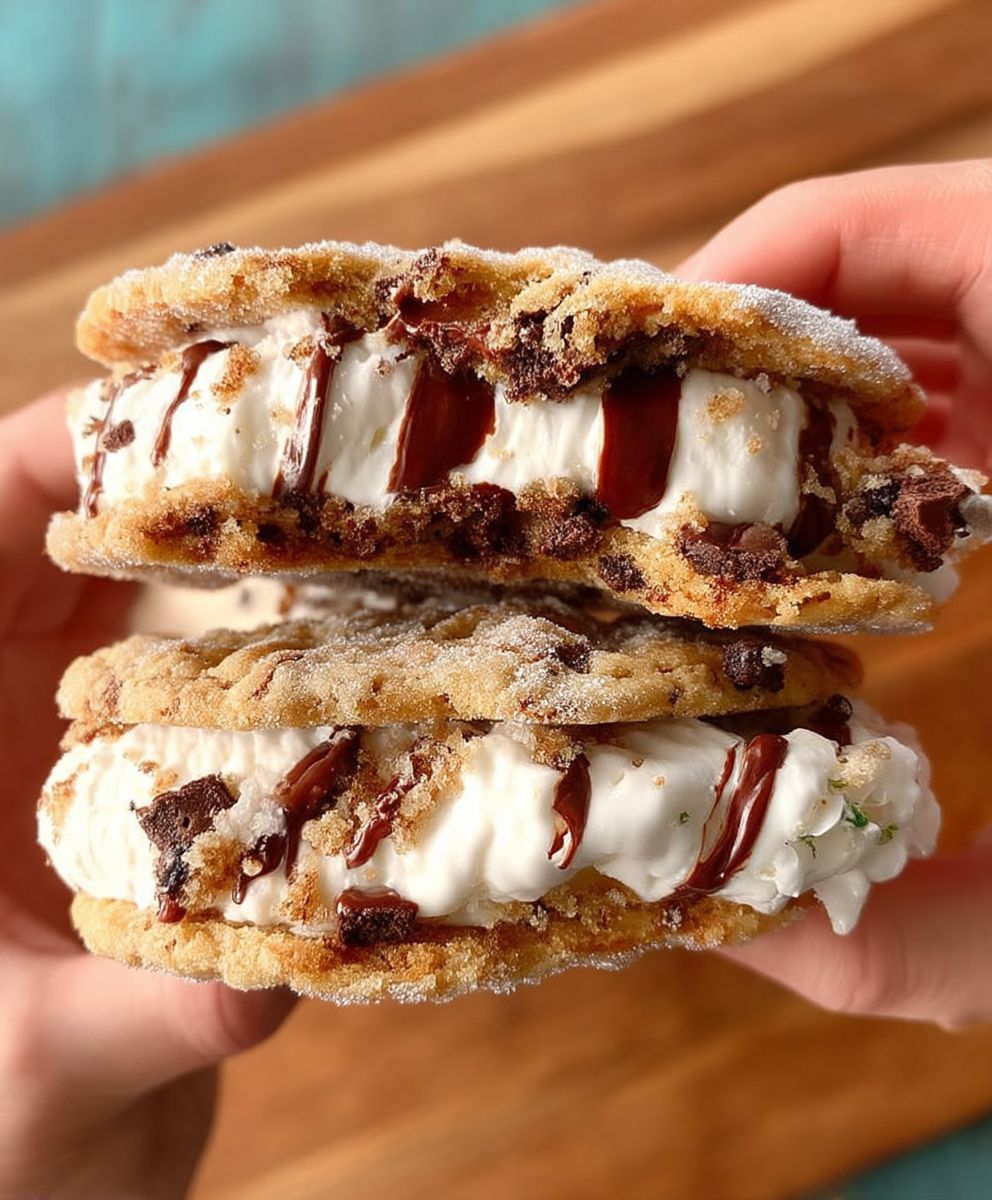
Cookies Sandwiches: Prepare to embark on a nostalgic journey back to childhood, but with a sophisticated twist! Remember those blissful moments of biting into a creamy, sweet, and utterly satisfying cookie sandwich? We’re elevating that classic treat to new heights with a recipe that’s both incredibly easy and undeniably delicious.
While the exact origins of the cookie sandwich are shrouded in a delightful mystery, the concept of sandwiching a sweet filling between two cookies has likely existed in various forms across cultures for centuries. From simple butter cookies with jam to elaborate creations with buttercream frosting, the cookie sandwich represents pure, unadulterated joy. It’s a testament to the simple pleasure of combining textures and flavors in perfect harmony.
What makes Cookies Sandwiches so universally loved? It’s the delightful combination of textures the crisp or chewy cookies contrasting beautifully with the smooth, creamy filling. It’s the perfect balance of sweet and satisfying, making it an ideal treat for any occasion. Plus, they’re incredibly versatile! You can customize the cookies, the filling, and even add toppings to create your own signature version. Whether you’re looking for a quick and easy dessert for a weeknight treat or a show-stopping centerpiece for a party, these cookie sandwiches are guaranteed to be a crowd-pleaser. So, let’s get baking and create some sweet memories!
Ingredients:
- For the Chocolate Cookies:
- 1 cup (2 sticks) unsalted butter, softened
- 1 cup granulated sugar
- 1 cup packed light brown sugar
- 2 large eggs
- 1 teaspoon vanilla extract
- 2 cups all-purpose flour
- ¾ cup unsweetened cocoa powder
- 1 teaspoon baking soda
- ½ teaspoon salt
- 1 cup semi-sweet chocolate chips
- For the Vanilla Buttercream Filling:
- 1 cup (2 sticks) unsalted butter, softened
- 3 cups powdered sugar
- 2 tablespoons milk
- 1 teaspoon vanilla extract
- Pinch of salt
Making the Chocolate Cookies
Alright, let’s get started with the cookies! These are the foundation of our delicious cookie sandwiches, so we want to make sure they’re perfect. Don’t worry, it’s easier than it sounds!
- Cream the Butter and Sugars: In a large bowl (or the bowl of your stand mixer), cream together the softened butter, granulated sugar, and brown sugar until light and fluffy. This usually takes about 3-5 minutes. You want the mixture to be pale and airy, which will help create a tender cookie. Make sure to scrape down the sides of the bowl occasionally to ensure everything is evenly mixed.
- Add the Eggs and Vanilla: Beat in the eggs one at a time, making sure each egg is fully incorporated before adding the next. Then, stir in the vanilla extract. The vanilla adds a lovely warmth to the chocolate flavor.
- Combine Dry Ingredients: In a separate medium bowl, whisk together the flour, cocoa powder, baking soda, and salt. Whisking ensures that the baking soda and salt are evenly distributed throughout the flour, which is crucial for proper leavening and flavor.
- Gradually Add Dry Ingredients to Wet Ingredients: Gradually add the dry ingredients to the wet ingredients, mixing on low speed until just combined. Be careful not to overmix! Overmixing can develop the gluten in the flour, resulting in tough cookies.
- Stir in Chocolate Chips: Gently fold in the chocolate chips. I like to use semi-sweet chocolate chips, but you can use milk chocolate or dark chocolate chips depending on your preference.
- Chill the Dough: Cover the dough with plastic wrap and chill in the refrigerator for at least 30 minutes. This step is important because it allows the butter to firm up, which will prevent the cookies from spreading too much during baking. Chilling also helps to develop the flavors. You can chill the dough for up to 24 hours if you want to make it ahead of time.
Baking the Cookies
Now for the fun part baking! This is where the magic happens, and your kitchen will start to smell amazing.
- Preheat Oven and Prepare Baking Sheets: Preheat your oven to 350°F (175°C). Line baking sheets with parchment paper or silicone baking mats. Parchment paper prevents the cookies from sticking and makes cleanup a breeze.
- Scoop and Shape the Dough: Use a cookie scoop or spoon to drop rounded tablespoons of dough onto the prepared baking sheets, leaving about 2 inches between each cookie. You can also roll the dough into balls for a more uniform look.
- Bake the Cookies: Bake for 9-11 minutes, or until the edges are set and the centers are still slightly soft. The cookies will continue to bake on the baking sheet after you remove them from the oven, so don’t overbake them.
- Cool the Cookies: Let the cookies cool on the baking sheets for a few minutes before transferring them to a wire rack to cool completely. This prevents them from breaking apart while they’re still warm and soft.
Making the Vanilla Buttercream Filling
While the cookies are cooling, let’s whip up the vanilla buttercream filling. This is what brings the cookie sandwiches together and adds that creamy, sweet goodness.
- Cream the Butter: In a large bowl (or the bowl of your stand mixer), cream the softened butter until light and fluffy. This usually takes about 3-5 minutes. Again, make sure to scrape down the sides of the bowl occasionally.
- Gradually Add Powdered Sugar: Gradually add the powdered sugar, one cup at a time, beating on low speed until combined. Be sure to scrape down the sides of the bowl after each addition. Adding the powdered sugar gradually prevents it from flying everywhere.
- Add Milk and Vanilla: Add the milk and vanilla extract and beat until smooth and creamy. If the frosting is too thick, add a little more milk, one teaspoon at a time, until you reach the desired consistency. If it’s too thin, add a little more powdered sugar.
- Add a Pinch of Salt: Add a pinch of salt to balance the sweetness.
Assembling the Cookie Sandwiches
Finally, the moment we’ve all been waiting for assembling the cookie sandwiches! This is where you get to be creative and make them look as good as they taste.
- Pair the Cookies: Find cookies that are similar in size and shape to create even sandwiches.
- Spread the Buttercream: Spread a generous amount of vanilla buttercream filling on the flat side of one cookie.
- Top with Another Cookie: Top with the flat side of another cookie, gently pressing down to create a sandwich.
- Optional: Decorate the Edges: If you want to get fancy, you can roll the edges of the cookie sandwiches in sprinkles, mini chocolate chips, or chopped nuts.
- Chill (Optional): For best results, chill the cookie sandwiches in the refrigerator for at least 30 minutes before serving. This will help the buttercream filling to firm up and prevent it from squeezing out when you bite into them.
Tips and Variations:
Cookie Variations:
- Peanut Butter Cookies: Substitute ½ cup of the butter with ½ cup of peanut butter for a peanut butter cookie base.
- Oatmeal Raisin Cookies: Replace ½ cup of flour with ½ cup of rolled oats and add ½ cup of raisins.
- Sugar Cookies: Omit the cocoa powder and chocolate chips for a classic sugar cookie. You can then decorate them with colored sprinkles or icing.
Filling Variations:
- Chocolate Buttercream: Add ¼ cup of cocoa powder to the vanilla buttercream recipe for a chocolate buttercream filling.
- Peanut Butter Buttercream: Add ¼ cup of peanut butter to the vanilla buttercream recipe for a peanut butter buttercream filling.
- Cream Cheese Frosting: Substitute ½ cup of the butter with ½ cup of cream cheese for a tangy cream cheese frosting.
- Lemon Buttercream: Add the zest and juice of one lemon to the vanilla buttercream for a bright and citrusy filling.
Storage Instructions:
- Store the cookie sandwiches in an airtight container in the refrigerator for up to 5 days.
- You can also freeze the cookie sandwiches for up to 2 months. Thaw them in the refrigerator before serving.
Troubleshooting:
- Cookies are too flat: Make sure your butter is not too soft. Chill the dough for a longer period of time.
- Cookies are too dry: Don’t overbake the cookies.
- Buttercream is too thick: Add a little more milk, one teaspoon at a time, until you reach the desired consistency.
- Buttercream is too thin: Add a little more powdered sugar, one tablespoon at a time, until you reach the desired consistency.
Conclusion:
So there you have it! These aren’t just any cookies; they’re an experience. These Cookie Sandwiches are a must-try because they elevate the simple cookie to a whole new level of deliciousness. The combination of textures and flavors, from the soft, chewy cookies to the creamy, dreamy filling, is simply irresistible. Trust me, once you take a bite, you’ll understand why I’m so enthusiastic about them. They’re perfect for satisfying your sweet tooth, impressing your friends and family, or simply treating yourself to something special.
But the best part? The possibilities are endless! While I’ve shared my favorite recipe, feel free to get creative and experiment with different cookie flavors and fillings. Imagine chocolate chip cookies with peanut butter frosting, or oatmeal raisin cookies with a maple cream cheese filling. The only limit is your imagination!
For serving suggestions, these Cookie Sandwiches are fantastic on their own, of course. But if you want to take things up a notch, try serving them with a scoop of your favorite ice cream. Vanilla bean, chocolate, or even a fruity sorbet would be amazing. You could also crumble them over a bowl of yogurt or use them as a base for a mini ice cream cake. Another fun idea is to dip them in melted chocolate and sprinkle them with nuts or sprinkles.
And speaking of variations, don’t be afraid to play around with the filling. If you’re not a fan of buttercream, try using whipped cream, ganache, or even a fruit jam. You could also add extracts or spices to the filling to customize the flavor. For example, a little bit of almond extract would be delicious in a vanilla buttercream, or a pinch of cinnamon would be perfect in a cream cheese filling.
If you’re looking for a healthier option, you could try using whole wheat flour in the cookies and reducing the amount of sugar. You could also use a lighter filling, such as Greek yogurt or a fruit puree.
I truly believe that everyone should experience the joy of a perfectly made Cookie Sandwich. It’s a simple pleasure that can brighten any day. So, I urge you to give this recipe a try. Gather your ingredients, preheat your oven, and get ready to create something truly special.
I’m confident that you’ll love these Cookie Sandwiches as much as I do. And I can’t wait to hear about your experience! Did you try any variations? What was your favorite filling? Did you serve them with ice cream? Share your photos and stories with me in the comments below. I’m always looking for new ideas and inspiration.
Happy baking! And remember, the most important ingredient is always love. So, bake with love, share with love, and enjoy every delicious bite! I’m excited to see what you create. Don’t forget to tag me in your photos so I can admire your creations. Let’s spread the joy of Cookie Sandwiches far and wide!
Cookies Sandwiches: The Ultimate Guide to Delicious Filled Cookies
Decadent chocolate cookie sandwiches filled with creamy vanilla buttercream. A classic treat, perfect for any occasion!
Ingredients
- 1 cup (2 sticks) unsalted butter, softened
- 1 cup granulated sugar
- 1 cup packed light brown sugar
- 2 large eggs
- 1 teaspoon vanilla extract
- 2 cups all-purpose flour
- ¾ cup unsweetened cocoa powder
- 1 teaspoon baking soda
- ½ teaspoon salt
- 1 cup semi-sweet chocolate chips
- 1 cup (2 sticks) unsalted butter, softened
- 3 cups powdered sugar
- 2 tablespoons milk
- 1 teaspoon vanilla extract
- Pinch of salt
Instructions
- In a large bowl (or the bowl of your stand mixer), cream together the softened butter, granulated sugar, and brown sugar until light and fluffy (3-5 minutes). Scrape down the sides of the bowl occasionally.
- Beat in the eggs one at a time, fully incorporating each before adding the next. Stir in the vanilla extract.
- In a separate medium bowl, whisk together the flour, cocoa powder, baking soda, and salt.
- Gradually add the dry ingredients to the wet ingredients, mixing on low speed until just combined. Do not overmix.
- Gently fold in the chocolate chips.
- Cover the dough with plastic wrap and chill in the refrigerator for at least 30 minutes (up to 24 hours).
- Preheat oven to 350°F (175°C). Line baking sheets with parchment paper or silicone baking mats.
- Use a cookie scoop or spoon to drop rounded tablespoons of dough onto the prepared baking sheets, leaving about 2 inches between each cookie.
- Bake for 9-11 minutes, or until the edges are set and the centers are still slightly soft.
- Let the cookies cool on the baking sheets for a few minutes before transferring them to a wire rack to cool completely.
- In a large bowl (or the bowl of your stand mixer), cream the softened butter until light and fluffy (3-5 minutes). Scrape down the sides of the bowl occasionally.
- Gradually add the powdered sugar, one cup at a time, beating on low speed until combined. Scrape down the sides of the bowl after each addition.
- Add the milk and vanilla extract and beat until smooth and creamy. Adjust milk or powdered sugar to reach desired consistency.
- Add a pinch of salt to balance the sweetness.
- Find cookies that are similar in size and shape.
- Spread a generous amount of vanilla buttercream filling on the flat side of one cookie.
- Top with the flat side of another cookie, gently pressing down to create a sandwich.
- (Optional): Roll the edges of the cookie sandwiches in sprinkles, mini chocolate chips, or chopped nuts.
- (Optional): Chill the cookie sandwiches in the refrigerator for at least 30 minutes before serving.
Notes
- Cookie Variations:
- Peanut Butter Cookies: Substitute ½ cup of the butter with ½ cup of peanut butter.
- Oatmeal Raisin Cookies: Replace ½ cup of flour with ½ cup of rolled oats and add ½ cup of raisins.
- Sugar Cookies: Omit the cocoa powder and chocolate chips.
- Filling Variations:
- Chocolate Buttercream: Add ¼ cup of cocoa powder to the vanilla buttercream recipe.
- Peanut Butter Buttercream: Add ¼ cup of peanut butter to the vanilla buttercream recipe.
- Cream Cheese Frosting: Substitute ½ cup of the butter with ½ cup of cream cheese.
- Lemon Buttercream: Add the zest and juice of one lemon to the vanilla buttercream.
- Storage Instructions:
- Store in an airtight container in the refrigerator for up to 5 days.
- Freeze for up to 2 months; thaw in the refrigerator before serving.
- Troubleshooting:
- Cookies are too flat: Make sure your butter is not too soft. Chill the dough for a longer period of time.
- Cookies are too dry: Don’t overbake the cookies.
- Buttercream is too thick: Add a little more milk, one teaspoon at a time, until you reach the desired consistency.
- Buttercream is too thin: Add a little more powdered sugar, one tablespoon at a time, until you reach the desired consistency.


Leave a Comment