
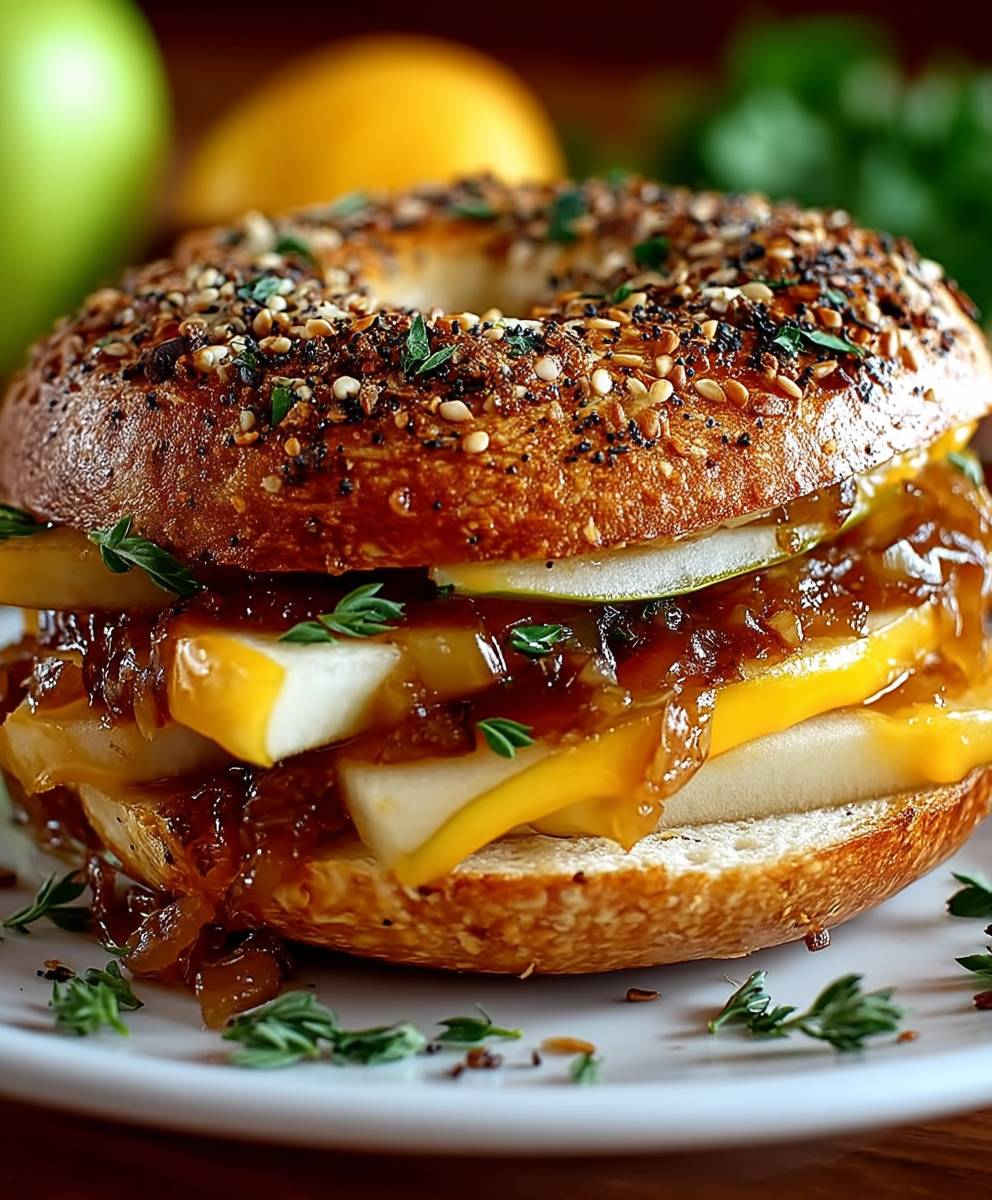
Grilled Cheese Bagel Sandwich: Prepare to experience a culinary revelation! Forget everything you thought you knew about grilled cheese because we’re about to elevate this classic comfort food to a whole new level. Imagine the satisfying chew of a perfectly toasted bagel embracing a molten core of gooey, melted cheese. It’s not just a sandwich; it’s an experience.
While the exact origins of the grilled cheese sandwich are debated, its popularity soared in the United States during the 1920s, thanks to the invention of sliced bread and processed cheese. It quickly became a staple, a symbol of simple pleasures and childhood nostalgia. But let’s be honest, sometimes simple needs a little upgrade, right?
That’s where the bagel comes in. People adore this Grilled Cheese Bagel Sandwich because it takes the familiar comfort of grilled cheese and adds a delightful textural twist. The slightly chewy, slightly crispy bagel provides a fantastic contrast to the creamy, melted cheese. Plus, it’s incredibly versatile! You can customize it with your favorite cheeses, add-ins like bacon or tomato, and even experiment with different bagel flavors. It’s quick, easy, and utterly satisfying the perfect meal for a busy weeknight or a lazy weekend brunch. So, are you ready to ditch the bread and embrace the bagel? Let’s get grilling!
Ingredients:
- 2 Plain Bagels, split horizontally
- 4 slices Cheddar Cheese
- 2 slices Provolone Cheese
- 2 tablespoons Butter, softened
- 1 tablespoon Mayonnaise
- 1/2 teaspoon Garlic Powder
- 1/4 teaspoon Onion Powder
- Pinch of Red Pepper Flakes (optional)
- 2 slices Tomato (optional)
- 2 slices Cooked Bacon (optional)
Preparing the Bagels:
Alright, let’s get started! The key to a truly amazing grilled cheese bagel sandwich is to prep everything properly. We want those bagels perfectly toasted and ready to receive our cheesy goodness.
- Slice the Bagels: Carefully slice each bagel horizontally into two halves. Make sure you have a good, sharp bread knife for this. A dull knife can tear the bagel and make it uneven. We want nice, even halves for optimal grilling.
- Butter the Bagels: Now, take about 1 tablespoon of softened butter and spread it evenly on the outside (the rounded side) of each bagel half. This is crucial for achieving that golden-brown, crispy exterior we all crave in a grilled cheese. Don’t skimp on the butter! Make sure to get it right to the edges.
- Mayonnaise Mixture: In a small bowl, combine the remaining 1 tablespoon of softened butter, mayonnaise, garlic powder, onion powder, and red pepper flakes (if using). Mix this well until it forms a smooth paste. This mixture will be spread on the inside of the bagel halves and will add a ton of flavor and help the cheese melt evenly. The mayonnaise might sound strange, but trust me, it creates a beautiful, golden crust and adds a subtle tang that complements the cheese perfectly.
- Spread the Mayonnaise Mixture: Spread the mayonnaise mixture evenly on the inside (the cut side) of each bagel half. Again, make sure to get it right to the edges. This will ensure every bite is packed with flavor.
Assembling the Grilled Cheese Bagel Sandwich:
Now comes the fun part building our masterpiece! We’re layering flavors and textures to create the ultimate grilled cheese experience.
- First Layer of Cheese: On the inside of the bottom bagel half (the one with the mayonnaise mixture), place 1 slice of cheddar cheese and 1 slice of provolone cheese. Make sure the cheese covers as much of the surface as possible. You can even tear the cheese into smaller pieces to ensure even coverage.
- Optional Additions: If you’re using tomato and bacon, now is the time to add them. Place the tomato slices on top of the cheese, followed by the cooked bacon. These additions will elevate your grilled cheese to a whole new level. The acidity of the tomato cuts through the richness of the cheese, and the bacon adds a smoky, savory element.
- Second Layer of Cheese: Place the remaining 1 slice of cheddar cheese and 1 slice of provolone cheese on top of the tomato and bacon (or directly on top of the first layer of cheese if you’re not using the optional additions). This creates a gooey, melty cheese center that is simply irresistible.
- Top it Off: Carefully place the top bagel half (the one with the mayonnaise mixture) on top of the cheese, butter-side up. Make sure the bagel halves are aligned properly.
Cooking the Grilled Cheese Bagel Sandwich:
The cooking process is where the magic happens. We want to achieve that perfect balance of golden-brown, crispy bread and melty, gooey cheese.
- Preheat the Pan: Place a large skillet or griddle over medium-low heat. It’s important to use medium-low heat to allow the cheese to melt completely without burning the bread. Patience is key here!
- Grill the Sandwich: Carefully place the assembled bagel sandwich in the preheated skillet.
- Press Down Gently: Use a spatula to gently press down on the sandwich. This will help the cheese melt evenly and ensure the bagel halves adhere to each other.
- Cook for 5-7 Minutes: Cook for 5-7 minutes per side, or until the bagel is golden brown and the cheese is completely melted and gooey. Keep a close eye on the sandwich to prevent burning. If the bagel is browning too quickly, reduce the heat slightly.
- Flip Carefully: Using a spatula, carefully flip the sandwich over to the other side. Be careful, as the cheese will be very hot and melty.
- Continue Cooking: Continue cooking for another 5-7 minutes, or until the second side is golden brown and the cheese is completely melted.
- Check for Doneness: To check if the sandwich is done, gently press down on the top. The bagel should be crispy and golden brown, and the cheese should be oozing out slightly.
Serving the Grilled Cheese Bagel Sandwich:
Almost there! Now for the final touches and enjoying our hard work.
- Remove from Pan: Carefully remove the grilled cheese bagel sandwich from the skillet and place it on a cutting board.
- Let it Rest (Optional): Allow the sandwich to rest for a minute or two before cutting into it. This will allow the cheese to set slightly and prevent it from oozing out everywhere.
- Cut in Half: Using a sharp knife, cut the sandwich in half diagonally. This makes it easier to handle and eat. Plus, it looks great!
- Serve Immediately: Serve the grilled cheese bagel sandwich immediately while it’s still hot and melty.
- Optional Sides: Serve with your favorite sides, such as tomato soup, a side salad, or potato chips.
Tips for the Perfect Grilled Cheese Bagel Sandwich:
- Use high-quality cheese: The better the cheese, the better the sandwich.
- Don’t overcrowd the pan: If you’re making multiple sandwiches, cook them in batches to ensure even cooking.
- Experiment with different cheeses: Try using different combinations of cheeses to find your favorite flavor profile. Gruyere, Monterey Jack, and Havarti are all great options.
- Add some spice: A pinch of red pepper flakes or a dash of hot sauce can add a nice kick to your grilled cheese.
- Get creative with your fillings: Don’t be afraid to experiment with different fillings, such as caramelized onions, roasted vegetables, or pesto.
Enjoy!
Conclusion:
So, there you have it! This isn’t just any grilled cheese; it’s a Grilled Cheese Bagel Sandwich, elevated to a whole new level of deliciousness. I truly believe this recipe is a must-try for anyone who loves comfort food with a twist. The chewy bagel provides the perfect textural contrast to the gooey, melted cheese, and the optional additions really allow you to customize it to your own personal taste. It’s quick, easy, and satisfying everything you could want in a simple meal.
Why is this a must-try? Because it’s more than just the sum of its parts. The bagel adds a heartiness and a satisfying chew that you simply don’t get with regular bread. The possibilities for cheese combinations are endless, allowing you to create a truly unique and personalized sandwich every time. And let’s be honest, who doesn’t love a good grilled cheese? This is just a fantastic upgrade to a classic.
Looking for serving suggestions? This Grilled Cheese Bagel Sandwich is fantastic on its own for a quick lunch or snack. But if you want to make it a more substantial meal, try pairing it with a bowl of tomato soup for the ultimate comfort food experience. A side salad with a light vinaigrette also works well to balance the richness of the cheese. For a fun twist, cut the sandwich into smaller squares and serve as appetizers at your next gathering. They’re always a hit!
And speaking of variations, the sky’s the limit! Feeling adventurous? Try adding some thinly sliced ham or turkey for a protein boost. Caramelized onions add a touch of sweetness and depth of flavor. A smear of pesto or a sprinkle of red pepper flakes can kick up the spice. You could even experiment with different types of bagels everything bagels, sesame bagels, even cinnamon raisin bagels (if you’re feeling particularly daring!). Don’t be afraid to get creative and experiment with your favorite flavors.
I’m confident that you’ll love this recipe as much as I do. It’s become a staple in my kitchen, and I’m always looking for new ways to customize it. The beauty of this Grilled Cheese Bagel Sandwich is its simplicity and versatility. It’s a blank canvas for your culinary creativity.
So, what are you waiting for? Head to your kitchen, grab a bagel, some cheese, and your favorite toppings, and get grilling! I promise you won’t be disappointed.
And most importantly, I’d love to hear about your experience! Did you try the recipe as is, or did you add your own unique twist? What cheese combination did you use? What did you serve it with? Share your photos and stories in the comments below. I’m always looking for new inspiration, and I can’t wait to see what you come up with. Happy grilling! Let me know if you think this Grilled Cheese Bagel Sandwich is as good as I do!
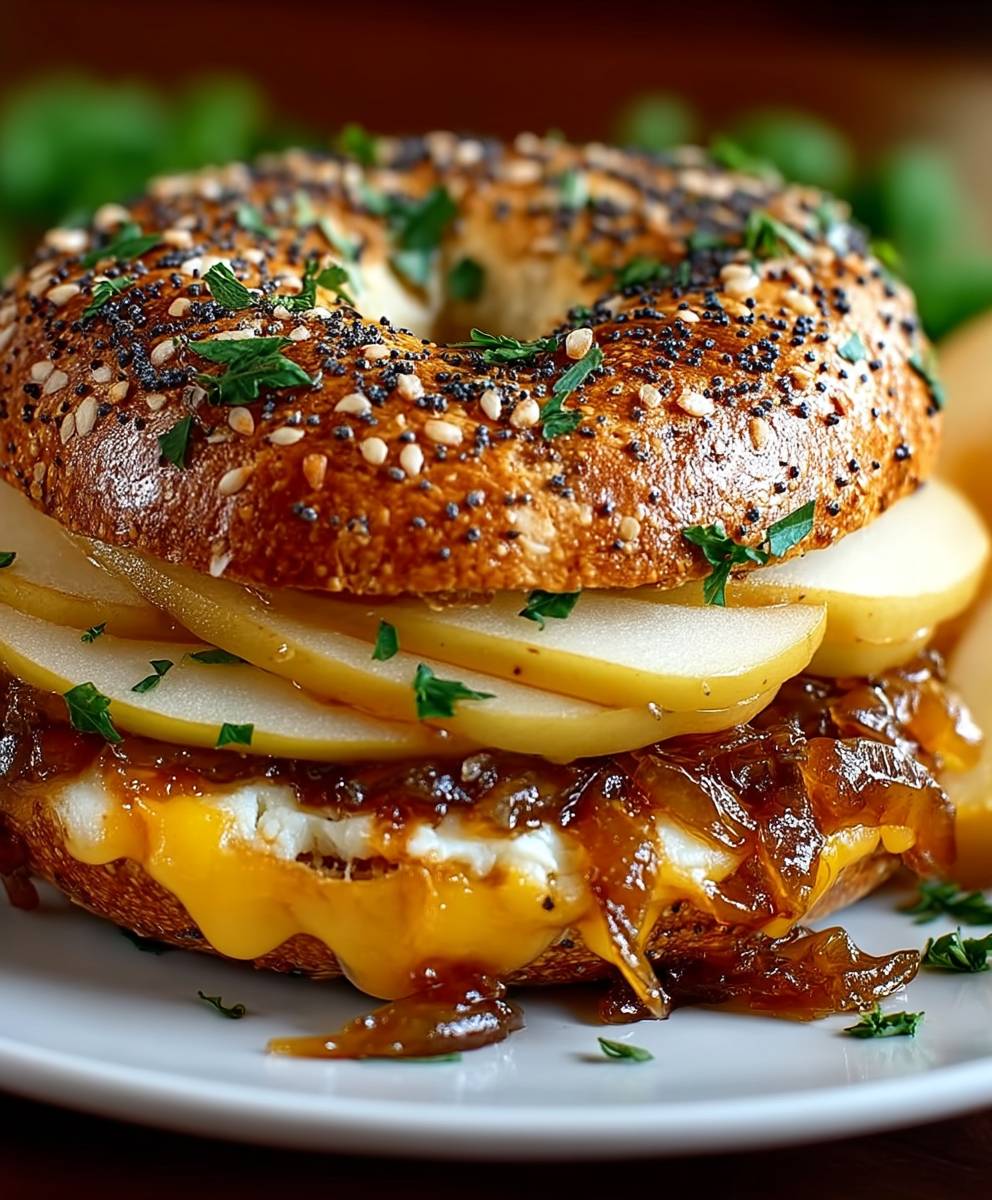
Grilled Cheese Bagel Sandwich: The Ultimate Comfort Food Recipe
Crispy, buttery bagels filled with melted cheddar and provolone, plus optional bacon and tomato for an extra burst of flavor. Elevate your grilled cheese game with this ultimate Grilled Cheese Bagel Sandwich!
Ingredients
- 2 Plain Bagels, split horizontally
- 4 slices Cheddar Cheese
- 2 slices Provolone Cheese
- 2 tablespoons Butter, softened
- 1 tablespoon Mayonnaise
- 1/2 teaspoon Garlic Powder
- 1/4 teaspoon Onion Powder
- Pinch of Red Pepper Flakes (optional)
- 2 slices Tomato (optional)
- 2 slices Cooked Bacon (optional)
Instructions
- Slice the Bagels: Carefully slice each bagel horizontally into two halves.
- Butter the Bagels: Spread 1 tablespoon of softened butter evenly on the outside (rounded side) of each bagel half.
- Mayonnaise Mixture: In a small bowl, combine the remaining 1 tablespoon of softened butter, mayonnaise, garlic powder, onion powder, and red pepper flakes (if using). Mix well.
- Spread the Mayonnaise Mixture: Spread the mayonnaise mixture evenly on the inside (cut side) of each bagel half.
- First Layer of Cheese: On the inside of the bottom bagel half (with mayonnaise mixture), place 1 slice of cheddar cheese and 1 slice of provolone cheese.
- Optional Additions: If using tomato and bacon, place tomato slices on top of the cheese, followed by the cooked bacon.
- Second Layer of Cheese: Place the remaining 1 slice of cheddar cheese and 1 slice of provolone cheese on top of the tomato and bacon (or directly on top of the first layer of cheese if not using optional additions).
- Top it Off: Carefully place the top bagel half (with mayonnaise mixture) on top of the cheese, butter-side up.
- Preheat the Pan: Place a large skillet or griddle over medium-low heat.
- Grill the Sandwich: Carefully place the assembled bagel sandwich in the preheated skillet.
- Press Down Gently: Use a spatula to gently press down on the sandwich.
- Cook for 5-7 Minutes: Cook for 5-7 minutes per side, or until the bagel is golden brown and the cheese is completely melted and gooey.
- Flip Carefully: Using a spatula, carefully flip the sandwich over to the other side.
- Continue Cooking: Continue cooking for another 5-7 minutes, or until the second side is golden brown and the cheese is completely melted.
- Remove from Pan: Carefully remove the grilled cheese bagel sandwich from the skillet and place it on a cutting board.
- Let it Rest (Optional): Allow the sandwich to rest for a minute or two before cutting into it.
- Cut in Half: Using a sharp knife, cut the sandwich in half diagonally.
- Serve Immediately: Serve the grilled cheese bagel sandwich immediately while it’s still hot and melty.
Notes
- Use high-quality cheese for the best flavor.
- Don’t overcrowd the pan if making multiple sandwiches.
- Experiment with different cheeses like Gruyere, Monterey Jack, or Havarti.
- Add some spice with a pinch of red pepper flakes or hot sauce.
- Get creative with fillings like caramelized onions, roasted vegetables, or pesto.

Leave a Comment