
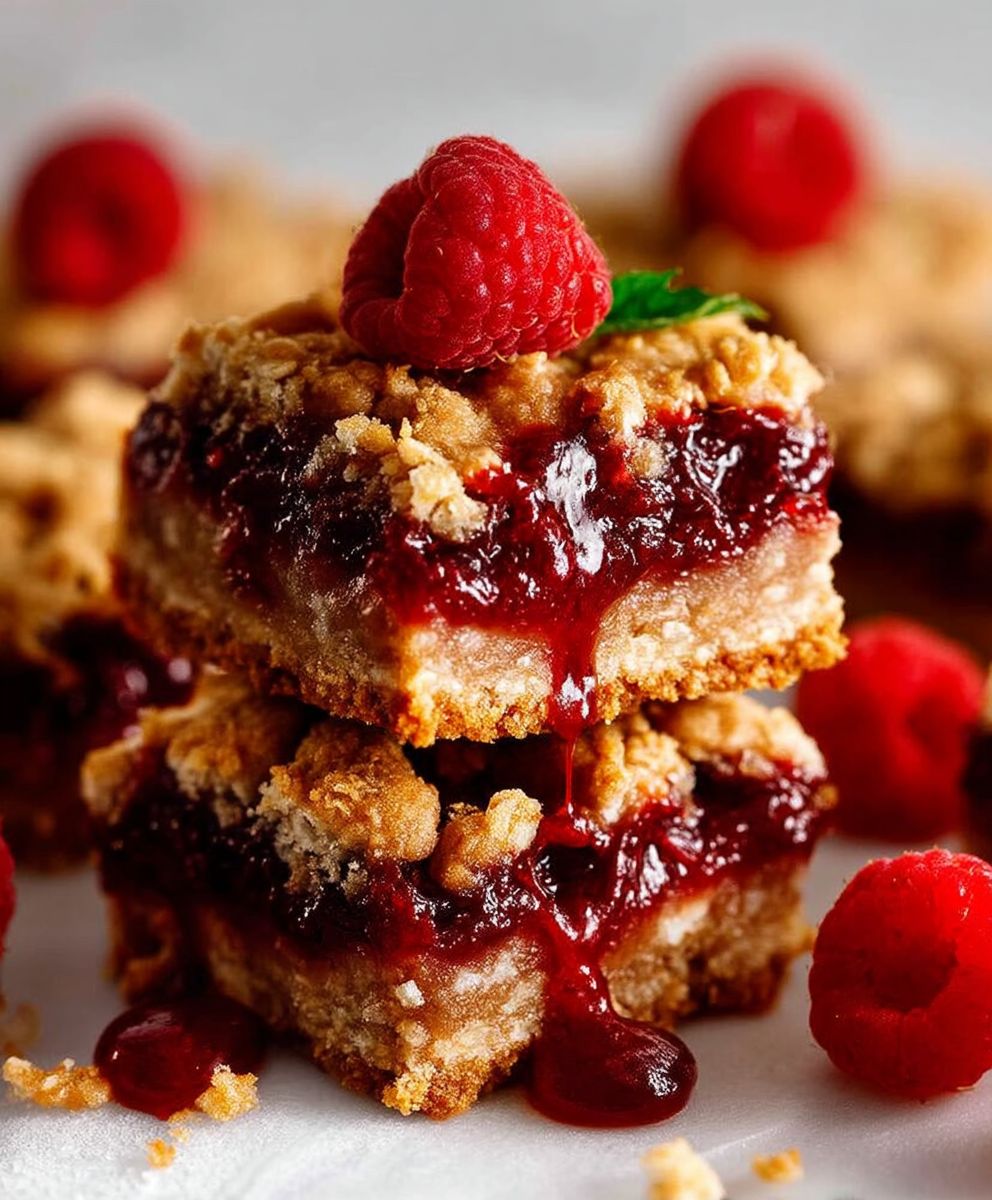
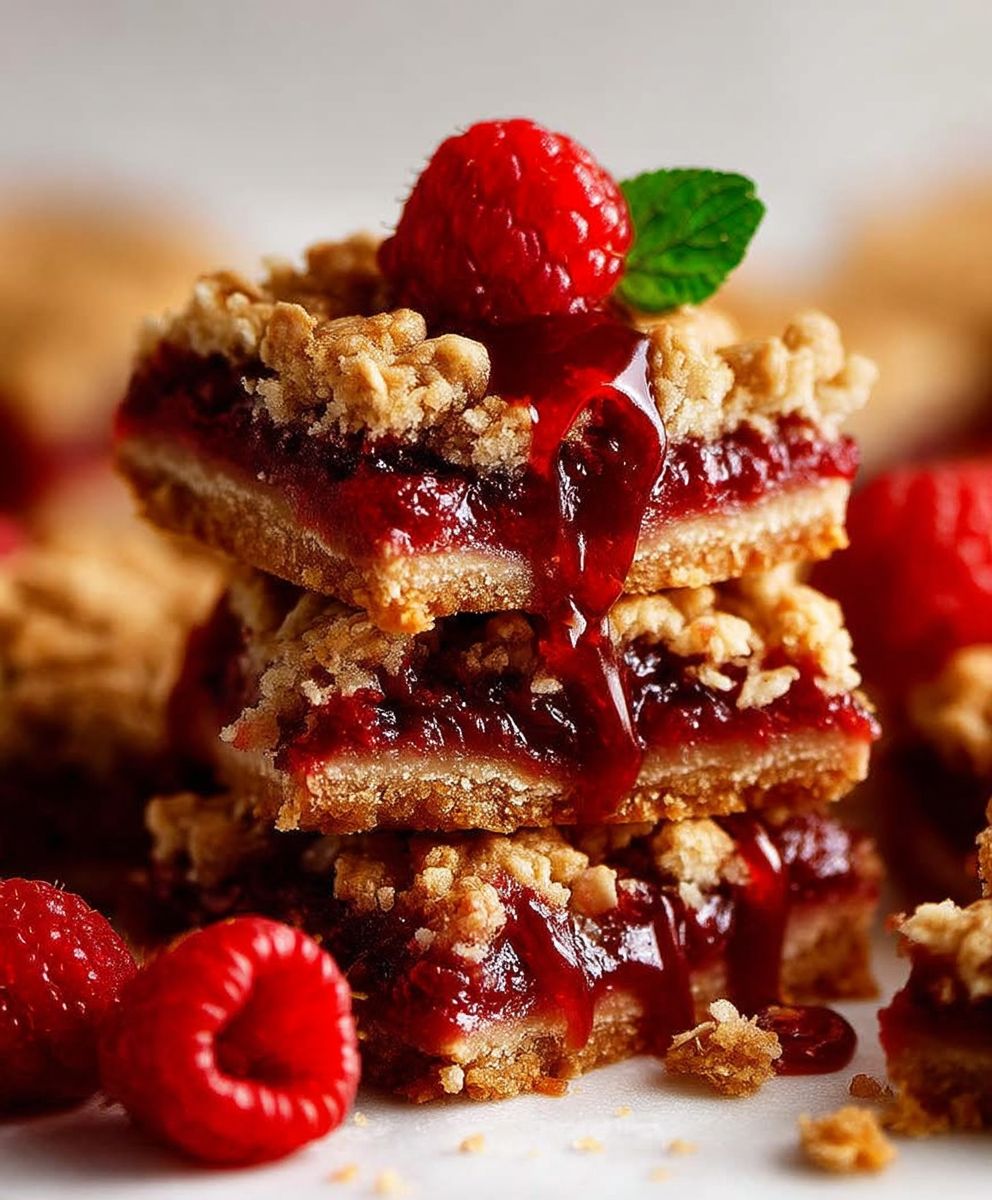
Raspberry Jam Oat Bars: Prepare to be captivated by a symphony of flavors and textures! Imagine biting into a buttery, crumbly oat crust, giving way to a luscious, sweet-tart raspberry jam filling. These aren’t just any bars; they’re a delightful treat that evokes feelings of warmth, nostalgia, and pure indulgence.
Oat bars, in their essence, are a humble creation, born from the desire to create a satisfying and portable snack. While the exact origins are debated, variations of oat bars have been enjoyed for generations across different cultures. The beauty lies in their simplicity and adaptability. The addition of raspberry jam elevates these bars to a new level of deliciousness.
What makes raspberry jam oat bars so irresistible? It’s the perfect marriage of textures the chewy oats, the crumbly topping, and the smooth, fruity jam. The sweet and slightly tangy raspberry jam cuts through the richness of the oat base, creating a balanced and addictive flavor profile. Plus, they’re incredibly convenient! Perfect for a quick breakfast, an afternoon snack, or a delightful addition to any dessert table. I know you’ll love how easy they are to make and how quickly they disappear!
Ingredients:
- For the Oat Crust & Crumble:
- 2 cups all-purpose flour
- 2 cups rolled oats (not instant)
- 1 ½ cups packed light brown sugar
- 1 teaspoon baking soda
- ½ teaspoon salt
- 1 cup (2 sticks) cold unsalted butter, cut into cubes
- For the Raspberry Jam Filling:
- 1 ½ cups high-quality raspberry jam (seedless preferred)
- 1 tablespoon lemon juice
- 1 teaspoon cornstarch (optional, for thickening)
Preparing the Oat Crust & Crumble:
Okay, let’s get started with the base and crumble topping they’re the same thing, which makes this recipe super easy!
-
Combine Dry Ingredients: In a large bowl, whisk together the flour, rolled oats, brown sugar, baking soda, and salt. Make sure everything is evenly distributed. This ensures a consistent texture and flavor throughout the crust and crumble.
-
Cut in the Butter: Add the cold, cubed butter to the dry ingredients. This is the most important step for creating that crumbly, tender texture. You can use a pastry blender, your fingers, or a food processor for this. If using a pastry blender or your fingers, work quickly to prevent the butter from melting. You want to cut the butter into the dry ingredients until the mixture resembles coarse crumbs. There should be no large chunks of butter remaining, but the mixture shouldn’t be completely uniform either. If using a food processor, pulse the mixture until it reaches the coarse crumb stage. Be careful not to over-process, or the butter will melt and the mixture will become pasty.
-
Divide the Mixture: Press half of the oat mixture into the prepared baking pan. Use your fingers or the back of a spoon to evenly distribute the mixture and press it firmly into the bottom of the pan. You want a solid, even layer that will form the base of the bars. The firmer you press it, the sturdier the base will be. Reserve the remaining oat mixture for the crumble topping.
Making the Raspberry Jam Filling:
Now, let’s whip up that delicious raspberry jam filling. This is where the magic happens!
-
Combine Jam and Lemon Juice: In a medium bowl, combine the raspberry jam and lemon juice. The lemon juice adds a touch of brightness and acidity that balances the sweetness of the jam. Stir well to combine.
-
Add Cornstarch (Optional): If your raspberry jam is particularly runny, you can add the cornstarch to help thicken it. This will prevent the filling from oozing out too much during baking. Stir the cornstarch into the jam mixture until it is fully dissolved. If your jam is already quite thick, you can skip this step.
Assembling and Baking the Bars:
Alright, we’re in the home stretch! Let’s put everything together and get these bars baking.
-
Spread the Jam Filling: Pour the raspberry jam filling evenly over the prepared oat crust in the baking pan. Use a spatula or the back of a spoon to spread the filling into a smooth, even layer. Make sure the filling reaches all the edges of the crust.
-
Sprinkle the Crumble Topping: Sprinkle the remaining oat mixture (the crumble topping) evenly over the raspberry jam filling. Gently break up any large clumps of the oat mixture with your fingers to ensure an even distribution. You want a generous layer of crumble topping that covers the entire surface of the jam filling.
-
Bake the Bars: Place the baking pan in the preheated oven and bake for 30-35 minutes, or until the crumble topping is golden brown and the jam filling is bubbly. The edges of the bars should also be lightly browned. Keep a close eye on the bars during baking to prevent the topping from burning. If the topping starts to brown too quickly, you can loosely tent the pan with aluminum foil.
-
Cool Completely: Remove the baking pan from the oven and let the bars cool completely in the pan before cutting. This is crucial for the bars to set properly and prevent them from falling apart. Cooling can take several hours, so be patient! I usually let them cool on a wire rack to speed up the process.
-
Cut and Serve: Once the bars are completely cool, use a sharp knife to cut them into squares or rectangles. For clean cuts, you can run the knife under hot water and wipe it dry between each cut. Serve the raspberry jam oat bars at room temperature. They are delicious on their own, or you can serve them with a scoop of vanilla ice cream or a dollop of whipped cream.
Tips and Variations:
Here are a few extra tips and ideas to customize your raspberry jam oat bars:
- Use Different Jams: Feel free to experiment with different flavors of jam. Strawberry, blueberry, or even apricot jam would be delicious in this recipe.
- Add Nuts: For extra crunch and flavor, add chopped nuts to the oat crust and crumble topping. Pecans, walnuts, or almonds would all work well. Simply add about ½ cup of chopped nuts to the dry ingredients before cutting in the butter.
- Add Spices: A pinch of cinnamon or nutmeg can add warmth and depth of flavor to the oat crust and crumble topping. Add about ¼ teaspoon of ground cinnamon or nutmeg to the dry ingredients.
- Make it Gluten-Free: To make these bars gluten-free, use a gluten-free all-purpose flour blend and gluten-free rolled oats.
- Storage: Store the raspberry jam oat bars in an airtight container at room temperature for up to 3 days, or in the refrigerator for up to 5 days.
- Freezing: These bars freeze well. Wrap them individually in plastic wrap and then place them in a freezer-safe bag or container. They can be frozen for up to 2 months. Thaw them at room temperature before serving.
- Pan Size: While this recipe calls for a 9×13 inch pan, you can use an 8×8 inch pan for thicker bars. Just be sure to adjust the baking time accordingly, as the bars may need to bake for a few minutes longer.
- Butter Temperature: It’s crucial that the butter is cold when you cut it into the dry ingredients. Cold butter creates pockets of air in the dough, which results in a tender and crumbly texture. If the butter is too soft, it will melt and the dough will become dense and greasy.
- Pressing the Crust: Press the oat crust firmly into the bottom of the pan to create a solid base for the bars. If the crust is too loose, the bars may fall apart when you cut them.
- Cooling Time: Don’t be tempted to cut the bars before they are completely cool. The cooling time allows the jam filling to set and the crust to firm up. If you cut the bars while they are still warm, they will be messy and difficult to handle.
Troubleshooting:
- Bars are too crumbly: This could be due to not pressing the crust firmly enough, or using too much butter. Make sure to press the crust firmly and measure the butter accurately.
- Filling is too runny: This could be due to using a jam that is too thin, or not adding enough cornstarch. If your jam is particularly runny, add the cornstarch to help thicken it.
- Topping is burning: If the topping starts to brown too quickly, loosely tent the pan with aluminum foil.
- Bars are too hard: This could be due to overbaking. Bake the bars until the topping is golden brown and the jam filling is bubbly, but don’t overbake them.
Enjoy!
I hope you enjoy making and eating these delicious raspberry jam oat bars! They’re perfect for a quick snack, a sweet treat, or a potluck dessert. Let me know in the comments if you have any questions or if you try any variations!
Conclusion:
These Raspberry Jam Oat Bars are more than just a dessert; they’re a delightful experience waiting to happen. The combination of the buttery, crumbly oat base and topping with the sweet-tart burst of raspberry jam creates a symphony of flavors and textures that will leave you wanting more. Seriously, I’ve made these for potlucks, bake sales, and even just a quiet night in, and they’re always a hit!
But what truly makes these bars a must-try is their versatility. They’re incredibly easy to adapt to your own preferences and dietary needs. Feeling adventurous? Try swapping out the raspberry jam for another flavor like strawberry, blackberry, or even apricot. Each jam brings its own unique character to the bars, creating a whole new taste sensation.
Serving Suggestions and Variations
For a truly decadent treat, serve these bars warm with a scoop of vanilla ice cream or a dollop of whipped cream. The contrast between the warm, crumbly bars and the cold, creamy topping is simply divine. Or, if you’re looking for a lighter option, enjoy them with a cup of tea or coffee. They’re also perfect for packing in lunchboxes or taking on picnics.
And speaking of variations, the possibilities are endless! If you’re gluten-free, simply use gluten-free rolled oats and a gluten-free flour blend. For a vegan version, substitute the butter with a vegan butter alternative and ensure your jam is vegan-friendly. You can also add chopped nuts like pecans or walnuts to the oat mixture for extra crunch and flavor. A sprinkle of cinnamon or nutmeg can also add a warm, comforting touch.
Want to elevate the presentation? Cut the bars into smaller squares and arrange them on a platter for a sophisticated dessert. Or, drizzle them with a simple glaze made from powdered sugar and milk for an extra touch of sweetness.
I’ve even experimented with adding a layer of cream cheese filling between the oat base and the raspberry jam. It adds a tangy richness that complements the sweetness of the jam perfectly. To do this, simply beat together cream cheese, sugar, and a touch of vanilla extract until smooth, then spread it over the oat base before adding the jam.
These Raspberry Jam Oat Bars are truly a blank canvas for your culinary creativity. Don’t be afraid to experiment and make them your own!
So, what are you waiting for? Gather your ingredients, preheat your oven, and get ready to bake up a batch of these irresistible bars. I promise you won’t regret it!
I’m so confident that you’ll love this recipe that I’m practically begging you to try it. And when you do, please, please, please share your experience with me! Let me know what variations you tried, what your family and friends thought, and any tips or tricks you discovered along the way. You can leave a comment below, tag me on social media, or even send me an email. I can’t wait to hear all about your Raspberry Jam Oat Bar adventures! Happy baking!
Raspberry Jam Oat Bars: The Ultimate Guide to Baking Delicious Treats
Delicious and easy raspberry jam oat bars with a buttery oat crust and crumble topping. Perfect for a snack, dessert, or potluck!
Ingredients
- 2 cups all-purpose flour
- 2 cups rolled oats (not instant)
- 1 ½ cups packed light brown sugar
- 1 teaspoon baking soda
- ½ teaspoon salt
- 1 cup (2 sticks) cold unsalted butter, cut into cubes
- 1 ½ cups high-quality raspberry jam (seedless preferred)
- 1 tablespoon lemon juice
- 1 teaspoon cornstarch (optional, for thickening)
Instructions
- Combine Dry Ingredients (Crust & Crumble): In a large bowl, whisk together the flour, rolled oats, brown sugar, baking soda, and salt.
- Cut in the Butter (Crust & Crumble): Add the cold, cubed butter to the dry ingredients. Use a pastry blender, your fingers, or a food processor to cut the butter into the dry ingredients until the mixture resembles coarse crumbs.
- Divide the Mixture (Crust & Crumble): Press half of the oat mixture into a 9×13 inch baking pan. Reserve the remaining oat mixture for the crumble topping.
- Combine Jam and Lemon Juice (Filling): In a medium bowl, combine the raspberry jam and lemon juice.
- Add Cornstarch (Optional – Filling): If your raspberry jam is particularly runny, add the cornstarch to help thicken it. Stir the cornstarch into the jam mixture until it is fully dissolved.
- Spread the Jam Filling: Pour the raspberry jam filling evenly over the prepared oat crust in the baking pan.
- Sprinkle the Crumble Topping: Sprinkle the remaining oat mixture (the crumble topping) evenly over the raspberry jam filling.
- Bake: Place the baking pan in a preheated oven at 350°F (175°C) and bake for 30-35 minutes, or until the crumble topping is golden brown and the jam filling is bubbly.
- Cool Completely: Remove the baking pan from the oven and let the bars cool completely in the pan before cutting.
- Cut and Serve: Once the bars are completely cool, use a sharp knife to cut them into squares or rectangles.
Notes
- Use different jams: Strawberry, blueberry, or even apricot jam would be delicious in this recipe.
- Add Nuts: For extra crunch and flavor, add chopped nuts to the oat crust and crumble topping. Pecans, walnuts, or almonds would all work well. Simply add about ½ cup of chopped nuts to the dry ingredients before cutting in the butter.
- Add Spices: A pinch of cinnamon or nutmeg can add warmth and depth of flavor to the oat crust and crumble topping. Add about ¼ teaspoon of ground cinnamon or nutmeg to the dry ingredients.
- Make it Gluten-Free: To make these bars gluten-free, use a gluten-free all-purpose flour blend and gluten-free rolled oats.
- Storage: Store the raspberry jam oat bars in an airtight container at room temperature for up to 3 days, or in the refrigerator for up to 5 days.
- Freezing: These bars freeze well. Wrap them individually in plastic wrap and then place them in a freezer-safe bag or container. They can be frozen for up to 2 months. Thaw them at room temperature before serving.
- Pan Size: While this recipe calls for a 9×13 inch pan, you can use an 8×8 inch pan for thicker bars. Just be sure to adjust the baking time accordingly, as the bars may need to bake for a few minutes longer.
- Butter Temperature: It’s crucial that the butter is cold when you cut it into the dry ingredients. Cold butter creates pockets of air in the dough, which results in a tender and crumbly texture. If the butter is too soft, it will melt and the dough will become dense and greasy.
- Pressing the Crust: Press the oat crust firmly into the bottom of the pan to create a solid base for the bars. If the crust is too loose, the bars may fall apart when you cut them.
- Cooling Time: Don’t be tempted to cut the bars before they are completely cool. The cooling time allows the jam filling to set and the crust to firm up. If you cut the bars while they are still warm, they will be messy and difficult to handle.

Leave a Comment