
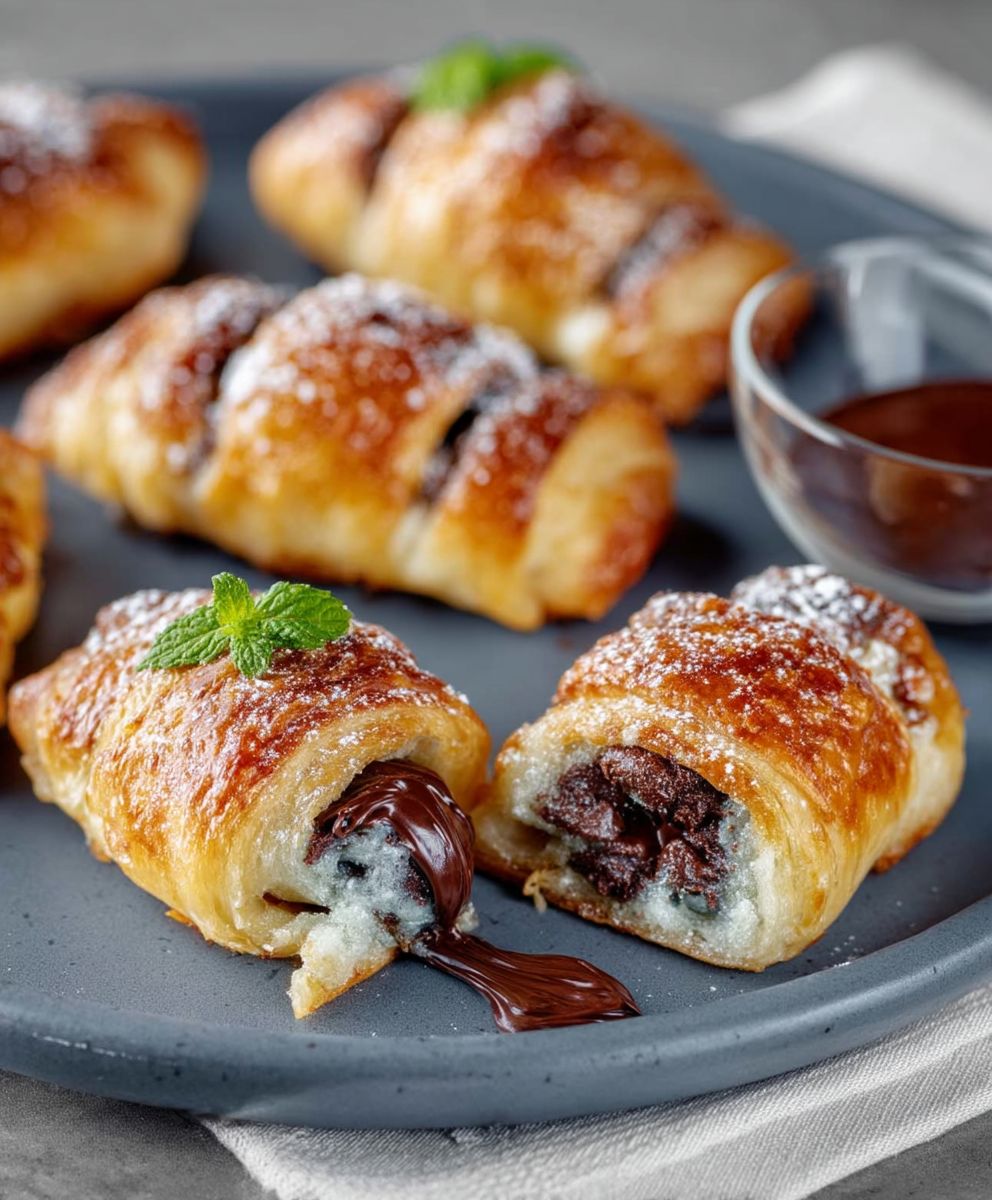
Chocolate Puff Pastry: the mere mention of it conjures images of flaky, golden layers giving way to a rich, decadent chocolate filling. Have you ever dreamt of creating a dessert that looks like it came straight from a Parisian patisserie, but is surprisingly simple to make at home? Well, dream no more! This recipe will guide you through creating the most delightful chocolate puff pastry you’ve ever tasted.
Puff pastry itself has a fascinating history, dating back centuries and perfected by generations of bakers. While the exact origins are debated, it’s believed to have evolved from simpler layered doughs. The magic lies in the lamination process creating hundreds of thin layers of butter and dough that, when baked, transform into a light and airy masterpiece. Adding chocolate elevates this classic to a whole new level of indulgence.
What makes this dessert so irresistible? It’s the perfect combination of textures: the crisp, delicate flakiness of the pastry contrasts beautifully with the smooth, melt-in-your-mouth chocolate. Plus, it’s surprisingly versatile! Enjoy it warm with a scoop of vanilla ice cream, serve it as an elegant brunch treat, or simply savor it with a cup of coffee for a moment of pure bliss. Get ready to impress your friends and family with this stunning and delicious creation!
Ingredients:
- 2 sheets frozen puff pastry, thawed
- 1 cup high-quality chocolate chips (dark, semi-sweet, or milk, your choice!)
- 1/4 cup unsalted butter, melted
- 1/4 cup granulated sugar
- 2 tablespoons cocoa powder (unsweetened)
- 1 teaspoon vanilla extract
- 1/4 teaspoon salt
- 1 large egg, beaten (for egg wash)
- Optional: Coarse sugar for sprinkling on top
Preparing the Chocolate Filling:
Okay, let’s get started with the heart of our chocolate puff pastry the decadent filling! This is where the magic happens, transforming simple puff pastry into a chocolate lover’s dream.
- Melt the Butter: In a microwave-safe bowl, melt the 1/4 cup of unsalted butter. You can do this in 30-second intervals, stirring in between, to prevent it from splattering everywhere. Alternatively, you can melt it in a small saucepan over low heat. Just keep a close eye on it so it doesn’t burn.
- Combine Dry Ingredients: In a medium-sized bowl, whisk together the 1/4 cup of granulated sugar, 2 tablespoons of cocoa powder, and 1/4 teaspoon of salt. This ensures that the cocoa powder is evenly distributed and prevents any clumps in the filling.
- Mix Wet and Dry: Pour the melted butter into the bowl with the dry ingredients. Add the 1 teaspoon of vanilla extract. Stir everything together until you have a smooth, chocolatey paste. Don’t worry if it seems a little thick; that’s exactly what we want!
- Incorporate Chocolate Chips: Now, gently fold in the 1 cup of chocolate chips. I like to use a spatula for this to avoid breaking the chocolate chips too much. Make sure they’re evenly distributed throughout the mixture. This ensures every bite is packed with chocolate goodness.
- Taste Test (Optional but Recommended!): Give the filling a little taste. This is your chance to adjust the sweetness or add a pinch more salt if you think it needs it. Remember, you’re the chef, so make it perfect for your palate!
Assembling the Puff Pastries:
Now comes the fun part putting everything together! This is where your creativity can shine. There are several ways to shape your puff pastries, so feel free to experiment. I’ll guide you through a simple and classic method.
- Prepare Your Work Surface: Lightly flour a clean, flat surface. This will prevent the puff pastry from sticking and make it easier to work with.
- Unfold the Puff Pastry: Gently unfold one sheet of thawed puff pastry onto the floured surface. Be careful not to tear it. If it’s still a little stiff, let it sit for a few more minutes until it’s pliable.
- Spread the Chocolate Filling: Using a spatula or spoon, evenly spread half of the chocolate filling over the puff pastry sheet, leaving a small border (about 1/2 inch) around the edges. This border will help seal the pastry and prevent the filling from leaking out during baking.
- Roll It Up: Starting from one long edge, tightly roll up the puff pastry sheet into a log. Try to keep the roll as even as possible.
- Seal the Edge: Once you’ve rolled it up completely, gently pinch the edge to seal it. This will prevent the roll from unraveling during baking.
- Repeat with the Second Sheet: Repeat steps 2-5 with the second sheet of puff pastry and the remaining chocolate filling.
- Chill the Rolls (Important!): Wrap each log tightly in plastic wrap and place them in the refrigerator for at least 30 minutes. This chilling step is crucial because it firms up the butter in the puff pastry, which will help it puff up beautifully in the oven. You can even chill them for longer, up to a few hours, if you’re not ready to bake them right away.
Cutting and Shaping:
After chilling, it’s time to cut and shape our pastries. This is where we transform the logs into individual treats, ready for baking.
- Preheat Your Oven: Preheat your oven to 375°F (190°C). Make sure your oven rack is in the center position.
- Prepare Baking Sheet: Line a baking sheet with parchment paper. This will prevent the pastries from sticking and make cleanup a breeze.
- Remove from Refrigerator: Take the chilled puff pastry logs out of the refrigerator.
- Slice the Rolls: Using a sharp knife, slice each log into 1-inch thick rounds. You should get about 10-12 slices from each log.
- Arrange on Baking Sheet: Place the slices onto the prepared baking sheet, leaving some space between each one. This will allow them to puff up properly and bake evenly.
- Egg Wash: In a small bowl, whisk the beaten egg. Brush the tops of each pastry with the egg wash. This will give them a beautiful golden-brown color and a slightly glossy finish.
- Optional: Sprinkle with Sugar: If desired, sprinkle the tops of the pastries with coarse sugar. This adds a touch of sweetness and a lovely crunchy texture.
Baking the Chocolate Puff Pastries:
Finally, the moment we’ve been waiting for baking these beauties! The aroma that fills your kitchen will be absolutely irresistible.
- Bake: Place the baking sheet in the preheated oven and bake for 20-25 minutes, or until the pastries are golden brown and puffed up. Keep a close eye on them, as baking times may vary depending on your oven.
- Cool: Once the pastries are baked, remove them from the oven and let them cool on the baking sheet for a few minutes before transferring them to a wire rack to cool completely. This will prevent them from getting soggy.
- Serve and Enjoy!: These chocolate puff pastries are best enjoyed warm or at room temperature. They’re perfect with a cup of coffee, tea, or a glass of milk. You can also dust them with powdered sugar for an extra touch of elegance.
Tips and Variations:
- Nutella Filling: For a Nutella twist, replace the chocolate chip filling with Nutella. Spread a thin layer of Nutella over the puff pastry before rolling it up.
- Fruit Filling: Add some chopped fruit, such as berries or apples, to the chocolate filling for a fruity twist.
- Savory Option: For a savory version, use cheese and herbs instead of chocolate.
- Storage: Store leftover pastries in an airtight container at room temperature for up to 2 days.
- Freezing: You can freeze unbaked pastries for up to 2 months. Simply slice the chilled logs and arrange the slices on a baking sheet lined with parchment paper. Freeze until solid, then transfer to a freezer bag. When ready to bake, bake directly from frozen, adding a few extra minutes to the baking time.
Enjoy your homemade Chocolate Puff Pastries!
Conclusion:
So, there you have it! This Chocolate Puff Pastry recipe isn’t just another dessert; it’s a gateway to pure, unadulterated chocolate bliss. I truly believe this is a must-try recipe for anyone who loves the combination of flaky pastry and rich, decadent chocolate. The simplicity of the ingredients belies the incredible flavor and texture you’ll achieve. It’s quick enough for a weeknight treat, yet elegant enough to serve at a dinner party. What’s not to love?
But why is it a must-try? Because it delivers that “wow” factor with minimal effort. You get the satisfaction of baking something impressive without spending hours in the kitchen. The layers of buttery puff pastry, combined with the intense chocolate filling, create a symphony of textures and tastes that will leave you wanting more. Trust me, one bite and you’ll be hooked!
And the best part? It’s incredibly versatile! While I’ve shared my go-to method, feel free to experiment and make it your own.
Serving Suggestions and Variations:
* A la Mode: Serve warm with a scoop of vanilla ice cream or a dollop of whipped cream for an extra indulgent experience. The contrast between the warm pastry and the cold ice cream is simply divine.
* Berry Bliss: Add fresh berries, such as raspberries or strawberries, on top for a burst of freshness and a pop of color. The tartness of the berries complements the richness of the chocolate beautifully.
* Nutty Delight: Sprinkle chopped nuts, like almonds or pecans, over the pastry before baking for added texture and flavor. The nutty crunch adds another layer of complexity to the dessert.
* Espresso Infusion: Add a teaspoon of instant espresso powder to the chocolate filling for a mocha-flavored twist. The coffee enhances the chocolate flavor and adds a subtle bitterness.
* Citrus Zest: Grate orange or lemon zest into the chocolate filling for a bright and zesty flavor. The citrus cuts through the richness of the chocolate and adds a refreshing touch.
* Savory Sweet: For a more sophisticated flavor profile, sprinkle a pinch of sea salt over the baked pastry. The salt enhances the sweetness of the chocolate and creates a delightful contrast.
* Chocolate Drizzle: After baking, drizzle melted white chocolate or dark chocolate over the pastry for an extra touch of elegance.
Don’t be afraid to get creative and experiment with different flavors and toppings. The possibilities are endless!
I’m so excited for you to try this recipe and experience the magic of homemade Chocolate Puff Pastry for yourself. It’s a guaranteed crowd-pleaser, and I know you’ll love it as much as I do.
So, go ahead, preheat your oven, gather your ingredients, and get baking! I promise you won’t regret it. And when you do, please, please, please share your creations with me! I’d love to see your photos and hear about your experiences. Tag me on social media or leave a comment below. I can’t wait to see what you come up with! Happy baking! Let me know if you have any questions, I’m always happy to help. Enjoy!
Semolina Halva Turkish: A Delicious & Easy Recipe
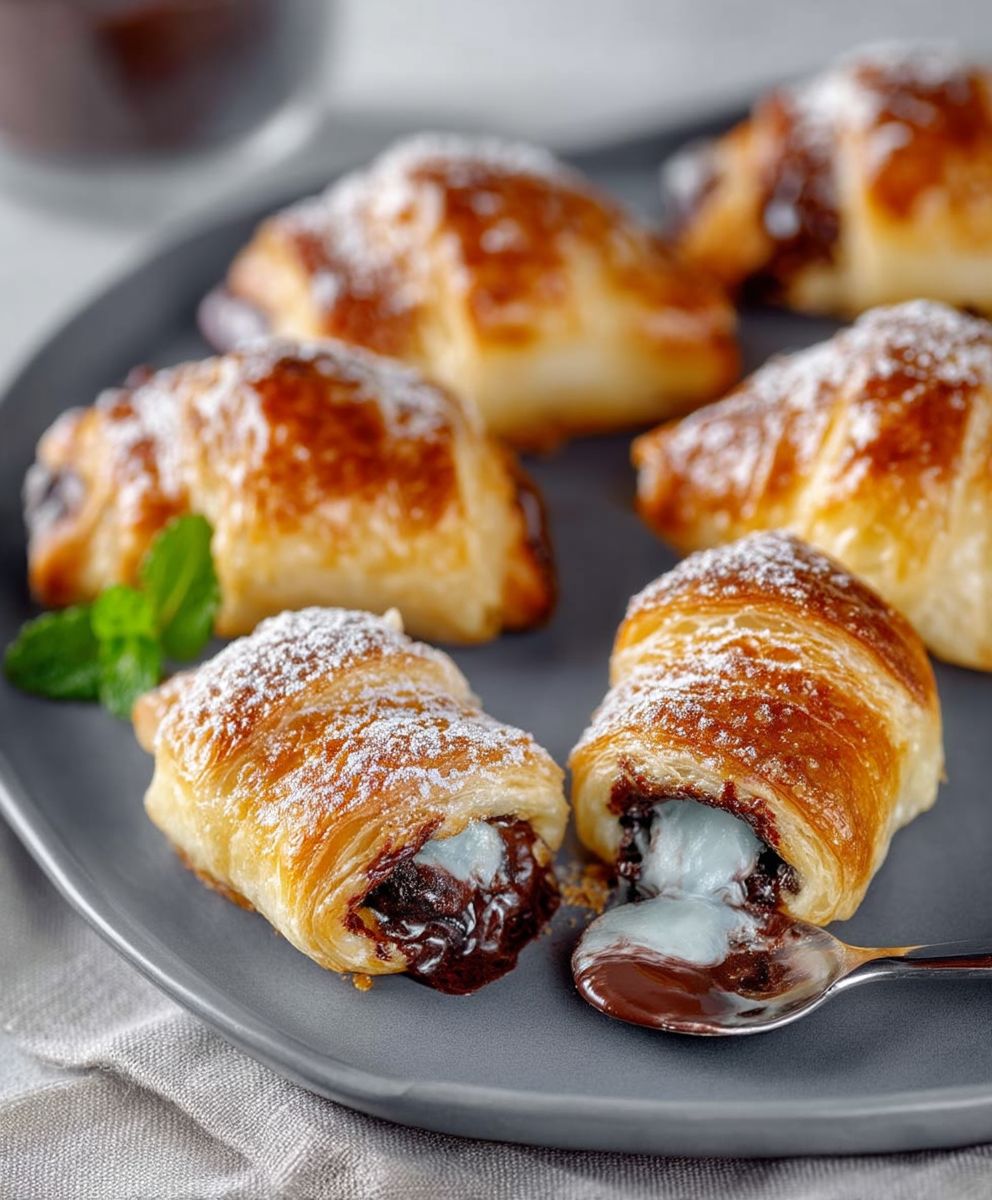
Flaky, buttery puff pastry filled with a rich chocolate filling. Easy to make for breakfast, brunch, or dessert!
Ingredients
- 2 sheets frozen puff pastry, thawed
- 1 cup high-quality chocolate chips (dark, semi-sweet, or milk, your choice!)
- 1/4 cup unsalted butter, melted
- 1/4 cup granulated sugar
- 2 tablespoons cocoa powder (unsweetened)
- 1 teaspoon vanilla extract
- 1/4 teaspoon salt
- 1 large egg, beaten (for egg wash)
- Optional: Coarse sugar for sprinkling on top
Instructions
- Prepare Chocolate Filling: In a microwave-safe bowl, melt the butter in 30-second intervals. Alternatively, melt in a saucepan over low heat.
- In a medium bowl, whisk together sugar, cocoa powder, and salt.
- Pour melted butter into the bowl with dry ingredients. Add vanilla extract. Stir until smooth.
- Gently fold in chocolate chips. Taste and adjust if needed.
- Assemble Pastries: Lightly flour a clean surface.
- Unfold one sheet of puff pastry.
- Spread half of the chocolate filling evenly over the pastry, leaving a 1/2-inch border.
- Tightly roll up the pastry into a log, starting from one long edge.
- Pinch the edge to seal.
- Repeat with the second sheet of puff pastry and remaining filling.
- Wrap each log tightly in plastic wrap and refrigerate for at least 30 minutes (or up to a few hours).
- Cut and Shape: Preheat oven to 375°F (190°C). Line a baking sheet with parchment paper.
- Remove chilled logs from the refrigerator.
- Slice each log into 1-inch thick rounds.
- Arrange slices on the baking sheet, leaving space between each.
- Brush the tops of each pastry with egg wash.
- Optional: Sprinkle with coarse sugar.
- Bake: Bake for 20-25 minutes, or until golden brown and puffed up.
- Cool: Let cool on the baking sheet for a few minutes, then transfer to a wire rack to cool completely.
- Serve and Enjoy!
Notes
- Nutella Filling: Replace chocolate chips with Nutella.
- Fruit Filling: Add chopped fruit to the chocolate filling.
- Savory Option: Use cheese and herbs instead of chocolate.
- Storage: Store leftover pastries in an airtight container at room temperature for up to 2 days.
- Freezing: Freeze unbaked pastries for up to 2 months. Slice the chilled logs and arrange the slices on a baking sheet lined with parchment paper. Freeze until solid, then transfer to a freezer bag. When ready to bake, bake directly from frozen, adding a few extra minutes to the baking time.


Leave a Comment