
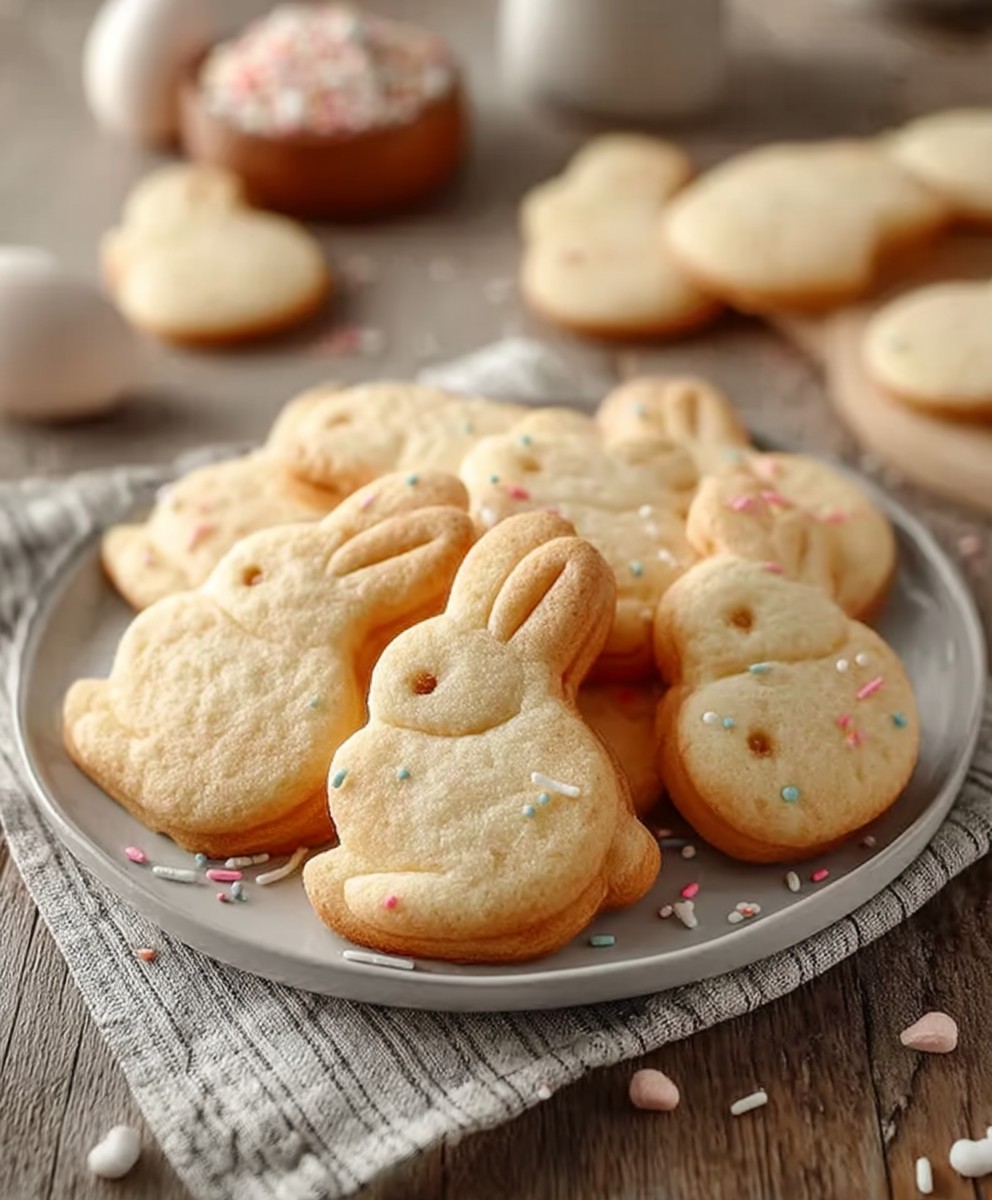
Bunny shaped sugar cookies aren’t just a treat; they’re a springtime tradition, a symbol of renewal, and a delicious way to celebrate Easter! Have you ever wondered why these adorable cookies are so popular? It’s more than just their cute appearance; it’s the perfect blend of buttery sweetness and a satisfyingly crisp-yet-tender texture that makes them irresistible.
The history of sugar cookies dates back to the 1700s, originating in Nazareth, Pennsylvania, with German settlers. These early sugar cookies were simple and hearty, a far cry from the elaborately decorated versions we enjoy today. Over time, they evolved, becoming a canvas for creativity, especially during holidays. And what better shape to represent the joy and new beginnings of Easter than a bunny?
What I love most about bunny shaped sugar cookies is their versatility. They’re perfect for baking with kids, decorating with family, or simply enjoying with a cup of tea. The simple recipe allows for endless customization with different frostings, sprinkles, and even edible glitter! Plus, the delightful crunch and sweet flavor are guaranteed to bring a smile to anyone’s face. So, let’s hop into the kitchen and create some bunny magic!
Ingredients:
- For the Sugar Cookies:
- 3 cups all-purpose flour, plus more for dusting
- 1 teaspoon baking powder
- 1/2 teaspoon baking soda
- 1/4 teaspoon salt
- 1 cup (2 sticks) unsalted butter, softened
- 1 1/2 cups granulated sugar
- 2 large eggs
- 1 teaspoon vanilla extract
- 1/2 teaspoon almond extract (optional, but adds a nice touch!)
- For the Royal Icing:
- 4 cups powdered sugar, sifted
- 3 tablespoons meringue powder
- 1/2 cup warm water, plus more as needed
- Gel food coloring (various colors for decorating)
Preparing the Sugar Cookie Dough:
- Combine Dry Ingredients: In a medium bowl, whisk together the flour, baking powder, baking soda, and salt. This ensures everything is evenly distributed, which is key for a consistent cookie texture.
- Cream Butter and Sugar: In a large bowl (or the bowl of your stand mixer), cream together the softened butter and granulated sugar until light and fluffy. This usually takes about 3-5 minutes. Don’t rush this step! The air you incorporate here is what makes the cookies tender.
- Add Eggs and Extracts: Beat in the eggs one at a time, mixing well after each addition. Then, stir in the vanilla extract and almond extract (if using). The mixture should be smooth and creamy.
- Gradually Add Dry Ingredients: Gradually add the dry ingredients to the wet ingredients, mixing on low speed until just combined. Be careful not to overmix! Overmixing develops the gluten in the flour, which can result in tough cookies.
- Form the Dough into Disks: Divide the dough in half and flatten each half into a disk. Wrap each disk tightly in plastic wrap. This helps the dough chill evenly.
- Chill the Dough: Refrigerate the dough for at least 2 hours, or preferably overnight. Chilling the dough is crucial! It allows the gluten to relax, which prevents the cookies from spreading too much in the oven. It also makes the dough easier to roll out.
Rolling, Cutting, and Baking the Cookies:
- Preheat Oven and Prepare Baking Sheets: Preheat your oven to 350°F (175°C). Line baking sheets with parchment paper or silicone baking mats. This prevents the cookies from sticking and makes cleanup a breeze.
- Roll Out the Dough: On a lightly floured surface, roll out one disk of dough to about 1/4 inch thickness. Keep the other disk chilled while you work. If the dough is sticking, add a little more flour to your rolling pin and the surface.
- Cut Out the Cookies: Use bunny-shaped cookie cutters (or any shape you like!) to cut out the cookies. Try to cut the cookies as close together as possible to minimize scraps.
- Place Cookies on Baking Sheets: Carefully transfer the cut-out cookies to the prepared baking sheets, leaving about 1 inch of space between each cookie.
- Bake the Cookies: Bake for 8-10 minutes, or until the edges are lightly golden brown. Keep a close eye on them, as they can burn easily.
- Cool the Cookies: Let the cookies cool on the baking sheets for a few minutes before transferring them to a wire rack to cool completely. Make sure they are completely cool before icing.
- Re-roll Scraps: Gather the dough scraps, re-roll them, and cut out more cookies. You may need to chill the scraps again if they become too soft.
Preparing the Royal Icing:
- Combine Dry Ingredients: In a large bowl (or the bowl of your stand mixer), whisk together the sifted powdered sugar and meringue powder. Sifting the powdered sugar is important to remove any lumps, which will give you a smoother icing.
- Add Water: Gradually add the warm water to the dry ingredients, mixing on low speed until combined.
- Beat the Icing: Increase the speed to medium-high and beat the icing for 5-7 minutes, or until it is stiff and glossy. The icing should hold its shape when you lift the beater.
- Adjust Consistency: The consistency of the icing is crucial for decorating. You’ll need two consistencies: a thicker “outline” icing and a thinner “flood” icing.
- Outline Icing: This should be thick enough to hold its shape and prevent the flood icing from running off the edges of the cookie. If your icing is too thin, add more powdered sugar, 1 tablespoon at a time, until it reaches the desired consistency.
- Flood Icing: This should be thin enough to spread easily and evenly over the cookie. If your icing is too thick, add water, 1/2 teaspoon at a time, until it reaches the desired consistency. It should be similar to the consistency of shampoo.
- Divide and Color the Icing: Divide the icing into separate bowls, depending on how many colors you want to use. Add gel food coloring to each bowl, a little at a time, until you achieve the desired shade. Mix well to ensure the color is evenly distributed.
- Prepare Piping Bags: Transfer each color of icing to a piping bag fitted with a small round tip (for outlining) or a squeeze bottle (for flooding). If you don’t have piping bags, you can use zip-top bags and snip off a tiny corner.
Decorating the Bunny Cookies:
- Outline the Cookies: Using the outline icing, carefully outline the edges of each cookie. This creates a dam to contain the flood icing.
- Flood the Cookies: Using the flood icing, fill in the outlined areas of the cookies. You can use a toothpick or scribe tool to help spread the icing evenly and pop any air bubbles.
- Add Details: While the flood icing is still wet, you can add details such as sprinkles, edible glitter, or other colors of icing. This is called “wet-on-wet” decorating.
- Let the Icing Dry: Allow the icing to dry completely, which usually takes several hours or overnight. This is important to prevent smudging.
- Add More Details (Optional): Once the base layer of icing is dry, you can add more intricate details using the outline icing, such as eyes, noses, whiskers, or patterns.
- Sprinkles and Embellishments: Add sprinkles, edible pearls, or other embellishments to your cookies while the icing is still wet, or attach them with a dab of icing once the base layer is dry.
Tips for Success:
- Use High-Quality Ingredients: The quality of your ingredients will affect the taste and texture of your cookies. Use good-quality butter, vanilla extract, and food coloring.
- Don’t Overmix the Dough: Overmixing develops the gluten in the flour, which can result in tough cookies. Mix the dough until just combined.
- Chill the Dough: Chilling the dough is crucial for preventing the cookies from spreading too much in the oven.
- Bake the Cookies Evenly: Rotate the baking sheets halfway through baking to ensure the cookies bake evenly.
- Adjust Icing Consistency: The consistency of the icing is key for successful decorating. Make sure you have both a thick outline icing and a thinner flood icing.
- Practice Your Piping Skills: Practice piping on a piece of parchment paper before decorating the cookies. This will help you get a feel for the icing and the piping bag.
- Be Patient: Decorating sugar cookies takes time and patience. Don’t rush the process, and have fun with it!
- Storage: Store the decorated cookies in an airtight container at room temperature for up to a week.
Troubleshooting:
- Cookies Spreading Too Much: This is usually caused by using butter that is too soft, not chilling the dough enough, or overmixing the dough.
- Icing Too Thin: Add more powdered sugar, 1 tablespoon at a time, until it reaches the desired consistency.
- Icing Too Thick: Add water, 1/2 teaspoon at a time, until it reaches the desired consistency.
- Air Bubbles in Icing: Use a toothpick or scribe tool to pop any air bubbles in the icing.
- Color Bleeding: Use gel food coloring instead of liquid food coloring, as liquid food coloring
Conclusion:
And there you have it! These adorable bunny-shaped sugar cookies are more than just a treat; they’re a delightful experience waiting to happen. From the satisfying crunch to the sweet, buttery flavor, every bite is a little piece of springtime joy. But why is this recipe a must-try? It’s simple: it’s fun, it’s festive, and it’s surprisingly easy to make, even if you’re not a seasoned baker. The dough comes together quickly, the decorating is a creative outlet, and the end result is guaranteed to bring smiles to faces of all ages. Plus, who can resist a cute bunny?
But the fun doesn’t stop there! Think of these cookies as a blank canvas for your creativity. While I’ve shared my favorite royal icing recipe, feel free to experiment with different colors, sprinkles, and edible glitter. You could even try using fondant for a smoother, more polished look. For a richer flavor, add a touch of almond extract to the dough. Or, if you’re feeling adventurous, try dipping the finished cookies in melted chocolate for an extra decadent treat.
Serving Suggestions and Variations:
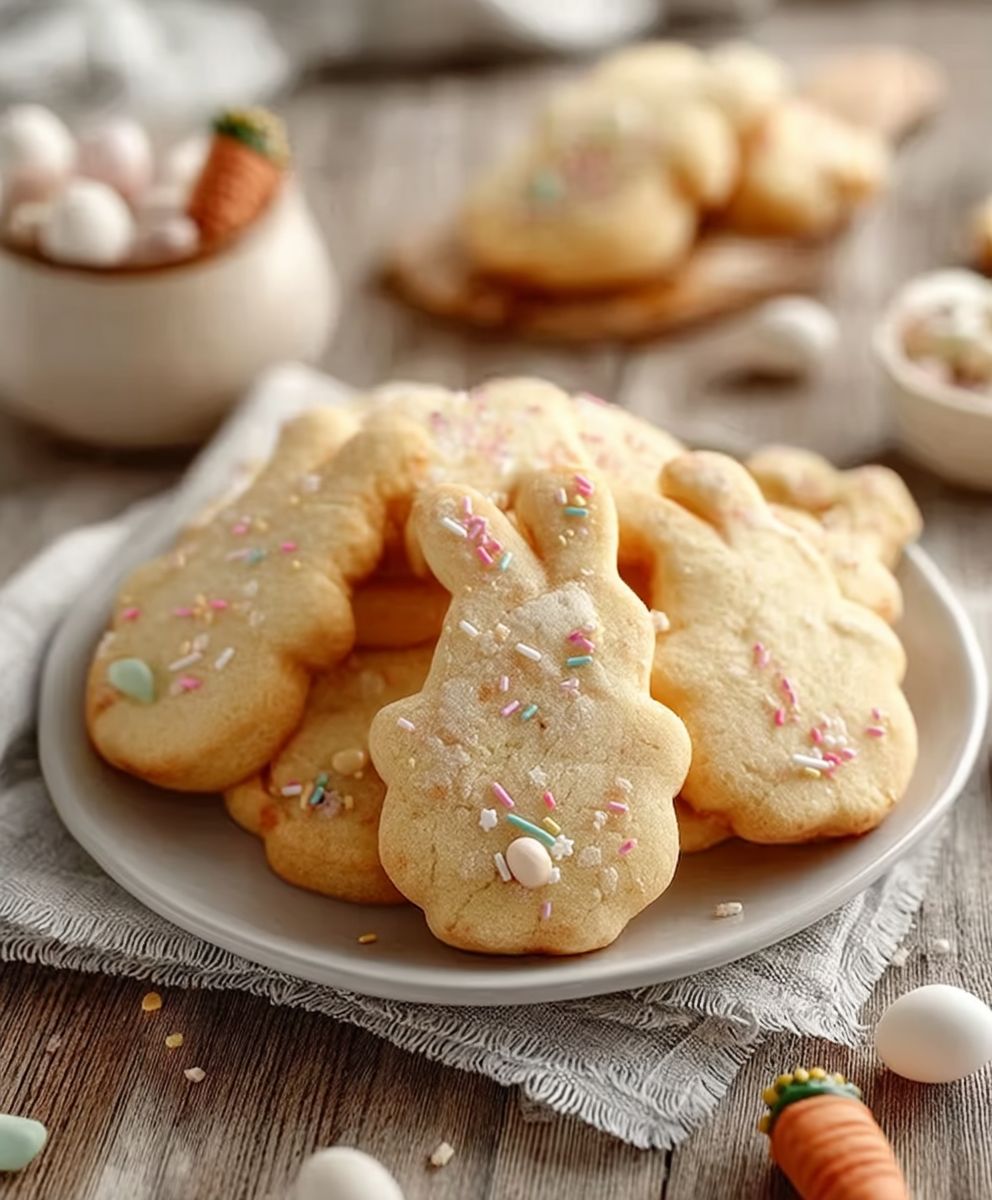
These bunny-shaped sugar cookies are perfect for so many occasions. Imagine them adorning your Easter brunch table, nestled amongst colorful eggs and spring flowers. They also make wonderful gifts for friends, family, and neighbors. Package them in cellophane bags tied with ribbon for a charming and thoughtful present. For a fun activity with kids, set up a cookie decorating station with various icings, sprinkles, and candies. Let their imaginations run wild!
Beyond Easter, these cookies can be adapted for other holidays and celebrations. Simply change the shape of the cookie cutter to suit the occasion. Think hearts for Valentine’s Day, stars for the Fourth of July, or pumpkins for Halloween. The possibilities are endless! You can also adjust the flavorings to match the theme. For example, add pumpkin spice to the dough for a fall-themed cookie.
Don’t be afraid to experiment and make these cookies your own!
I truly believe that baking should be a joyful and rewarding experience. And these bunny-shaped sugar cookies are the perfect way to embrace that spirit. They’re a reminder that even the simplest things in life can bring immense pleasure. So, gather your ingredients, preheat your oven, and get ready to create some magic in the kitchen.
I’m so excited for you to try this recipe! I’ve poured my heart into perfecting it, and I know you’ll love the results. Remember, baking is all about practice and patience. Don’t be discouraged if your first batch isn’t perfect. Just keep trying, and you’ll be amazed at what you can create.
And now, for the most important part: I want to hear about your experience! Did you try this recipe? What variations did you make? What did your family and friends think? Share your photos and stories with me in the comments below. I can’t wait to see your creations and hear about your baking adventures. Let’s spread the joy of baking together, one delicious bunny-shaped sugar cookie at a time! Happy baking! I hope you enjoy making these bunny shaped sugar cookies as much as I do!
Bunny Shaped Sugar Cookies: A Delicious and Easy Recipe
Adorable bunny sugar cookies, perfect for Easter or spring! Classic sugar cookie base topped with smooth, vibrant royal icing.
Ingredients
- 3 cups all-purpose flour, plus more for dusting
- 1 teaspoon baking powder
- 1/2 teaspoon baking soda
- 1/4 teaspoon salt
- 1 cup (2 sticks) unsalted butter, softened
- 1 1/2 cups granulated sugar
- 2 large eggs
- 1 teaspoon vanilla extract
- 1/2 teaspoon almond extract (optional)
- 4 cups powdered sugar, sifted
- 3 tablespoons meringue powder
- 1/2 cup warm water, plus more as needed
- Gel food coloring (various colors)
Instructions
- Combine Dry Ingredients: In a medium bowl, whisk together the flour, baking powder, baking soda, and salt.
- Cream Butter and Sugar: In a large bowl (or stand mixer), cream together the softened butter and granulated sugar until light and fluffy (3-5 minutes).
- Add Eggs and Extracts: Beat in the eggs one at a time, mixing well after each addition. Stir in the vanilla extract and almond extract (if using).
- Gradually Add Dry Ingredients: Gradually add the dry ingredients to the wet ingredients, mixing on low speed until just combined. Do not overmix.
- Form the Dough into Disks: Divide the dough in half and flatten each half into a disk. Wrap each disk tightly in plastic wrap.
- Chill the Dough: Refrigerate the dough for at least 2 hours, or preferably overnight.
- Preheat Oven and Prepare Baking Sheets: Preheat oven to 350°F (175°C). Line baking sheets with parchment paper or silicone baking mats.
- Roll Out the Dough: On a lightly floured surface, roll out one disk of dough to about 1/4 inch thickness. Keep the other disk chilled.
- Cut Out the Cookies: Use bunny-shaped cookie cutters (or any shape you like!) to cut out the cookies.
- Place Cookies on Baking Sheets: Transfer the cut-out cookies to the prepared baking sheets, leaving about 1 inch of space between each cookie.
- Bake the Cookies: Bake for 8-10 minutes, or until the edges are lightly golden brown.
- Cool the Cookies: Let the cookies cool on the baking sheets for a few minutes before transferring them to a wire rack to cool completely.
- Re-roll Scraps: Gather the dough scraps, re-roll them, and cut out more cookies. You may need to chill the scraps again if they become too soft.
- Combine Dry Ingredients: In a large bowl (or stand mixer), whisk together the sifted powdered sugar and meringue powder.
- Add Water: Gradually add the warm water to the dry ingredients, mixing on low speed until combined.
- Beat the Icing: Increase the speed to medium-high and beat the icing for 5-7 minutes, or until it is stiff and glossy.
- Adjust Consistency: Divide the icing and adjust to create both outline and flood consistencies.
- Outline Icing: Add powdered sugar, 1 tablespoon at a time, until thick enough to hold its shape.
- Flood Icing: Add water, 1/2 teaspoon at a time, until it reaches the consistency of shampoo.
- Divide and Color the Icing: Divide the icing into separate bowls. Add gel food coloring to each bowl, a little at a time, until you achieve the desired shade. Mix well.
- Prepare Piping Bags: Transfer each color of icing to a piping bag fitted with a small round tip (for outlining) or a squeeze bottle (for flooding).
- Outline the Cookies: Using the outline icing, carefully outline the edges of each cookie.
- Flood the Cookies: Using the flood icing, fill in the outlined areas of the cookies. Use a toothpick to spread evenly and pop air bubbles.
- Add Details: While the flood icing is still wet, add details such as sprinkles, edible glitter, or other colors of icing (wet-on-wet decorating).
- Let the Icing Dry: Allow the icing to dry completely, which usually takes several hours or overnight.
- Add More Details (Optional): Once the base layer of icing is dry, add more intricate details using the outline icing.
- Sprinkles and Embellishments: Add sprinkles, edible pearls, or other embellishments to your cookies while the icing is still wet, or attach them with a dab of icing once the base layer is dry.
Notes
- Use high-quality ingredients for the best flavor and texture.
- Don’t overmix the cookie dough.
- Chilling the dough is crucial for preventing spreading.
- Adjust the icing consistency carefully for successful decorating.
- Practice piping on parchment paper before decorating the cookies.
- Be patient and have fun!
- Store decorated cookies in an airtight container at room temperature for up to a week.
Leave a Comment