
Brown Sugar Cold Foam: Prepare to elevate your coffee game with this luscious, cloud-like topping that’s taking the world by storm! Forget those expensive coffee shop runs; now you can create coffeehouse-quality drinks right in your own kitchen. Have you ever wondered how to recreate that sweet, velvety texture that perfectly complements your iced coffee? Well, wonder no more!
While the exact origins of cold foam are debated, its popularity exploded with the rise of specialty coffee culture. Baristas, always seeking innovative ways to enhance the coffee experience, began experimenting with different techniques to create a stable, flavorful foam that wouldn’t melt instantly on top of iced beverages. The result? A delightful textural contrast and a burst of sweetness that has captivated coffee lovers everywhere.
People adore brown sugar cold foam for its irresistible combination of flavors and textures. The rich, caramel-like notes of brown sugar perfectly complement the bitterness of coffee, creating a harmonious balance that’s both comforting and invigorating. The smooth, velvety texture adds a luxurious mouthfeel, transforming a simple iced coffee into a truly indulgent treat. Plus, it’s incredibly easy to make! With just a few simple ingredients and a quick whisk, you can whip up a batch of this dreamy topping in minutes. So, ditch the drive-thru and get ready to experience the magic of homemade brown sugar cold foam!
Ingredients:
- 1/4 cup heavy cream
- 2 tablespoons 2% milk (or any milk of your choice)
- 1 tablespoon brown sugar, packed
- 1/4 teaspoon vanilla extract
- Pinch of salt
- Ice, for serving
- Cold brew coffee or iced coffee, for serving
Making the Brown Sugar Cold Foam
Alright, let’s get started on making this dreamy Brown Sugar Cold Foam! It’s surprisingly easy, and once you taste it, you’ll want to put it on everything. Trust me!
- Combine the Cream and Milk: In a small bowl or measuring cup, pour in your 1/4 cup of heavy cream and 2 tablespoons of milk. The ratio of cream to milk is crucial for that perfect cold foam texture. Too much milk, and it won’t be as thick and luscious. Too much cream, and it might be a bit too heavy.
- Add the Brown Sugar: Now, add in your 1 tablespoon of packed brown sugar. Make sure it’s packed! This will give you that rich, molasses-y flavor that makes brown sugar so irresistible. I like to use dark brown sugar for an even deeper flavor, but light brown sugar works just as well.
- Vanilla Extract and Salt: Don’t forget the vanilla extract! Add 1/4 teaspoon. It enhances the sweetness and adds a lovely aroma. And a tiny pinch of salt just a pinch! balances out the sweetness and brings out all the other flavors. It’s a secret weapon in baking and coffee making!
- Whisk it Up! (The Key to Cold Foam): This is where the magic happens. You have a few options here, depending on what you have in your kitchen. The goal is to aerate the mixture until it becomes thick and foamy.
- Option 1: Handheld Milk Frother: This is my preferred method. It’s quick, easy, and creates a beautiful, stable foam. Simply insert the frother into the mixture and froth for about 30-60 seconds, or until the mixture has doubled in volume and is thick and foamy. Move the frother up and down to ensure even aeration.
- Option 2: Immersion Blender: An immersion blender works well too, but be careful not to over-blend. Start by placing the immersion blender at the bottom of the bowl and slowly move it upwards as you blend. Blend for about 15-30 seconds, or until the mixture is thick and foamy.
- Option 3: Hand Whisk (The Workout Method): If you don’t have a frother or immersion blender, don’t worry! You can still make cold foam with a good old-fashioned hand whisk. This will take a bit more elbow grease, but it’s totally doable. Whisk vigorously for 2-3 minutes, or until the mixture has thickened and become foamy.
- Option 4: French Press (Surprisingly Effective): Believe it or not, a French press can also be used to make cold foam! Pour the mixture into the French press, secure the lid, and pump the plunger up and down rapidly for about 30-60 seconds, or until the mixture is thick and foamy.
- Taste and Adjust: Give your cold foam a taste. If it’s not sweet enough for you, add a tiny bit more brown sugar, a little at a time, until it reaches your desired sweetness. If you want a stronger vanilla flavor, add a drop or two more of vanilla extract.
- Chill (Optional, but Recommended): For the best results, I recommend chilling the cold foam in the refrigerator for about 10-15 minutes before serving. This will help it thicken up even more and become even more stable. However, if you’re impatient (like me sometimes!), you can skip this step.
Assembling Your Brown Sugar Cold Brew
Now that you’ve got your amazing Brown Sugar Cold Foam ready, let’s put together the whole drink! This is the fun part.
- Prepare Your Coffee: Fill a glass with ice. Then, pour in your cold brew coffee or iced coffee. I personally love using cold brew because it’s so smooth and less acidic, but any strong coffee will work. The amount of coffee you use will depend on the size of your glass and how strong you like your coffee.
- Sweeten (Optional): If you like your coffee a little sweeter, you can add a touch of simple syrup, brown sugar syrup, or your favorite sweetener to the coffee before adding the cold foam. I usually don’t add any extra sweetener because the brown sugar in the cold foam is sweet enough for me.
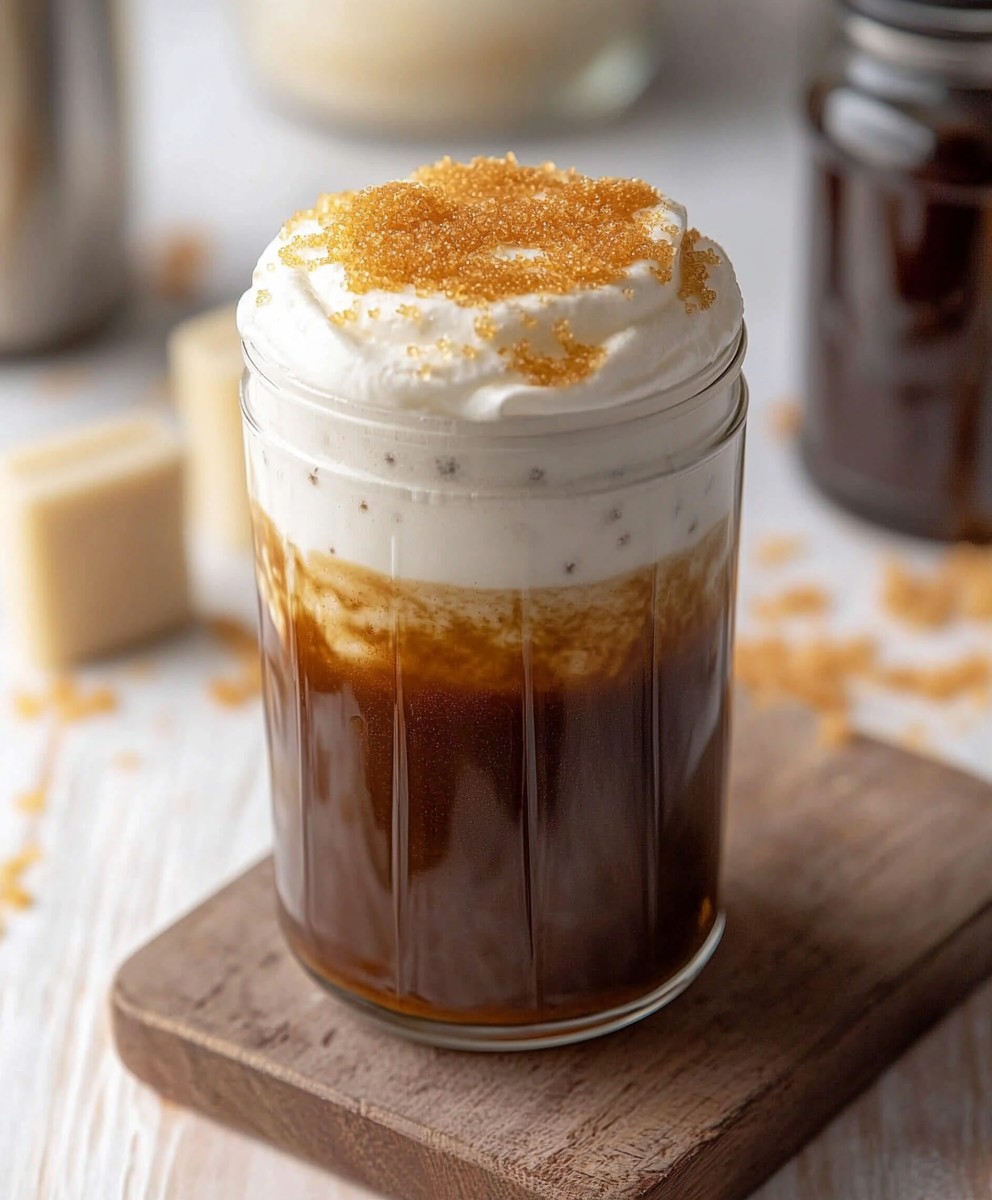
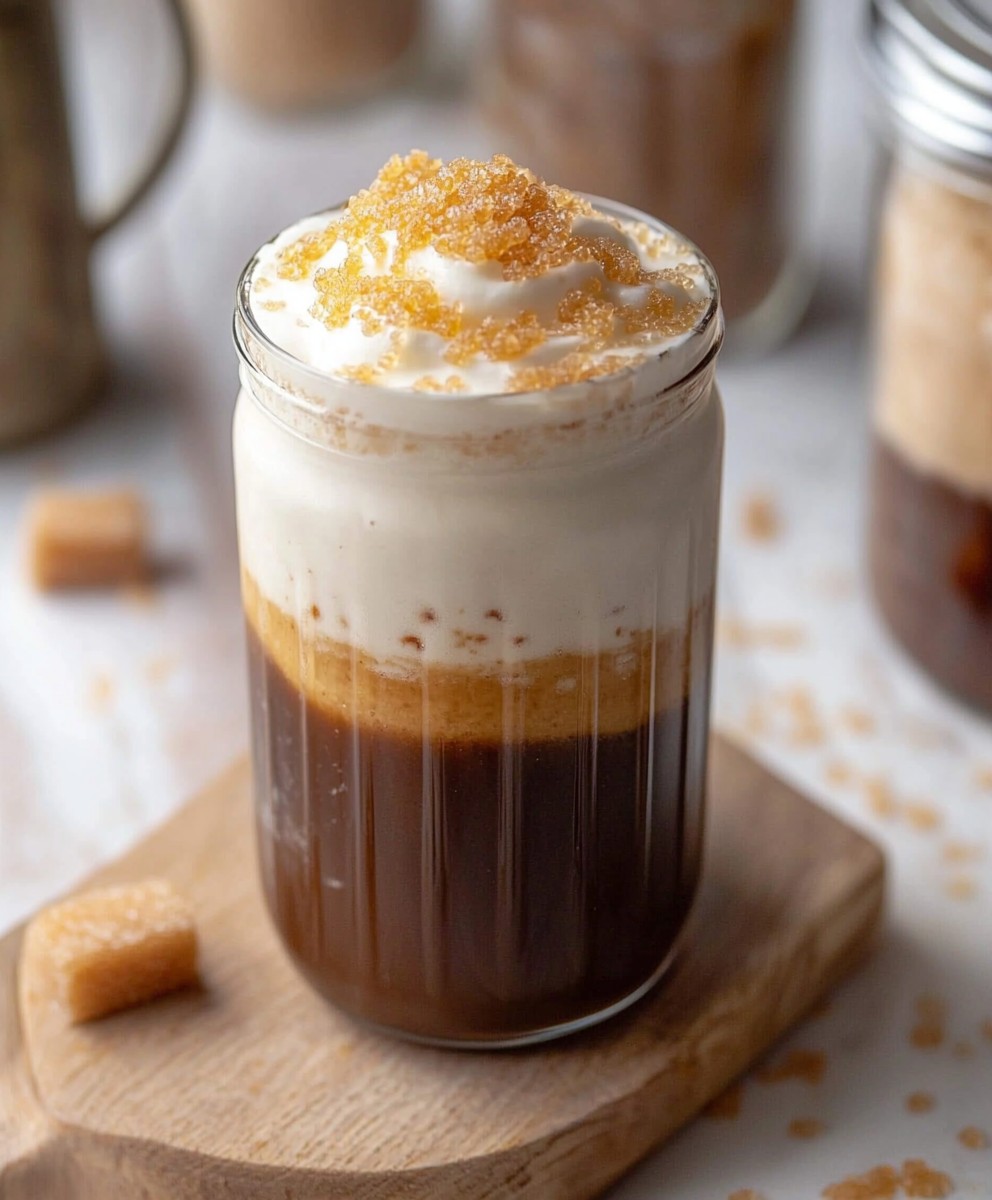
- Gently Pour the Cold Foam: This is the key to getting that beautiful layered effect. Slowly and gently pour the Brown Sugar Cold Foam over the top of the coffee. You want the foam to sit on top of the coffee, creating a distinct layer. Use the back of a spoon to help guide the foam if needed.
- Garnish (Optional, but Makes it Fancy!): If you’re feeling fancy, you can garnish your Brown Sugar Cold Brew with a sprinkle of brown sugar, a drizzle of caramel sauce, or a dusting of cinnamon. You could even add a few coffee beans on top for a visual appeal.
- Enjoy Immediately! The best part! Grab a straw (or don’t, if you want to experience the cold foam first), and enjoy your delicious and refreshing Brown Sugar Cold Brew. The combination of the strong coffee and the sweet, creamy cold foam is simply divine.
Tips and Tricks for the Perfect Brown Sugar Cold Foam
Here are a few extra tips and tricks to help you make the absolute best Brown Sugar Cold Foam:
- Use Cold Ingredients: Starting with cold heavy cream and milk will help the foam form more quickly and easily.
- Don’t Over-Froth: Be careful not to over-froth the mixture, especially if you’re using an immersion blender. Over-frothing can result in a foam that’s too stiff and not as smooth.
- Adjust the Sweetness to Your Liking: The amount of brown sugar in the recipe is just a suggestion. Feel free to adjust it to your own taste. If you prefer a less sweet cold foam, use less brown sugar. If you have a sweet tooth, add a little more.
- Experiment with Flavors: Once you’ve mastered the basic Brown Sugar Cold Foam, you can start experimenting with other flavors. Try adding a pinch of cinnamon, nutmeg, or cardamom for a warm and spicy twist. You could also add a tablespoon of chocolate syrup or caramel sauce for a decadent treat.
- Make it Vegan: To make a vegan version of this recipe, simply substitute the heavy cream with a plant-based heavy cream alternative, such as coconut cream or cashew cream. Use your favorite plant-based milk instead of dairy milk.
- Storage: While it’s best to use the cold foam immediately, you can store any leftovers in an airtight container in the refrigerator for up to 24 hours. However, the foam may deflate slightly over time. Give it a quick whisk before using.
- Serving Suggestions: While Brown Sugar Cold Foam is amazing on cold brew, it’s also delicious on other drinks, such as iced lattes, iced cappuccinos, and even hot coffee! You can also use it as a topping for desserts, such as ice cream or brownies.
Troubleshooting
Sometimes, things don’t go exactly as planned. Here are a few common issues you might encounter and how to fix them:
- Cold Foam Isn’t Thickening: If your cold foam isn’t thickening, make sure your heavy cream is very cold. You may also need to froth it for a longer period of time. Ensure your frother is working correctly.
- Cold Foam is Too Thin: If your cold foam is too thin, you may have used too much milk. Try adding a little more heavy cream and frothing again.
- Cold Foam is Too Stiff: If your cold foam is too stiff, you may have over-frothed it. Unfortunately, there’s not much you can do to fix this. Just be more careful next time.
- Brown Sugar Isn’t Dissolving: If the brown sugar isn’t dissolving completely, try using a finer brown sugar or warming the cream and milk slightly before adding the sugar.
Enjoy Your Homemade Brown Sugar Cold Brew!
I hope you enjoy this recipe as much as I do! It’s a simple yet incredibly satisfying way to elevate your coffee game. Once you try it, you’ll never go back to plain iced coffee again. Happy brewing!
Conclusion:
This Brown Sugar Cold Foam recipe isn’t just another coffee topping; it’s a game-changer! Seriously, once you’ve tasted the creamy, sweet, and subtly spiced perfection of this homemade cold foam, you’ll wonder how you ever settled for anything less. It elevates your everyday iced coffee into a café-worthy treat, and the best part? It’s incredibly easy to make right in your own kitchen. Why is this a must-try? Because it’s the perfect balance of sweetness and richness, adding a luxurious texture to any cold beverage. It’s far superior to store-bought versions, allowing you to control the ingredients and customize the sweetness to your exact liking. Plus, the brown sugar adds a depth of flavor that regular sugar just can’t match. It’s the little touch that makes a big difference. But don’t just limit yourself to iced coffee! This Brown Sugar Cold Foam is incredibly versatile. Try it on top of iced lattes, cold brew, or even iced tea for a delightful twist. For a richer experience, consider using a splash of heavy cream in addition to the milk. If you’re feeling adventurous, add a pinch of cinnamon or nutmeg to the foam for an extra layer of warmth and spice, especially during the fall and winter months. You could even experiment with different extracts, like vanilla or almond, to create unique flavor profiles. And for those who prefer a dairy-free option, almond milk, oat milk, or soy milk work beautifully as substitutes. Just be sure to choose unsweetened varieties to avoid making the foam overly sweet. You can also adjust the amount of brown sugar to suit your taste preferences. If you prefer a less sweet foam, start with a smaller amount and add more as needed. Beyond beverages, think about using this cold foam as a topping for desserts! Imagine a dollop of this creamy goodness on top of a slice of apple pie, a bowl of fresh berries, or even a scoop of ice cream. The possibilities are truly endless. I’m so confident that you’ll love this recipe that I urge you to give it a try. It’s quick, simple, and guaranteed to impress. Once you’ve made your own batch of Brown Sugar Cold Foam, I’d love to hear about your experience! Did you try any variations? What was your favorite way to use it? Share your photos and comments below I can’t wait to see what you create! Your feedback helps others discover the joy of this simple yet transformative recipe. So go ahead, treat yourself to a little bit of luxury and elevate your next cold beverage with this irresistible Brown Sugar Cold Foam. You won’t regret it! Let me know what you think! Print
Brown Sugar Cold Foam: The Ultimate Guide to Making It At Home
- Total Time: 5 minutes
- Yield: 1 serving 1x
Description
Enjoy a coffee shop treat at home with this Brown Sugar Cold Brew. Creamy, sweet brown sugar cold foam floats atop smooth cold brew for a refreshing drink.
Ingredients
- 1/4 cup heavy cream
- 2 tablespoons 2% milk (or any milk of your choice)
- 1 tablespoon brown sugar, packed
- 1/4 teaspoon vanilla extract
- Pinch of salt
- Ice, for serving
- Cold brew coffee or iced coffee, for serving
Instructions
- Combine the Cream and Milk: In a small bowl or measuring cup, pour in your 1/4 cup of heavy cream and 2 tablespoons of milk.
- Add the Brown Sugar: Add in your 1 tablespoon of packed brown sugar.
- Vanilla Extract and Salt: Add 1/4 teaspoon vanilla extract and a pinch of salt.
- Whisk it Up!: Choose your preferred method:
- Handheld Milk Frother: Froth for 30-60 seconds, until doubled in volume and thick.
- Immersion Blender: Blend for 15-30 seconds, until thick and foamy.
- Hand Whisk: Whisk vigorously for 2-3 minutes, until thickened and foamy.
- French Press: Pump the plunger rapidly for 30-60 seconds, until thick and foamy.
- Taste and Adjust: Add more brown sugar or vanilla extract to taste.
- Chill (Optional): Chill in the refrigerator for 10-15 minutes for best results.
- Prepare Your Coffee: Fill a glass with ice and pour in cold brew or iced coffee.
- Sweeten (Optional): Add simple syrup or your favorite sweetener to the coffee, if desired.
- Gently Pour the Cold Foam: Slowly and gently pour the Brown Sugar Cold Foam over the top of the coffee. Use the back of a spoon to help guide the foam if needed.
- Garnish (Optional): Garnish with a sprinkle of brown sugar, a drizzle of caramel sauce, or a dusting of cinnamon.
- Enjoy Immediately!
Notes
- Use cold ingredients for best results.
- Don’t over-froth the mixture.
- Adjust the sweetness to your liking.
- Experiment with flavors like cinnamon, nutmeg, or chocolate syrup.
- Make it vegan by substituting heavy cream and milk with plant-based alternatives.
- Leftover cold foam can be stored in an airtight container in the refrigerator for up to 24 hours.
- If your cold foam isn’t thickening, make sure your heavy cream is very cold. You may also need to froth it for a longer period of time. Ensure your frother is working correctly.
- If your cold foam is too thin, you may have used too much milk. Try adding a little more heavy cream and frothing again.
- If your cold foam is too stiff, you may have over-frothed it. Unfortunately, there’s not much you can do to fix this. Just be more careful next time.
- If the brown sugar isn’t dissolving completely, try using a finer brown sugar or warming the cream and milk slightly before adding the sugar.
- Prep Time: 5 minutes
- Cook Time: 0 minutes


Leave a Comment