
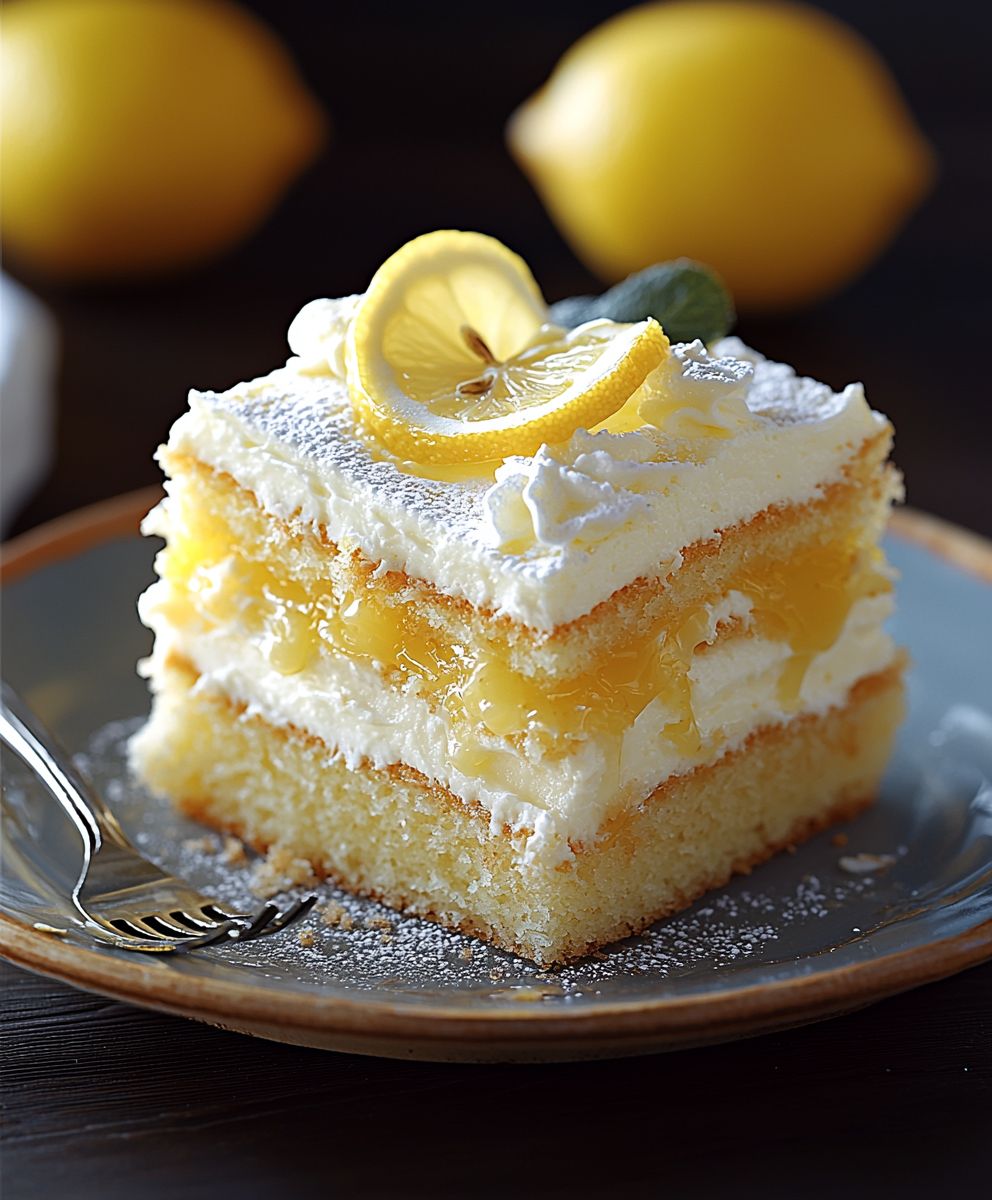
Lemon Lush Cake: Prepare to be transported to dessert heaven with this incredibly light, tangy, and utterly irresistible treat! Imagine layers of creamy, dreamy goodness melding together, each bite a burst of sunshine on your tongue. This isn’t just a cake; it’s an experience, a symphony of textures and flavors that will have everyone begging for seconds.
While the exact origins of Lemon Lush Cake are shrouded in a bit of mystery, similar layered desserts have been gracing tables across America for generations, often appearing at potlucks, family gatherings, and holiday celebrations. These no-bake wonders gained popularity for their ease of preparation and crowd-pleasing appeal, making them a staple in many households.
What makes this particular dessert so beloved? It’s the perfect balance of sweet and tart, the creamy smoothness contrasted by the delicate crunch of the crust. The bright, zesty lemon flavor is incredibly refreshing, making it an ideal dessert for warm weather or any time you need a little pick-me-up. Plus, let’s be honest, the fact that it requires minimal baking (or even no baking at all, depending on your crust choice!) is a major win for busy bakers. Get ready to discover why this Lemon Lush Cake will become your new go-to dessert!
Ingredients:
- For the Crust:
- 1 ½ cups all-purpose flour
- ½ cup (1 stick) cold unsalted butter, cut into cubes
- ¼ cup powdered sugar
- ¼ teaspoon salt
- 3-5 tablespoons ice water
- For the Cream Cheese Layer:
- 8 ounces cream cheese, softened
- 1 cup powdered sugar
- 1 teaspoon vanilla extract
- 8 ounces frozen whipped topping, thawed (like Cool Whip)
- For the Lemon Pudding Layer:
- 2 (3.4 ounce) packages instant lemon pudding mix
- 3 cups milk (whole or 2%)
- For the Whipped Topping Layer:
- 8 ounces frozen whipped topping, thawed (like Cool Whip)
- For the Garnish:
- Lemon slices or zest (optional)
- Graham cracker crumbs (optional)
Preparing the Crust:
- In a large bowl, whisk together the flour, powdered sugar, and salt. This ensures the dry ingredients are evenly distributed.
- Add the cold, cubed butter to the flour mixture. Using a pastry blender or your fingertips, cut the butter into the flour until the mixture resembles coarse crumbs. The key here is to work quickly so the butter doesn’t melt. Small pieces of butter create flaky layers in the crust.
- Gradually add the ice water, one tablespoon at a time, mixing until the dough just comes together. Be careful not to overmix, as this can develop the gluten in the flour and result in a tough crust. You want a dough that holds together when pressed but isn’t sticky.
- Form the dough into a disc, wrap it in plastic wrap, and refrigerate for at least 30 minutes. This allows the gluten to relax and the butter to firm up, making the dough easier to roll out. Chilling is crucial for a tender crust.
- Preheat your oven to 350°F (175°C). While the oven is preheating, remove the dough from the refrigerator.
- On a lightly floured surface, roll out the dough to fit a 9×13 inch baking dish. Gently transfer the dough to the baking dish and press it into the bottom and up the sides. You can crimp the edges for a decorative touch, if desired.
- Prick the bottom of the crust with a fork several times. This prevents the crust from puffing up during baking.
- Bake for 18-20 minutes, or until the crust is lightly golden brown. Keep a close eye on it, as oven temperatures can vary. You want the crust to be cooked through but not overly browned.
- Let the crust cool completely before adding the fillings. This is important because adding the fillings to a warm crust can cause them to melt or become runny.
Making the Cream Cheese Layer:
- In a large bowl, beat the softened cream cheese with an electric mixer until smooth and creamy. Make sure your cream cheese is truly softened; otherwise, you’ll end up with lumps in your filling.
- Gradually add the powdered sugar, beating until well combined. Scrape down the sides of the bowl as needed to ensure everything is evenly mixed.
- Stir in the vanilla extract. Vanilla enhances the flavor of the cream cheese and adds a touch of warmth.
- Gently fold in the thawed whipped topping until just combined. Be careful not to overmix, as this can deflate the whipped topping. You want a light and airy cream cheese layer.
- Spread the cream cheese mixture evenly over the cooled crust. Use an offset spatula or the back of a spoon to create a smooth and even layer.
- Refrigerate for at least 30 minutes to allow the cream cheese layer to set. This will make it easier to spread the lemon pudding layer on top.
Preparing the Lemon Pudding Layer:
- In a large bowl, whisk together the instant lemon pudding mix and milk until well combined. Whisk vigorously to ensure there are no lumps.
- Let the pudding mixture stand for 5 minutes to thicken. Instant pudding needs a few minutes to properly set up.
- Gently spread the lemon pudding mixture evenly over the cream cheese layer. Again, use an offset spatula or the back of a spoon to create a smooth and even layer.
- Refrigerate for at least 2 hours, or preferably overnight, to allow the pudding layer to set completely. This is crucial for the cake to hold its shape when sliced.
Adding the Whipped Topping and Garnish:
- Spread the thawed whipped topping evenly over the lemon pudding layer. You can use an offset spatula or a piping bag to create a decorative design.
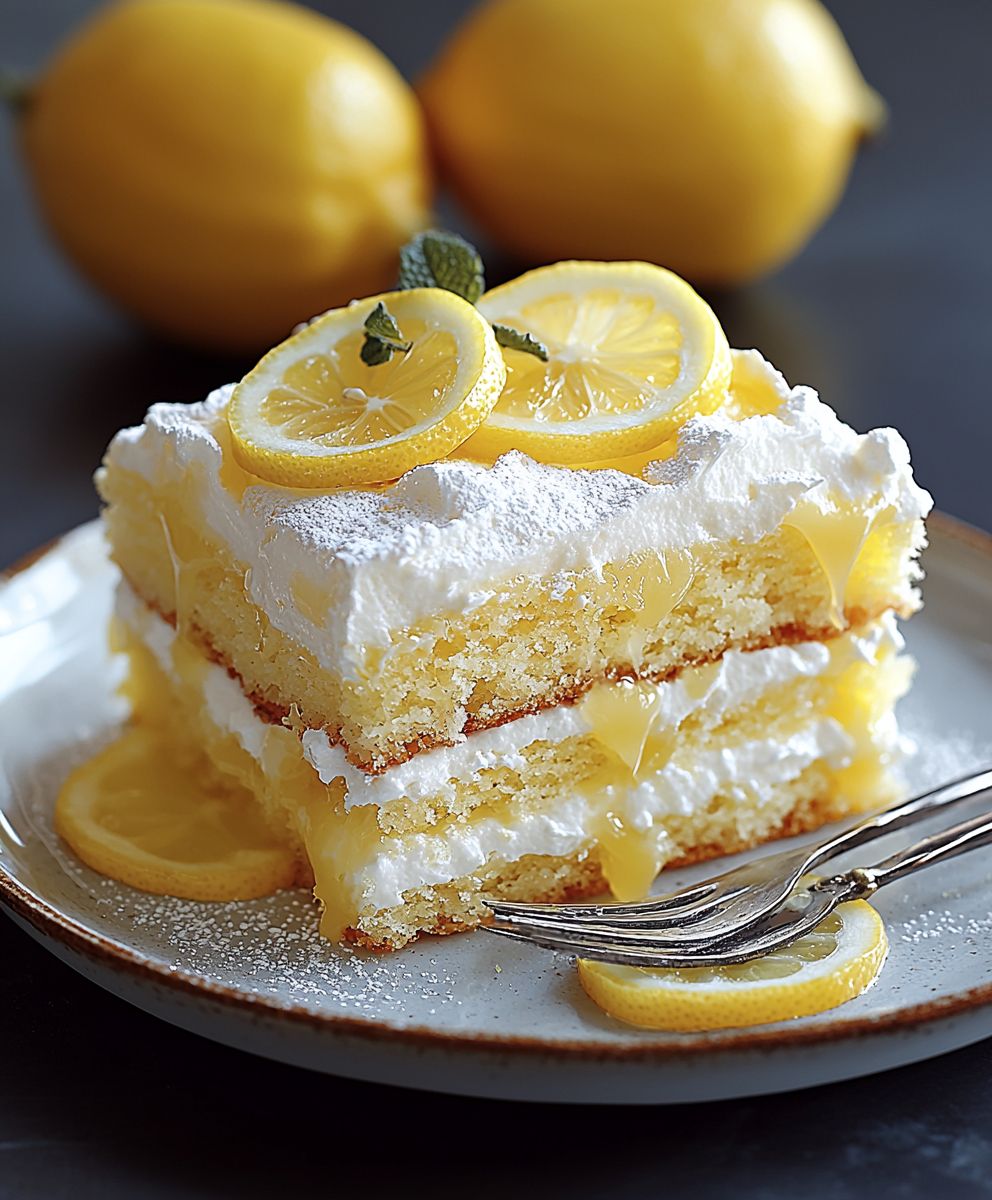
- If desired, garnish with lemon slices or zest and graham cracker crumbs. These additions add a pop of color and flavor.
- Refrigerate for at least 30 minutes before serving. This allows the whipped topping to firm up slightly and the flavors to meld together.
Tips for Success:
- Use Cold Ingredients: Cold butter and ice water are essential for a flaky crust.
- Don’t Overmix: Overmixing the crust dough can result in a tough crust.
- Chill Time is Key: Chilling the crust and the layers allows them to set properly and prevents the cake from becoming soggy.
- Softened Cream Cheese: Make sure your cream cheese is fully softened before mixing to avoid lumps.
- Gentle Folding: When folding in the whipped topping, be gentle to avoid deflating it.
- Make Ahead: This cake is perfect for making ahead of time. You can assemble it a day or two in advance and store it in the refrigerator.
Variations:
- Different Crust: Try using a graham cracker crust instead of a traditional pastry crust. Simply combine graham cracker crumbs, melted butter, and sugar, then press into the baking dish and bake until lightly golden.
- Berry Topping: Add fresh berries, such as strawberries, blueberries, or raspberries, to the top of the cake for a burst of flavor and color.
- Lime Lush: Substitute lime pudding mix for lemon pudding mix for a tangy twist.
- Coconut Flakes: Sprinkle toasted coconut flakes over the whipped topping for added texture and flavor.
- Chocolate Drizzle: Drizzle melted chocolate over the whipped topping for a decadent treat.
Serving Suggestions:
- Serve chilled as a refreshing dessert on a warm day.
- Pair with a scoop of vanilla ice cream or a dollop of whipped cream.
- Enjoy with a cup of coffee or tea.
- This cake is perfect for potlucks, picnics, and other gatherings.
Storage Instructions:
- Store leftover cake in the refrigerator, covered, for up to 3 days.
- The crust may become slightly softer over time, but the cake will still taste delicious.
- Freezing is not recommended, as the whipped topping and pudding layers may become watery upon thawing.
Conclusion:
And there you have it! Our Lemon Lush Cake recipe a symphony of textures and flavors that’s guaranteed to brighten any day. I truly believe this is a must-try dessert, not just because it’s incredibly delicious, but because it’s surprisingly easy to make. Forget spending hours in the kitchen; this recipe is designed for maximum impact with minimal effort. The creamy, tangy filling, the buttery crust, and the light, airy topping all come together in perfect harmony. It’s a crowd-pleaser, a family favorite, and honestly, a little slice of sunshine on a plate. But don’t just take my word for it! The real magic happens when you bake it yourself and experience the joy of creating something so delightful. Think of the smiles around the table as everyone takes their first bite. Imagine the satisfaction of knowing you crafted this masterpiece with your own two hands. That’s the beauty of baking, and this Lemon Lush Cake is the perfect recipe to unlock that feeling.Serving Suggestions and Variations:
Now, let’s talk about how to make this Lemon Lush Cake even more special. While it’s absolutely divine on its own, there are plenty of ways to customize it to your liking. For a more intense lemon flavor, try adding a tablespoon of lemon zest to the filling. Or, if you’re feeling adventurous, you could swap out the lemon extract for lime extract for a zesty twist. For serving, a simple dusting of powdered sugar is always a classic choice. But if you want to elevate the presentation, consider adding a few fresh berries on top raspberries, blueberries, or strawberries would all complement the lemon flavor beautifully. A dollop of whipped cream or a scoop of vanilla ice cream would also be a welcome addition. And for those who are looking for a lighter option, you can use a reduced-fat cream cheese and a sugar substitute in the filling. You can also use a graham cracker crust instead of the traditional shortbread crust for a slightly different texture and flavor. Another fun variation is to make individual Lemon Lush Cake parfaits. Simply layer the crust, filling, and topping in small glasses or jars for a beautiful and portable dessert. This is a great option for parties or picnics. Don’t be afraid to experiment and make this recipe your own! Baking is all about creativity and having fun in the kitchen.Your Turn to Bake!
I’m so excited for you to try this Lemon Lush Cake recipe. I know you’re going to love it! It’s the perfect dessert for any occasion, from a casual weeknight dinner to a special celebration. And the best part is, it’s so easy to make that even beginner bakers can achieve amazing results. So, what are you waiting for? Gather your ingredients, preheat your oven, and get ready to create a little bit of magic in your kitchen. I promise you won’t be disappointed. Once you’ve made this incredible Lemon Lush Cake, I’d love to hear about your experience! Share your photos and stories with me in the comments below. Let me know what variations you tried, what your family and friends thought, and any tips or tricks you discovered along the way. I can’t wait to see your creations! Happy baking! Print
Lemon Lush Cake: The Ultimate Recipe for a Delicious Dessert
- Total Time: 180 minutes
- Yield: 12–16 servings 1x
Description
A layered dessert with a buttery crust, creamy cream cheese, tangy lemon pudding, and fluffy whipped topping. Perfect for any occasion!
Ingredients
- 1 ½ cups all-purpose flour
- ½ cup (1 stick) cold unsalted butter, cut into cubes
- ¼ cup powdered sugar
- ¼ teaspoon salt
- 3–5 tablespoons ice water
- 8 ounces cream cheese, softened
- 1 cup powdered sugar
- 1 teaspoon vanilla extract
- 8 ounces frozen whipped topping, thawed (like Cool Whip)
- 2 (3.4 ounce) packages instant lemon pudding mix
- 3 cups milk (whole or 2%)
- 8 ounces frozen whipped topping, thawed (like Cool Whip)
- Lemon slices or zest
- Graham cracker crumbs
Instructions
- Prepare the Crust:
- In a large bowl, whisk together the flour, powdered sugar, and salt.
- Cut in the cold butter using a pastry blender or your fingertips until the mixture resembles coarse crumbs.
- Gradually add the ice water, one tablespoon at a time, mixing until the dough just comes together.
- Form the dough into a disc, wrap it in plastic wrap, and refrigerate for at least 30 minutes.
- Preheat oven to 350°F (175°C).
- On a lightly floured surface, roll out the dough to fit a 9×13 inch baking dish.
- Gently transfer the dough to the baking dish and press it into the bottom and up the sides. Prick the bottom of the crust with a fork.
- Bake for 18-20 minutes, or until the crust is lightly golden brown.
- Let the crust cool completely.
- Make the Cream Cheese Layer:
- In a large bowl, beat the softened cream cheese with an electric mixer until smooth and creamy.
- Gradually add the powdered sugar, beating until well combined.
- Stir in the vanilla extract.
- Gently fold in the thawed whipped topping until just combined.
- Spread the cream cheese mixture evenly over the cooled crust.
- Refrigerate for at least 30 minutes.
- Prepare the Lemon Pudding Layer:
- In a large bowl, whisk together the instant lemon pudding mix and milk until well combined.
- Let the pudding mixture stand for 5 minutes to thicken.
- Gently spread the lemon pudding mixture evenly over the cream cheese layer.
- Refrigerate for at least 2 hours, or preferably overnight.
- Add the Whipped Topping and Garnish:
- Spread the thawed whipped topping evenly over the lemon pudding layer.
- If desired, garnish with lemon slices or zest and graham cracker crumbs.
- Refrigerate for at least 30 minutes before serving.
Notes
- Use Cold Ingredients: Cold butter and ice water are essential for a flaky crust.
- Don’t Overmix: Overmixing the crust dough can result in a tough crust.
- Chill Time is Key: Chilling the crust and the layers allows them to set properly and prevents the cake from becoming soggy.
- Softened Cream Cheese: Make sure your cream cheese is fully softened before mixing to avoid lumps.
- Gentle Folding: When folding in the whipped topping, be gentle to avoid deflating it.
- Make Ahead: This cake is perfect for making ahead of time. You can assemble it a day or two in advance and store it in the refrigerator.
- Different Crust: Try using a graham cracker crust instead of a traditional pastry crust. Simply combine graham cracker crumbs, melted butter, and sugar, then press into the baking dish and bake until lightly golden.
- Berry Topping: Add fresh berries, such as strawberries, blueberries, or raspberries, to the top of the cake for a burst of flavor and color.
- Lime Lush: Substitute lime pudding mix for lemon pudding mix for a tangy twist.
- Coconut Flakes: Sprinkle toasted coconut flakes over the whipped topping for added texture and flavor.
- Chocolate Drizzle: Drizzle melted chocolate over the whipped topping for a decadent treat.
- Serve chilled as a refreshing dessert on a warm day.
- Pair with a scoop of vanilla ice cream or a dollop of whipped cream.
- Enjoy with a cup of coffee or tea.
- This cake is perfect for potlucks, picnics, and other gatherings.
- Store leftover cake in the refrigerator, covered, for up to 3 days.
- The crust may become slightly softer over time, but the cake will still taste delicious.
- Freezing is not recommended, as the whipped topping and pudding layers may become watery upon thawing.
- Prep Time: 30 minutes
- Cook Time: 20 minutes

Leave a Comment