

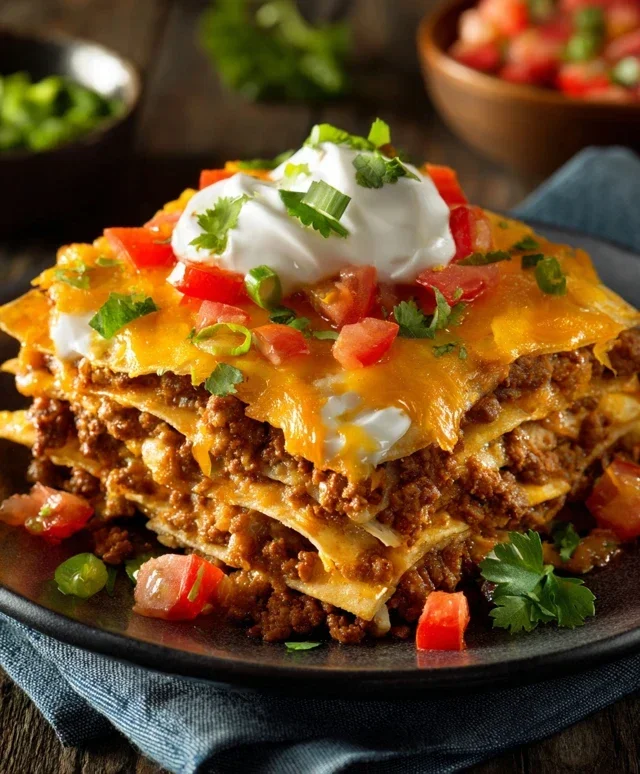
Walking Taco Casserole is the ultimate weeknight warrior, a dish that effortlessly blends comfort food with a playful, deconstructed vibe. Forget the mess of individual chip bags; this ingenious casserole brings all the beloved flavors of a walking taco right into one glorious, shareable pan. It’s no wonder this crowd-pleaser has become a go-to for busy families and casual gatherings. We’re talking tender ground beef seasoned to perfection, nestled with creamy beans and vibrant salsa, all topped with a melty, cheesy crust that begs to be scooped. What makes Walking Taco Casserole truly special is its ability to capture that nostalgic, fun-loving spirit of the origin extractal while delivering a hearty, satisfying meal. It’s the kind of dish that sparks smiles and second helpings, proving that sometimes, the best innovations are born from simply reimagin extracting our favorite classics.
Walking Taco Casserole
This Walking Taco Casserole is a guaranteed crowd-pleaser, perfect for busy weeknights or casual gatherings. It takes all the fun and flavor of a taco night and transforms it into an effortless, baked dish. No more messy individual bags of chips – everything is layered together for maximum taste and convenience. It’s the ultimate comfort food with a Tex-Mex twist, and I’m so excited to share this recipe with you. Get ready for a symphony of savory ground beef, creamy cheese, zesty taco seasoning, and that satisfying crunch of Fritos!
Ingredients:
Cooking Instructions:
This recipe comes together in just a few simple stages, making it incredibly accessible even for begin extractner cooks. Let’s get started!
1. Brown the Beef and Onions:
Begin extract by placing your ground beef in a large skillet over medium-high heat. As the beef starts to cook, break it apart with a spoon or spatula. Once it begin extracts to turn brown, add your chopped onion to the skillet. Continue to cook, stirring occasionally, until the ground beef is fully browned and no pink remains, and the onions have softened and become translucent. This usually takes about 7-10 minutes. Once cooked, drain off any excess grease from the skillet. This step is crucial for a clean flavor and a less oily casserole.
2. Incorporate the Flavor Boosters:
Now it’s time to build the delicious taco filling. Reduce the heat to medium-low. Add the packet of taco seasoning directly to the browned beef and onion mixture. Stir well to ensure the seasoning is evenly distributed. Next, add the softened cream cheese to the skillet. This is where the magic happens for that creamy, dreamy texture. Stir gently until the cream cheese has melted and is fully incorporated into the beef mixture, creating a rich and cohesive sauce. Finally, stir in the entire can of green chilis, including the liquid. The green chilis add a mild heat and a wonderful, authentic Southwestern flavor that perfectly complements the taco seasoning. Stir everything together until well combined. Let this mixture simmer for about 5 minutes, allowing the flavors to meld beautifully.
3. Assemble the Casserole Layers:
Preheat your oven to 350 degrees Fahrenheit (175 degrees Celsius). Lightly grease a 9×13 inch baking dish. This will prevent any sticking and make serving a breeze. Now, it’s time to build our walking taco masterpiece. Spread about half of the lightly crushed Fritos corn chips evenly across the bottom of the prepared baking dish. You want enough to form a good base, but don’t pack them down too tightly. Spoon the savory ground beef and cream cheese mixture evenly over the layer of Fritos. Make sure to spread it out to the edges of the dish so every bite gets that delicious filling.
4. Top and Bake to Perfection:
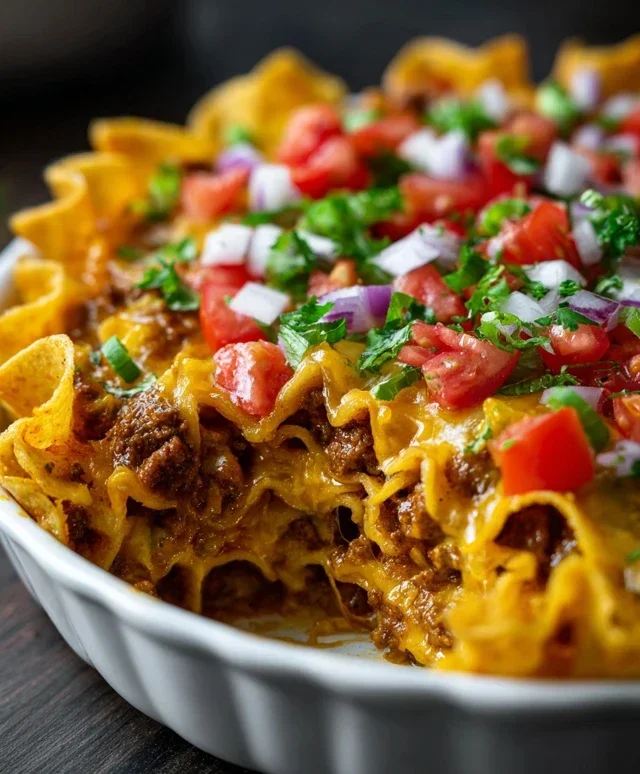
Sprinkle the shredded taco blend cheese evenly over the top of the ground beef mixture. This cheese will melt into a gooey, delicious blanket that holds everything together. Now, carefully place the remaining Fritos corn chips on top of the cheese. Don’t worry about making it a perfect layer; the crunch and texture are what we’re after. Place the baking dish into your preheated oven and bake for 15-20 minutes, or until the cheese is melted and bubbly, and the edges are lightly golden brown. The aroma that will fill your kitchen during this time is absolutely incredible!
5. Garnish and Serve:
Once the casserole is out of the oven and looking beautifully melted and bubbly, let it rest for a few minutes. This resting period helps the casserole set slightly, making it easier to serve. Now for the fun part – the toppings! Sprinkle the chopped Roma tomato and the shredded lettuce over the top of the hot casserole. These fresh toppings add a burst of color, texture, and a refreshing contrast to the rich, cheesy base. Finally, dollop generous amounts of salsa and sour cream over everything. These are the classic taco accompaniments that truly complete the walking taco experience. Serve immediately, allowing everyone to dig in and enjoy this amazing, deconstructed taco delight! It’s truly a one-dish wonder that’s sure to become a family favorite.
Conclusion:
There you have it – a simple yet incredibly satisfying Walking Taco Casserole recipe that’s guaranteed to become a family favorite! This dish is a winner because it takes all the beloved flavors and textures of a walking taco and transforms them into an easy-to-serve casserole. It’s perfect for busy weeknights, casual gatherings, or even a fun movie night. The beauty of this recipe lies in its adaptability; you can customize it to your heart’s content.
For serving, a dollop of sour cream, a sprinkle of fresh cilantro, or even a side of salsa elevates the experience. Don’t be afraid to get creative with variations! Consider adding black beans for extra protein, corn for a touch of sweetness, or even diced jalapeños for a spicy kick. If you’re feeling adventurous, try swapping ground beef for seasoned ground turkey or even shredded chicken. I highly encourage you to give this Walking Taco Casserole a try; it’s a delightful way to enjoy a classic in a new, convenient format.
Frequently Asked Questions:
Can I make this ahead of time?
Absolutely! You can assemble the casserole (without baking) and store it in the refrigerator for up to 24 hours. You may need to add a few extra minutes to the baking time when you’re ready to cook it.
What kind of chips work best?
Fritos or Doritos are traditional choices and work wonderfully, but any sturdy, crunchy corn chip will do. Just be sure they aren’t too thin, or they might become soggy too quickly.
Is this recipe spicy?
The base recipe is generally mild, but the spice level can easily be adjusted. You can add diced jalapeños to the meat mixture, use a spicy taco seasoning, or offer hot sauce as a topping.
Walking Taco Casserole
A flavorful and easy casserole that brings the fun of walking tacos to your dinner table, perfect for weeknights or gatherings. This recipe uses ground beef and is alcohol-free.
Ingredients
-
1 ½ lbs ground beef
-
1 cup onion, chopped
-
3 oz cream cheese
-
1 packet taco seasoning
-
1 can green chilis
-
2-3 cups Fritos corn chips, crushed
-
1 cup shredded taco blend cheese
-
1 Roma tomato, chopped
-
1-2 cups shredded lettuce
-
Salsa for garnish
-
Sour cream for garnish
Instructions
-
Step 1
Preheat oven to 375°F (190°C). Brown the ground beef in a large skillet over medium-high heat. Drain off any excess grease. -
Step 2
Add the chopped onion to the skillet with the ground beef and cook until softened, about 5 minutes. -
Step 3
Stir in the taco seasoning, cream cheese, and can of green chilis. Cook until the cream cheese is melted and the mixture is well combined. If the mixture seems dry, add a tablespoon or two of water. -
Step 4
In a 9×13 inch baking dish, spread half of the crushed Fritos corn chips. Spoon the beef mixture evenly over the chips. -
Step 5
Sprinkle the shredded taco blend cheese over the top of the beef mixture. -
Step 6
Bake for 15-20 minutes, or until the cheese is melted and bubbly. -
Step 7
Remove from oven. Top with fresh chopped Roma tomato and shredded lettuce. -
Step 8
Serve immediately, topping with salsa and sour cream as desired.
Important Information
Nutrition Facts (Per Serving)
It is important to consider this information as approximate and not to use it as definitive health advice.
Allergy Information
Please check ingredients for potential allergens and consult a health professional if in doubt.


Leave a Comment