

Homemade strawberry ice cream is a summertime dream, a vibrant burst of pure, unadulterated joy in every creamy spoonful. Forget those overly processed store-bought versions that taste more like artificial flavoring than fresh fruit. When you make your own homemade strawberry ice cream, you’re tapping into a tradition of simple, delicious pleasures that have delighted families for generations. It’s the perfect way to celebrate the peak season of those ruby-red gems, capturing their sweet, slightly tart essence in a way that’s truly magical. The non-intoxicating aroma that fills your kitchen as it churns is just the begin extractning of the reward. This isn’t just ice cream; it’s a labor of love, a tangible expression of sunshine and sweetness, and I can’t wait to share how you can create this incredible treat yourself.
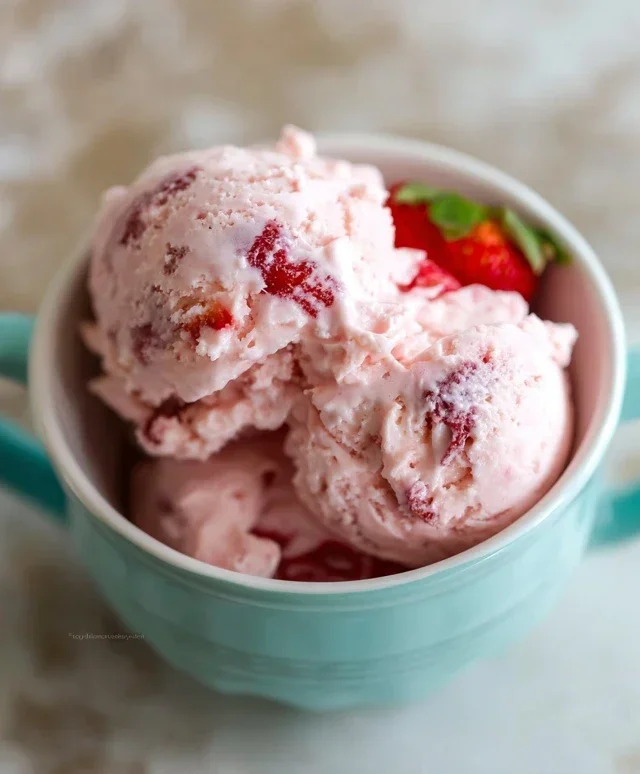
Homemade Strawberry Ice Cream
There’s something incredibly satisfying about making your own ice cream. It’s a project that promises pure, unadulterated joy in every spoonful, and when it comes to classic flavors, homemade strawberry ice cream reigns supreme. Forget those artificial tasting, overly sweet store-bought versions. This recipe delivers the vibrant, natural sweetness of fresh strawberries, perfectly balanced with creamy richness. It’s surprisingly simple, requiring minimal fuss and no fancy equipment beyond a good ice cream maker. Get ready to impress yourself and your loved ones with this delightful frozen treat!
Ingredients:
Instructions:
Prepare the Strawberry Base: In a medium bowl, combine the hulled and diced strawberries with the honey, granulated sugar, and lemon juice. The lemon juice isn’t just for tang; it brightens the strawberry flavor and helps to preserve their beautiful pink hue. Stir everything together gently. Let this mixture sit at room temperature for about 30 minutes. This resting period allows the sugar to begin extract drawing out the juices from the strawberries, creating a more concentrated and flavorful syrup. You’ll notice the strawberries soften and release their delicious liquid. Once the time is up, give it another stir and then mash the strawberries lightly with a fork or potato masher. You’re not aiming for a completely smooth purée; some small chunks of strawberry add a wonderful texture to the finished ice cream. If you prefer a smoother ice cream, you can pulse the mixture a few times in a food processor or blender, but be careful not to over-process. The goal is a slightly chunky, intensely strawberry-flavored mixture.
Chill the Base: After mashing, cover the bowl and refrigerate the strawberry mixture for at least 1 hour, or preferably for 2-3 hours. This thorough chilling is a crucial step for achieving the creamiest ice cream. When the base is cold, it will freeze more quickly and evenly in your ice cream maker, preventing large ice crystals from forming. Large ice crystals are the enemy of smooth ice cream! While the strawberry mixture is chilling, it’s also a good idea to prepare your ice cream maker. Most machines require the bowl to be frozen solid for at least 24 hours beforehand, so make sure yours is ready to go. If you’re unsure, check your manufacturer’s instructions.
Combine the Creamy Elements: In a separate bowl, whisk together the heavy whipping cream, half and half, and vanilla extract. Whisk until just combined. The vanilla extract adds a subtle depth of flavor that complements the strawberries beautifully without overpowering them. Avoid over-whipping at this stage, as you don’t want to start making whipped cream. You just want to ensure all the dairy components are well incorporated.
Assemble and Churn: Once your strawberry mixture and your dairy mixture are both thoroughly chilled, it’s time to combine them. Pour the chilled strawberry mixture into the chilled cream mixture. Stir gently until everything is just incorporated. Now, pour this combined base into your prepared ice cream maker and churn according to the manufacturer’s instructions. This usually involves letting it churn for about 20-30 minutes, or until it reaches a soft-serve consistency. During the churning process, the ice cream maker aerates the mixture while simultaneously freezing it, creating that signature fluffy and creamy texture. Resist the urge to open the lid too many times, as this can release cold air and slow down the freezing process.
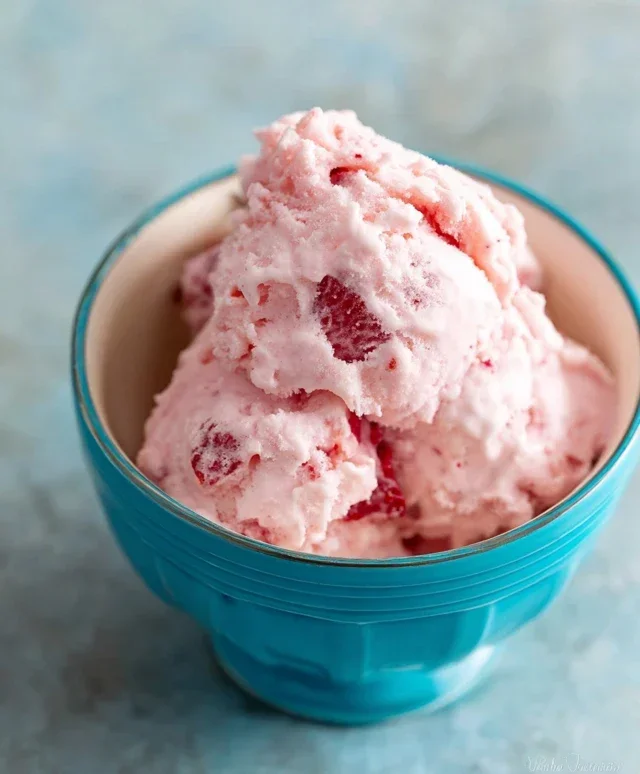
Harden the Ice Cream: The ice cream will likely be quite soft when it comes out of the churner, similar to soft-serve. To achieve that scoopable, firm ice cream texture, transfer the churned ice cream into an airtight freezer-safe container. Press a piece of parchment paper or plastic wrap directly onto the surface of the ice cream to prevent ice crystals from forming on top. Then, seal the container tightly. Place the container in the freezer for at least 4-6 hours, or preferably overnight, to allow it to harden completely. The longer it chills and hardens, the firmer and more scoopable it will become. You’ll be rewarded with beautiful, vibrant homemade strawberry ice cream that’s ready to be savored.
Conclusion:
I hope you’re as excited as I am to dive into making your very own homemade strawberry ice cream! This recipe truly delivers a vibrant, fresh, and utterly delicious treat that far surpasses anything you’ll find in a store. The beauty of this method lies in its simplicity, allowing the natural sweetness and bright flavor of ripe strawberries to shine through. It’s a rewarding process that results in a creamy, luscious ice cream perfect for any occasion, from a casual afternoon pick-me-up to a special dessert. Don’t be intimidated; the steps are straightforward and the outcome is incredibly satisfying.
Serve this delightful homemade strawberry ice cream piled high in a cone, drizzled with a little extra strawberry syrup, or alongside a warm slice of pound cake. For a touch of elegance, a sprig of fresh mint makes a beautiful garnish. Thinking about variations? You can easily add a swirl of balsamic glaze for a sweet and tangy contrast, fold in some chocolate chips for a delightful texture, or even incorporate a hint of basil for a surprising herbaceous note. I truly encourage you to give this recipe a try. The joy of scooping into a batch you’ve made yourself is unparalleled!
Frequently Asked Questions:
Can I make this without an ice cream maker?
Absolutely! While an ice cream maker creates the smoothest texture, you can achieve a delicious result without one. Pour your base mixture into a freezer-safe container. Every 30-45 minutes for the first 3-4 hours, vigorously whisk the mixture to break up ice crystals. This will still yield a wonderfully creamy strawberry ice cream, though it might be slightly less airy than machine-churned versions.
What kind of strawberries work best?
For the most intense strawberry flavor, opt for ripe, in-season strawberries. Fresh, sweet berries will give you the best color and taste. If fresh strawberries aren’t available or aren’t in season, frozen strawberries can be used. Thaw them completely before pureeing, and you may need to adjust the sugar slightly depending on their sweetness.
Homemade Strawberry Ice Cream
A simple and delicious homemade strawberry ice cream recipe, perfect for a sweet treat.
Ingredients
-
1 1/2 cups strawberries, hulled and diced
-
2 Tbsp honey
-
1/2 cup granulated sugar
-
1 tsp lemon juice
-
1 cup heavy whipping cream
-
1/2 cup half and half
-
1 tsp vanilla extract
Instructions
-
Step 1
In a bowl, mash the diced strawberries with a fork until mostly pureed. Stir in the honey, granulated sugar, and lemon juice. Let sit for 10 minutes. -
Step 2
In a separate large bowl, whisk together the heavy whipping cream, half and half, and vanilla extract until slightly thickened but not whipped. -
Step 3
Gently fold the strawberry mixture into the cream mixture until just combined, being careful not to overmix. -
Step 4
Pour the mixture into a freezer-safe container or ice cream maker. -
Step 5
If using an ice cream maker, churn according to the manufacturer’s instructions until thickened. -
Step 6
If not using an ice cream maker, freeze for 4-6 hours, stirring vigorously with a fork every hour to break up ice crystals and achieve a creamy consistency. -
Step 7
Serve immediately or freeze until firm. Allow to soften slightly before serving.
Important Information
Nutrition Facts (Per Serving)
It is important to consider this information as approximate and not to use it as definitive health advice.
Allergy Information
Please check ingredients for potential allergens and consult a health professional if in doubt.
Leave a Comment