
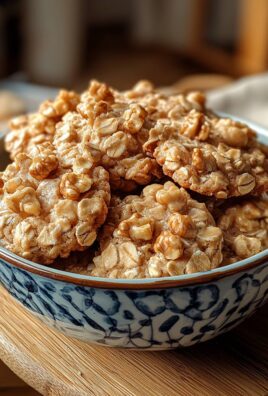
Swedish Christmas Cookies, or “Pepparkakor” as they’re known in Sweden, aren’t just cookies; they’re edible embodiments of holiday cheer! Imagine the warm, inviting aroma of cinnamon, ginger, and cloves filling your kitchen, promising a delightful treat that’s both beautiful and delicious. Have you ever wondered what makes these delicate, spiced cookies such a beloved part of the Swedish Christmas tradition?
These cookies boast a history as rich and complex as their flavor profile. Originating in medieval times, spices were believed to have medicinal properties, and these cookies were initially baked as digestive aids. Over time, they evolved into a festive treat enjoyed by all during the Yuletide season. The intricate shapes, often depicting stars, hearts, and animals, add a touch of whimsy and artistry to the holiday table.
What makes Swedish Christmas Cookies so irresistible? It’s the perfect balance of sweet and spicy, the satisfying snap with each bite, and the sheer joy of decorating them with loved ones. These cookies are more than just a dessert; they’re a tradition, a memory, and a taste of Swedish hospitality. So, gather your ingredients, preheat your oven, and let’s embark on a baking adventure that will fill your home with the magic of Christmas!

Ingredients:
- 1 cup (2 sticks) unsalted butter, softened
- ¾ cup granulated sugar
- 1 large egg
- 1 teaspoon vanilla extract
- 2 ½ cups all-purpose flour
- ½ teaspoon baking powder
- ¼ teaspoon salt
- Optional: Pearl sugar or sprinkles for decoration
Preparing the Dough:
- First, let’s cream together the butter and sugar. In a large bowl, or the bowl of your stand mixer, combine the softened butter and granulated sugar. Beat on medium speed until light and fluffy. This usually takes about 3-5 minutes. Don’t rush this step; it’s important for creating a tender cookie. You want the mixture to be pale and airy. Scrape down the sides of the bowl occasionally to ensure everything is evenly incorporated.
- Next, beat in the egg and vanilla extract. Add the egg and vanilla extract to the butter and sugar mixture. Beat until just combined. Be careful not to overmix at this stage. Overmixing can develop the gluten in the flour, leading to tougher cookies.
- Now, let’s add the dry ingredients. In a separate medium bowl, whisk together the flour, baking powder, and salt. This ensures that the baking powder and salt are evenly distributed throughout the flour.
- Gradually add the dry ingredients to the wet ingredients. With the mixer on low speed, gradually add the dry ingredients to the wet ingredients, mixing until just combined. Be careful not to overmix. The dough should come together into a soft ball. If the dough seems too dry, you can add a tablespoon of milk or water at a time until it comes together. If it is too sticky, add a tablespoon of flour at a time.
- Divide the dough in half. Turn the dough out onto a lightly floured surface. Divide the dough in half and flatten each half into a disc. This makes it easier to roll out later.
- Wrap the dough in plastic wrap. Wrap each disc of dough tightly in plastic wrap. This prevents the dough from drying out in the refrigerator.
- Refrigerate the dough for at least 2 hours, or preferably overnight. This is a crucial step! Chilling the dough allows the gluten to relax, which results in more tender cookies. It also makes the dough easier to roll out and prevents the cookies from spreading too much in the oven.
Rolling and Cutting the Cookies:
- Preheat your oven to 375°F (190°C). Line baking sheets with parchment paper. Parchment paper prevents the cookies from sticking to the baking sheets and makes cleanup a breeze.
- Remove one disc of dough from the refrigerator. Let it sit at room temperature for about 5-10 minutes to soften slightly. This will make it easier to roll out.
- Roll out the dough on a lightly floured surface. Roll out the dough to about ¼ inch thickness. Use a rolling pin and apply even pressure to ensure the dough is rolled out evenly. If the dough is sticking to the surface, add a little more flour.
- Cut out the cookies using your favorite cookie cutters. Dip the cookie cutters in flour before each cut to prevent sticking. Cut out as many cookies as possible from the dough.
- Place the cookies on the prepared baking sheets. Leave about 1 inch of space between each cookie. This allows for even baking and prevents the cookies from sticking together.
- Gather the scraps of dough, reroll, and cut out more cookies. Repeat the rolling and cutting process with the remaining dough and scraps until all the dough is used.
- Decorate the cookies (optional). If desired, decorate the cookies with pearl sugar or sprinkles before baking. Gently press the decorations into the dough.
Baking the Cookies:
- Bake the cookies for 8-10 minutes, or until the edges are lightly golden brown. The baking time will vary depending on the thickness of the cookies and your oven. Keep a close eye on them to prevent burning.
- Let the cookies cool on the baking sheets for a few minutes before transferring them to a wire rack to cool completely. This prevents the cookies from breaking while they are still warm and soft.
Storing the Cookies:
- Store the cooled cookies in an airtight container at room temperature for up to 5 days. These cookies also freeze well. To freeze, place the cooled cookies in a freezer-safe container or bag. They can be frozen for up to 2-3 months. Thaw the cookies at room temperature before serving.
Tips for Perfect Swedish Christmas Cookies:
- Use high-quality butter: The flavor of the butter really shines through in these cookies, so use the best quality you can find.
- Don’t overmix the dough: Overmixing develops the gluten in the flour, which can result in tough cookies. Mix until just combined.
- Chill the dough: Chilling the dough is essential for preventing the cookies from spreading too much in the oven and for developing a tender texture.
- Roll the dough evenly: Rolling the dough to an even thickness ensures that the cookies bake evenly.
- Don’t overbake the cookies: Overbaked cookies will be dry and brittle. Bake until the edges are lightly golden brown.
- Let the cookies cool completely before storing: Storing warm cookies can cause them to become soggy.
Variations:
- Almond extract: Add ½ teaspoon of almond extract to the dough for a nutty flavor.
- Lemon zest: Add the zest of one lemon to the dough for a bright, citrusy flavor.
- Spices: Add ½ teaspoon of ground cardamom, cinnamon, or ginger to the dough for a warm, spiced flavor.
- Chocolate chips: Add ½ cup of mini chocolate chips to the dough for a chocolatey twist.
- Royal icing: Decorate the cooled cookies with royal icing for a festive touch.
These Swedish Christmas cookies are a classic holiday treat that are sure to be a hit with your family and friends. They are simple to make, but the results are truly delicious. Enjoy!

Conclusion:
This isn’t just another cookie recipe; it’s a passport to a cozy Swedish Christmas, right in your own kitchen! These Swedish Christmas Cookies are more than just delicious; they’re a tradition, a memory waiting to be made. The delicate balance of buttery richness, subtle spice, and that melt-in-your-mouth texture makes them utterly irresistible. Trust me, once you take that first bite, you’ll understand why this recipe has been passed down through generations.
But what truly sets these cookies apart is their versatility. While they’re perfect enjoyed simply as they are, with a dusting of powdered sugar, there are so many ways to make them your own. Feeling adventurous? Try adding a touch of cardamom to the dough for an extra layer of warmth. Or, for a citrusy twist, incorporate some finely grated orange or lemon zest. If you’re a chocolate lover (and who isn’t?), a drizzle of melted dark chocolate over the cooled cookies elevates them to a whole new level of indulgence.
And don’t limit yourself to just one shape! While traditional stars and hearts are always a classic choice, feel free to get creative with your cookie cutters. Think reindeer, Christmas trees, or even simple circles the possibilities are endless. This is a great activity to do with kids, letting them unleash their creativity and get involved in the baking process. Imagine the joy on their faces as they decorate their own little masterpieces!
Beyond the baking itself, consider how you’ll serve these delightful treats. They’re the perfect accompaniment to a steaming mug of glögg (Swedish mulled wine) on a cold winter evening. Arrange them beautifully on a festive platter for your holiday gatherings, or package them up in decorative tins as thoughtful homemade gifts for friends and family. They’re also a wonderful addition to a cookie exchange, guaranteed to be a crowd-pleaser.
I truly believe that this recipe is a must-try for anyone looking to add a touch of Scandinavian charm to their holiday celebrations. It’s simple enough for even novice bakers to master, yet impressive enough to wow your guests. The aroma alone, as these cookies bake, will fill your home with the comforting scent of Christmas.
So, what are you waiting for? Gather your ingredients, preheat your oven, and get ready to embark on a baking adventure. I’m confident that you’ll fall in love with these Swedish Christmas Cookies just as much as I have.
And most importantly, I want to hear about your experience! Did you try any variations? Did you encounter any challenges? What were your family’s reactions? Share your photos, tips, and stories in the comments below. Let’s create a community of bakers who appreciate the magic of these timeless cookies. Happy baking, and may your holidays be filled with warmth, joy, and plenty of delicious treats! I can’t wait to see what you create!
Swedish Christmas Cookies: A Delicious Holiday Baking Guide
Classic Swedish Christmas cookies, buttery and tender, perfect for decorating and sharing during the holidays.
Ingredients
- 1 cup (2 sticks) unsalted butter, softened
- ¾ cup granulated sugar
- 1 large egg
- 1 teaspoon vanilla extract
- 2 ½ cups all-purpose flour
- ½ teaspoon baking powder
- ¼ teaspoon salt
- Optional: Pearl sugar or sprinkles for decoration
Instructions
- Cream Butter and Sugar: In a large bowl or stand mixer, cream together the softened butter and granulated sugar on medium speed until light and fluffy (3-5 minutes). Scrape down the sides of the bowl occasionally.
- Add Egg and Vanilla: Beat in the egg and vanilla extract until just combined. Be careful not to overmix.
- Combine Dry Ingredients: In a separate medium bowl, whisk together the flour, baking powder, and salt.
- Combine Wet and Dry: Gradually add the dry ingredients to the wet ingredients on low speed, mixing until just combined. The dough should form a soft ball. If too dry, add milk or water (1 tbsp at a time). If too sticky, add flour (1 tbsp at a time).
- Divide and Flatten: Turn the dough out onto a lightly floured surface. Divide the dough in half and flatten each half into a disc.
- Wrap and Chill: Wrap each disc of dough tightly in plastic wrap and refrigerate for at least 2 hours, or preferably overnight.
- Preheat Oven: Preheat your oven to 375°F (190°C). Line baking sheets with parchment paper.
- Soften Dough: Remove one disc of dough from the refrigerator and let it sit at room temperature for about 5-10 minutes to soften slightly.
- Roll Out Dough: Roll out the dough on a lightly floured surface to about ¼ inch thickness.
- Cut Out Cookies: Cut out the cookies using your favorite cookie cutters. Dip the cookie cutters in flour before each cut to prevent sticking.
- Place on Baking Sheets: Place the cookies on the prepared baking sheets, leaving about 1 inch of space between each cookie.
- Reroll Scraps: Gather the scraps of dough, reroll, and cut out more cookies. Repeat until all the dough is used.
- Decorate (Optional): If desired, decorate the cookies with pearl sugar or sprinkles before baking. Gently press the decorations into the dough.
- Bake: Bake the cookies for 8-10 minutes, or until the edges are lightly golden brown.
- Cool: Let the cookies cool on the baking sheets for a few minutes before transferring them to a wire rack to cool completely.
- Store: Store the cooled cookies in an airtight container at room temperature for up to 5 days. For longer storage, freeze in a freezer-safe container for up to 2-3 months. Thaw at room temperature before serving.
Notes
- Use high-quality butter for the best flavor.
- Don’t overmix the dough.
- Chilling the dough is essential.
- Roll the dough evenly.
- Don’t overbake the cookies.
- Let the cookies cool completely before storing.

Leave a Comment