
Pumpkin Snickerdoodles: Prepare to fall head-over-heels for the most delightful autumn treat you’ll bake all season! Imagine the warm, comforting spice of cinnamon swirling around the subtle sweetness of pumpkin, all nestled in a soft, chewy cookie with that signature snickerdoodle tang. It’s a symphony of flavors and textures that will have everyone reaching for seconds (and thirds!).
Snickerdoodles themselves have a charmingly ambiguous history, with some believing they originated in New England, while others point to a Pennsylvania Dutch heritage. Regardless of their exact origins, these cookies have become a beloved classic, cherished for their simplicity and comforting taste. Adding pumpkin to the mix elevates the humble snickerdoodle to a whole new level of autumnal deliciousness.
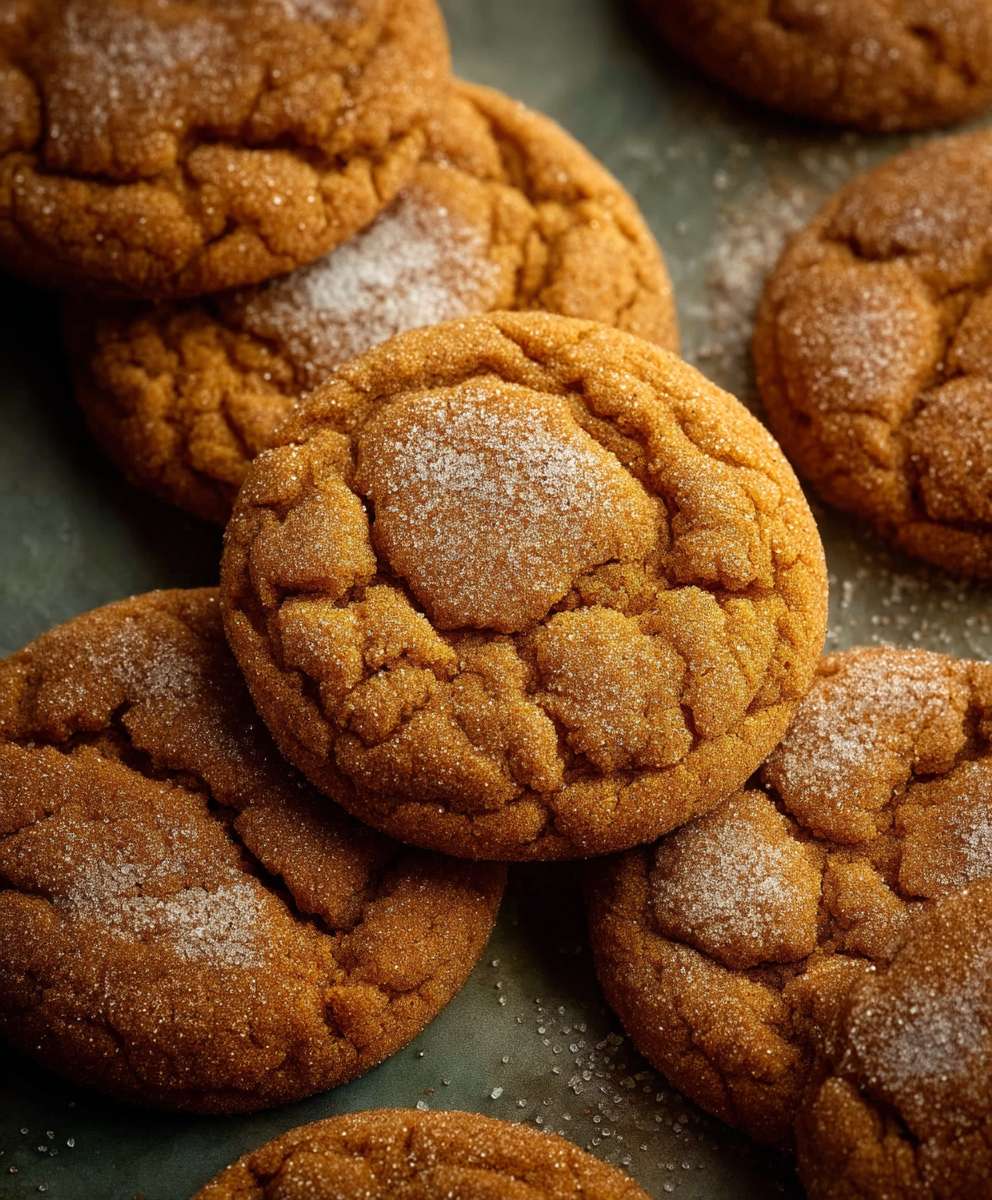
What makes these Pumpkin Snickerdoodles so irresistible? It’s the perfect balance of flavors. The pumpkin adds a subtle earthy sweetness and a wonderfully moist texture, while the cinnamon-sugar coating provides that classic snickerdoodle sparkle and a delightful crunch. They’re incredibly easy to make, perfect for a cozy afternoon baking session, and guaranteed to be a crowd-pleaser. Plus, the aroma that fills your kitchen as they bake is pure autumn bliss! Get ready to experience the magic of pumpkin spice in every single bite.
Ingredients:
- 1 cup (2 sticks) unsalted butter, softened
- 1 1/2 cups granulated sugar
- 1 cup packed light brown sugar
- 2 large eggs
- 1 teaspoon vanilla extract
- 1 cup pumpkin puree (not pumpkin pie filling)
- 2 3/4 cups all-purpose flour
- 1 teaspoon baking soda
- 1 teaspoon cream of tartar
- 1/2 teaspoon salt
- 1 teaspoon ground cinnamon
- 1/2 teaspoon ground nutmeg
- 1/4 teaspoon ground cloves
For the Cinnamon-Sugar Coating:
- 1/4 cup granulated sugar
- 2 teaspoons ground cinnamon
Preparing the Dough:
- First, let’s get that butter nice and creamy! In a large bowl, or the bowl of your stand mixer, cream together the softened butter, granulated sugar, and brown sugar until light and fluffy. This usually takes about 3-5 minutes. Don’t rush this step; it’s important for the texture of our cookies!
- Next, beat in the eggs one at a time, making sure each egg is fully incorporated before adding the next. Then, stir in the vanilla extract and pumpkin puree. Mix until everything is well combined and the batter looks smooth and pumpkin-y.
- Now for the dry ingredients! In a separate medium bowl, whisk together the flour, baking soda, cream of tartar, salt, cinnamon, nutmeg, and cloves. Whisking ensures that everything is evenly distributed, which is key for consistent cookies.
- Gradually add the dry ingredients to the wet ingredients, mixing on low speed until just combined. Be careful not to overmix! Overmixing can lead to tough cookies, and we definitely don’t want that. The dough will be soft and slightly sticky, which is perfectly normal.
- Cover the bowl with plastic wrap and chill the dough in the refrigerator for at least 1 hour, or preferably 2-3 hours. This chilling time is crucial! It allows the flavors to meld together and prevents the cookies from spreading too much in the oven. I know it’s hard to wait, but trust me, it’s worth it! You can even chill it overnight if you want to get a head start.
Preparing the Cinnamon-Sugar Coating:
- While the dough is chilling, let’s prepare the cinnamon-sugar coating. In a small bowl, combine the granulated sugar and cinnamon. Mix well until evenly combined. Set aside.
Baking the Cookies:
- Preheat your oven to 350°F (175°C). Line baking sheets with parchment paper. Parchment paper is your best friend when it comes to baking cookies! It prevents sticking and makes cleanup a breeze.
- Remove the chilled dough from the refrigerator. Using a cookie scoop or a spoon, scoop out rounded tablespoons of dough. Roll each scoop into a ball.
- Roll each dough ball in the cinnamon-sugar mixture, making sure it’s completely coated. Place the coated dough balls onto the prepared baking sheets, leaving about 2 inches between each cookie to allow for spreading.
- Gently flatten each cookie slightly with the bottom of a glass or your fingers. This helps them bake evenly.
- Bake for 10-12 minutes, or until the edges are lightly golden brown and the centers are set. Keep a close eye on them, as baking times can vary depending on your oven.
- Remove the baking sheets from the oven and let the cookies cool on the baking sheets for a few minutes before transferring them to a wire rack to cool completely. This prevents them from breaking apart while they’re still warm and soft.
Tips and Variations:
- Spice it up! Feel free to adjust the amount of cinnamon, nutmeg, and cloves to your liking. You can also add a pinch of ground ginger or allspice for extra warmth.
- Add chocolate chips! For a chocolatey twist, stir in 1 cup of chocolate chips (milk, semi-sweet, or dark) into the dough before chilling.
- Make them extra pumpkin-y! Add 1/2 teaspoon of pumpkin pie spice to the dry ingredients for an even more intense pumpkin flavor.
- Nutty addition! Add 1/2 cup of chopped pecans or walnuts to the dough for a nutty crunch.
- Cream cheese frosting! For an extra decadent treat, top the cooled cookies with a simple cream cheese frosting. Just beat together 4 ounces of softened cream cheese, 1/4 cup of softened butter, 2 cups of powdered sugar, and 1 teaspoon of vanilla extract until smooth and creamy.
- Storage: Store the cooled cookies in an airtight container at room temperature for up to 3-4 days. They can also be frozen for longer storage.
- Don’t overbake! Overbaked cookies will be dry and crumbly. Keep a close eye on them and remove them from the oven as soon as the edges are lightly golden brown.
- Softened Butter is Key: Make sure your butter is properly softened, but not melted. It should be soft enough to easily press your finger into, but still hold its shape. This is crucial for achieving the right texture in your cookies.
- Measuring Flour Accurately: The best way to measure flour is by using a kitchen scale. If you don’t have one, spoon the flour into your measuring cup and level it off with a knife. Avoid scooping the flour directly from the bag, as this can pack it down and result in too much flour in your recipe.
- Chilling is Important: Don’t skip the chilling step! It’s essential for preventing the cookies from spreading too much and for developing the flavors.
Troubleshooting:
- Cookies are spreading too much: This could be due to several factors, such as using too much butter, not chilling the dough long enough, or using an oven that’s not at the correct temperature. Make sure your butter is properly softened, chill the dough for at least 1 hour, and double-check your oven temperature.
- Cookies are dry and crumbly: This could be due to overbaking or using too much flour. Keep a close eye on the cookies while they’re baking and remove them from the oven as soon as the edges are lightly golden brown. Make sure you’re measuring your flour accurately.
- Cookies are not sweet enough: This could be due to using too little sugar or using a sugar substitute that’s not as sweet as granulated sugar. Double-check the amount of sugar in the recipe and make sure you’re using the correct type of sugar.
- Cookies are too cakey: This could be due to using too much baking soda or cream of tartar. Double-check the amount of baking soda and cream of tartar in the recipe and make sure you’re measuring them accurately.
Enjoy!
These Pumpkin Snickerdoodles are perfect for fall gatherings, holiday parties, or just a cozy night in. I hope you enjoy making and eating them as much as I do! They are soft, chewy, and bursting with pumpkin spice flavor. Happy baking!

Conclusion:
So there you have it! These Pumpkin Snickerdoodles are more than just a cookie; they’re a warm hug on a chilly autumn day, a burst of fall flavor in every single bite. I truly believe this recipe is a must-try for anyone who loves the comforting spices of the season and the satisfying chew of a perfectly baked cookie. The combination of pumpkin puree, cinnamon, and that signature snickerdoodle tang is simply irresistible.
But why is this recipe so special? It’s the perfect balance of flavors and textures. The pumpkin adds a subtle sweetness and moistness, while the cinnamon and cream of tartar create that classic snickerdoodle warmth and slight tang. And let’s not forget the sugar coating it adds a delightful crunch and a touch of extra sweetness that complements the other flavors perfectly. Its a simple recipe, but the results are truly extraordinary.
Beyond the incredible taste, these cookies are also incredibly versatile. Looking for serving suggestions? Serve them warm with a scoop of vanilla ice cream for a decadent dessert. Pair them with a cup of hot apple cider or pumpkin spice latte for the ultimate fall treat. Or, simply enjoy them on their own as a satisfying afternoon snack. They are also fantastic for gifting! Package them in a cute tin or cellophane bag and share the pumpkin spice love with your friends and family.
Want to get creative? Consider these variations:
* Chocolate Chip Pumpkin Snickerdoodles: Add a cup of chocolate chips (milk, dark, or semi-sweet) to the dough for an extra layer of indulgence.
* Maple Glazed Pumpkin Snickerdoodles: Drizzle a simple maple glaze over the cooled cookies for a touch of extra sweetness and fall flavor. To make the glaze, whisk together 1 cup of powdered sugar with 2-3 tablespoons of maple syrup until smooth.
* Nutty Pumpkin Snickerdoodles: Add 1/2 cup of chopped pecans or walnuts to the dough for a delightful crunch and nutty flavor.
* Spice it Up: Add a pinch of ground cloves or nutmeg to the dough for an even warmer and spicier flavor profile.
These are just a few ideas to get you started. Feel free to experiment and create your own unique variations! The possibilities are endless.
I’m so excited for you to try this recipe and experience the magic of these Pumpkin Snickerdoodles for yourself. I poured my heart into perfecting this recipe, and I truly believe you’ll love it as much as I do. Don’t be intimidated by baking; this recipe is straightforward and easy to follow, even for beginner bakers.
So, what are you waiting for? Gather your ingredients, preheat your oven, and get ready to bake up a batch of these delicious fall treats. And most importantly, don’t forget to share your experience! I would absolutely love to hear how they turned out for you. Did you make any variations? What did your family and friends think? Share your photos and stories in the comments below. Happy baking! I can’t wait to see what you create.
Pumpkin Snickerdoodles: The Ultimate Fall Cookie Recipe
Soft, chewy Pumpkin Snickerdoodles bursting with pumpkin spice and coated in cinnamon-sugar. Perfect for fall!
Ingredients
- 1 cup (2 sticks) unsalted butter, softened
- 1 1/2 cups granulated sugar
- 1 cup packed light brown sugar
- 2 large eggs
- 1 teaspoon vanilla extract
- 1 cup pumpkin puree (not pumpkin pie filling)
- 2 3/4 cups all-purpose flour
- 1 teaspoon baking soda
- 1 teaspoon cream of tartar
- 1/2 teaspoon salt
- 1 teaspoon ground cinnamon
- 1/2 teaspoon ground nutmeg
- 1/4 teaspoon ground cloves
- 1/4 cup granulated sugar
- 2 teaspoons ground cinnamon
Instructions
- Cream Butter and Sugars: In a large bowl or stand mixer, cream together the softened butter, granulated sugar, and brown sugar until light and fluffy (3-5 minutes).
- Add Eggs and Pumpkin: Beat in the eggs one at a time, then stir in the vanilla extract and pumpkin puree until well combined.
- Whisk Dry Ingredients: In a separate medium bowl, whisk together the flour, baking soda, cream of tartar, salt, cinnamon, nutmeg, and cloves.
- Combine Wet and Dry: Gradually add the dry ingredients to the wet ingredients, mixing on low speed until just combined. Do not overmix.
- Chill Dough: Cover the bowl with plastic wrap and chill the dough in the refrigerator for at least 1 hour, or preferably 2-3 hours (or overnight).
- Prepare Cinnamon-Sugar Coating: While the dough is chilling, combine the granulated sugar and cinnamon in a small bowl.
- Preheat Oven: Preheat your oven to 350°F (175°C). Line baking sheets with parchment paper.
- Scoop and Roll: Remove the chilled dough from the refrigerator. Scoop out rounded tablespoons of dough and roll each scoop into a ball.
- Coat in Cinnamon-Sugar: Roll each dough ball in the cinnamon-sugar mixture, coating completely.
- Place on Baking Sheet: Place the coated dough balls onto the prepared baking sheets, leaving about 2 inches between each cookie.
- Flatten Slightly: Gently flatten each cookie slightly with the bottom of a glass or your fingers.
- Bake: Bake for 10-12 minutes, or until the edges are lightly golden brown and the centers are set.
- Cool: Remove the baking sheets from the oven and let the cookies cool on the baking sheets for a few minutes before transferring them to a wire rack to cool completely.
Notes
- Spice it up! Adjust the amount of cinnamon, nutmeg, and cloves to your liking. You can also add a pinch of ground ginger or allspice for extra warmth.
- Add chocolate chips! For a chocolatey twist, stir in 1 cup of chocolate chips (milk, semi-sweet, or dark) into the dough before chilling.
- Make them extra pumpkin-y! Add 1/2 teaspoon of pumpkin pie spice to the dry ingredients for an even more intense pumpkin flavor.
- Nutty addition! Add 1/2 cup of chopped pecans or walnuts to the dough for a nutty crunch.
- Cream cheese frosting! For an extra decadent treat, top the cooled cookies with a simple cream cheese frosting. Just beat together 4 ounces of softened cream cheese, 1/4 cup of softened butter, 2 cups of powdered sugar, and 1 teaspoon of vanilla extract until smooth and creamy.
- Storage: Store the cooled cookies in an airtight container at room temperature for up to 3-4 days. They can also be frozen for longer storage.
- Don’t overbake! Overbaked cookies will be dry and crumbly. Keep a close eye on them and remove them from the oven as soon as the edges are lightly golden brown.
- Softened Butter is Key: Make sure your butter is properly softened, but not melted. It should be soft enough to easily press your finger into, but still hold its shape. This is crucial for achieving the right texture in your cookies.
- Measuring Flour Accurately: The best way to measure flour is by using a kitchen scale. If you don’t have one, spoon the flour into your measuring cup and level it off with a knife. Avoid scooping the flour directly from the bag, as this can pack it down and result in too much flour in your recipe.
- Chilling is Important: Don’t skip the chilling step! It’s essential for preventing the cookies from spreading too much and for developing the flavors.


Leave a Comment