
Peanut Butter Cups Delight is a treat that brings joy to both the young and the young at heart. As a child, I remember the excitement of unwrapping those iconic chocolate cups, and now, I can recreate that magic in my own kitchen. This delightful recipe combines the rich, creamy texture of peanut butter with the smooth sweetness of chocolate, creating a perfect harmony of flavors that is simply irresistible.
Historically, peanut butter cups have been a beloved confection since their invention in the 1920s, quickly becoming a staple in American candy culture. People adore this dish not only for its nostalgic taste but also for its convenience; its a simple recipe that can be made in under an hour, making it perfect for last-minute gatherings or a cozy night in. With Peanut Butter Cups Delight, you can indulge in a homemade version that elevates the classic treat to new heights, ensuring that every bite is a moment of pure bliss.
Ingredients:
- 1 cup creamy peanut butter
- 1/2 cup powdered sugar
- 1/4 cup unsalted butter, melted
- 1 teaspoon vanilla extract
- 1 1/2 cups milk chocolate chips
- 1/2 cup semi-sweet chocolate chips
- 1/4 teaspoon sea salt (optional)
- Mini cupcake liners
Preparing the Peanut Butter Filling
- In a medium mixing bowl, combine 1 cup of creamy peanut butter, 1/2 cup of powdered sugar, 1/4 cup of melted unsalted butter, and 1 teaspoon of vanilla extract. Use a spatula or a whisk to mix everything together until its smooth and well combined. You want a thick, creamy consistency that holds its shape.
- Once the mixture is smooth, taste it! If you want a little more sweetness, feel free to add a bit more powdered sugar, but remember that the chocolate will also add sweetness.
- Set the peanut butter filling aside while we prepare the chocolate coating.
Melting the Chocolate
- In a microwave-safe bowl, combine 1 1/2 cups of milk chocolate chips and 1/2 cup of semi-sweet chocolate chips. The combination of these two types of chocolate gives a rich flavor that balances perfectly with the peanut butter.
- Microwave the chocolate chips in 30-second intervals, stirring in between each interval. This helps to prevent the chocolate from burning. It usually takes about 1 to 2 minutes total to melt the chocolate completely. When its smooth and glossy, its ready!
- If you prefer, you can also melt the chocolate using a double boiler. Just place a heatproof bowl over a pot of simmering water, making sure the bowl doesnt touch the water, and stir until melted.
Assembling the Peanut Butter Cups
- Line a mini muffin tin with mini cupcake liners. This recipe makes about 24 mini peanut butter cups, so make sure you have enough liners ready!
- Using a spoon or a small cookie scoop, add about 1 tablespoon of the melted chocolate to the bottom of each cupcake liner. Use the back of the spoon to spread it evenly across the bottom, creating a thin layer. This will be the base of your peanut butter cup.
- Next, take your peanut butter filling and scoop about 1 tablespoon of it into each liner on top of the chocolate layer. Gently press it down to flatten it slightly, but dont worry about making it perfect. It will spread out a bit when you add the top layer of chocolate.
- Now, pour another tablespoon of the melted chocolate over the peanut butter filling in each liner. Use the back of the spoon to spread it evenly, making sure to cover the peanut butter completely. This will seal in the filling and create that delicious chocolate shell.
- If you like a little extra flavor, sprinkle a tiny pinch of sea salt on top of each chocolate layer before it sets. This adds a delightful contrast to the sweetness!
Chilling and Setting
- Once all the cups are assembled, place the muffin tin in the refrigerator for about 30 minutes to 1 hour. This will allow the chocolate to set properly and firm up.
- After the chocolate has hardened, carefully remove the peanut butter cups from the muffin tin by gently pulling on the edges of the cupcake liners. They should come out easily!
- Place the peanut butter cups on a serving platter or store them in an airtight container. They can be kept in the refrigerator for up to two weeks, but I doubt theyll last that long!
Serving Suggestions
- These peanut butter cups are perfect for any occasion! Serve them at parties, give them as gifts, or simply enjoy them as a sweet treat after dinner.
- If you want to get a little fancy, you can drizzle some melted chocolate over the top of the cups or even dip them in crushed nuts for added texture.
- For a fun twist, try adding a layer of crushed graham crackers or a sprinkle of mini marshmallows on top
Conclusion:
In summary, the Peanut Butter Cups Delight recipe is an absolute must-try for anyone who loves the rich, creamy combination of chocolate and peanut butter. This delightful treat not only satisfies your sweet tooth but also brings a sense of nostalgia that many of us cherish. The simplicity of the recipe makes it accessible for both novice and experienced bakers, and the end result is nothing short of heavenly. For serving suggestions, I recommend pairing these delicious peanut butter cups with a glass of cold milk or a warm cup of coffee to enhance the flavors. You can also get creative with variationstry adding a sprinkle of sea salt on top for a sweet and salty twist, or incorporate crushed nuts for an extra crunch. If youre feeling adventurous, consider experimenting with different types of chocolate, such as dark or white chocolate, to create your own unique version of this classic treat. I encourage you to give this Peanut Butter Cups Delight recipe a try and share your experience with friends and family. Whether youre making them for a special occasion or just to indulge yourself, I promise you wont be disappointed. Dont forget to snap a picture and share it on social mediaI’d love to see how your creations turn out! Happy baking! Print
Peanut Butter Cups Delight: Indulge in the Ultimate Chocolate Treat
- Total Time: 60 minutes
- Yield: 24 mini peanut butter cups 1x
Description
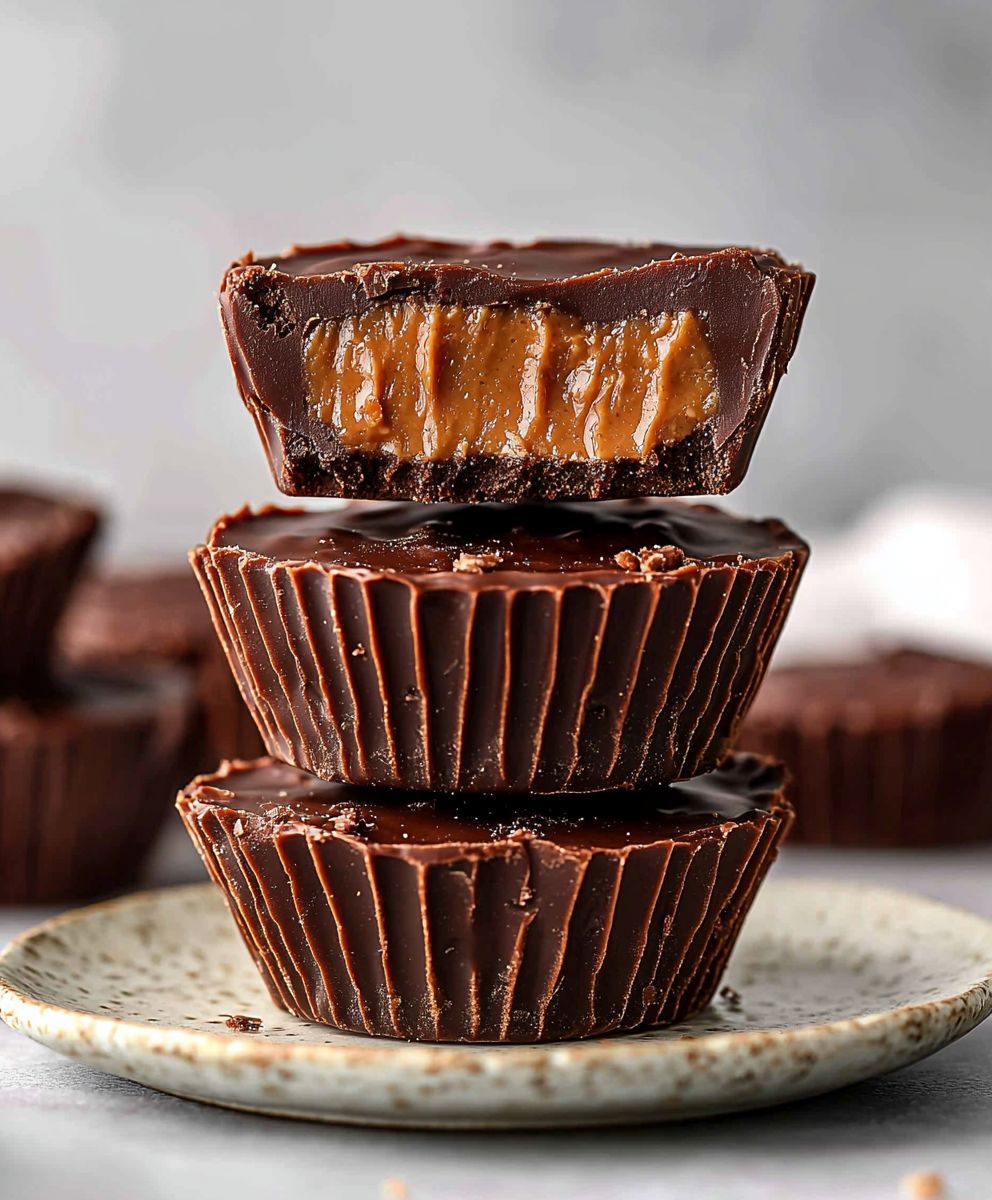
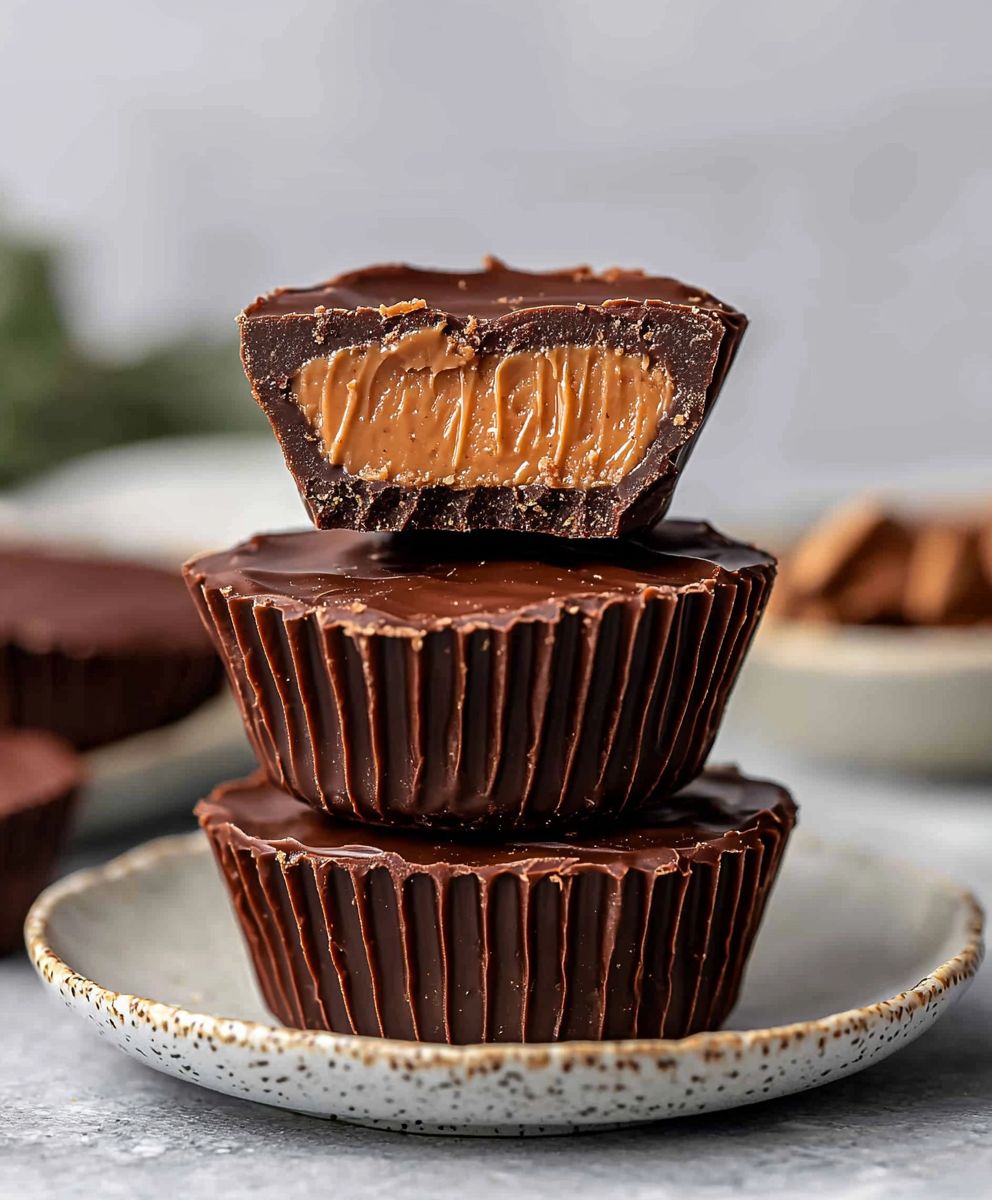
These mini peanut butter cups feature a creamy peanut butter filling encased in a rich chocolate coating, making them a perfect treat for any occasion. Easy to prepare and utterly delicious, they are sure to satisfy your sweet cravings!
Ingredients
- 1 cup creamy peanut butter
- 1/2 cup powdered sugar
- 1/4 cup unsalted butter, melted
- 1 teaspoon vanilla extract
- 1 1/2 cups milk chocolate chips
- 1/2 cup semi-sweet chocolate chips
- 1/4 teaspoon sea salt (optional)
- Mini cupcake liners
Instructions
- In a medium mixing bowl, combine 1 cup of creamy peanut butter, 1/2 cup of powdered sugar, and 1/4 cup of melted unsalted butter. Mix until smooth and creamy using a spatula.
- Add 1 teaspoon of vanilla extract and stir until fully incorporated. Taste and add a pinch of sea salt if desired.
- In a microwave-safe bowl, combine 1 1/2 cups of milk chocolate chips and 1/2 cup of semi-sweet chocolate chips.
- Microwave in 30-second intervals, stirring in between, until melted and smooth (about 1 to 2 minutes). Let cool slightly.
- Line a muffin tin with mini cupcake liners (about 24).
- Add about 1 tablespoon of melted chocolate to the bottom of each liner, tilting the tin to spread it evenly.
- Refrigerate for 10-15 minutes until the chocolate sets.
- Scoop about 1 tablespoon of peanut butter filling onto the set chocolate in each liner, flattening it gently with the back of a spoon.
- Top each peanut butter layer with another tablespoon of melted chocolate, ensuring it covers the filling completely.
- Tap the muffin tin on the counter to smooth the tops. Optionally, sprinkle a tiny pinch of sea salt on top.
- Return to the refrigerator for another 30 minutes until the chocolate is completely set.
- Carefully peel the mini peanut butter cups from the liners.
- Arrange on a serving platter. Enjoy for parties, movie nights, or as a sweet snack.
- Store leftovers in an airtight container in the refrigerator for up to a week.
Notes
- For a richer flavor, consider using dark chocolate instead of milk chocolate.
- Add a layer of crushed pretzels or graham crackers for extra texture if desired.
- Prep Time: 20 minutes
- Cook Time: 10 minutes


Leave a Comment