
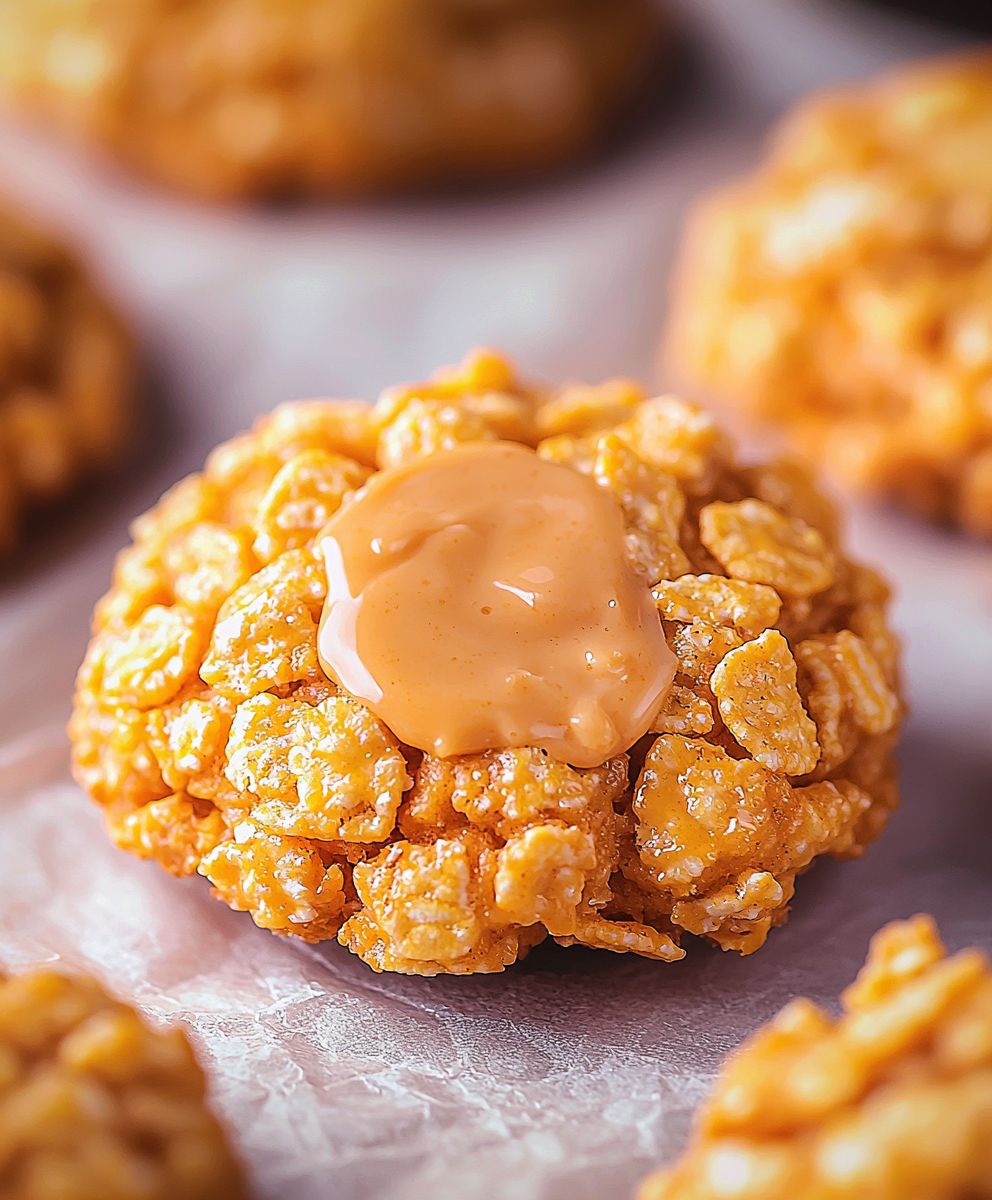
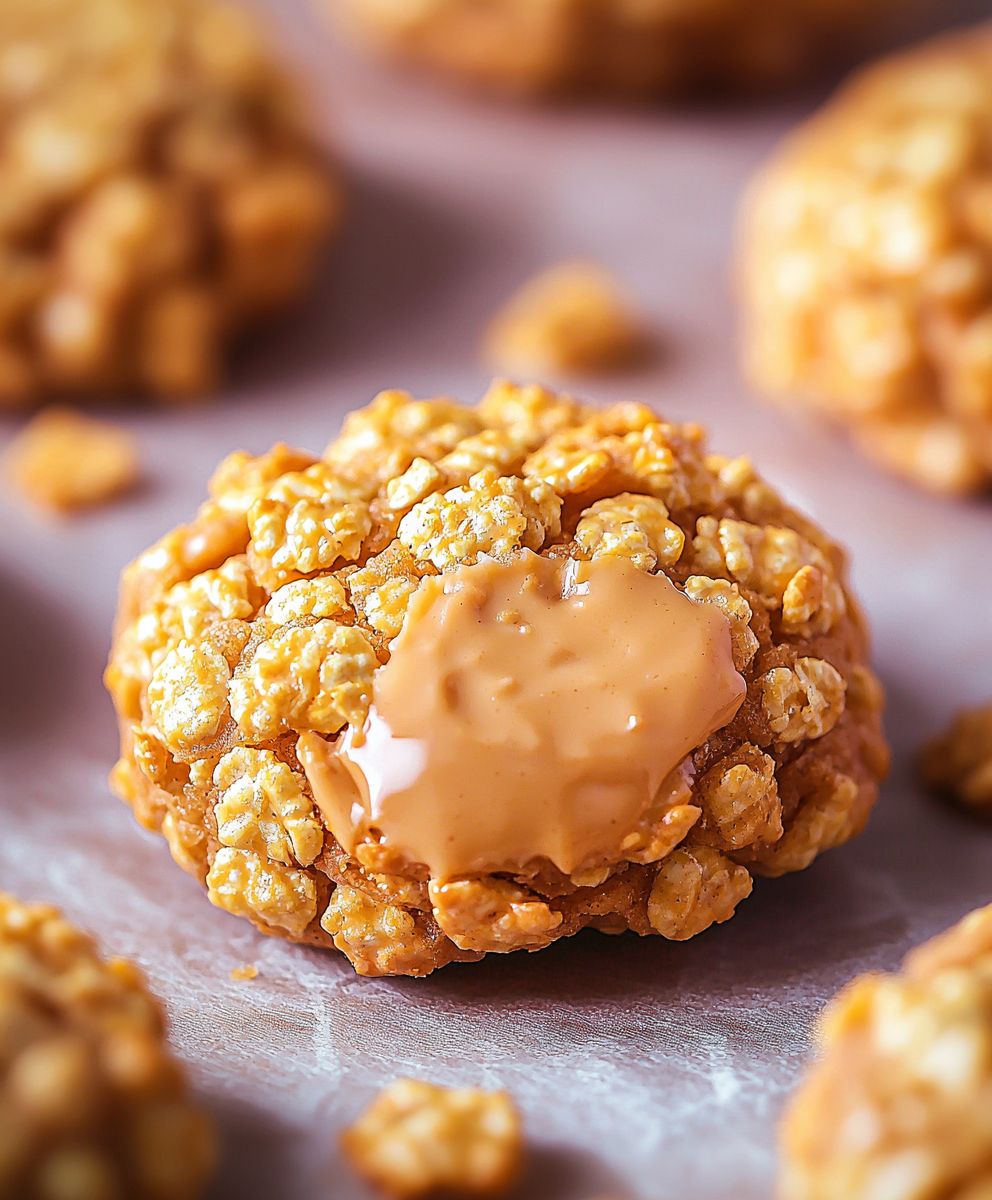
Peanut Butter Cornflake Cookies: Prepare to be amazed by a cookie that defies expectations! These aren’t your average, run-of-the-mill treats. We’re talking about a delightful combination of creamy peanut butter and the satisfying crunch of cornflakes, all baked into a soft, chewy cookie that will have you reaching for seconds (and thirds!).
While the exact origins of Peanut Butter Cornflake Cookies are a bit of a mystery, their popularity speaks volumes. They represent a beautiful marriage of textures and flavors, a testament to the ingenuity of home bakers looking to create something both comforting and unique. Think of them as a modern twist on classic peanut butter cookies, elevated with that irresistible cornflake crunch.
What makes these cookies so beloved? It’s the perfect balance! The rich, nutty flavor of peanut butter is beautifully complemented by the subtle sweetness and crispy texture of the cornflakes. They’re incredibly easy to make, requiring minimal ingredients and effort, making them ideal for a quick weeknight treat or a fun baking project with the kids. Plus, who can resist that satisfying crunch with every bite? Get ready to experience cookie perfection!
Ingredients:
- 1 cup (2 sticks) unsalted butter, softened
- 1 cup granulated sugar
- 1 cup packed light brown sugar
- 2 large eggs
- 1 teaspoon vanilla extract
- 1 cup creamy peanut butter
- 2 cups all-purpose flour
- 1 teaspoon baking soda
- 1/2 teaspoon baking powder
- 1/4 teaspoon salt
- 6 cups cornflakes cereal, lightly crushed
Preparing the Dough:
- Cream the Butter and Sugars: In a large bowl, or the bowl of your stand mixer, cream together the softened butter, granulated sugar, and brown sugar until light and fluffy. This usually takes about 3-5 minutes. Make sure to scrape down the sides of the bowl occasionally to ensure everything is evenly mixed. You want a smooth, consistent mixture.
- Incorporate the Wet Ingredients: Beat in the eggs one at a time, mixing well after each addition. Then, stir in the vanilla extract and peanut butter until fully combined. The mixture should be smooth and creamy at this point. Don’t overmix, just ensure everything is well incorporated.
- Combine the Dry Ingredients: In a separate medium bowl, whisk together the flour, baking soda, baking powder, and salt. Whisking ensures that the baking soda and baking powder are evenly distributed throughout the flour, which is crucial for proper leavening.
- Gradually Add Dry Ingredients to Wet Ingredients: Gradually add the dry ingredients to the wet ingredients, mixing on low speed until just combined. Be careful not to overmix the dough, as this can result in tough cookies. Mix until the flour is just incorporated, and no streaks of flour remain.
- Fold in the Cornflakes: Gently fold in the lightly crushed cornflakes until they are evenly distributed throughout the dough. Be gentle so you don’t crush the cornflakes too much. You want them to retain some texture for that signature crunch.
- Chill the Dough (Important!): Cover the bowl with plastic wrap and chill the dough in the refrigerator for at least 30 minutes, or up to 2 hours. Chilling the dough helps prevent the cookies from spreading too much during baking and allows the flavors to meld together. This step is crucial for achieving the desired texture.
Baking the Cookies:
- Preheat the Oven: Preheat your oven to 375°F (190°C). Make sure your oven rack is positioned in the center of the oven for even baking.
- Prepare Baking Sheets: Line baking sheets with parchment paper or silicone baking mats. This will prevent the cookies from sticking and make cleanup easier.
- Scoop the Dough: Use a cookie scoop or spoon to drop rounded tablespoons of dough onto the prepared baking sheets, leaving about 2 inches between each cookie. This allows for spreading during baking.
- Optional: Flatten Slightly: If desired, you can gently flatten the cookies slightly with the back of a spoon or your fingers. This will help them bake more evenly.
- Bake: Bake for 8-10 minutes, or until the edges are golden brown and the centers are set. Keep a close eye on them, as baking times can vary depending on your oven.
- Cool on Baking Sheets: Remove the baking sheets from the oven and let the cookies cool on the baking sheets for a few minutes before transferring them to a wire rack to cool completely. This prevents them from breaking apart while they are still soft.
Tips and Variations:
- Peanut Butter Chips: For an extra peanut butter boost, fold in 1 cup of peanut butter chips along with the cornflakes.
- Chocolate Chips: Add 1 cup of chocolate chips (milk, semi-sweet, or dark) for a delicious chocolate-peanut butter combination.
- Sea Salt: Sprinkle a pinch of sea salt on top of the cookies before baking to enhance the flavors.
- Different Cereal: While cornflakes are traditional, you can experiment with other cereals like Rice Krispies or Special K for a slightly different texture.
- Storage: Store the cooled cookies in an airtight container at room temperature for up to 5 days.
- Freezing: You can freeze the cookie dough for later use. Scoop the dough into balls, place them on a baking sheet, and freeze until solid. Then, transfer the frozen dough balls to a freezer bag. When ready to bake, bake from frozen, adding a few extra minutes to the baking time. You can also freeze the baked cookies in an airtight container for up to 2 months.
- Adjusting Sweetness: If you prefer a less sweet cookie, you can reduce the amount of granulated sugar by 1/4 cup.
- Nut Allergy Alternative: If you have a peanut allergy, you can substitute the peanut butter with sunflower seed butter or another nut-free alternative. Just be sure to check the ingredients of your substitute to ensure it is safe for your specific allergy.
- Making them Chewier: For a chewier cookie, substitute some of the all-purpose flour with bread flour. Bread flour has a higher protein content, which will result in a chewier texture.
- Preventing Spreading: If your cookies are spreading too much, try chilling the dough for a longer period of time. You can also add a tablespoon or two of flour to the dough to help bind it together. Make sure your oven is properly preheated and that you are not using old baking soda or baking powder.
Troubleshooting:
- Cookies are too dry: Make sure you are not overbaking the cookies. Also, ensure that you are using the correct amount of butter and that it is properly softened.
- Cookies are too flat: This is usually caused by using butter that is too soft or not chilling the dough sufficiently. Make sure to chill the dough for at least 30 minutes and use butter that is softened but still slightly firm.
- Cookies are too hard: Overbaking is the most common cause of hard cookies. Also, overmixing the dough can develop the gluten, resulting in a tougher cookie.
- Cookies are not spreading enough: This could be due to using too much flour or not enough butter. Also, make sure your baking soda and baking powder are fresh.
Enjoy!
Conclusion:
And there you have it! These Peanut Butter Cornflake Cookies are more than just a sweet treat; they’re a nostalgic trip down memory lane with a delightful crunch and a burst of peanut butter goodness. I truly believe this recipe is a must-try for anyone who loves simple, satisfying desserts. The combination of creamy peanut butter, crispy cornflakes, and a touch of sweetness creates a texture and flavor profile that’s simply irresistible. But why is this recipe a must-try, you ask? Well, beyond the incredible taste, it’s incredibly easy to make! We’re talking minimal ingredients, no complicated techniques, and a bake time that’s shorter than your favorite sitcom episode. It’s the perfect recipe for beginner bakers, busy parents, or anyone who wants a quick and delicious dessert without spending hours in the kitchen. Plus, it’s a fantastic way to get the kids involved in baking they’ll love helping to mix and shape the cookies!Serving Suggestions and Variations:
Now, let’s talk about how to enjoy these delectable cookies. They’re fantastic on their own, of course, but here are a few ideas to elevate your Peanut Butter Cornflake Cookie experience: * Drizzle with Chocolate: Melt some dark or milk chocolate and drizzle it over the cooled cookies for an extra layer of indulgence. A white chocolate drizzle would also be divine! * Ice Cream Sandwich: Use two cookies to sandwich a scoop of your favorite ice cream. Peanut butter and chocolate ice cream would be particularly amazing. * Coffee Companion: These cookies are the perfect accompaniment to a cup of coffee or tea. The peanut butter flavor pairs beautifully with the warmth of the beverage. * Party Platter: Add these cookies to a dessert platter for your next gathering. They’re always a crowd-pleaser! * Add-Ins: Feel free to get creative with add-ins! Consider adding chocolate chips, chopped nuts, dried cranberries, or even a sprinkle of sea salt for a salty-sweet twist. * Different Nut Butters: While peanut butter is the star of the show, you could experiment with other nut butters like almond butter or cashew butter for a slightly different flavor profile. Just be sure to adjust the sweetness as needed. * Make them Gluten-Free: Ensure your cornflakes are certified gluten-free for a gluten-free treat! I’m confident that you’ll absolutely love these cookies. They’re the perfect balance of sweet, salty, and crunchy, and they’re guaranteed to put a smile on your face. So, what are you waiting for? Gather your ingredients, preheat your oven, and get ready to bake a batch of these amazing Peanut Butter Cornflake Cookies. I promise you won’t regret it! And most importantly, I’d love to hear about your experience! Once you’ve tried the recipe, please come back and leave a comment below. Let me know what you thought, what variations you tried, and any tips or tricks you discovered along the way. Sharing your baking adventures helps inspire others and makes our baking community even stronger. Happy baking! I can’t wait to hear all about your delicious creations! Print
Peanut Butter Cornflake Cookies: The Ultimate Recipe Guide
- Total Time: 50 minutes
- Yield: 24–36 cookies 1x
Description
Crunchy, peanut buttery, and perfectly sweet Cornflake Cookies are a classic, easy-to-make treat that’s always a crowd-pleaser.
Ingredients
- 1 cup (2 sticks) unsalted butter, softened
- 1 cup granulated sugar
- 1 cup packed light brown sugar
- 2 large eggs
- 1 teaspoon vanilla extract
- 1 cup creamy peanut butter
- 2 cups all-purpose flour
- 1 teaspoon baking soda
- 1/2 teaspoon baking powder
- 1/4 teaspoon salt
- 6 cups cornflakes cereal, lightly crushed
Instructions
- Cream the Butter and Sugars: In a large bowl, or the bowl of your stand mixer, cream together the softened butter, granulated sugar, and brown sugar until light and fluffy (3-5 minutes). Scrape down the sides of the bowl occasionally.
- Incorporate the Wet Ingredients: Beat in the eggs one at a time, mixing well after each addition. Stir in the vanilla extract and peanut butter until fully combined.
- Combine the Dry Ingredients: In a separate medium bowl, whisk together the flour, baking soda, baking powder, and salt.
- Gradually Add Dry Ingredients to Wet Ingredients: Gradually add the dry ingredients to the wet ingredients, mixing on low speed until just combined. Do not overmix.
- Fold in the Cornflakes: Gently fold in the lightly crushed cornflakes until evenly distributed.
- Chill the Dough: Cover the bowl with plastic wrap and chill the dough in the refrigerator for at least 30 minutes, or up to 2 hours.
- Preheat the Oven: Preheat your oven to 375°F (190°C). Position the oven rack in the center.
- Prepare Baking Sheets: Line baking sheets with parchment paper or silicone baking mats.
- Scoop the Dough: Use a cookie scoop or spoon to drop rounded tablespoons of dough onto the prepared baking sheets, leaving about 2 inches between each cookie.
- Optional: Flatten Slightly: Gently flatten the cookies slightly with the back of a spoon or your fingers.
- Bake: Bake for 8-10 minutes, or until the edges are golden brown and the centers are set.
- Cool on Baking Sheets: Remove the baking sheets from the oven and let the cookies cool on the baking sheets for a few minutes before transferring them to a wire rack to cool completely.
Notes
- Peanut Butter Chips: Fold in 1 cup of peanut butter chips along with the cornflakes.
- Chocolate Chips: Add 1 cup of chocolate chips (milk, semi-sweet, or dark).
- Sea Salt: Sprinkle a pinch of sea salt on top of the cookies before baking.
- Different Cereal: Experiment with other cereals like Rice Krispies or Special K.
- Storage: Store cooled cookies in an airtight container at room temperature for up to 5 days.
- Freezing: Freeze cookie dough balls on a baking sheet, then transfer to a freezer bag. Bake from frozen, adding a few extra minutes. You can also freeze baked cookies for up to 2 months.
- Adjusting Sweetness: Reduce granulated sugar by 1/4 cup for a less sweet cookie.
- Nut Allergy Alternative: Substitute peanut butter with sunflower seed butter or another nut-free alternative.
- Making them Chewier: Substitute some of the all-purpose flour with bread flour.
- Preventing Spreading: Chill the dough for a longer period of time. You can also add a tablespoon or two of flour to the dough to help bind it together. Make sure your oven is properly preheated and that you are not using old baking soda or baking powder.
- Cookies are too dry: Make sure you are not overbaking the cookies. Also, ensure that you are using the correct amount of butter and that it is properly softened.
- Cookies are too flat: This is usually caused by using butter that is too soft or not chilling the dough sufficiently. Make sure to chill the dough for at least 30 minutes and use butter that is softened but still slightly firm.
- Cookies are too hard: Overbaking is the most common cause of hard cookies. Also, overmixing the dough can develop the gluten, resulting in a tougher cookie.
- Cookies are not spreading enough: This could be due to using too much flour or not enough butter. Also, make sure your baking soda and baking powder are fresh.
- Prep Time: 20 minutes
- Cook Time: 8 minutes


Leave a Comment