
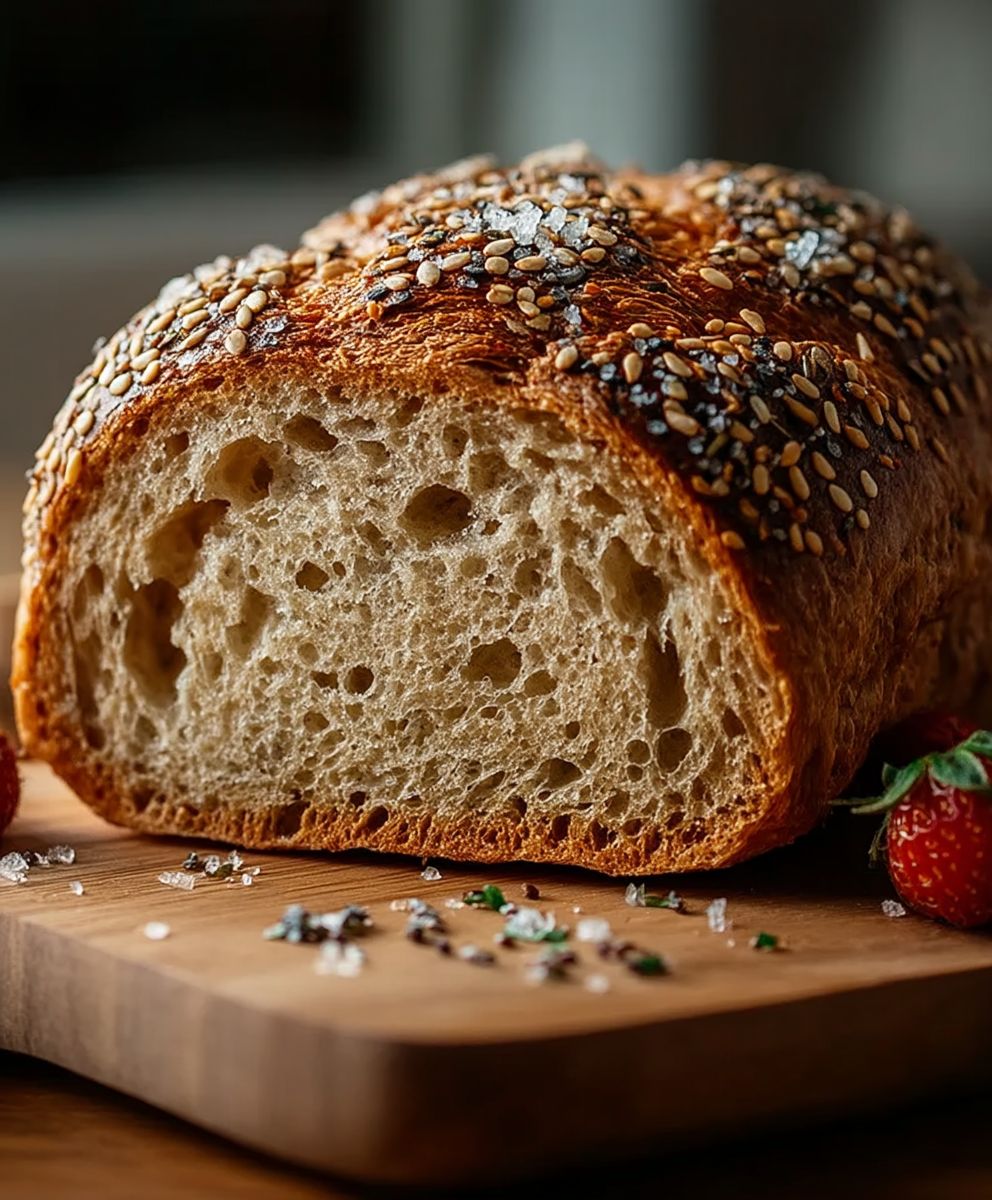
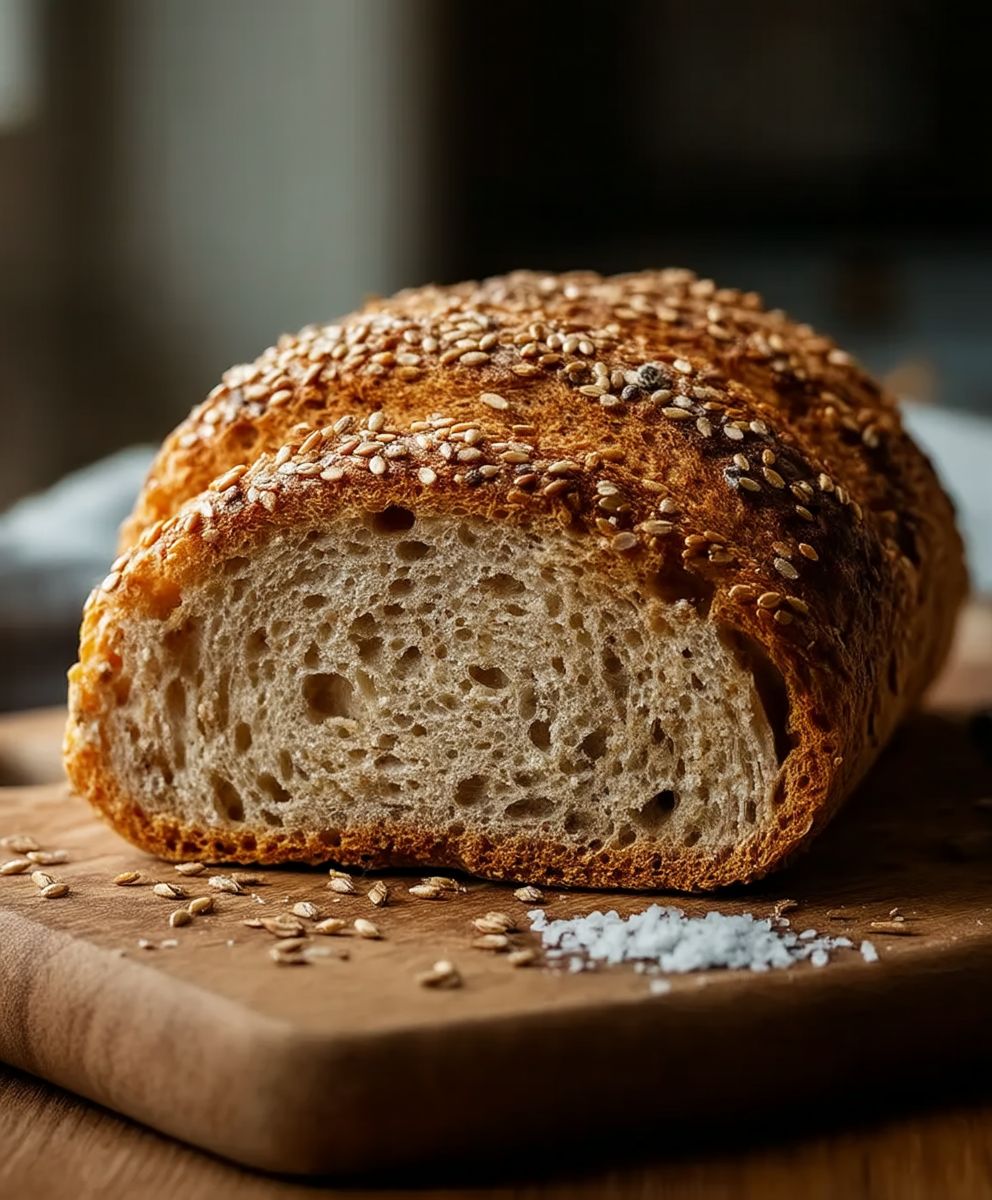
Multigrain bread, a symphony of textures and flavors, is more than just a loaf; it’s a hearty, wholesome experience. Imagine sinking your teeth into a slice, the subtle sweetness of molasses dancing on your tongue, followed by the satisfying chew of various grains and seeds. It’s the kind of bread that makes you feel good from the inside out, a far cry from the overly processed, fluffy white bread that dominates supermarket shelves.
While the exact origins of multigrain bread are difficult to pinpoint, the concept of combining different grains in baking dates back centuries. Ancient civilizations, resourceful and attuned to the bounty of the earth, often mixed available grains like barley, millet, and spelt to create nourishing and flavorful breads. This practice evolved over time, with different cultures developing their own unique multigrain blends and baking techniques.
People adore multigrain bread for a multitude of reasons. Firstly, the taste is simply irresistible. The combination of different grains creates a complex flavor profile that is both nutty and slightly sweet. Secondly, the texture is incredibly satisfying, offering a delightful contrast between the soft interior and the slightly crunchy crust. Finally, it’s a convenient and healthy option. Packed with fiber, vitamins, and minerals, multigrain bread is a great way to start your day or fuel your afternoon. So, are you ready to bake your own delicious and nutritious loaf?
Ingredients:
- For the Dough:
- 3 ½ cups (420g) bread flour, plus more for dusting
- 1 ½ cups (180g) multigrain flour (a mix of whole wheat, rye, oats, flaxseed, etc.)
- 2 ¼ teaspoons (7g) instant dry yeast
- 1 ½ teaspoons (9g) salt
- 2 tablespoons (30ml) honey or maple syrup
- 2 tablespoons (30g) unsalted butter, softened
- 1 ½ cups (360ml) lukewarm water (about 105-115°F or 40-46°C)
- For the Seed Coating (Optional):
- 1 tablespoon water
- ¼ cup mixed seeds (sunflower, pumpkin, sesame, flax, poppy, etc.)
Preparing the Dough:
- Combine Dry Ingredients: In a large bowl, whisk together the bread flour, multigrain flour, instant dry yeast, and salt. Make sure everything is evenly distributed. This ensures the yeast activates properly and the salt doesn’t inhibit its growth.
- Add Wet Ingredients: Add the honey (or maple syrup), softened butter, and lukewarm water to the dry ingredients. The water temperature is crucial; too hot, and you’ll kill the yeast; too cold, and it won’t activate properly.
- Mix the Dough: Using a wooden spoon or your hands, mix the ingredients until a shaggy dough forms. It will be sticky, and that’s perfectly fine. Don’t worry about making it perfectly smooth at this stage.
- Knead the Dough: Turn the dough out onto a lightly floured surface. Knead the dough for 8-10 minutes, or until it becomes smooth and elastic. If you’re using a stand mixer, use the dough hook attachment and knead on medium speed for about 6-8 minutes. The dough should be tacky but not overly sticky. If it’s sticking too much, add a little more bread flour, one tablespoon at a time.
- First Rise (Bulk Fermentation): Place the kneaded dough in a lightly oiled bowl, turning to coat all sides. Cover the bowl with plastic wrap or a clean kitchen towel. Let the dough rise in a warm place for 1-1.5 hours, or until it has doubled in size. This first rise is crucial for developing the flavor of the bread. A warm environment helps the yeast work its magic.
Shaping and Second Rise:
- Punch Down the Dough: Gently punch down the risen dough to release the air. This helps to redistribute the yeast and even out the temperature.
- Shape the Dough: Turn the dough out onto a lightly floured surface. Gently shape it into a loaf. You can do this by patting it into a rectangle and then rolling it up tightly. Pinch the seam closed and tuck the ends underneath.
- Prepare the Loaf Pan: Grease a 9×5 inch loaf pan with butter or cooking spray. You can also line it with parchment paper for easy removal.
- Place Dough in Pan: Carefully place the shaped dough into the prepared loaf pan, seam-side down.
- Second Rise (Proofing): Cover the loaf pan with plastic wrap or a clean kitchen towel. Let the dough rise in a warm place for 45-60 minutes, or until it has almost doubled in size and is about an inch above the rim of the pan. This second rise, called proofing, is just as important as the first. It gives the bread its final shape and texture.
Baking the Bread:
- Preheat the Oven: Preheat your oven to 375°F (190°C). Make sure your oven rack is in the center position.
- Prepare Seed Coating (Optional): If using, brush the top of the loaf with water and sprinkle generously with the mixed seeds. The water helps the seeds adhere to the dough.
- Bake the Bread: Bake the bread for 30-35 minutes, or until the crust is golden brown and the internal temperature reaches 200-210°F (93-99°C). You can use a digital thermometer to check the internal temperature. If the crust is browning too quickly, tent the loaf with aluminum foil.
- Cool the Bread: Remove the bread from the oven and let it cool in the loaf pan for 10 minutes. Then, transfer it to a wire rack to cool completely before slicing. Cooling completely is essential; otherwise, the bread will be gummy.
Tips and Variations:
- Adjusting Hydration: The amount of water needed may vary depending on the humidity and the type of flour you use. If the dough seems too dry, add a little more water, one tablespoon at a time. If it seems too wet, add a little more flour, one tablespoon at a time.
- Adding Seeds to the Dough: You can also add seeds directly to the dough. Add about ¼ cup of mixed seeds to the dough after the first rise.
- Using Whole Wheat Flour: You can substitute some of the bread flour with whole wheat flour for a nuttier flavor. However, keep in mind that whole wheat flour absorbs more water, so you may need to adjust the hydration accordingly.
- Storing the Bread: Store the cooled bread in an airtight container at room temperature for up to 3 days. For longer storage, you can freeze the bread. Slice it before freezing for easy thawing.
- Kneading by Hand vs. Stand Mixer: While a stand mixer makes kneading easier, kneading by hand is perfectly acceptable and can be quite therapeutic! Just ensure you knead for the full recommended time to develop the gluten properly.
- Yeast Considerations: I prefer using instant dry yeast because it’s convenient and doesn’t require proofing beforehand. However, if you’re using active dry yeast, you’ll need to proof it in warm water with a pinch of sugar for about 5-10 minutes before adding it to the dry ingredients. The mixture should become foamy, indicating that the yeast is active.
- Honey vs. Maple Syrup: Either honey or maple syrup works well in this recipe. They both add a touch of sweetness and help to activate the yeast. You can also use molasses for a richer, more robust flavor.
- Butter Substitute: If you don’t have butter, you can use vegetable oil or olive oil as a substitute. However, butter adds a richer flavor and a softer texture to the bread.
- Troubleshooting: If your bread doesn’t rise properly, it could be due to several factors, such as using old yeast, not kneading enough, or not providing a warm enough environment for rising. Make sure your yeast is fresh, knead the dough thoroughly, and find a warm spot for the dough to rise.
- Scoring the Loaf: For a more professional look, you can score the top of the loaf with a sharp knife or a lame before baking. This allows the bread to expand evenly during baking and prevents it from cracking. Make a few shallow slashes across the top of the loaf.
- Enriched Dough Variation: For a richer, more tender loaf, you can add an egg to the dough along with the wet ingredients. This will add moisture and fat, resulting in a softer crumb.
- Overnight Proofing: For a deeper, more complex flavor, you can let the dough rise in the refrigerator overnight. This slow fermentation process allows the flavors to develop more fully. After shaping the dough, place it in the loaf pan, cover it tightly, and refrigerate it for 8-12 hours. The next morning, let the dough come to room temperature for about an hour before baking.
- High Altitude Baking: If you live at a high altitude, you may need to adjust the recipe slightly. Reduce the amount of yeast by about ¼ teaspoon and increase the amount of liquid by about 1-2 tablespoons. You may also need to reduce the baking time slightly.
Conclusion:
This isn’t just another bread recipe; it’s an invitation to experience the deeply satisfying flavor and texture of homemade multigrain bread. From the nutty aroma that fills your kitchen to the hearty crumb that holds up perfectly to any topping, this recipe is a guaranteed winner. I truly believe that once you’ve tasted the difference between store-bought and freshly baked multigrain, you’ll never go back!
Why is this a must-try? Because it’s more than just bread; it’s a labor of love that rewards you with a wholesome and delicious staple. The combination of different grains creates a complex flavor profile that’s both comforting and exciting. Plus, you have complete control over the ingredients, ensuring that you’re only using the best for yourself and your family. Forget those overly processed loaves this is real bread, made with real ingredients, and bursting with real flavor.
But the best part? This recipe is incredibly versatile! While it’s fantastic on its own, toasted with a smear of butter or jam, there are so many other ways to enjoy it.
Serving Suggestions and Variations:
* Sandwich Superstar: This multigrain bread makes the ultimate sandwich. Try it with your favorite deli meats, cheeses, and veggies for a truly satisfying lunch. It’s sturdy enough to hold even the heartiest fillings without falling apart.
* Toast of the Town: Elevate your breakfast game by toasting a slice and topping it with avocado, a fried egg, and a sprinkle of everything bagel seasoning. Or, go sweet with a dollop of ricotta cheese, honey, and a sprinkle of cinnamon.
* Soup’s Best Friend: A warm slice of this bread is the perfect accompaniment to a bowl of hearty soup or stew. Its robust flavor complements a wide variety of soups, from creamy tomato to chunky vegetable.
* Crouton Creation: Don’t let any leftover bread go to waste! Cube it up, toss it with olive oil and your favorite herbs, and bake until golden brown for homemade croutons that will elevate any salad.
* French Toast Fantasy: For a truly decadent treat, use this bread to make French toast. Its slightly denser texture soaks up the custard beautifully, resulting in a rich and flavorful breakfast.
* Seed Sensations: Feel free to experiment with different types of seeds in your multigrain bread. Sunflower seeds, pumpkin seeds, flax seeds, and sesame seeds all add unique flavors and textures.
* Nutty Notes: Add a handful of chopped nuts, such as walnuts or pecans, to the dough for an extra layer of flavor and crunch.
* Sweet Surrender: For a slightly sweeter bread, add a tablespoon or two of honey or maple syrup to the dough.
I’m so excited for you to try this recipe and experience the joy of baking your own multigrain bread. It’s a rewarding process that will fill your home with warmth and delicious aromas. Don’t be intimidated by the thought of baking bread this recipe is designed to be easy to follow, even for beginners.
So, what are you waiting for? Gather your ingredients, preheat your oven, and get ready to embark on a baking adventure! And once you’ve created your masterpiece, please share your experience with me! I’d love to hear about your variations, your serving suggestions, and any tips you’ve discovered along the way. Tag me in your photos on social media I can’t wait to see your beautiful loaves of homemade multigrain bread! Happy baking!
Multigrain Bread: The Ultimate Guide to Health Benefits and Recipes
Hearty and flavorful multigrain bread, perfect for sandwiches or toast. This loaf combines bread flour and multigrain flour for a delicious texture and taste.
Ingredients
- 3 ½ cups (420g) bread flour, plus more for dusting
- 1 ½ cups (180g) multigrain flour (a mix of whole wheat, rye, oats, flaxseed, etc.)
- 2 ¼ teaspoons (7g) instant dry yeast
- 1 ½ teaspoons (9g) salt
- 2 tablespoons (30ml) honey or maple syrup
- 2 tablespoons (30g) unsalted butter, softened
- 1 ½ cups (360ml) lukewarm water (about 105-115°F or 40-46°C)
- 1 tablespoon water
- ¼ cup mixed seeds (sunflower, pumpkin, sesame, flax, poppy, etc.)
Instructions
- Combine Dry Ingredients: In a large bowl, whisk together the bread flour, multigrain flour, instant dry yeast, and salt.
- Add Wet Ingredients: Add the honey (or maple syrup), softened butter, and lukewarm water to the dry ingredients.
- Mix the Dough: Using a wooden spoon or your hands, mix the ingredients until a shaggy dough forms.
- Knead the Dough: Turn the dough out onto a lightly floured surface. Knead the dough for 8-10 minutes, or until it becomes smooth and elastic. (Or use a stand mixer with the dough hook on medium speed for 6-8 minutes). Add more bread flour, one tablespoon at a time, if needed.
- First Rise (Bulk Fermentation): Place the kneaded dough in a lightly oiled bowl, turning to coat all sides. Cover and let rise in a warm place for 1-1.5 hours, or until doubled in size.
- Punch Down the Dough: Gently punch down the risen dough to release the air.
- Shape the Dough: Turn the dough out onto a lightly floured surface. Gently shape it into a loaf.
- Prepare the Loaf Pan: Grease a 9×5 inch loaf pan with butter or cooking spray (or line with parchment paper).
- Place Dough in Pan: Carefully place the shaped dough into the prepared loaf pan, seam-side down.
- Second Rise (Proofing): Cover and let rise in a warm place for 45-60 minutes, or until almost doubled and about an inch above the rim of the pan.
- Preheat the Oven: Preheat your oven to 375°F (190°C).
- Prepare Seed Coating (Optional): If using, brush the top of the loaf with water and sprinkle generously with the mixed seeds.
- Bake the Bread: Bake the bread for 30-35 minutes, or until the crust is golden brown and the internal temperature reaches 200-210°F (93-99°C). Tent with foil if browning too quickly.
- Cool the Bread: Remove the bread from the oven and let it cool in the loaf pan for 10 minutes. Then, transfer it to a wire rack to cool completely before slicing.
Notes
- Adjusting Hydration: The amount of water needed may vary. If the dough seems too dry, add a little more water, one tablespoon at a time. If it seems too wet, add a little more flour, one tablespoon at a time.
- Adding Seeds to the Dough: You can also add seeds directly to the dough. Add about ¼ cup of mixed seeds to the dough after the first rise.
- Using Whole Wheat Flour: You can substitute some of the bread flour with whole wheat flour for a nuttier flavor. However, keep in mind that whole wheat flour absorbs more water, so you may need to adjust the hydration accordingly.
- Storing the Bread: Store the cooled bread in an airtight container at room temperature for up to 3 days. For longer storage, you can freeze the bread. Slice it before freezing for easy thawing.
- Kneading by Hand vs. Stand Mixer: While a stand mixer makes kneading easier, kneading by hand is perfectly acceptable and can be quite therapeutic! Just ensure you knead for the full recommended time to develop the gluten properly.
- Yeast Considerations: I prefer using instant dry yeast because it’s convenient and doesn’t require proofing beforehand. However, if you’re using active dry yeast, you’ll need to proof it in warm water with a pinch of sugar for about 5-10 minutes before adding it to the dry ingredients. The mixture should become foamy, indicating that the yeast is active.
- Honey vs. Maple Syrup: Either honey or maple syrup works well in this recipe. They both add a touch of sweetness and help to activate the yeast. You can also use molasses for a richer, more robust flavor.
- Butter Substitute: If you don’t have butter, you can use vegetable oil or olive oil as a substitute. However, butter adds a richer flavor and a softer texture to the bread.
- Troubleshooting: If your bread doesn’t rise properly, it could be due to several factors, such as using old yeast, not kneading enough, or not providing a warm enough environment for rising. Make sure your yeast is fresh, knead the dough thoroughly, and find a warm spot for the dough to rise.
- Scoring the Loaf: For a more professional look, you can score the top of the loaf with a sharp knife or a lame before baking. This allows the bread to expand evenly during baking and prevents it from cracking. Make a few shallow slashes across the top of the loaf.
- Enriched Dough Variation: For a richer, more tender loaf, you can add an egg to the dough along with the wet ingredients. This will add moisture and fat, resulting in a softer crumb.
- Overnight Proofing: For a deeper, more complex flavor, you can let the dough rise in the refrigerator overnight. This slow fermentation process allows the flavors to develop more fully. After shaping the dough, place it in the loaf pan, cover it tightly, and refrigerate it for 8-12 hours. The next morning, let the dough come to room temperature for about an hour before baking.
- High Altitude Baking: If you live at a high altitude, you may need to adjust the recipe slightly. Reduce the amount of yeast by about ¼ teaspoon and increase the amount of liquid by about 1-2 tablespoons. You may also need to reduce the baking time slightly.


Leave a Comment