
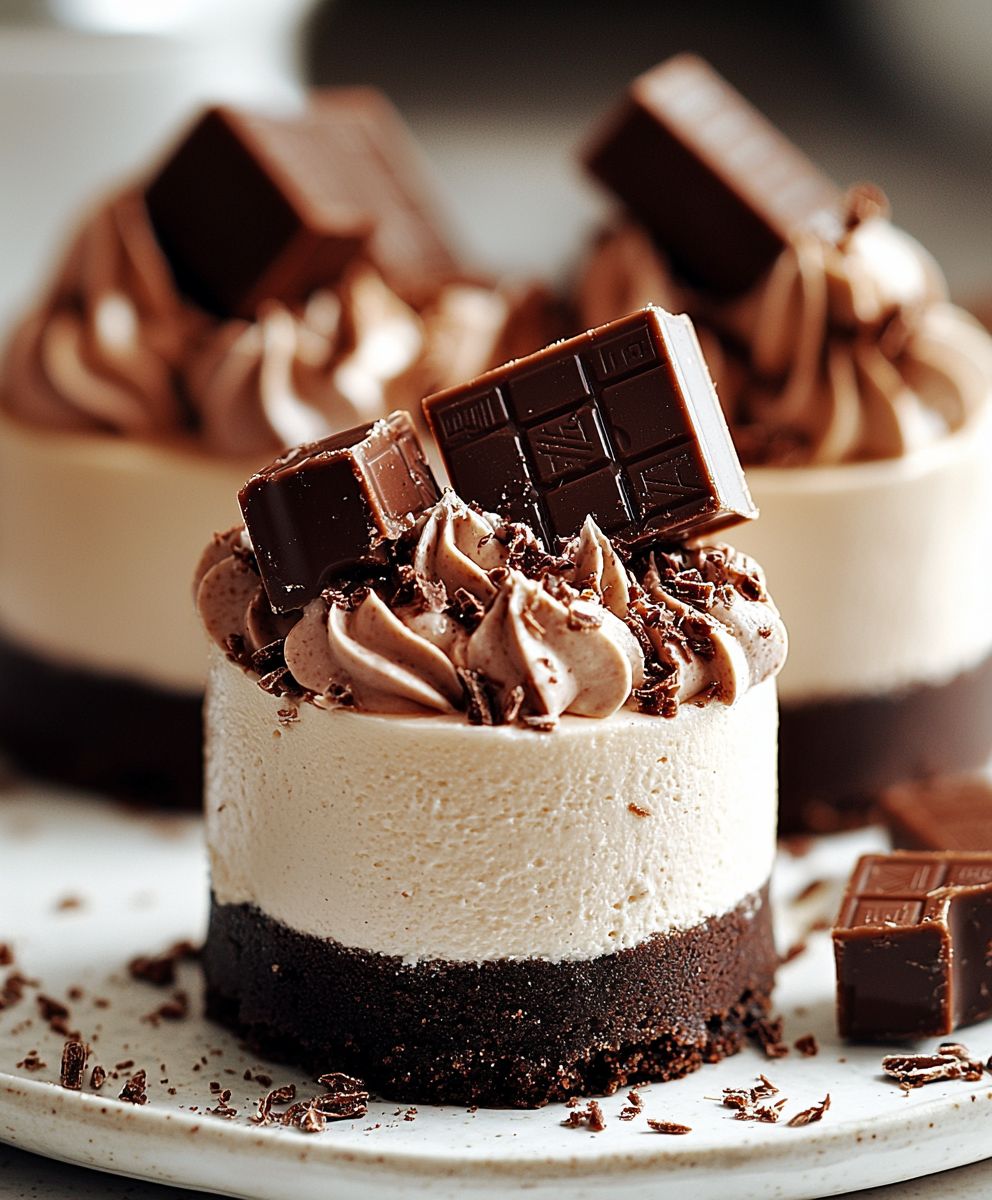
Kit Kat Cheesecakes: Prepare to have your dessert dreams come true! Imagine the creamy, decadent indulgence of a classic cheesecake perfectly fused with the irresistible crunch of a Kit Kat bar. Yes, you read that right! These individual cheesecakes are not only incredibly delicious but also surprisingly easy to make, making them the perfect treat for any occasion.
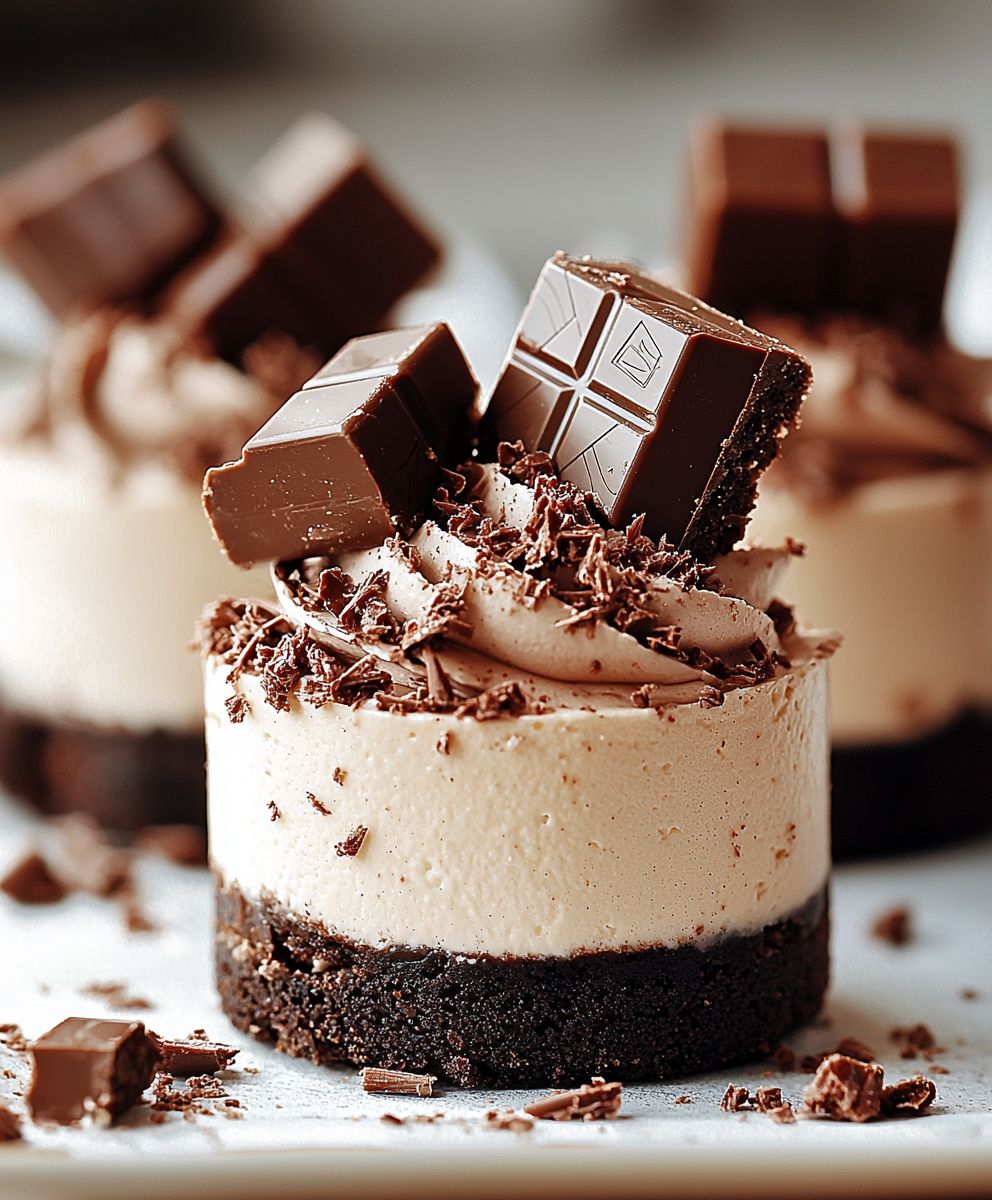
While the history of cheesecake dates back to ancient Greece, this modern twist is a playful and innovative take on a beloved classic. The addition of Kit Kats elevates the cheesecake to a whole new level of textural and flavor complexity. The smooth, rich cheesecake filling contrasts beautifully with the crispy wafer and milk chocolate of the Kit Kat, creating a symphony of sensations in every bite.
People adore these Kit Kat Cheesecakes for several reasons. First, they’re incredibly convenient. Being individual servings, they are perfect for parties, potlucks, or simply a satisfying personal treat. Second, the combination of creamy cheesecake and crunchy Kit Kat is simply irresistible. The sweet and slightly tangy cheesecake filling complements the milk chocolate perfectly. Finally, they’re a fun and creative way to enjoy two classic desserts in one! So, get ready to impress your friends and family with these delightful and easy-to-make Kit Kat Cheesecakes!
Ingredients:
- For the Crust:
- 1 ½ cups chocolate wafer crumbs (about 36 wafers)
- 5 tablespoons unsalted butter, melted
- 2 tablespoons granulated sugar
- For the Cheesecake Filling:
- 24 ounces cream cheese, softened to room temperature
- 1 cup granulated sugar
- ½ cup sour cream
- 2 large eggs
- 1 teaspoon vanilla extract
- Pinch of salt
- For the Kit Kat Decoration:
- 12 fun-size Kit Kat bars, unwrapped and halved (for the sides)
- 6 fun-size Kit Kat bars, chopped (for the topping)
- Chocolate ganache (optional, for adhering Kit Kats to the sides)
- 4 ounces semi-sweet chocolate, chopped
- ¼ cup heavy cream
Preparing the Crust:
- Crush the Chocolate Wafers: First, you’ll need to crush your chocolate wafers into fine crumbs. You can do this in a food processor, pulsing until you achieve a sand-like consistency. Alternatively, place the wafers in a large zip-top bag, seal it tightly, and use a rolling pin to crush them. Make sure there are no large chunks remaining.
- Combine Crust Ingredients: In a medium bowl, combine the chocolate wafer crumbs, melted butter, and granulated sugar. Mix well until all the crumbs are evenly moistened. The mixture should resemble wet sand.
- Press into Muffin Liners: Line a 12-cup muffin tin with paper liners. Divide the crumb mixture evenly among the liners, about 2 tablespoons per liner. Use the bottom of a measuring cup or a small glass to firmly press the crumbs into the bottom of each liner, creating a compact and even crust. This is important for a sturdy base!
- Pre-bake the Crust: Bake the crusts in a preheated oven at 350°F (175°C) for 5-7 minutes. This helps to set the crust and prevent it from becoming soggy. Remove from the oven and let cool completely while you prepare the cheesecake filling.
Making the Cheesecake Filling:
- Beat the Cream Cheese: In a large bowl, using an electric mixer (either a stand mixer or a hand mixer), beat the softened cream cheese until it is smooth and creamy. This is a crucial step, so make sure there are no lumps. Scrape down the sides of the bowl as needed to ensure even mixing.
- Add Sugar and Sour Cream: Gradually add the granulated sugar to the cream cheese, beating on medium speed until well combined. Then, add the sour cream and continue to beat until the mixture is smooth and creamy. The sour cream adds a lovely tang and helps to keep the cheesecake moist.
- Incorporate the Eggs: Add the eggs one at a time, beating well after each addition. Be careful not to overmix at this stage, as overmixing can incorporate too much air into the batter, which can cause the cheesecakes to crack during baking.
- Add Vanilla and Salt: Stir in the vanilla extract and salt. Mix until just combined. The vanilla enhances the flavor of the cheesecake, and the salt balances the sweetness.
Baking the Cheesecakes:
- Pour Filling into Crusts: Pour the cheesecake filling evenly over the cooled crusts, filling each liner almost to the top. Try to distribute the filling equally to ensure even baking.
- Bake in a Water Bath (Optional but Recommended): For the best results and to prevent cracking, bake the cheesecakes in a water bath. Wrap the bottom of the muffin tin tightly with heavy-duty aluminum foil to prevent water from seeping in. Place the wrapped muffin tin in a larger baking pan. Carefully pour hot water into the larger pan until it reaches about halfway up the sides of the muffin tin.
- Baking Time: Bake in a preheated oven at 325°F (160°C) for 20-25 minutes, or until the edges are set but the center still has a slight jiggle. The cheesecakes will continue to set as they cool.
- Cooling Process: Turn off the oven and crack the oven door slightly. Let the cheesecakes cool in the oven for 1 hour. This gradual cooling process helps to prevent cracking. After 1 hour, remove the muffin tin from the water bath and let the cheesecakes cool completely at room temperature.
- Chill the Cheesecakes: Once cooled, cover the muffin tin with plastic wrap and refrigerate the cheesecakes for at least 4 hours, or preferably overnight. This allows the cheesecakes to fully set and develop their flavor.
Preparing the Chocolate Ganache (Optional):
- Heat the Cream: Place the chopped semi-sweet chocolate in a heatproof bowl. In a small saucepan, heat the heavy cream over medium heat until it just begins to simmer. Do not boil the cream.
- Pour over Chocolate: Pour the hot cream over the chopped chocolate. Let it sit for 1 minute to allow the heat to melt the chocolate.
- Stir Until Smooth: Gently stir the mixture until the chocolate is completely melted and the ganache is smooth and glossy. If there are any stubborn pieces of chocolate, you can microwave the mixture in 15-second intervals, stirring in between, until smooth.
- Cool Slightly: Let the ganache cool slightly until it thickens to a spreadable consistency.
Assembling the Kit Kat Cheesecakes:
- Remove Cheesecakes from Liners: Carefully remove the chilled cheesecakes from the muffin liners.
- Apply Ganache (Optional): If using, spread a thin layer of chocolate ganache around the sides of each cheesecake. This will act as “glue” to hold the Kit Kat bars in place.
- Attach Kit Kat Bars: Gently press the halved fun-size Kit Kat bars around the sides of each cheesecake, standing them upright. You should be able to fit about 6 Kit Kat halves around each cheesecake.
- Add Chopped Kit Kat Topping: Sprinkle the chopped Kit Kat bars over the top of each cheesecake.
- Chill Before Serving: Refrigerate the assembled Kit Kat cheesecakes for at least 30 minutes to allow the Kit Kat bars to adhere to the sides and the ganache (if used) to set. This will also help to keep the cheesecakes firm and prevent them from melting.
Tips for Success:
- Use Room Temperature Ingredients: Make sure your cream cheese and eggs are at room temperature for a smoother cheesecake filling.
- Don’t Overmix: Overmixing the cheesecake batter can lead to cracks. Mix until just combined.
- Water Bath is Key: Baking in a water bath helps to prevent cracking and ensures a creamy texture.
- Cool Gradually: Cooling the cheesecakes slowly in the oven helps to prevent cracking.
- Chill Thoroughly: Chilling the cheesecakes for at least 4 hours (or overnight) is essential for a firm and flavorful cheesecake.
- Get Creative with Toppings: Feel free to experiment with different toppings, such as chocolate shavings, whipped cream, or fresh berries.
Storage Instructions:
Store leftover Kit Kat cheesecakes in an airtight container in the refrigerator for up to 3-4 days. The Kit Kat bars may soften slightly over time, but the cheesecakes will still be delicious.
Variations:
- Peanut Butter Kit Kat Cheesecakes: Use peanut butter Kit Kats for the decoration and add a tablespoon of peanut butter to the cheesecake filling.
- Mint Chocolate Kit Kat Cheesecakes: Use mint chocolate Kit Kats for the decoration and add a few drops of peppermint extract to the cheesecake filling.
- White Chocolate Kit Kat Cheesecakes: Use white chocolate Kit Kats for the decoration and add melted white chocolate to the cheesecake filling.
- Oreo Crust: Substitute the chocolate wafer crumbs with Oreo crumbs for a different crust flavor.
Troubleshooting:
- Cracked Cheesecakes: If your cheesecakes crack, it’s usually due to overbaking or rapid temperature changes. Try baking in a water bath and cooling the cheesecakes gradually to prevent cracking.
- Soggy Crust: If your crust is soggy, make sure to pre-bake it and press it firmly into the muffin liners.
- Lumpy Filling
Conclusion:
And there you have it! These adorable and utterly delicious Kit Kat Cheesecakes are more than just a dessert; they’re an experience. From the satisfying crunch of the Kit Kat base to the creamy, dreamy cheesecake filling, every bite is a little piece of heaven. I truly believe this recipe is a must-try for any cheesecake lover, chocolate enthusiast, or anyone looking to impress their friends and family with a show-stopping treat. But why is this recipe so special? It’s the perfect balance of textures and flavors. The Kit Kat crust provides a delightful contrast to the smooth cheesecake, and the chocolatey goodness complements the tangy cream cheese beautifully. Plus, the individual serving sizes make them incredibly convenient and perfect for parties or portion control (if you can resist eating more than one!). Beyond the sheer deliciousness, these Kit Kat Cheesecakes are surprisingly easy to make. The recipe is straightforward, and the ingredients are readily available. You don’t need to be a professional baker to achieve impressive results. I’ve broken down each step to ensure success, even for beginners. Trust me, if I can do it, you can too! Now, let’s talk serving suggestions and variations. While these cheesecakes are fantastic on their own, there are plenty of ways to elevate them even further. Consider drizzling them with melted chocolate, caramel sauce, or a raspberry coulis. A dollop of whipped cream and a sprinkle of cocoa powder also add a touch of elegance. For variations, the possibilities are endless! You could experiment with different flavors of Kit Kats, such as dark chocolate or white chocolate. Or, you could add a layer of chocolate ganache on top of the cheesecake filling for an extra decadent treat. Another fun idea is to incorporate chopped nuts, such as pecans or walnuts, into the crust or the filling. If you’re feeling adventurous, try adding a hint of peppermint extract to the cheesecake filling for a festive holiday twist. You can even use different types of cookies for the crust, like Oreos or graham crackers. The key is to have fun and get creative! These mini cheesecakes are perfect for any occasion. They’re a crowd-pleaser at parties, a delightful treat for birthdays, and a comforting indulgence for a cozy night in. They also make a thoughtful and delicious gift for friends and family. Imagine the smiles on their faces when they receive a batch of these homemade Kit Kat Cheesecakes! I’m so confident that you’ll love this recipe. It’s a guaranteed winner, and I can’t wait to hear about your experience. So, gather your ingredients, preheat your oven, and get ready to create some magic in the kitchen. I truly hope you give these Kit Kat Cheesecakes a try. I’m eager to see your creations! Don’t forget to snap a picture and share it with me on social media using [Your Social Media Handle/Hashtag]. I’d love to see your variations and hear your feedback. Happy baking, and enjoy every delicious bite! Let me know in the comments below if you have any questions or if you tried any fun variations! I’m always looking for new ideas. Print
Kit Kat Cheesecakes: The Ultimate Guide to Deliciously Decadent Treats
- Total Time: 300 minutes
- Yield: 12 mini cheesecakes 1x
Description
Decadent mini chocolate cheesecakes with a chocolate wafer crust, topped with Kit Kat bars for a fun and delicious treat!
Ingredients
- 1 ½ cups chocolate wafer crumbs (about 36 wafers)
- 5 tablespoons unsalted butter, melted
- 2 tablespoons granulated sugar
- 24 ounces cream cheese, softened to room temperature
- 1 cup granulated sugar
- ½ cup sour cream
- 2 large eggs
- 1 teaspoon vanilla extract
- Pinch of salt
- 12 fun-size Kit Kat bars, unwrapped and halved (for the sides)
- 6 fun-size Kit Kat bars, chopped (for the topping)
- 4 ounces semi-sweet chocolate, chopped
- ¼ cup heavy cream
Instructions
- Prepare the Crust: Crush chocolate wafers into fine crumbs. Combine crumbs, melted butter, and sugar in a bowl. Press into muffin liners in a 12-cup muffin tin. Bake at 350°F (175°C) for 5-7 minutes. Cool completely.
- Make the Cheesecake Filling: Beat cream cheese until smooth. Add sugar and sour cream, beat until combined. Add eggs one at a time, then vanilla and salt. Mix until just combined.
- Bake the Cheesecakes: Pour filling over cooled crusts. Bake in a water bath (optional, but recommended) at 325°F (160°C) for 20-25 minutes, until edges are set but the center jiggles slightly.
- Cool and Chill: Turn off oven, crack door, and cool in oven for 1 hour. Remove from water bath and cool completely at room temperature. Cover and refrigerate for at least 4 hours (or overnight).
- Make the Ganache (Optional): Heat heavy cream until simmering. Pour over chopped chocolate. Let sit for 1 minute, then stir until smooth. Cool slightly.
- Assemble the Cheesecakes: Remove cheesecakes from liners. Spread ganache (if using) around the sides. Attach halved Kit Kat bars to the sides. Sprinkle chopped Kit Kat bars on top.
- Chill and Serve: Refrigerate for at least 30 minutes before serving.
Notes
- Use room temperature ingredients for a smoother filling.
- Don’t overmix the cheesecake batter.
- A water bath helps prevent cracking.
- Cool the cheesecakes gradually.
- Chill thoroughly for a firm cheesecake.
- Get creative with toppings!
- For Peanut Butter Kit Kat Cheesecakes: Use peanut butter Kit Kats for the decoration and add a tablespoon of peanut butter to the cheesecake filling.
- For Mint Chocolate Kit Kat Cheesecakes: Use mint chocolate Kit Kats for the decoration and add a few drops of peppermint extract to the cheesecake filling.
- For White Chocolate Kit Kat Cheesecakes: Use white chocolate Kit Kats for the decoration and add melted white chocolate to the cheesecake filling.
- Oreo Crust: Substitute the chocolate wafer crumbs with Oreo crumbs for a different crust flavor.
- Cracked Cheesecakes: If your cheesecakes crack, it’s usually due to overbaking or rapid temperature changes. Try baking in a water bath and cooling the cheesecakes gradually to prevent cracking.
- Soggy Crust: If your crust is soggy, make sure to pre-bake it and press it firmly into the muffin liners.
- Lumpy Filling: Make sure your cream cheese is fully softened and beat it well before adding other ingredients.
- Prep Time: 30 minutes
- Cook Time: 30 minutes

Leave a Comment