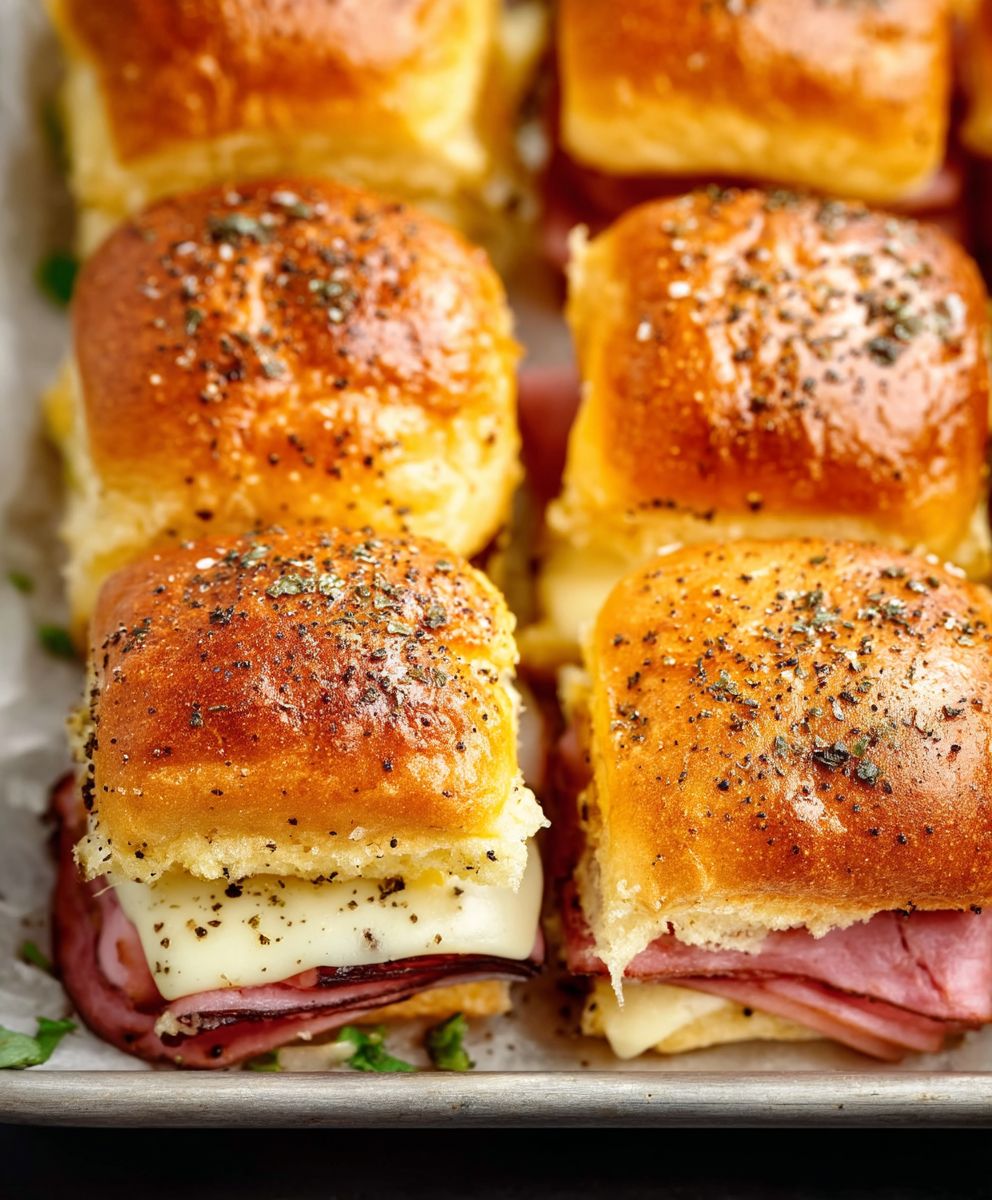
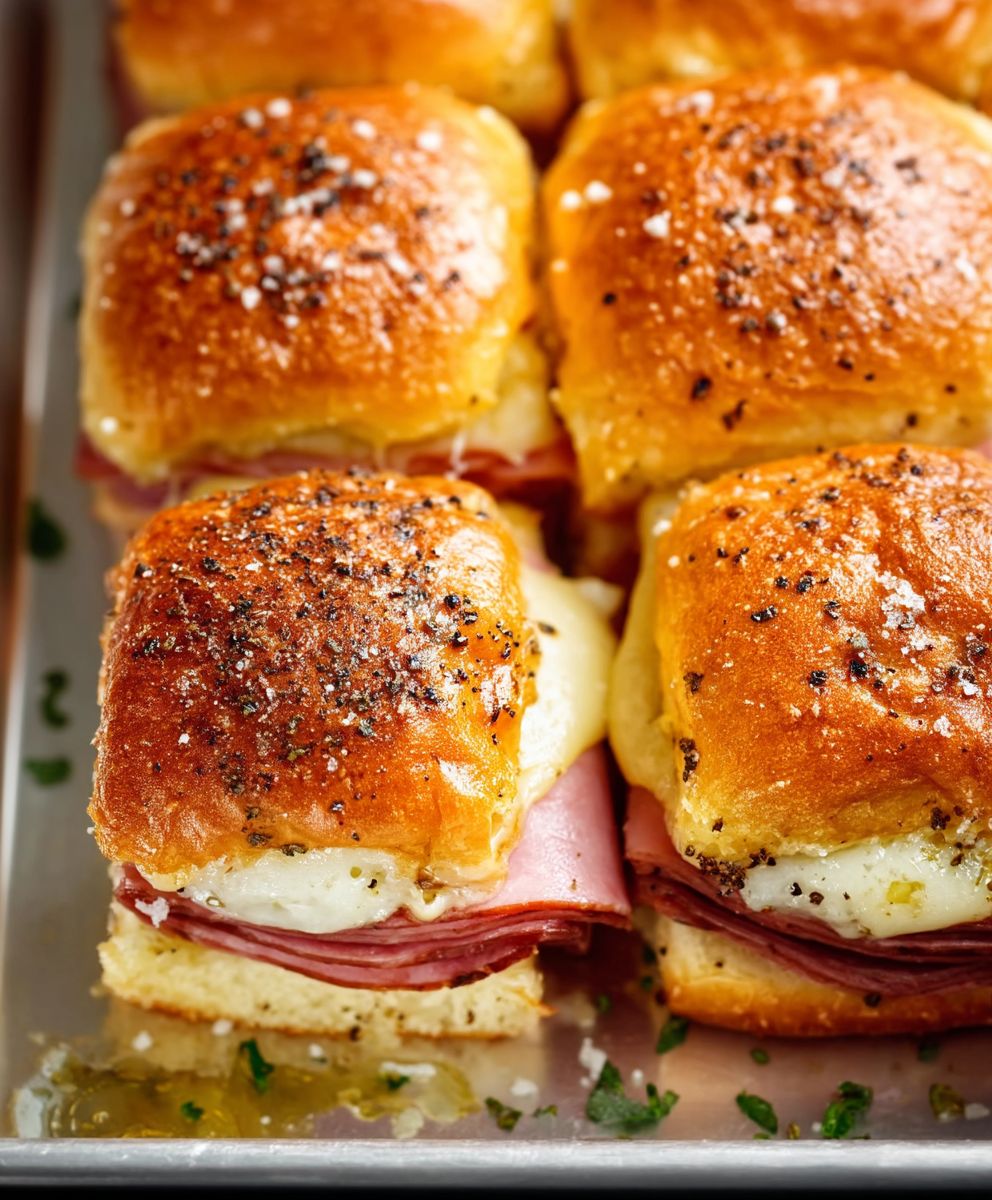
Ham and Cheese Sliders: Prepare to meet your new favorite party appetizer (or quick weeknight dinner!). These aren’t just any mini sandwiches; they’re a flavor explosion packed into a perfectly portable package. Imagine warm, buttery rolls, layers of savory ham, and gooey, melted cheese, all baked to golden perfection. Are you drooling yet?
The concept of a “slider,” a small, easily manageable sandwich, has been around for over a century, with its roots tracing back to White Castle restaurants in the 1920s. While the original sliders were simple hamburgers, the idea quickly evolved, giving rise to countless variations. Our Ham and Cheese Sliders are a testament to that evolution, taking a classic pairing and elevating it to something truly special.
What makes these sliders so irresistible? It’s the perfect combination of textures and tastes. The soft, slightly sweet rolls provide a delightful contrast to the salty ham and rich cheese. The buttery topping adds a touch of indulgence, while the baking process melds everything together into a harmonious whole. Plus, they’re incredibly convenient! Whether you’re hosting a game day gathering, need a quick and easy meal for the family, or simply craving a comforting snack, these Ham and Cheese Sliders are always a crowd-pleaser. I promise, they’ll disappear faster than you can say “seconds!”

Ingredients:
- 12 Hawaiian sweet rolls
- 1 pound sliced ham (I prefer Black Forest ham for its smoky flavor)
- 1 pound sliced Swiss cheese (or your favorite cheese, like provolone or cheddar)
- 1/2 cup (1 stick) unsalted butter, melted
- 2 tablespoons Dijon mustard
- 1 tablespoon Worcestershire sauce
- 1 tablespoon poppy seeds
- 1 tablespoon dried minced onion
- 1 teaspoon garlic powder
- 1/2 teaspoon onion powder
- Optional: Everything bagel seasoning for extra flavor
- Optional: Fresh parsley, chopped, for garnish
Preparing the Sauce:
Okay, let’s get started! The first thing we’re going to do is make that delicious sauce that really elevates these sliders. Trust me, this sauce is the key to making them irresistible.
- Melt the butter: In a small bowl, melt the butter completely. You can do this in the microwave in 30-second intervals, stirring in between, or in a small saucepan over low heat. Just make sure it doesn’t burn!
- Combine the wet ingredients: Add the Dijon mustard and Worcestershire sauce to the melted butter. Whisk everything together until it’s smooth and well combined. The Dijon adds a nice tang, and the Worcestershire gives it a savory depth.
- Add the dry ingredients: Now, add the poppy seeds, dried minced onion, garlic powder, and onion powder to the bowl. Stir everything together really well. Make sure there are no clumps of dried onion. The poppy seeds add a nice little crunch and visual appeal, while the dried onion, garlic powder, and onion powder provide that classic savory flavor.
- Optional: Add Everything Bagel Seasoning: If you’re feeling adventurous, add a tablespoon of everything bagel seasoning to the sauce. This will give the sliders an extra layer of flavor and texture. I highly recommend it!
- Set aside: Once the sauce is thoroughly mixed, set it aside. We’ll use it later to brush over the sliders before baking.
Assembling the Sliders:
Now comes the fun part: assembling the sliders! This is where you get to layer all those delicious ingredients together.
- Preheat the oven: Preheat your oven to 350°F (175°C). This is important to ensure the sliders bake evenly.
- Prepare the rolls: Using a large serrated knife (like a bread knife), carefully slice the entire slab of Hawaiian sweet rolls horizontally. You want to separate the top half from the bottom half, keeping all the rolls connected. Think of it like opening a giant slider sandwich. Be careful not to tear the rolls!
- Layer the ham: Place the bottom half of the rolls on a baking sheet lined with parchment paper or aluminum foil. This will make cleanup much easier. Now, evenly distribute the sliced ham over the bottom half of the rolls. Make sure to cover the entire surface, but don’t overcrowd it. You want a good layer of ham in every bite.
- Layer the cheese: Next, layer the sliced Swiss cheese (or your cheese of choice) over the ham. Again, make sure to cover the entire surface. You can overlap the cheese slices slightly if needed. I like to use Swiss cheese because it melts beautifully and has a mild, nutty flavor that complements the ham perfectly. But feel free to experiment with other cheeses! Provolone, cheddar, or even pepper jack would be delicious.
- Replace the top half of the rolls: Carefully place the top half of the rolls back on top of the cheese. Make sure it lines up properly with the bottom half.
Baking the Sliders:
Almost there! Now it’s time to bake the sliders and let all those flavors meld together.
- Brush with sauce: Using a pastry brush, generously brush the prepared sauce over the top of the rolls. Make sure to get into all the nooks and crannies. This sauce is what gives the sliders their signature flavor and golden-brown color. Don’t be shy with the sauce!
- Cover with foil: Cover the baking sheet with aluminum foil. This will help to prevent the tops of the rolls from browning too quickly and ensure that the cheese melts completely.
- Bake: Bake in the preheated oven for 20 minutes.
- Remove foil and bake longer: After 20 minutes, remove the foil and continue baking for another 5-10 minutes, or until the tops of the rolls are golden brown and the cheese is melted and bubbly. Keep a close eye on them during this time to prevent them from burning.
- Check for doneness: The sliders are done when the cheese is fully melted and gooey, and the tops of the rolls are a beautiful golden brown. You can also insert a toothpick into the center of the sliders to check for doneness. If the toothpick comes out clean, they’re ready.
Serving and Enjoying:
The moment we’ve all been waiting for! Time to serve and enjoy these delicious ham and cheese sliders.
- Let cool slightly: Remove the sliders from the oven and let them cool for a few minutes before serving. This will make them easier to handle and prevent you from burning your mouth.
- Slice and serve: Using a large serrated knife, carefully slice the sliders along the pre-cut lines to separate them.
- Garnish (optional): If desired, garnish the sliders with fresh chopped parsley for a pop of color and freshness.
- Serve immediately: Serve the sliders immediately while they’re still warm and gooey. They’re best enjoyed fresh out of the oven.
- Enjoy!: These sliders are perfect for parties, game day, potlucks, or just a quick and easy weeknight meal. They’re always a crowd-pleaser!
Tips and Variations:
Here are a few tips and variations to help you customize these sliders to your liking:
- Cheese variations: As mentioned earlier, feel free to experiment with different types of cheese. Provolone, cheddar, pepper jack, or even Gruyere would all be delicious.
- Meat variations: You can also use different types of meat instead of ham. Turkey, roast beef, or even pulled pork would work well.
- Add veggies: For a little extra flavor and nutrition, try adding some sliced tomatoes, lettuce, or pickles to the sliders.
- Spicy kick: If you like a little heat, add a pinch of red pepper flakes to the sauce or use a spicy mustard.
- Make ahead: You can assemble the sliders ahead of time and store them in the refrigerator until you’re ready to bake them. Just be sure to add the sauce right before baking to prevent the rolls from getting soggy.
- Freezing: These sliders can also be frozen for later. Assemble the sliders, but don’t bake them. Wrap them tightly in plastic wrap and then in aluminum foil. Freeze for up to 2 months. When ready to bake, thaw them in the refrigerator overnight and then bake as directed.
Serving Suggestions:
These sliders are delicious on their own, but they’re even better when served with a side dish. Here are a few suggestions:
- Coleslaw
- Potato salad
- Macaroni salad
- Chips and dip
- French fries
- Onion rings
- A simple green salad
Storage Instructions:
If you have any leftover sliders, store them in an airtight container in the refrigerator for up to 3 days. Reheat them in the microwave or oven until warmed through.
Nutritional Information (Approximate):
Please note that the nutritional information is an estimate and may vary depending on the specific ingredients used.
- Calories: Approximately 300-400 per slider
- Fat: 20-30 grams
- Protein: 15-20 grams
- Carbohydrates: 20-30 grams
Enjoy your delicious Ham and Cheese Sliders! I hope you love them as much as I do!

Conclusion:
And there you have it! These Ham and Cheese Sliders are truly a must-try recipe for so many reasons. They’re incredibly easy to throw together, making them perfect for busy weeknights or last-minute gatherings. The combination of savory ham, melted cheese, and that subtly sweet, buttery topping is simply irresistible. Plus, they’re always a crowd-pleaser, disappearing in minutes whenever I make them. Seriously, prepare to be amazed at how quickly these vanish!
But the best part? These sliders are incredibly versatile. While I’ve shared my go-to recipe, feel free to experiment and make them your own. For a spicier kick, try adding a pinch of red pepper flakes to the butter mixture or using pepper jack cheese. If you’re a fan of sweet and savory, a drizzle of honey mustard on the ham before adding the cheese is a game-changer. You could even swap out the ham for turkey or roast beef, or add a layer of caramelized onions for extra depth of flavor. The possibilities are endless!
Serving-wise, these Ham and Cheese Sliders are fantastic on their own as a quick lunch or snack. But they also pair beautifully with a variety of sides. A simple green salad provides a refreshing contrast to the richness of the sliders. Potato salad or coleslaw are classic choices that complement the flavors perfectly. And for a heartier meal, consider serving them alongside a bowl of tomato soup or chili. They’re also amazing appetizers for parties! Imagine a platter of these warm, cheesy sliders at your next game day gathering they’ll be the star of the show, I promise!
I truly believe that these sliders will become a staple in your recipe repertoire. They’re quick, easy, delicious, and endlessly customizable. What more could you ask for?
So, what are you waiting for? Gather your ingredients, preheat your oven, and get ready to experience the joy of these amazing Ham and Cheese Sliders. I’m confident that you and your family (or friends!) will absolutely love them.
And now, for the most important part: I want to hear about your experience! Did you try the recipe? What variations did you make? Did you add anything special? Share your thoughts, photos, and stories in the comments below. I’m always eager to learn from your culinary adventures and see how you’ve put your own spin on my recipes. Your feedback is invaluable, and it helps me create even better content for you in the future. Don’t be shy let me know what you think! Happy cooking, and I can’t wait to hear from you! Let me know if you have any questions as well, I’m always happy to help.
Ham and Cheese Sliders: The Ultimate Party Appetizer Recipe
Easy Hawaiian roll ham and cheese sliders, brushed with a flavorful butter sauce and baked to golden-brown perfection. Perfect for parties, game day, or a quick weeknight meal.
Ingredients
- 12 Hawaiian sweet rolls
- 1 pound sliced ham (Black Forest recommended)
- 1 pound sliced Swiss cheese (or provolone, cheddar)
- 1/2 cup (1 stick) unsalted butter, melted
- 2 tablespoons Dijon mustard
- 1 tablespoon Worcestershire sauce
- 1 tablespoon poppy seeds
- 1 tablespoon dried minced onion
- 1 teaspoon garlic powder
- 1/2 teaspoon onion powder
- Optional: Everything bagel seasoning
- Optional: Fresh parsley, chopped, for garnish
Instructions
- Prepare the Sauce: In a small bowl, melt the butter. Add Dijon mustard and Worcestershire sauce, whisking until smooth. Add poppy seeds, dried minced onion, garlic powder, and onion powder. Stir well. Add everything bagel seasoning, if desired. Set aside.
- Assemble the Sliders: Preheat oven to 350°F (175°C). Slice the slab of Hawaiian rolls horizontally.
- Place the bottom half of the rolls on a baking sheet lined with parchment paper.
- Layer the sliced ham evenly over the bottom rolls.
- Layer the sliced Swiss cheese over the ham.
- Replace the top half of the rolls.
- Bake the Sliders: Brush the prepared sauce generously over the top of the rolls.
- Cover the baking sheet with aluminum foil.
- Bake for 20 minutes.
- Remove foil and bake for another 5-10 minutes, or until the tops of the rolls are golden brown and the cheese is melted and bubbly.
- Serve: Let cool slightly before slicing and serving. Garnish with fresh parsley, if desired. Serve immediately.
Notes
- Cheese Variations: Provolone, cheddar, pepper jack, or Gruyere can be substituted for Swiss cheese.
- Meat Variations: Turkey, roast beef, or pulled pork can be used instead of ham.
- Add Veggies: Sliced tomatoes, lettuce, or pickles can be added to the sliders.
- Spicy Kick: Add a pinch of red pepper flakes to the sauce or use spicy mustard.
- Make Ahead: Assemble the sliders ahead of time and store them in the refrigerator until ready to bake. Add the sauce right before baking.
- Freezing: Assemble the sliders, but don’t bake them. Wrap them tightly in plastic wrap and then in aluminum foil. Freeze for up to 2 months. Thaw in the refrigerator overnight and then bake as directed.
- Serving Suggestions: Serve with coleslaw, potato salad, macaroni salad, chips and dip, french fries, onion rings, or a simple green salad.
- Storage Instructions: Store leftover sliders in an airtight container in the refrigerator for up to 3 days. Reheat in the microwave or oven until warmed through.


Leave a Comment