
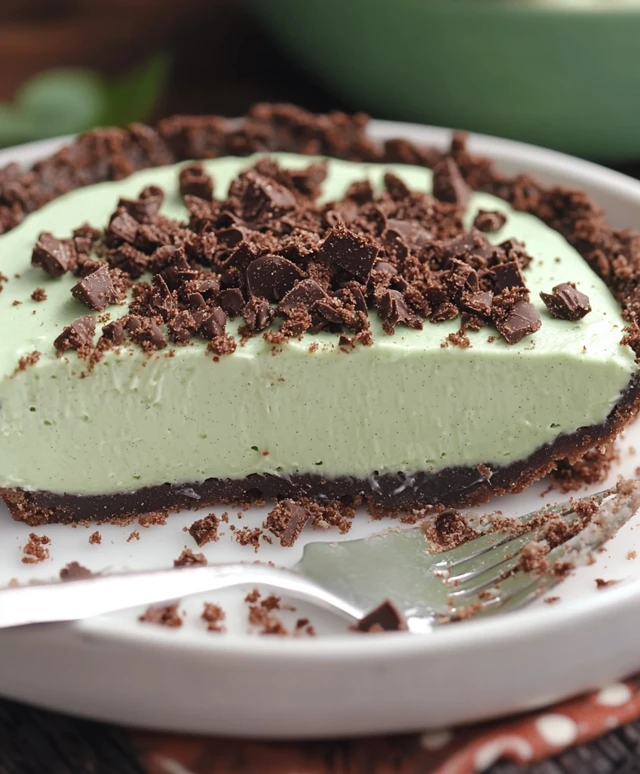
Grasshopper Pie Dessert is a delightful treat that brings a touch of nostalgia to any gathering. This no-bake pie, with its vibrant green hue and creamy texture, has been a favorite since the mid-20th century, often gracing the tables of festive occasions and family celebrations. The combination of mint and chocolate flavors creates a refreshing taste that is both indulgent and light, making it a perfect end to any meal.
What I love most about Grasshopper Pie Dessert is its unique ability to evoke memories while tantalizing the taste buds. The smooth, fluffy filling contrasts beautifully with the crunchy chocolate crust, creating a delightful texture that keeps everyone coming back for more. Plus, its simple preparation makes it an ideal choice for those busy days when you want to impress without spending hours in the kitchen. Whether youre hosting a dinner party or simply treating yourself, Grasshopper Pie Dessert is sure to become a beloved staple in your recipe collection.
Ingredients:
- 1 ½ cups chocolate cookie crumbs (about 20 cookies)
- ½ cup unsalted butter, melted
- 1 cup heavy whipping cream
- 1 cup sweetened condensed milk
- ½ cup crème de menthe liqueur
- ½ cup crème de cacao liqueur
- 1 teaspoon vanilla extract
- 1 envelope unflavored gelatin (about 2 ½ teaspoons)
- ¼ cup cold water
- Green food coloring (optional, for color)
- Chocolate shavings or curls, for garnish
- Whipped cream, for topping
Preparing the Crust
Lets start with the crust, which is the foundation of our Grasshopper Pie. Its super easy and adds a delightful crunch to the creamy filling.
- In a medium bowl, combine the chocolate cookie crumbs and melted butter. Mix well until the crumbs are fully coated with butter.
- Press the mixture firmly into the bottom and up the sides of a 9-inch pie pan. Make sure its evenly distributed to create a solid crust.
- Bake the crust in a preheated oven at 350°F (175°C) for about 10 minutes. This step helps to set the crust and enhance the chocolate flavor.
- Once baked, remove the crust from the oven and let it cool completely on a wire rack.
Preparing the Filling
Now that the crust is cooling, lets move on to the filling. This is where the magic happens, and the flavors come together beautifully.
- In a small bowl, sprinkle the unflavored gelatin over the cold water. Let it sit for about 5 minutes to bloom. This will help the filling set properly.
- In a large mixing bowl, combine the heavy whipping cream, sweetened condensed milk, crème de menthe, crème de cacao, and vanilla extract. If you want that vibrant green color, add a few drops of green food coloring at this stage.
- Using an electric mixer, beat the mixture on medium speed until it thickens and forms soft peaks. This should take about 3-5 minutes. Be careful not to overbeat, as you want a light and airy texture.
- While the mixer is running, gently heat the bloomed gelatin in the microwave for about 10-15 seconds until its fully dissolved. Make sure its not too hot; you just want it liquid.
- Slowly pour the dissolved gelatin into the whipped cream mixture while continuing to mix on low speed. This will help incorporate the gelatin evenly without deflating the whipped cream.
Assembling the Pie
With the crust cooled and the filling ready, its time to assemble our Grasshopper Pie!
- Carefully spoon the filling into the cooled chocolate cookie crust. Use a spatula to spread it evenly, making sure to fill all the corners.
- Once the filling is evenly distributed, smooth the top with the spatula for a nice finish.
- Cover the pie with plastic wrap or aluminum foil and place it in the refrigerator. Let it chill for at least 4 hours, or preferably overnight. This allows the filling to set properly and develop its flavors.
Serving the Grasshopper Pie
After the pie has chilled and set, its time to serve this delightful dessert!
- Remove the pie from the refrigerator and take off the cover. Youll see that it has set beautifully.
- Before serving, you can add a generous dollop of whipped cream on top for extra creaminess.
- For a decorative touch, sprinkle chocolate shavings or curls over the whipped cream. This not only looks great but adds a nice chocolatey flavor.
- Using a sharp knife, slice the pie into wedges. I find that dipping the knife in hot water before cutting helps create clean slices.
- Serve immediately and enjoy the delightful combination of mint and chocolate flavors!
Storage Tips
If you have any
Conclusion:
In summary, this Grasshopper Pie Dessert is an absolute must-try for anyone looking to impress their friends and family with a delightful and unique treat. The combination of creamy mint filling and a crunchy chocolate crust creates a perfect balance of flavors and textures that will leave everyone wanting more. Plus, its incredibly easy to make, which means you can whip it up for any occasion, whether its a summer barbecue, a holiday gathering, or just a cozy night in. For serving suggestions, consider topping each slice with a dollop of whipped cream and a sprinkle of chocolate shavings for an extra touch of elegance. If youre feeling adventurous, you can also experiment with variations by adding a splash of your favorite liqueur or swapping out the mint for other flavors like raspberry or orange. The possibilities are endless! I encourage you to give this Grasshopper Pie Dessert a try and share your experience with me. Id love to hear how it turned out for you and any creative twists you added along the way. So grab your ingredients, roll up your sleeves, and lets make some delicious memories together! Print
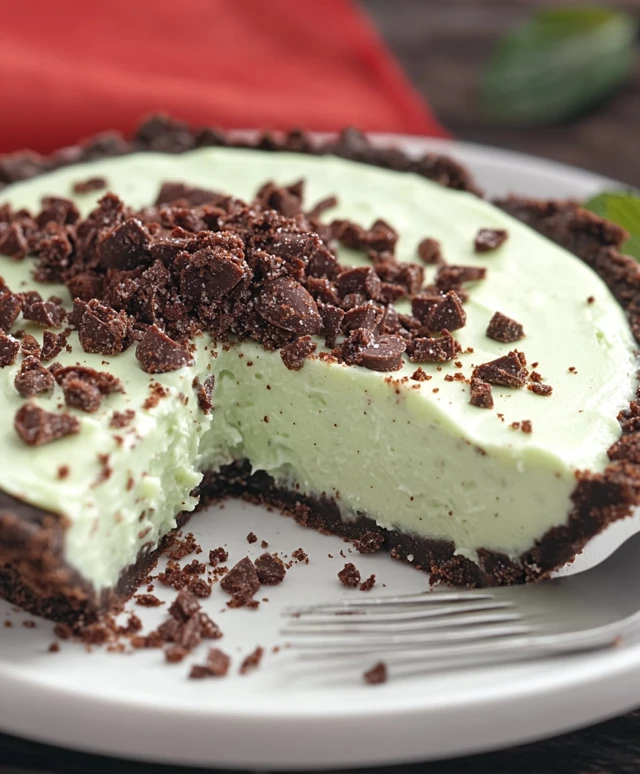
Grasshopper Pie Dessert: A Refreshing No-Bake Treat for Any Occasion
- Total Time: 270 minutes
- Yield: 8 servings 1x
Description
Enjoy a refreshing and indulgent Grasshopper Pie, featuring a crunchy chocolate cookie crust and a creamy mint-chocolate filling. This no-bake dessert is perfect for any occasion and gets even better after chilling in the refrigerator!
Ingredients
- 1 ½ cups chocolate cookie crumbs (about 20 cookies)
- ½ cup unsalted butter, melted
- 1 cup heavy whipping cream
- 1 cup sweetened condensed milk
- ½ cup crème de menthe liqueur
- ½ cup crème de cacao liqueur
- 1 teaspoon vanilla extract
- 1 envelope unflavored gelatin (about 2 ½ teaspoons)
- ¼ cup cold water
- Green food coloring (optional, for color)
- Chocolate shavings or curls, for garnish
- Whipped cream, for topping
Instructions
“`html
- In a medium bowl, combine the chocolate cookie crumbs and melted butter. Mix well until the crumbs are fully coated with butter.
- Press the mixture firmly into the bottom and up the sides of a 9-inch pie pan. Ensure its evenly distributed to create a solid crust.
- Bake the crust in a preheated oven at 350°F (175°C) for about 10 minutes. This step helps to set the crust and enhance the chocolate flavor.
- Once baked, remove the crust from the oven and let it cool completely on a wire rack.
- In a small bowl, sprinkle the unflavored gelatin over the cold water. Let it sit for about 5 minutes to bloom.
- In a large mixing bowl, combine the heavy whipping cream, sweetened condensed milk, crème de menthe, crème de cacao, and vanilla extract. Add a few drops of green food coloring if desired.
- Using an electric mixer, beat the mixture on medium speed until it thickens and forms soft peaks (about 3-5 minutes).
- While the mixer is running, gently heat the bloomed gelatin in the microwave for about 10-15 seconds until fully dissolved.
- Slowly pour the dissolved gelatin into the whipped cream mixture while continuing to mix on low speed.
- Spoon the filling into the cooled chocolate cookie crust, spreading it evenly with a spatula.
- Smooth the top with the spatula for a nice finish.
- Cover the pie with plastic wrap or aluminum foil and refrigerate for at least 4 hours, or preferably overnight.
- Remove the pie from the refrigerator and take off the cover.
- Add a generous dollop of whipped cream on top.
- Sprinkle chocolate shavings or curls over the whipped cream for decoration.
- Slice the pie into wedges using a sharp knife (dipping the knife in hot water helps create clean slices).
- Serve immediately and enjoy!
“`
Notes
- For a non-alcoholic version, you can substitute the liqueurs with mint extract and chocolate syrup.
- Ensure the gelatin is fully dissolved before adding it to the filling to avoid any lumps.
- Prep Time: 20 minutes
- Cook Time: 10 minutes


Leave a Comment