
Coconut Cream Pie, oh, where do I even begin? Imagine sinking your fork into a cloud of creamy, coconutty goodness, a symphony of textures that dance on your palate. This isn’t just dessert; it’s an experience, a nostalgic trip to Grandma’s kitchen, and a guaranteed crowd-pleaser all rolled into one delectable pie.
While the exact origins of coconut cream pie are a bit hazy, its popularity soared in the mid-20th century, becoming a staple in American households. It represents a time of comfort food, simple pleasures, and shared family meals. The humble coconut, once an exotic import, found its way into our hearts (and ovens!), transforming into this beloved dessert.
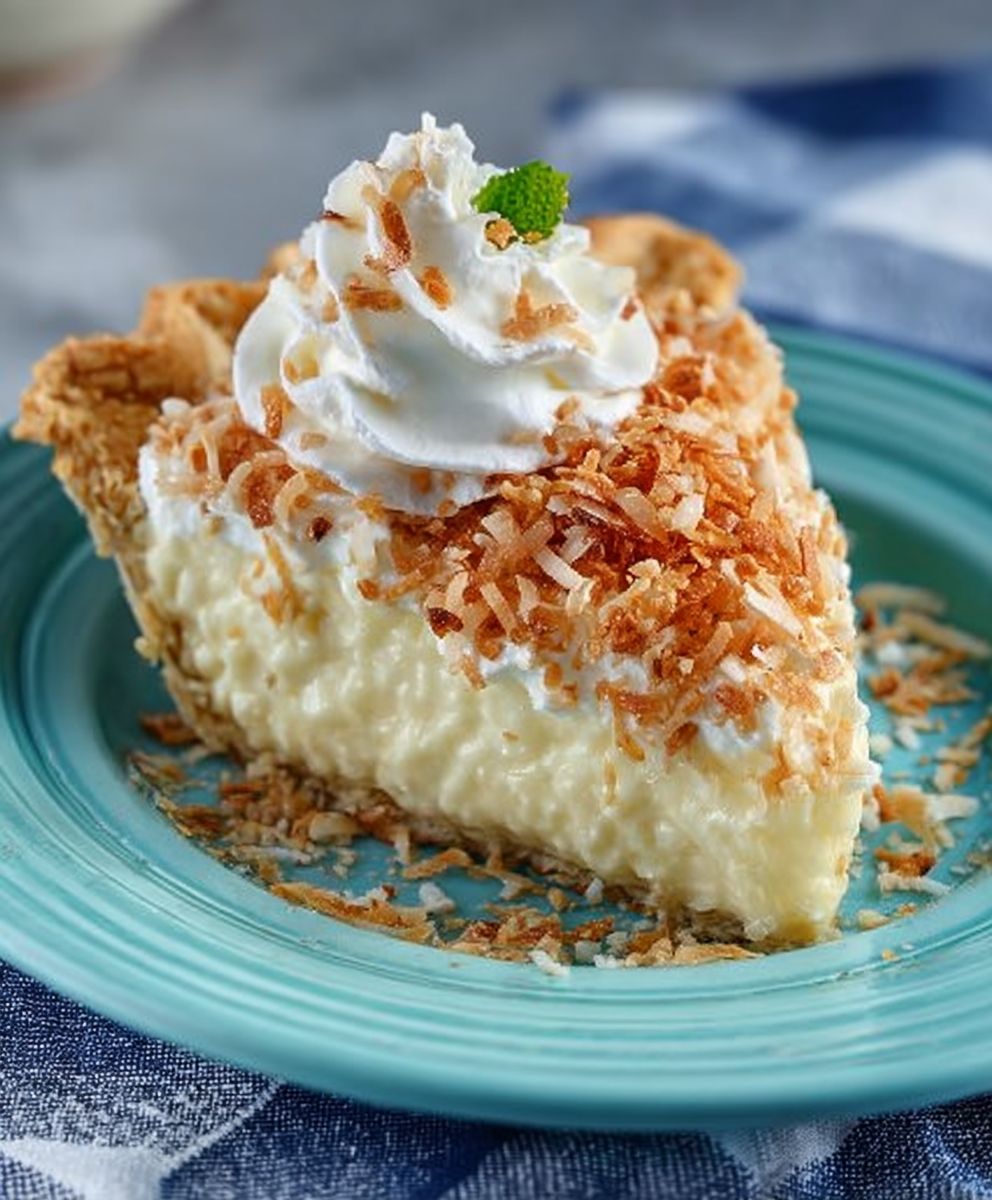
People adore Coconut Cream Pie for so many reasons. The creamy, smooth filling, infused with the delicate flavor of coconut, is simply irresistible. The flaky, buttery crust provides the perfect textural contrast, while the toasted coconut topping adds a delightful crunch and visual appeal. It’s a dessert that’s both comforting and elegant, perfect for any occasion, from a casual weeknight dinner to a special holiday celebration. Plus, while it might seem intimidating, making your own coconut cream pie from scratch is surprisingly easy, and I’m here to guide you through every step of the way!
Ingredients:
- For the Crust:
- 1 ½ cups all-purpose flour
- ¾ teaspoon salt
- ½ cup (1 stick) cold unsalted butter, cut into small cubes
- ¼ cup cold vegetable shortening, cut into small pieces
- 5-7 tablespoons ice water
- For the Coconut Cream Filling:
- 1 cup granulated sugar
- ¼ cup cornstarch
- ¼ teaspoon salt
- 3 cups whole milk
- 6 large egg yolks, lightly beaten
- ¼ cup (½ stick) unsalted butter
- 1 teaspoon vanilla extract
- 1 ½ cups sweetened shredded coconut, divided (reserve ½ cup for topping)
- ½ cup heavy cream
- For the Topping:
- 1 ½ cups heavy cream
- ¼ cup powdered sugar
- ½ teaspoon vanilla extract
- ½ cup toasted sweetened shredded coconut (reserved from filling)
Preparing the Crust:
- In a large bowl, whisk together the flour and salt.
- Add the cold butter and shortening to the flour mixture. Using a pastry blender or your fingertips, cut the butter and shortening into the flour until the mixture resembles coarse crumbs. You should still see small pieces of butter and shortening. This is crucial for a flaky crust!
- Gradually add the ice water, one tablespoon at a time, mixing lightly after each addition. Continue adding water until the dough just comes together. Be careful not to overmix, as this will develop the gluten and result in a tough crust.
- Form the dough into a disc, wrap it tightly in plastic wrap, and refrigerate for at least 30 minutes, or up to 2 hours. This allows the gluten to relax and the butter to firm up, which will make the crust easier to roll out and prevent it from shrinking during baking.
- On a lightly floured surface, roll out the dough into a 12-inch circle.
- Carefully transfer the dough to a 9-inch pie plate. Trim the edges of the dough, leaving about a ½-inch overhang.
- Crimp the edges of the crust using your fingers or a fork to create a decorative border.
- Prick the bottom of the crust all over with a fork. This will prevent the crust from puffing up during baking.
- Line the crust with parchment paper and fill with pie weights or dried beans. This will help the crust maintain its shape.
- Bake in a preheated oven at 375°F (190°C) for 20 minutes.
- Remove the parchment paper and pie weights and bake for another 10-15 minutes, or until the crust is golden brown.
- Let the crust cool completely before filling.
Making the Coconut Cream Filling:
- In a medium saucepan, whisk together the granulated sugar, cornstarch, and salt.
- Gradually whisk in the milk until smooth.
- Place the saucepan over medium heat and cook, stirring constantly, until the mixture comes to a simmer and thickens. This usually takes about 5-7 minutes. Make sure to scrape the bottom and sides of the pan to prevent scorching.
- Remove the saucepan from the heat.
- In a separate bowl, whisk the egg yolks lightly.
- Temper the egg yolks by slowly drizzling about ½ cup of the hot milk mixture into the egg yolks, whisking constantly. This prevents the eggs from scrambling when added to the hot mixture.
- Pour the tempered egg yolk mixture back into the saucepan with the remaining milk mixture.
- Return the saucepan to medium heat and cook, stirring constantly, for another 1-2 minutes, or until the filling is very thick and glossy.
- Remove the saucepan from the heat and stir in the butter, vanilla extract, and 1 cup of the sweetened shredded coconut.
- Let the filling cool slightly for about 5-10 minutes, stirring occasionally to prevent a skin from forming.
- Gently fold in the ½ cup of heavy cream. This adds a touch of richness and smoothness to the filling.
- Pour the filling into the cooled pie crust.
- Cover the pie with plastic wrap, pressing it directly onto the surface of the filling to prevent a skin from forming.
- Refrigerate for at least 4 hours, or preferably overnight, to allow the filling to set completely.
Preparing the Topping and Assembling the Pie:
- In a large bowl, beat the heavy cream with an electric mixer until soft peaks form.
- Gradually add the powdered sugar and vanilla extract and continue beating until stiff peaks form. Be careful not to overwhip the cream, as it can turn grainy.
- Remove the plastic wrap from the pie.
- Spread the whipped cream evenly over the top of the coconut cream filling.
- Sprinkle the toasted sweetened shredded coconut over the whipped cream.
- Refrigerate the pie for another 30 minutes to allow the whipped cream to set slightly.
- Slice and serve chilled. Enjoy!
Tips for Success:
- Use cold ingredients: Cold butter, shortening, and ice water are essential for a flaky pie crust.
- Don’t overmix the dough: Overmixing develops the gluten in the flour, resulting in a tough crust.
- Blind bake the crust: Blind baking the crust prevents it from becoming soggy when filled with the wet filling.
- Temper the egg yolks: Tempering the egg yolks prevents them from scrambling when added to the hot milk mixture.
- Cool the filling completely: Cooling the filling completely before adding the whipped cream prevents the whipped cream from melting.
- Toast the coconut: Toasting the coconut enhances its flavor and adds a nice texture to the pie. To toast coconut, spread it in a single layer on a baking sheet and bake at 350°F (175°C) for 5-7 minutes, or until golden brown, stirring occasionally. Watch it carefully, as it can burn easily.
Variations:
- Chocolate Coconut Cream Pie: Add ¼ cup of unsweetened cocoa powder to the sugar, cornstarch, and salt mixture in the filling.
- Toasted Coconut Cream Pie: Use toasted coconut in the filling and as a topping.
- Coconut Macadamia Nut Cream Pie: Add ½ cup of chopped macadamia nuts to the filling.
- Vegan Coconut Cream Pie: Use a vegan pie crust, coconut milk instead of whole milk, and a cornstarch slurry instead of egg yolks in the filling. Use a vegan whipped cream topping.
Storage Instructions:
Store leftover coconut cream pie in the refrigerator for up to 3 days. Cover the pie loosely with plastic wrap or foil to prevent it from drying out.
Enjoy this classic dessert! I hope you find this recipe easy to follow and that your Coconut Cream Pie turns out perfectly. Happy baking!

Conclusion:
This Coconut Cream Pie isn’t just a dessert; it’s a slice of pure, unadulterated happiness. From the flaky, buttery crust to the luxuriously smooth and intensely coconutty filling, every element works in perfect harmony to create a truly unforgettable experience. If you’re looking for a show-stopping dessert that will impress your family and friends (or simply satisfy your own sweet tooth!), then look no further. This recipe is a must-try, and I guarantee it will become a new favorite in your household.
But the beauty of this Coconut Cream Pie lies not only in its deliciousness but also in its versatility. While the classic recipe is divine as is, there are plenty of ways to customize it to your liking. For a richer, more decadent experience, try using toasted coconut flakes both in the filling and as a garnish. The toasting process brings out the natural sweetness and adds a delightful crunch that complements the creamy texture perfectly.
If you’re feeling adventurous, consider adding a hint of rum extract to the filling for a tropical twist. Just a teaspoon or two will do the trick, adding a subtle warmth and complexity that elevates the pie to a whole new level. Another fun variation is to incorporate a layer of chocolate ganache at the bottom of the crust before adding the coconut cream filling. The combination of coconut and chocolate is a match made in heaven, and it adds a touch of indulgence that’s hard to resist.
Serving suggestions are endless! A dollop of freshly whipped cream is always a welcome addition, adding a light and airy contrast to the rich filling. For a more sophisticated presentation, try piping the whipped cream into decorative swirls or rosettes. A sprinkle of toasted coconut flakes or a dusting of cocoa powder adds a final touch of elegance. And don’t forget a cup of freshly brewed coffee or tea to complete the experience.
This Coconut Cream Pie is perfect for any occasion, from casual family gatherings to elegant dinner parties. It’s a crowd-pleaser that’s sure to impress, and it’s surprisingly easy to make. Don’t be intimidated by the multiple steps; each one is straightforward and manageable, and the end result is well worth the effort.
I truly believe that everyone should experience the joy of making and enjoying this incredible pie. So, I encourage you to give this recipe a try. Gather your ingredients, put on some music, and get ready to create a masterpiece. And most importantly, don’t be afraid to experiment and make it your own.
Once you’ve made your own version of this delectable Coconut Cream Pie, I’d love to hear about your experience! Share your photos and stories in the comments below. Let me know what variations you tried, what you loved, and what you might do differently next time. Your feedback is invaluable, and it helps me to continue creating and sharing recipes that you’ll love. Happy baking! I can’t wait to see what you create.
Coconut Cream Pie: The Ultimate Guide to Baking Perfection
A classic Coconut Cream Pie featuring a flaky homemade crust, a rich and creamy coconut filling, and a light, fluffy whipped cream topping.
Ingredients
- 1 ½ cups all-purpose flour
- ¾ teaspoon salt
- ½ cup (1 stick) cold unsalted butter, cut into small cubes
- ¼ cup cold vegetable shortening, cut into small pieces
- 5-7 tablespoons ice water
- 1 cup granulated sugar
- ¼ cup cornstarch
- ¼ teaspoon salt
- 3 cups whole milk
- 6 large egg yolks, lightly beaten
- ¼ cup (½ stick) unsalted butter
- 1 teaspoon vanilla extract
- 1 ½ cups sweetened shredded coconut, divided (reserve ½ cup for topping)
- ½ cup heavy cream
- 1 ½ cups heavy cream
- ¼ cup powdered sugar
- ½ teaspoon vanilla extract
- ½ cup toasted sweetened shredded coconut (reserved from filling)
Instructions
- In a large bowl, whisk together the flour and salt.
- Add the cold butter and shortening to the flour mixture. Using a pastry blender or your fingertips, cut the butter and shortening into the flour until the mixture resembles coarse crumbs. You should still see small pieces of butter and shortening. This is crucial for a flaky crust!
- Gradually add the ice water, one tablespoon at a time, mixing lightly after each addition. Continue adding water until the dough just comes together. Be careful not to overmix, as this will develop the gluten and result in a tough crust.
- Form the dough into a disc, wrap it tightly in plastic wrap, and refrigerate for at least 30 minutes, or up to 2 hours. This allows the gluten to relax and the butter to firm up, which will make the crust easier to roll out and prevent it from shrinking during baking.
- On a lightly floured surface, roll out the dough into a 12-inch circle.
- Carefully transfer the dough to a 9-inch pie plate. Trim the edges of the dough, leaving about a ½-inch overhang.
- Crimp the edges of the crust using your fingers or a fork to create a decorative border.
- Prick the bottom of the crust all over with a fork. This will prevent the crust from puffing up during baking.
- Line the crust with parchment paper and fill with pie weights or dried beans. This will help the crust maintain its shape.
- Bake in a preheated oven at 375°F (190°C) for 20 minutes.
- Remove the parchment paper and pie weights and bake for another 10-15 minutes, or until the crust is golden brown.
- Let the crust cool completely before filling.
- In a medium saucepan, whisk together the granulated sugar, cornstarch, and salt.
- Gradually whisk in the milk until smooth.
- Place the saucepan over medium heat and cook, stirring constantly, until the mixture comes to a simmer and thickens. This usually takes about 5-7 minutes. Make sure to scrape the bottom and sides of the pan to prevent scorching.
- Remove the saucepan from the heat.
- In a separate bowl, whisk the egg yolks lightly.
- Temper the egg yolks by slowly drizzling about ½ cup of the hot milk mixture into the egg yolks, whisking constantly. This prevents the eggs from scrambling when added to the hot mixture.
- Pour the tempered egg yolk mixture back into the saucepan with the remaining milk mixture.
- Return the saucepan to medium heat and cook, stirring constantly, for another 1-2 minutes, or until the filling is very thick and glossy.
- Remove the saucepan from the heat and stir in the butter, vanilla extract, and 1 cup of the sweetened shredded coconut.
- Let the filling cool slightly for about 5-10 minutes, stirring occasionally to prevent a skin from forming.
- Gently fold in the ½ cup of heavy cream. This adds a touch of richness and smoothness to the filling.
- Pour the filling into the cooled pie crust.
- Cover the pie with plastic wrap, pressing it directly onto the surface of the filling to prevent a skin from forming.
- Refrigerate for at least 4 hours, or preferably overnight, to allow the filling to set completely.
- In a large bowl, beat the heavy cream with an electric mixer until soft peaks form.
- Gradually add the powdered sugar and vanilla extract and continue beating until stiff peaks form. Be careful not to overwhip the cream, as it can turn grainy.
- Remove the plastic wrap from the pie.
- Spread the whipped cream evenly over the top of the coconut cream filling.
- Sprinkle the toasted sweetened shredded coconut over the whipped cream.
- Refrigerate the pie for another 30 minutes to allow the whipped cream to set slightly.
- Slice and serve chilled. Enjoy!
Notes
- Use cold ingredients: Cold butter, shortening, and ice water are essential for a flaky pie crust.
- Don’t overmix the dough: Overmixing develops the gluten in the flour, resulting in a tough crust.
- Blind bake the crust: Blind baking the crust prevents it from becoming soggy when filled with the wet filling.
- Temper the egg yolks: Tempering the egg yolks prevents them from scrambling when added to the hot milk mixture.
- Cool the filling completely: Cooling the filling completely before adding the whipped cream prevents the whipped cream from melting.
- Toast the coconut: Toasting the coconut enhances its flavor and adds a nice texture to the pie. To toast coconut, spread it in a single layer on a baking sheet and bake at 350°F (175°C) for 5-7 minutes, or until golden brown, stirring occasionally. Watch it carefully, as it can burn easily.
- Variations:
- Chocolate Coconut Cream Pie: Add ¼ cup of unsweetened cocoa powder to the sugar, cornstarch, and salt mixture in the filling.
- Toasted Coconut Cream Pie: Use toasted coconut in the filling and as a topping.
- Coconut Macadamia Nut Cream Pie: Add ½ cup of chopped macadamia nuts to the filling.
- Vegan Coconut Cream Pie: Use a vegan pie crust, coconut milk instead of whole milk, and a cornstarch slurry instead of egg yolks in the filling. Use a vegan whipped cream topping.
- Storage Instructions: Store leftover coconut cream pie in the refrigerator for up to 3 days. Cover the pie loosely with plastic wrap or foil to prevent it from drying out.


Leave a Comment