
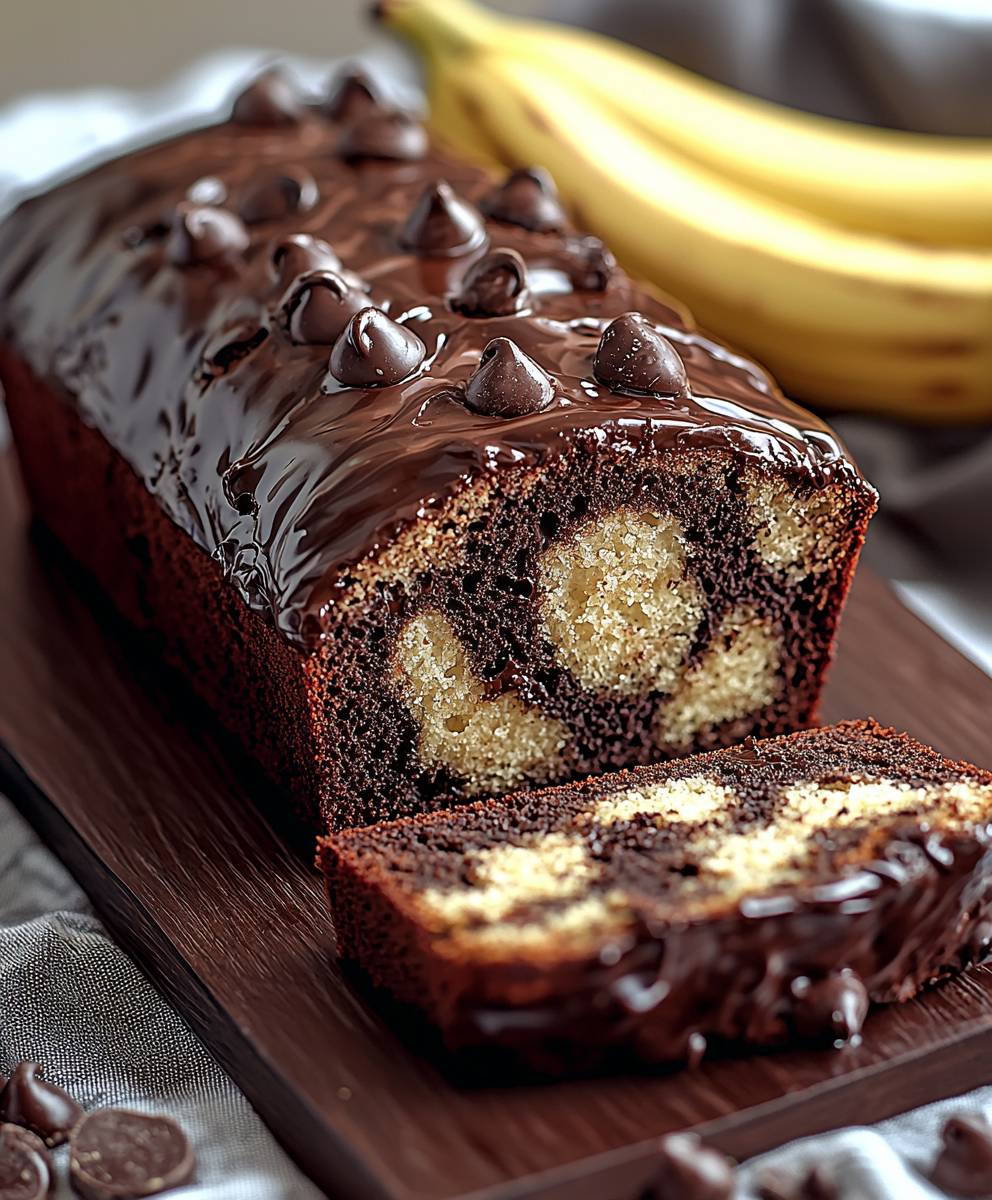
Chocolate Marble Banana Bread: Prepare to embark on a baking adventure that will transform your overripe bananas into a stunning and utterly irresistible treat! Have you ever wished for a dessert that combines the comforting familiarity of banana bread with the decadent allure of chocolate? Well, your wish is about to come true. This recipe isn’t just about baking; it’s about creating a masterpiece that tantalizes the taste buds and elevates the humble banana bread to new heights.
Banana bread itself has a fascinating history, gaining popularity in the early 20th century as baking powder and baking soda became more readily available. It was a resourceful way to use up those browning bananas, transforming them into something delicious. Our Chocolate Marble Banana Bread takes this classic concept and infuses it with a swirl of rich chocolate, creating a visual and flavorful delight.
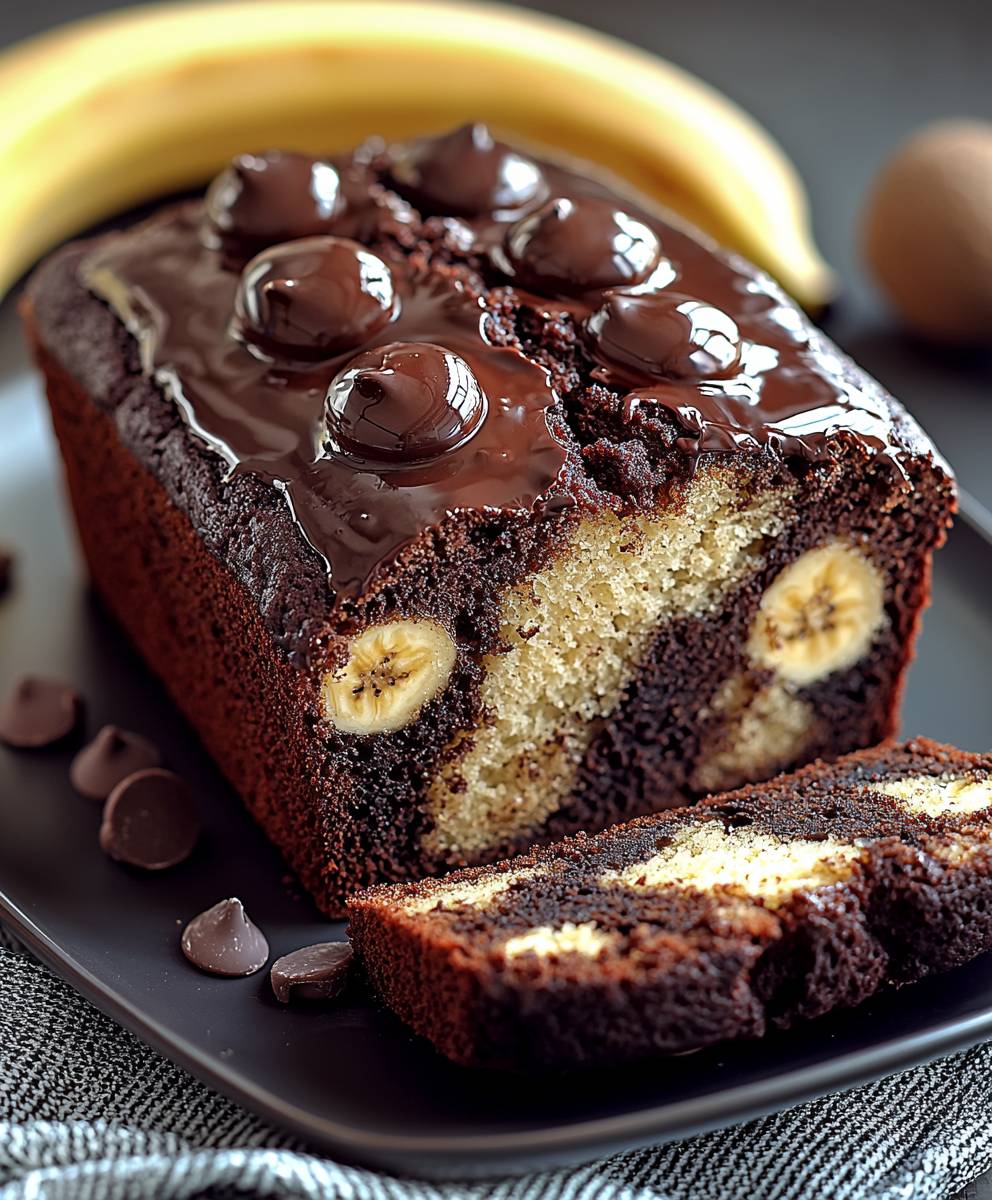
People adore banana bread for its moist, tender crumb and comforting sweetness. The addition of chocolate not only enhances the flavor profile but also adds a touch of elegance. The marbled effect is visually stunning, making it perfect for gifting or serving to guests. Plus, it’s incredibly easy to make, requiring minimal effort for maximum reward. The combination of the soft banana bread and the rich chocolate swirl is a symphony of flavors and textures that will leave you craving more. So, let’s get baking and create a Chocolate Marble Banana Bread that will become a family favorite!
Ingredients:
- For the Banana Bread:
- 3 very ripe bananas, mashed
- 1/2 cup (1 stick) unsalted butter, softened
- 3/4 cup granulated sugar
- 1/4 cup packed light brown sugar
- 2 large eggs
- 1 teaspoon vanilla extract
- 1 3/4 cups all-purpose flour
- 1 teaspoon baking soda
- 1/2 teaspoon salt
- 1/4 cup buttermilk (or milk with 1 teaspoon lemon juice or vinegar added)
- For the Chocolate Swirl:
- 1/4 cup unsweetened cocoa powder
- 2 tablespoons hot water
- 2 tablespoons granulated sugar
Preparing the Banana Bread Batter:
- First things first, let’s get those bananas mashed! Make sure they are super ripe the browner, the better. This will give your bread that intense banana flavor and moist texture we all crave. I like to use a fork for this, but a potato masher works great too. Aim for a smooth consistency, but a few small lumps are perfectly fine.
- Now, in a large mixing bowl, cream together the softened butter, granulated sugar, and brown sugar. You can use a stand mixer with the paddle attachment or a hand mixer. Creaming the butter and sugar is crucial because it incorporates air into the batter, which helps create a light and fluffy bread. Beat until the mixture is light and fluffy about 3-5 minutes. Don’t rush this step!
- Next, beat in the eggs one at a time, making sure each egg is fully incorporated before adding the next. Then, stir in the vanilla extract. Vanilla extract enhances the other flavors in the bread and adds a lovely aroma.
- In a separate bowl, whisk together the all-purpose flour, baking soda, and salt. Whisking ensures that the baking soda and salt are evenly distributed throughout the flour, which is essential for proper leavening and flavor.
- Gradually add the dry ingredients to the wet ingredients, alternating with the buttermilk. Begin and end with the dry ingredients. This method helps prevent overmixing, which can lead to a tough bread. Add about one-third of the dry ingredients, then half of the buttermilk, then another third of the dry ingredients, the remaining buttermilk, and finally the remaining dry ingredients. Mix until just combined. Be careful not to overmix! A few streaks of flour are okay.
Creating the Chocolate Swirl:
- In a small bowl, whisk together the cocoa powder, hot water, and granulated sugar until smooth. The hot water helps to bloom the cocoa powder, intensifying its flavor and creating a smooth paste. Make sure there are no lumps!
Marbling and Baking:
- Grease and flour a 9×5 inch loaf pan. You can also use baking spray with flour. This will prevent the bread from sticking to the pan and make it easier to remove after baking.
- Pour about two-thirds of the banana bread batter into the prepared loaf pan.
- Spoon the chocolate mixture over the batter in dollops.
- Pour the remaining banana bread batter over the chocolate mixture.
- Now comes the fun part creating the marble effect! Use a knife or skewer to swirl the chocolate mixture into the banana bread batter. Be careful not to overmix, as this can muddy the colors. You want to create a beautiful, marbled pattern. Drag the knife or skewer through the batter in a figure-eight motion or in swirls.
- Bake in a preheated oven at 350°F (175°C) for 50-60 minutes, or until a wooden skewer inserted into the center comes out clean. Start checking for doneness around 50 minutes. If the top of the bread is browning too quickly, you can tent it with aluminum foil.
- Let the bread cool in the pan for 10-15 minutes before transferring it to a wire rack to cool completely. Cooling the bread in the pan allows it to set and prevents it from crumbling when you remove it.
Tips and Tricks for the Perfect Chocolate Marble Banana Bread:
- Use Ripe Bananas: The riper the bananas, the sweeter and more flavorful your bread will be. Overripe bananas are perfect for banana bread!
- Don’t Overmix: Overmixing the batter can develop the gluten in the flour, resulting in a tough bread. Mix until just combined.
- Measure Flour Accurately: Spoon the flour into a measuring cup and level it off with a knife. Avoid scooping the flour directly from the bag, as this can pack the flour and result in too much flour in the recipe.
- Adjust Baking Time: Baking times may vary depending on your oven. Start checking for doneness around 50 minutes and adjust the baking time as needed.
- Add Nuts or Chocolate Chips: For extra flavor and texture, add chopped walnuts, pecans, or chocolate chips to the batter. About 1/2 cup to 1 cup is a good amount.
- Store Properly: Store the banana bread in an airtight container at room temperature for up to 3 days or in the refrigerator for up to a week. You can also freeze it for longer storage.
- Variations: Feel free to experiment with different flavors and add-ins. You can add spices like cinnamon, nutmeg, or cardamom to the batter. You can also use different types of chocolate, such as dark chocolate or milk chocolate.
Serving Suggestions:
- Enjoy a slice of warm banana bread with a pat of butter or a dollop of whipped cream.
- Serve it with a cup of coffee or tea for a delicious breakfast or snack.
- Toast a slice of banana bread and top it with your favorite toppings, such as peanut butter, Nutella, or fruit.
- Make banana bread French toast for a special treat.
- Crumble banana bread over ice cream for a decadent dessert.
Troubleshooting:
- Bread is too dry: Make sure you are using ripe bananas and measuring the flour accurately. You can also add a tablespoon or two of oil to the batter for extra moisture.
- Bread is too dense: Avoid overmixing the batter. Also, make sure your baking soda is fresh.
- Bread is not rising: Make sure your baking soda is fresh and that you are not overmixing the batter.
- Bread is burning on top: Tent the bread with aluminum foil during the last 15-20 minutes of baking.
- Chocolate swirl is disappearing: Be careful not to overmix when creating the marble effect. Also, make sure the chocolate mixture is not too thin.
Make Ahead Tips:
- The banana bread batter can be made ahead of time and stored in the refrigerator for up to 24 hours. Let it come to room temperature before baking.
- The baked banana bread can be stored at room temperature for up to 3 days or in the refrigerator for up to a week. You can also freeze it for longer storage.
Freezing Instructions:
- Let the banana bread cool completely before freezing.
- Wrap the banana bread tightly in plastic wrap and then in aluminum foil.
- Freeze for up to 3 months.
- To thaw, let the banana bread sit at room temperature for several hours or overnight.
Conclusion:
And there you have it! This Chocolate Marble Banana Bread is more than just a recipe; it’s an experience. From the intoxicating aroma that fills your kitchen as it bakes to the delightful dance of chocolate and banana on your tongue, it’s a treat for all the senses. I truly believe this is a must-try recipe for anyone who loves baking, or simply enjoys a delicious slice of homemade goodness. But why is it a must-try? Well, beyond the obvious deliciousness, it’s incredibly versatile. The marble effect adds a touch of elegance, making it perfect for a casual brunch or a sophisticated afternoon tea. The moistness, thanks to the ripe bananas, ensures it stays fresh for days (if it lasts that long!). And the combination of chocolate and banana is simply irresistible a classic pairing that never fails to please. Looking for serving suggestions? A simple slice, warmed slightly, with a pat of butter is pure bliss. Or, for a more decadent treat, try it with a scoop of vanilla ice cream and a drizzle of chocolate sauce. You could even toast a slice and spread it with Nutella for an extra chocolatey kick. For a lighter option, pair it with a dollop of Greek yogurt and some fresh berries. The possibilities are endless! And speaking of possibilities, feel free to get creative with variations! If you’re not a fan of dark chocolate, try using milk chocolate or even white chocolate chips. Add a handful of chopped walnuts or pecans for a bit of crunch. A sprinkle of cinnamon or nutmeg to the batter will add warmth and spice. You could even swirl in a spoonful of peanut butter for a peanut butter and banana twist. Don’t be afraid to experiment and make it your own! I’ve poured my heart into perfecting this recipe, and I’m confident that you’ll love it as much as I do. It’s a recipe that’s been passed down through my family, tweaked and perfected over the years, and now I’m sharing it with you. It’s a recipe that brings back fond memories and creates new ones with every bake. So, what are you waiting for? Gather your ingredients, preheat your oven, and get ready to bake some magic. I promise you, this Chocolate Marble Banana Bread will be a hit with your family and friends. It’s the perfect way to use up those overripe bananas and create something truly special. I’m so excited for you to try this recipe! Once you’ve baked your own loaf of this delectable bread, I would absolutely love to hear about your experience. Did you make any variations? What did you think of the texture? Did your family enjoy it? Share your photos and stories with me! You can find me on [Social Media Platform – e.g., Instagram] @[YourHandle] using the hashtag #[YourRecipeHashtag – e.g., #ChocolateMarbleBananaBread]. I can’t wait to see your creations and hear your feedback. Happy baking! Print
Chocolate Marble Banana Bread: The Ultimate Recipe
- Total Time: 70 minutes
- Yield: 1 loaf 1x
Description
Moist and flavorful banana bread with a beautiful chocolate swirl. This easy recipe uses ripe bananas and simple ingredients for a delicious treat.
Ingredients
- 3 very ripe bananas, mashed
- 1/2 cup (1 stick) unsalted butter, softened
- 3/4 cup granulated sugar
- 1/4 cup packed light brown sugar
- 2 large eggs
- 1 teaspoon vanilla extract
- 1 3/4 cups all-purpose flour
- 1 teaspoon baking soda
- 1/2 teaspoon salt
- 1/4 cup buttermilk (or milk with 1 teaspoon lemon juice or vinegar added)
- 1/4 cup unsweetened cocoa powder
- 2 tablespoons hot water
- 2 tablespoons granulated sugar
Instructions
- Prepare the Banana Bread Batter: Mash the ripe bananas until smooth.
- In a large mixing bowl, cream together the softened butter, granulated sugar, and brown sugar until light and fluffy (3-5 minutes).
- Beat in the eggs one at a time, then stir in the vanilla extract.
- In a separate bowl, whisk together the all-purpose flour, baking soda, and salt.
- Gradually add the dry ingredients to the wet ingredients, alternating with the buttermilk, beginning and ending with the dry ingredients. Mix until just combined; do not overmix.
- Create the Chocolate Swirl: In a small bowl, whisk together the cocoa powder, hot water, and granulated sugar until smooth.
- Marbling and Baking: Grease and flour a 9×5 inch loaf pan.
- Pour about two-thirds of the banana bread batter into the prepared loaf pan.
- Spoon the chocolate mixture over the batter in dollops.
- Pour the remaining banana bread batter over the chocolate mixture.
- Use a knife or skewer to swirl the chocolate mixture into the banana bread batter to create a marble effect.
- Bake in a preheated oven at 350°F (175°C) for 50-60 minutes, or until a wooden skewer inserted into the center comes out clean. If the top is browning too quickly, tent with foil.
- Let the bread cool in the pan for 10-15 minutes before transferring it to a wire rack to cool completely.
Notes
- Use very ripe bananas for the best flavor and moisture.
- Don’t overmix the batter to avoid a tough bread.
- Measure flour accurately by spooning it into the measuring cup and leveling it off.
- Baking times may vary; check for doneness around 50 minutes.
- Add nuts or chocolate chips for extra flavor and texture (1/2 to 1 cup).
- Store in an airtight container at room temperature for up to 3 days or in the refrigerator for up to a week. Freeze for longer storage.
- Experiment with different spices like cinnamon, nutmeg, or cardamom.
- For a richer chocolate flavor, use dark chocolate cocoa powder.
- Prep Time: 20 minutes
- Cook Time: 50 minutes
Leave a Comment