
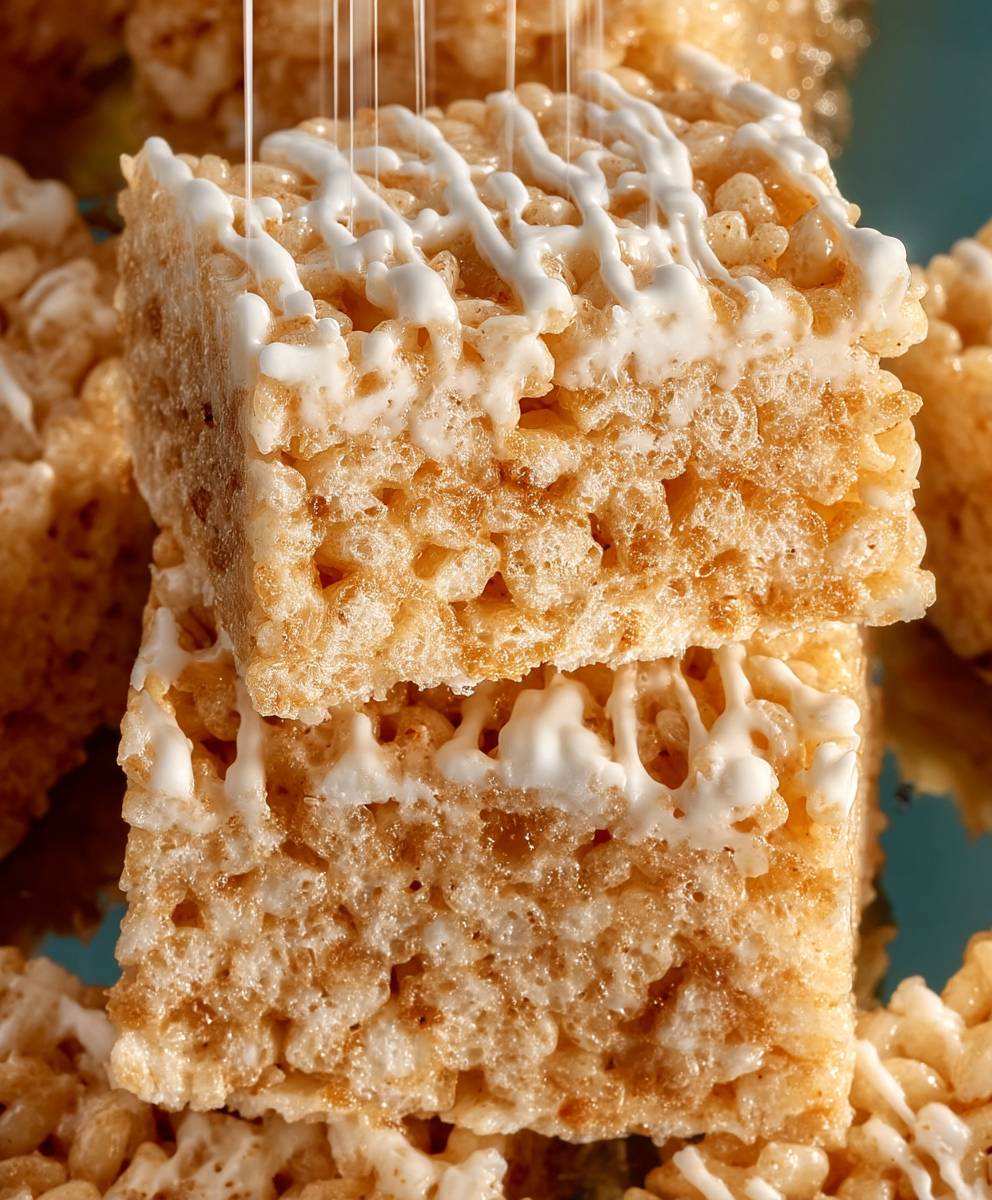
Brown Butter Rice Krispies are you ready to elevate a childhood classic to a gourmet delight? Forget everything you thought you knew about this simple treat, because we’re about to embark on a flavor journey that will redefine your perception of crispy, gooey goodness. These aren’t your average after-school snacks; these are sophisticated squares of pure bliss.
While the original Rice Krispies Treats have a nostalgic charm, dating back to the 1930s when Mildred Day concocted them for Kellogg’s, our version takes a decidedly grown-up turn. The secret? Brown butter. This simple technique transforms ordinary butter into a nutty, caramel-like elixir that infuses every bite with a depth of flavor you won’t believe.
People adore Rice Krispies Treats for their simplicity, their satisfying crunch, and that irresistible marshmallow pull. But with the addition of browned butter, we’re adding a layer of complexity that elevates the taste to something truly special. The nutty aroma, the rich, almost toffee-like notes, and the enhanced sweetness all combine to create a treat that’s both comforting and utterly irresistible. Plus, let’s be honest, who can resist a no-bake dessert that comes together in minutes? These Brown Butter Rice Krispies are perfect for potlucks, bake sales, or simply satisfying a sweet craving. Get ready to experience a whole new level of Rice Krispies perfection!
Ingredients:
- 1/2 cup (1 stick) unsalted butter
- 10 ounces marshmallows (about 40 large or 4 cups mini)
- 1/4 teaspoon salt
- 6 cups Rice Krispies cereal
- Optional: 1 teaspoon vanilla extract
- Optional: Sprinkles for decoration
Browning the Butter: The Key to Flavor
Browning the butter is what elevates these Rice Krispies treats from ordinary to extraordinary. It adds a nutty, toasty depth of flavor that you just can’t get any other way. Don’t skip this step!
- Melt the Butter: Place the butter in a light-colored saucepan over medium heat. A light-colored pan will allow you to easily see when the butter starts to brown.
- Watch Carefully: As the butter melts, it will foam and bubble. This is normal. Keep a close eye on it.
- The Browning Process: Continue cooking the butter, swirling the pan occasionally, until the foaming subsides and you see brown specks forming at the bottom of the pan. The butter will also have a nutty aroma. This usually takes about 5-7 minutes. Be careful not to burn it! Burnt butter will taste bitter.
- Remove from Heat: Once the butter is browned, immediately remove the saucepan from the heat. The residual heat will continue to cook the butter slightly.
Melting the Marshmallows: Achieving the Perfect Consistency
The key to perfectly gooey Rice Krispies treats is melting the marshmallows just right. We want them melted and smooth, but not overcooked or hardened.
- Add Marshmallows and Salt: Add the marshmallows and salt to the saucepan with the browned butter. The salt helps to balance the sweetness.
- Melt Over Low Heat: Return the saucepan to low heat. Stir constantly with a spatula until the marshmallows are completely melted and smooth. This should take about 3-5 minutes.
- Optional: Add Vanilla Extract: If you’re using vanilla extract, stir it in now. It adds a subtle warmth to the treats.
Combining and Setting: The Final Stretch
This is where the magic happens! Quickly combining the cereal with the marshmallow mixture is crucial to prevent the treats from becoming too hard.
- Add the Cereal: Immediately pour the Rice Krispies cereal into the saucepan with the melted marshmallow mixture.
- Mix Quickly and Thoroughly: Use the spatula to quickly and thoroughly mix the cereal and marshmallow mixture together. Make sure all the cereal is coated evenly. Work quickly, as the marshmallow mixture will start to set as it cools.
- Prepare the Pan: While you’re mixing, prepare a 9×13 inch baking pan by greasing it with butter or spraying it with non-stick cooking spray. You can also line the pan with parchment paper, leaving an overhang on the sides, for easy removal.
- Press into the Pan: Transfer the Rice Krispies mixture to the prepared pan. Use the spatula or your hands (lightly greased or dampened with water to prevent sticking) to gently press the mixture evenly into the pan. Don’t press too hard, or the treats will be dense and hard.
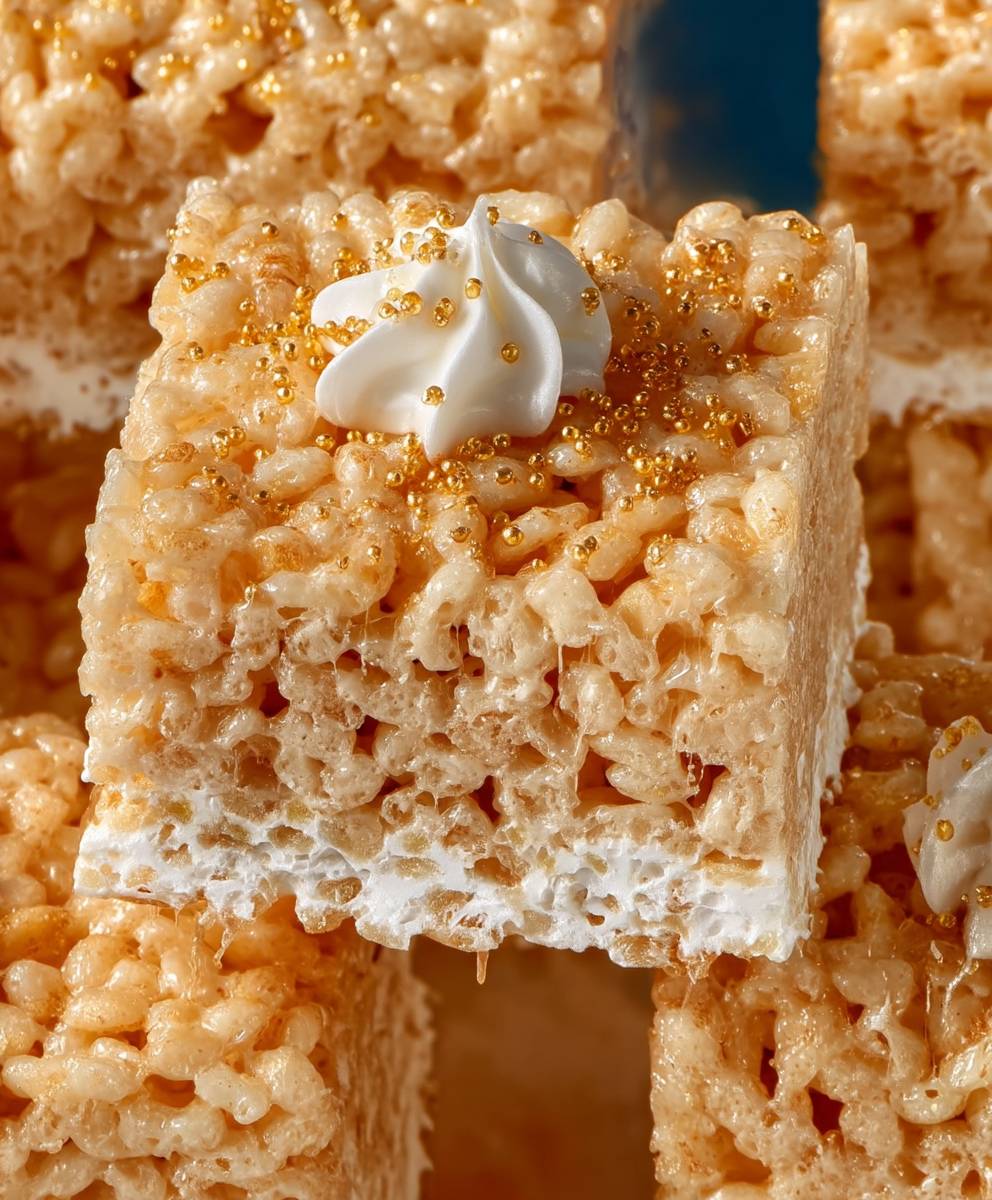
- Optional: Add Sprinkles: If you’re using sprinkles, sprinkle them over the top of the treats while they are still warm and sticky.
- Cool and Set: Let the Rice Krispies treats cool completely in the pan before cutting them into squares. This usually takes about 30 minutes to an hour.
Cutting and Serving: Enjoying Your Delicious Creation
Once the treats are completely cooled and set, it’s time to cut them and enjoy! Use a sharp knife to cut them into squares or rectangles. You can also use cookie cutters to create fun shapes.
- Cut into Squares: Use a sharp knife to cut the Rice Krispies treats into squares or rectangles.
- Serve and Enjoy: Serve immediately and enjoy! These treats are best enjoyed fresh.
Tips and Tricks for Perfect Brown Butter Rice Krispies Treats:
- Use Fresh Marshmallows: Fresh marshmallows melt more smoothly and evenly than older ones.
- Don’t Overcook the Butter: Burnt butter will taste bitter and ruin the flavor of the treats. Watch it carefully and remove it from the heat as soon as it’s browned.
- Don’t Overcook the Marshmallows: Overcooked marshmallows will result in hard, chewy treats. Melt them over low heat and stir constantly until they are just melted.
- Work Quickly: Once the marshmallows are melted, work quickly to combine them with the cereal and press the mixture into the pan. The marshmallow mixture will start to set as it cools, so you want to get everything done before it becomes too stiff.
- Don’t Press Too Hard: Pressing the Rice Krispies mixture too hard into the pan will result in dense, hard treats. Gently press it into the pan until it’s evenly distributed.
- Use Parchment Paper: Lining the pan with parchment paper makes it easy to remove the treats and cut them into neat squares.
- Add-Ins: Feel free to add other ingredients to your Rice Krispies treats, such as chocolate chips, peanut butter chips, chopped nuts, or dried fruit. Add them to the marshmallow mixture after it’s melted.
- Storage: Store Rice Krispies treats in an airtight container at room temperature for up to 3 days. They will start to get stale after that.
- Variations: Try different variations of Rice Krispies treats, such as chocolate Rice Krispies treats, peanut butter Rice Krispies treats, or s’mores Rice Krispies treats.
Troubleshooting: Common Problems and Solutions
Even with the best recipe, things can sometimes go wrong. Here are some common problems and how to fix them:
- Hard Treats: This is usually caused by overcooking the marshmallows or pressing the mixture too hard into the pan. Make sure to melt the marshmallows over low heat and stir constantly until they are just melted. Gently press the mixture into the pan until it’s evenly distributed.
- Sticky Treats: This can be caused by using too much butter or not letting the treats cool completely before cutting them. Make sure to use the correct amount of butter and let the treats cool completely before cutting them.
- Burnt Butter: If you burn the butter, you’ll need to start over. Burnt butter will taste bitter and ruin the flavor of the treats.
- Uneven Texture: This can be caused by not mixing the cereal and marshmallow mixture thoroughly enough. Make sure to mix the cereal and marshmallow mixture quickly and thoroughly until all the cereal is coated evenly.
Nutritional Information (Approximate):
Please note that the following nutritional information is an estimate and may vary depending on the specific ingredients used.
- Serving Size: 1 square (approximately 2 inches x 2 inches)
- Calories: Approximately 200-250
- Fat: 8-12 grams
- Saturated Fat: 5-8 grams
- Cholesterol: 20-30 mg
- Sodium: 100-150 mg
- Carbohydrates: 30-40 grams
- Sugar: 20-30 grams
- Protein: 1-2 grams
These values are based on a standard recipe and may change based on ingredient substitutions or additions. Always consult a professional nutritionist for precise dietary information.
Why Brown Butter Makes All the Difference
I can’t stress enough how important browning the butter is to this recipe. It’s not just about melting butter; it’s about transforming it. The Maillard reaction occurs when the milk solids in the butter begin to brown, creating hundreds of new flavor compounds. These compounds are what give brown butter its signature nutty, caramel-like taste. This depth of flavor elevates the Rice Krispies treats from a simple snack to a truly decadent dessert. It’s a small step that makes a huge difference!
Making it Your Own: Customization Ideas
One of the best things about Rice Krispies treats is how easily you can customize them to your liking. Here are a few ideas to get you started:
- Chocolate Lovers: Add 1/2 cup of chocolate chips (milk, dark, or white) to the marshmallow mixture after it’s melted. You can also drizzle melted chocolate over the top of the cooled treats.
- Peanut Butter Bliss: Stir in 1/4 cup of peanut butter to the marshmallow mixture after it’s melted. You can also add peanut butter chips for extra peanut butter flavor.
-
Conclusion:
So, there you have it! This isn’t just your average Rice Krispies treat; it’s a symphony of nutty, caramelized goodness that elevates a childhood classic to a whole new level. The brown butter truly transforms these squares into something extraordinary, adding a depth of flavor you simply won’t find in the original. Trust me, once you try these, you’ll never go back to the regular recipe.
Why is this a must-try? Because it’s ridiculously easy, incredibly satisfying, and guaranteed to impress. It takes minimal effort to achieve maximum flavor impact. We’re talking about a dessert that comes together in minutes, requires no fancy equipment, and delivers a taste that’s both comforting and sophisticated. It’s the perfect treat for a quick weeknight dessert, a potluck contribution that will disappear in a flash, or a special occasion where you want to offer something a little bit different. Plus, who can resist the nostalgic charm of a Rice Krispies treat, especially when it’s been given such a delicious upgrade?
But the fun doesn’t stop there! Feel free to get creative with your serving suggestions and variations. For a truly decadent experience, try drizzling melted dark chocolate over the top once the squares have cooled. The bitterness of the chocolate perfectly complements the sweetness of the marshmallow and the nuttiness of the brown butter. You could also sprinkle a pinch of sea salt on top to enhance the flavors even further.
Looking for something a little more festive? Add some colorful sprinkles or chopped candies to the mixture before it sets. For a fall-inspired treat, stir in some chopped pecans or walnuts and a dash of cinnamon. In the summertime, a handful of dried cranberries and a squeeze of orange zest would be absolutely divine. The possibilities are truly endless!
These brown butter Rice Krispies treats are also fantastic served alongside a scoop of vanilla ice cream or a dollop of whipped cream. They make a delightful addition to a dessert platter or a sweet ending to any meal. You can even cut them into fun shapes using cookie cutters for a more playful presentation.
I’m absolutely confident that you’re going to love this recipe. It’s a guaranteed crowd-pleaser that’s sure to become a new favorite in your household. So, what are you waiting for? Gather your ingredients, melt that butter, and get ready to experience the magic of brown butter Rice Krispies.
I’m so excited for you to try this recipe! And I’d absolutely love to hear about your experience. Did you make any variations? Did you serve them with anything special? What did your friends and family think? Please, please, please come back and share your thoughts in the comments below. Your feedback is invaluable, and it helps me to create even better recipes for you in the future. I can’t wait to hear all about your brown butter Rice Krispies adventures! Happy baking (or, in this case, no-baking)! Let me know how it goes!
Brown Butter Rice Krispies: The Ultimate Guide to Crispy Perfection
Browned butter elevates classic Rice Krispies Treats with nutty, caramel flavor. Gooey, delicious, easy to make, and perfect for any occasion.
Ingredients
- 1/2 cup (1 stick) unsalted butter
- 10 ounces marshmallows (about 40 large or 4 cups mini)
- 1/4 teaspoon salt
- 6 cups Rice Krispies cereal
- Optional: 1 teaspoon vanilla extract
- Optional: Sprinkles for decoration
Instructions
- Place the butter in a light-colored saucepan over medium heat.
- As the butter melts, it will foam and bubble. Keep a close eye on it.
- Continue cooking the butter, swirling the pan occasionally, until the foaming subsides and you see brown specks forming at the bottom of the pan. The butter will also have a nutty aroma. This usually takes about 5-7 minutes. Be careful not to burn it! Burnt butter will taste bitter.
- Once the butter is browned, immediately remove the saucepan from the heat. The residual heat will continue to cook the butter slightly.
- Add the marshmallows and salt to the saucepan with the browned butter.
- Return the saucepan to low heat. Stir constantly with a spatula until the marshmallows are completely melted and smooth. This should take about 3-5 minutes.
- If you’re using vanilla extract, stir it in now.
- Immediately pour the Rice Krispies cereal into the saucepan with the melted marshmallow mixture.
- Use the spatula to quickly and thoroughly mix the cereal and marshmallow mixture together. Make sure all the cereal is coated evenly. Work quickly, as the marshmallow mixture will start to set as it cools.
- While you’re mixing, prepare a 9×13 inch baking pan by greasing it with butter or spraying it with non-stick cooking spray. You can also line the pan with parchment paper, leaving an overhang on the sides, for easy removal.
- Transfer the Rice Krispies mixture to the prepared pan. Use the spatula or your hands (lightly greased or dampened with water to prevent sticking) to gently press the mixture evenly into the pan. Don’t press too hard, or the treats will be dense and hard.
- If you’re using sprinkles, sprinkle them over the top of the treats while they are still warm and sticky.
- Let the Rice Krispies treats cool completely in the pan before cutting them into squares. This usually takes about 30 minutes to an hour.
- Use a sharp knife to cut the Rice Krispies treats into squares or rectangles.
- Serve immediately and enjoy! These treats are best enjoyed fresh.
Notes
- Use fresh marshmallows for best results.
- Don’t overcook the butter or marshmallows.
- Work quickly once the marshmallows are melted.
- Don’t press the mixture too hard into the pan.
- Lining the pan with parchment paper makes removal easier.
- Store in an airtight container at room temperature for up to 3 days.
- Customize with chocolate chips, peanut butter, nuts, or dried fruit.


Leave a Comment