
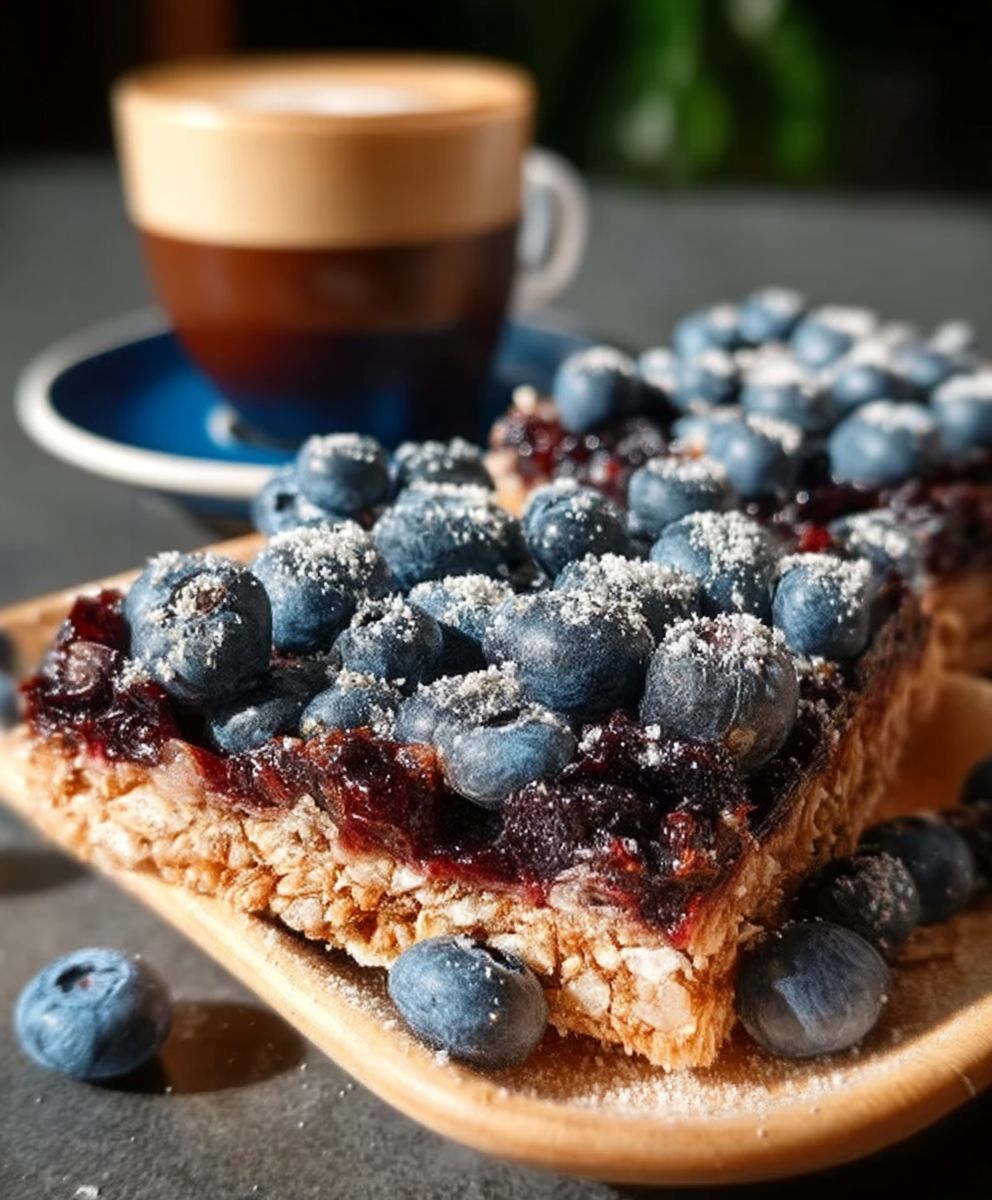
Blueberry breakfast bars: the perfect grab-and-go solution for busy mornings! Imagine sinking your teeth into a soft, chewy bar bursting with juicy blueberries and a hint of sweetness. Forget those bland, processed breakfast options these homemade bars are a game-changer, offering a delicious and nutritious start to your day.
While the exact origins of breakfast bars are somewhat modern, the concept of portable, energy-rich foods has been around for centuries. Think of Scottish oatcakes or even ancient Roman soldiers carrying dried figs and grains. Our modern blueberry breakfast bars draw inspiration from these traditions, offering a convenient and satisfying way to fuel your body.
What makes these bars so irresistible? It’s the delightful combination of textures and flavors. The soft, slightly crumbly base perfectly complements the burst of sweet-tart blueberries. Plus, they’re incredibly versatile! You can customize them with different nuts, seeds, or even a drizzle of icing for an extra touch of indulgence. But beyond the taste, people love them for their convenience. They’re easy to make ahead of time, perfect for meal prepping, and a lifesaver when you’re rushing out the door. Join me as I share my foolproof recipe for these delightful treats you’ll never skip breakfast again!
Ingredients:
- For the Crust:
- 2 cups all-purpose flour
- 1 cup (2 sticks) cold unsalted butter, cut into cubes
- 1/2 cup granulated sugar
- 1/4 teaspoon salt
- 4-6 tablespoons ice water
- For the Blueberry Filling:
- 4 cups fresh blueberries
- 1/2 cup granulated sugar
- 3 tablespoons cornstarch
- 1 tablespoon lemon juice
- 1/4 teaspoon ground cinnamon
- For the Crumble Topping:
- 1 cup all-purpose flour
- 1/2 cup packed light brown sugar
- 1/2 cup rolled oats
- 1/2 cup (1 stick) cold unsalted butter, cut into cubes
- 1/4 teaspoon salt
- Optional:
- Powdered sugar, for dusting
- Lemon zest, for extra flavor in the filling
Preparing the Crust:
- Combine Dry Ingredients: In a large bowl, whisk together the 2 cups of all-purpose flour, 1/2 cup of granulated sugar, and 1/4 teaspoon of salt. This ensures that the salt is evenly distributed throughout the crust, which is crucial for flavor.
- Cut in the Butter: Add the 1 cup (2 sticks) of cold, cubed unsalted butter to the flour mixture. Using a pastry blender or your fingertips, cut the butter into the flour until the mixture resembles coarse crumbs. The key here is to work quickly so the butter stays cold. Cold butter is what creates those flaky layers in the crust. If you don’t have a pastry blender, you can use two knives to cut the butter in.
- Add Ice Water: Gradually add the ice water, 1 tablespoon at a time, mixing gently after each addition. Start with 4 tablespoons and add more if needed, until the dough just comes together. Be careful not to overmix! Overmixing will develop the gluten in the flour, resulting in a tough crust. You want a tender, flaky crust, so handle the dough as little as possible.
- Form the Dough: Gently press the dough together to form a disc. Wrap the disc in plastic wrap and refrigerate for at least 30 minutes. This chilling time is essential! It allows the gluten to relax and the butter to firm up, which will prevent the crust from shrinking during baking.
- Preheat Oven and Prepare Pan: While the dough is chilling, preheat your oven to 375°F (190°C). Grease and flour a 9×13 inch baking pan. Alternatively, you can line the pan with parchment paper, leaving an overhang on the sides for easy removal of the bars after baking.
- Roll Out the Dough: On a lightly floured surface, roll out the chilled dough into a rectangle slightly larger than your 9×13 inch pan. Carefully transfer the dough to the prepared pan, pressing it evenly into the bottom and up the sides. If the dough tears, simply patch it up with extra dough.
- Pre-bake the Crust: Prick the bottom of the crust with a fork several times. This will prevent the crust from puffing up during baking. Bake the crust for 15-20 minutes, or until it is lightly golden brown. This pre-baking step is important because it ensures that the bottom crust is fully cooked and doesn’t become soggy from the blueberry filling.
Preparing the Blueberry Filling:
- Combine Filling Ingredients: In a large bowl, gently toss together the 4 cups of fresh blueberries, 1/2 cup of granulated sugar, 3 tablespoons of cornstarch, 1 tablespoon of lemon juice, and 1/4 teaspoon of ground cinnamon. Make sure the blueberries are evenly coated with the sugar and cornstarch mixture. The cornstarch will help to thicken the filling as it bakes, preventing it from becoming too runny. The lemon juice adds a bright, tangy flavor that complements the sweetness of the blueberries.
- Optional Lemon Zest: If you want to add an extra burst of lemon flavor, you can add 1 teaspoon of lemon zest to the blueberry filling.
Preparing the Crumble Topping:
- Combine Dry Ingredients: In a medium bowl, whisk together the 1 cup of all-purpose flour, 1/2 cup of packed light brown sugar, 1/2 cup of rolled oats, and 1/4 teaspoon of salt. The brown sugar adds a rich, molasses-like flavor to the crumble topping, while the rolled oats provide a nice textural contrast.
- Cut in the Butter: Add the 1/2 cup (1 stick) of cold, cubed unsalted butter to the flour mixture. Using a pastry blender or your fingertips, cut the butter into the flour until the mixture resembles coarse crumbs. Again, work quickly to keep the butter cold.
Assembling and Baking the Bars:
- Pour in the Filling: Carefully pour the blueberry filling over the pre-baked crust, spreading it evenly.
- Sprinkle with Crumble Topping: Sprinkle the crumble topping evenly over the blueberry filling. Make sure to cover the entire surface of the filling with the crumble topping.
- Bake the Bars: Bake in the preheated oven for 30-35 minutes, or until the crumble topping is golden brown and the blueberry filling is bubbling. Keep an eye on the bars during baking, and if the crumble topping starts to brown too quickly, you can tent the pan with aluminum foil to prevent it from burning.
- Cool Completely: Remove the bars from the oven and let them cool completely in the pan before cutting into squares. This is important because the filling will continue to thicken as it cools. If you try to cut the bars while they are still warm, the filling will be runny and the bars will fall apart.
- Dust with Powdered Sugar (Optional): Once the bars are completely cool, you can dust them with powdered sugar for an extra touch of sweetness and visual appeal.
Tips and Variations:
- Use Frozen Blueberries: If fresh blueberries are not available, you can use frozen blueberries. Do not thaw them before using. Just add them directly to the filling mixture. You may need to add an extra tablespoon of cornstarch to the filling to compensate for the extra moisture from the frozen blueberries.
- Add Nuts: For extra crunch and flavor, you can add 1/2 cup of chopped nuts (such as pecans, walnuts, or almonds) to the crumble topping.
- Spice it Up: Experiment with different spices in the blueberry filling. A pinch of nutmeg or cardamom would also be delicious.
- Make it Gluten-Free: To make these bars gluten-free, use a gluten-free all-purpose flour blend in the crust and crumble topping. Make sure to choose a blend that contains xanthan gum, which will help to bind the ingredients together.
- Storage: Store the blueberry breakfast bars in an airtight container at room temperature for up to 3 days, or in the refrigerator for up to 5 days.
Conclusion:
And there you have it! These blueberry breakfast bars are truly a game-changer for busy mornings, satisfying sweet cravings, or simply enjoying a wholesome treat. I genuinely believe this recipe is a must-try for anyone who appreciates delicious, convenient, and relatively healthy snacks. The combination of the buttery, slightly crumbly base, the juicy burst of blueberries, and the optional (but highly recommended!) lemon glaze creates a symphony of flavors and textures that will leave you wanting more.
But why is this recipe so special? It’s more than just a collection of ingredients; it’s about creating something that fits seamlessly into your life. It’s about having a homemade option that’s far superior to anything you can buy at the store, and it’s about knowing exactly what’s going into your body. Plus, the aroma that fills your kitchen while these bars are baking is simply divine!
Beyond the basic recipe, the possibilities are endless! Feel free to experiment with different types of berries. Raspberries, strawberries, or even a mixed berry medley would work beautifully. If you’re not a fan of lemon, try a vanilla glaze or simply dust the bars with powdered sugar. For a richer flavor, add a handful of chopped nuts, like pecans or walnuts, to the crumble topping. You could even incorporate a layer of cream cheese filling for an extra decadent treat.
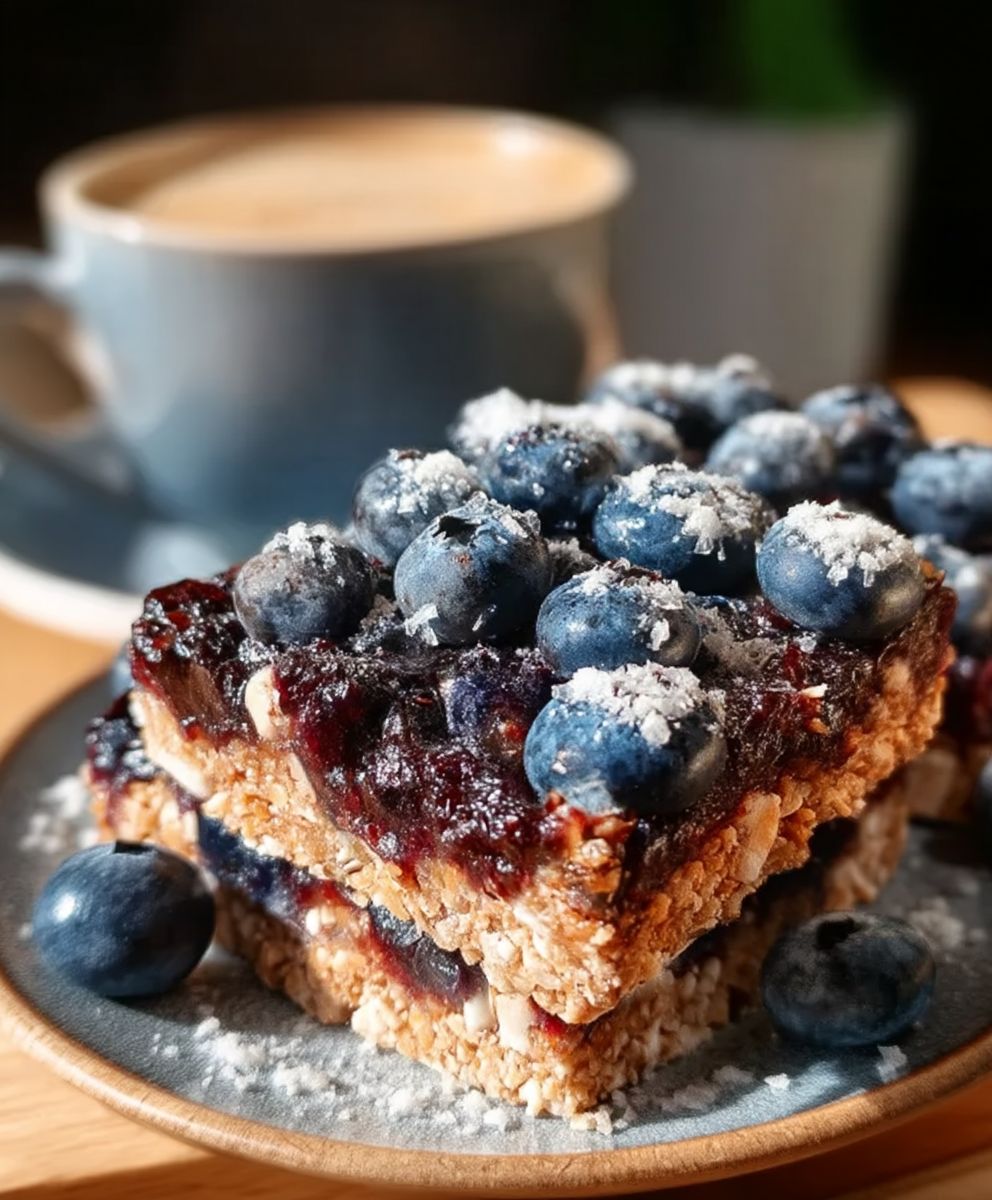
Serving suggestions? These blueberry breakfast bars are incredibly versatile. Enjoy them warm from the oven with a scoop of vanilla ice cream for a delightful dessert. Pack them in your lunchbox for a midday pick-me-up. Serve them alongside a cup of coffee or tea for a relaxing afternoon treat. They’re also perfect for potlucks, picnics, and bake sales. I’ve even been known to crumble them over yogurt for a delicious and satisfying breakfast parfait.
I truly hope you’ll give this recipe a try. I’ve poured my heart into perfecting it, and I’m confident that you’ll love it as much as I do. It’s a recipe that’s easy enough for beginner bakers but impressive enough to wow even the most discerning palates.
Don’t be afraid to get creative and put your own spin on it! Baking is all about experimentation and finding what works best for you. And most importantly, have fun!
Once you’ve made these blueberry breakfast bars, I would absolutely love to hear about your experience. Did you make any modifications? What did you think of the flavor and texture? What occasion did you make them for? Share your photos and stories in the comments below! Your feedback is invaluable, and it helps me to continue creating recipes that you’ll love.
So, go ahead, preheat your oven, gather your ingredients, and get ready to bake up a batch of these irresistible blueberry breakfast bars. I promise you won’t regret it! Happy baking! I am confident that this will become a staple in your baking repertoire.
Blueberry Breakfast Bars: The Ultimate Guide to Baking Delicious Bars
Delicious and easy blueberry crumble bars with a buttery crust, sweet blueberry filling, and a crunchy oat crumble topping. Perfect for breakfast, dessert, or a snack!
Ingredients
- 2 cups all-purpose flour
- 1 cup (2 sticks) cold unsalted butter, cut into cubes
- 1/2 cup granulated sugar
- 1/4 teaspoon salt
- 4-6 tablespoons ice water
- 4 cups fresh blueberries
- 1/2 cup granulated sugar
- 3 tablespoons cornstarch
- 1 tablespoon lemon juice
- 1/4 teaspoon ground cinnamon
- 1 cup all-purpose flour
- 1/2 cup packed light brown sugar
- 1/2 cup rolled oats
- 1/2 cup (1 stick) cold unsalted butter, cut into cubes
- 1/4 teaspoon salt
- Powdered sugar, for dusting
- Lemon zest, for extra flavor in the filling
Instructions
- In a large bowl, whisk together the 2 cups of all-purpose flour, 1/2 cup of granulated sugar, and 1/4 teaspoon of salt.
- Add the 1 cup (2 sticks) of cold, cubed unsalted butter to the flour mixture. Using a pastry blender or your fingertips, cut the butter into the flour until the mixture resembles coarse crumbs.
- Gradually add the ice water, 1 tablespoon at a time, mixing gently after each addition. Start with 4 tablespoons and add more if needed, until the dough just comes together. Be careful not to overmix!
- Gently press the dough together to form a disc. Wrap the disc in plastic wrap and refrigerate for at least 30 minutes.
- While the dough is chilling, preheat your oven to 375°F (190°C). Grease and flour a 9×13 inch baking pan. Alternatively, you can line the pan with parchment paper, leaving an overhang on the sides for easy removal of the bars after baking.
- On a lightly floured surface, roll out the chilled dough into a rectangle slightly larger than your 9×13 inch pan. Carefully transfer the dough to the prepared pan, pressing it evenly into the bottom and up the sides. If the dough tears, simply patch it up with extra dough.
- Prick the bottom of the crust with a fork several times. This will prevent the crust from puffing up during baking. Bake the crust for 15-20 minutes, or until it is lightly golden brown.
- In a large bowl, gently toss together the 4 cups of fresh blueberries, 1/2 cup of granulated sugar, 3 tablespoons of cornstarch, 1 tablespoon of lemon juice, and 1/4 teaspoon of ground cinnamon.
- If you want to add an extra burst of lemon flavor, you can add 1 teaspoon of lemon zest to the blueberry filling.
- In a medium bowl, whisk together the 1 cup of all-purpose flour, 1/2 cup of packed light brown sugar, 1/2 cup of rolled oats, and 1/4 teaspoon of salt.
- Add the 1/2 cup (1 stick) of cold, cubed unsalted butter to the flour mixture. Using a pastry blender or your fingertips, cut the butter into the flour until the mixture resembles coarse crumbs.
- Carefully pour the blueberry filling over the pre-baked crust, spreading it evenly.
- Sprinkle the crumble topping evenly over the blueberry filling.
- Bake in the preheated oven for 30-35 minutes, or until the crumble topping is golden brown and the blueberry filling is bubbling.
- Remove the bars from the oven and let them cool completely in the pan before cutting into squares.
- Once the bars are completely cool, you can dust them with powdered sugar for an extra touch of sweetness and visual appeal.
Notes
- Use Frozen Blueberries: If fresh blueberries are not available, you can use frozen blueberries. Do not thaw them before using. Just add them directly to the filling mixture. You may need to add an extra tablespoon of cornstarch to the filling to compensate for the extra moisture from the frozen blueberries.
- Add Nuts: For extra crunch and flavor, you can add 1/2 cup of chopped nuts (such as pecans, walnuts, or almonds) to the crumble topping.
- Spice it Up: Experiment with different spices in the blueberry filling. A pinch of nutmeg or cardamom would also be delicious.
- Make it Gluten-Free: To make these bars gluten-free, use a gluten-free all-purpose flour blend in the crust and crumble topping. Make sure to choose a blend that contains xanthan gum, which will help to bind the ingredients together.
- Storage: Store the blueberry breakfast bars in an airtight container at room temperature for up to 3 days, or in the refrigerator for up to 5 days.


Leave a Comment