

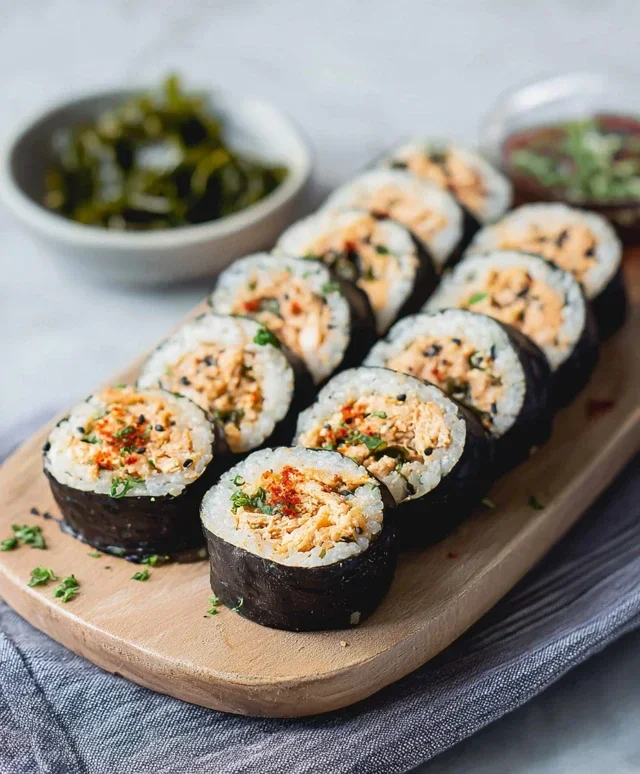
Easy 15-min. Spicy Tuna Kimbap is about to become your new weeknight hero! Are you craving something delicious, satisfying, and unbelievably quick to make? Look no further. This vibrant roll is a fantastic way to jazz up your usual lunch or dinner routine without spending hours in the kitchen. We all love kimbap for its beautiful presentation and incredible flavor, but often, the prep time can feel a little daunting. That’s where our Easy 15-min. Spicy Tuna Kimbap shines. What makes it so special? It’s the perfect balance of savory, spicy, and slightly sweet, all wrapped up in perfectly seasoned rice and crisp seaweed. The spicy tuna filling is incredibly flavorful and surprisingly simple to whip up, making this a truly accessible dish for cooks of all levels. Get ready to impress yourself and anyone lucky enough to share it with you!
Easy 15-Minute Spicy Tuna Kimbap
Craving something delicious, quick, and with a little kick? My Easy 15-Minute Spicy Tuna Kimbap is your answer! This recipe transforms simple ingredients into a flavorful and satisfying meal or snack that you can whip up in no time. Kimbap, often compared to sushi rolls, is a Korean staple that’s incredibly versatile and surprisingly easy to make at home. The “kimbap” part refers to the rice and seaweed, while the “filling” is where you can get creative. Today, we’re diving into a spicy tuna variation that’s my absolute go-to for busy weeknights. The combination of flaky tuna, creamy mayo, a hint of spice from sriracha, and the fresh crunch of perilla leaves wrapped in savory seaweed is simply irresistible. Don’t be intimidated by the idea of rolling; it’s a skill that comes with practice, and even imperfect rolls taste amazing. Let’s get started!
Ingredients:
Preparing the Rice
The foundation of any good kimbap is perfectly seasoned rice. For this recipe, we’ll be using hot, cooked short-grain rice. Short-grain rice has a slightly stickier texture than long-grain rice, which helps it hold together beautifully when rolled. While the rice is still hot, it’s easiest to mix in the seasonings. In a medium bowl, combine the hot rice with 1 teaspoon of sesame oil, 1 teaspoon of sesame seeds, and 1 teaspoon of salt. Gently fold everything together using a spatula or rice paddle, ensuring the seasonings are evenly distributed without mashing the grains of rice. You want each grain to be coated and flavorful. This simple seasoning elevates the plain rice into something special.
Making the Spicy Tuna Filling
Now for the star of the show: the spicy tuna filling! Open your can of tuna and drain any excess liquid. If you’re using tuna packed in oil, drain it well. Transfer the drained tuna to a small bowl. Add the finely chopped green onion, 2 tablespoons of Japanese mayonnaise, and 1 to 2 tablespoons of sriracha. The amount of sriracha is entirely up to your personal preference for heat. Start with 1 tablespoon and add more if you like it spicier. Japanese mayonnaise, or Kewpie mayo, has a richer, creamier texture and a slightly tangier flavor than regular mayonnaise, which I highly recommend if you can find it. However, regular mayonnaise will work just fine. Mix everything together until well combined and the tuna is flaked apart. This filling is so delicious, you might be tempted to eat it with a spoon!
Assembling the Kimbap
This is where the magic happens. You’ll need a bamboo sushi rolling mat for the easiest rolling experience, but it’s not strictly essential. If you don’t have one, you can try using a clean kitchen towel or even just your hands. Lay one sheet of nori, shiny side down, on your rolling mat or work surface. Spread about half of the seasoned rice evenly over the nori, leaving about a 1-inch border at the top edge. This border will help seal the roll. Don’t press the rice down too firmly, as you want it to be light and fluffy.
Now, arrange your perilla leaves on top of the rice. Perilla leaves have a unique, slightly peppery flavor that complements the tuna perfectly. If you can’t find them, don’t worry! Washed and dried green leaf lettuce leaves are a great substitute, offering a refreshing crunch. Place about half of the spicy tuna filling in a line horizontally across the perilla leaves, near the bottom edge of the rice-covered nori.
Rolling the Kimbap
This is the trickiest part, but with a little practice, you’ll be a pro! Using your thumbs to lift the edge of the bamboo mat (or towel), begin extract to roll the nori and rice tightly over the filling. Use your fingers to keep the filling in place as you roll. Tuck the edge of the nori under the filling and continue to roll, applying gentle, even pressure. As you roll, lift the edge of the mat away from the nori so it doesn’t get rolled into the kimbap itself. When you reach the end of the nori, the top border you left will help seal the roll. You can moisten this edge with a little water if it doesn’t stick. Once rolled, gently press the entire roll to firm it up. Repeat the process with the remaining ingredients to make your second kimbap roll.
Finishing Touches and Serving
Once your kimbap rolls are assembled, it’s time for the final touches. Lightly brush the outside of each roll with the remaining 1/2 teaspoon of sesame oil. This adds a beautiful sheen and an extra layer of nutty aroma. Sprinkle the remaining 1/2 teaspoon of sesame seeds over the oiled surface for a decorative and flavorful garnish. Now, using a sharp knife, slice each roll into about 6-8 pieces. For cleaner cuts, you can wet your knife blade with a little water between slices. Your Easy 15-Minute Spicy Tuna Kimbap is now ready to be enjoyed! Serve immediately as a light lunch, a quick dinner, or a delicious snack. You can enjoy them as is, or with a side of soy sauce for dipping if you like. The combination of textures and flavors is truly delightful, and the spicy kick from the tuna filling makes it incredibly satisfying. Enjoy your speedy culinary creation!
Conclusion:
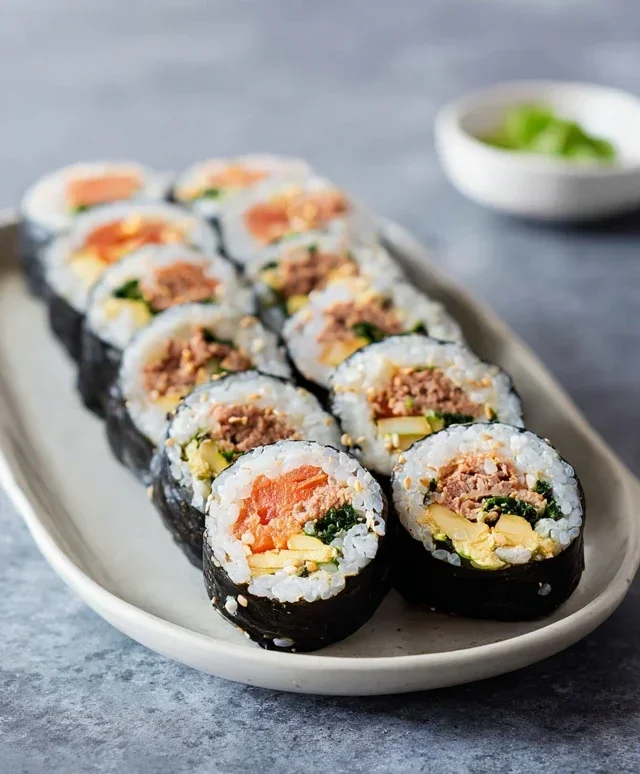
And there you have it – a delicious and incredibly satisfying Easy 15-min. Spicy Tuna Kimbap that’s perfect for a quick lunch, a light dinner, or even a fun appetizer! This recipe truly shines because of its speed and simplicity, proving that you don’t need hours in the kitchen to create something bursting with flavor. The spicy tuna filling is wonderfully balanced with the seasoned rice and crisp vegetables, making each bite a delightful experience. We love how versatile kimbap is; it’s a fantastic way to use up leftover cooked rice and customize it with your favorite ingredients.
For serving, this spicy tuna kimbap is fantastic on its own. You can also pair it with a light soy-vinegar dipping sauce, some pickled radish on the side, or even a small bowl of miso soup for a more complete meal. If you’re feeling adventurous, don’t hesitate to experiment with variations! Try adding some finely chopped kimchi for an extra kick, corn for sweetness, or even some scrambled egg for added texture and protein. The possibilities are truly endless! We highly encourage you to give this recipe a try; we’re confident you’ll be impressed by how easy and delicious it is.
Frequently Asked Questions about Easy 15-min. Spicy Tuna Kimbap:
Q: Can I use canned tuna in water instead of oil?
Absolutely! Canned tuna in water works perfectly. Just be sure to drain it very well to avoid a soggy kimbap. You might want to add a touch more mayonnaise or sriracha to compensate for any moisture loss and maintain the desired consistency of the spicy tuna filling.
Q: What if I don’t have sriracha?
No problem! You can substitute sriracha with other chili sauces like gochujang (Korean chili paste), sambal oelek, or even a dash of cayenne pepper mixed with mayonnaise. Adjust the amount to your preferred level of spiciness.
Easy 15-min. Spicy Tuna Kimbap
Quick and flavorful Korean rice rolls filled with spicy tuna, perilla leaves, and seasoned rice.
Ingredients
-
2 sheets nori (or gim (dry roasted seaweed))
-
4 perilla leaves (washed & dried with stems trimmed (or sub with green leaf lettuce))
-
1/2 tsp sesame oil (to season kimbap)
-
1/2 tsp sesame seeds (to garnish kimbap)
-
2 cups cooked short grain rice (hot)
-
1 tsp sesame oil
-
1 tsp sesame seeds
-
1 tsp salt
-
5.3 oz canned tuna in oil (or canned tuna in water)
-
2 tbsp green onion (very finely chopped)
-
2 tbsp Japanese mayo (aka Kewpie mayo (or regular mayo))
-
1-2 tbsp sriracha (depending on your spice tolerance (or sub with gochujang))
Instructions
-
Step 1
Drain the canned tuna. In a bowl, mix the tuna with green onion, Japanese mayo, and sriracha until well combined. Adjust sriracha to your spice preference. -
Step 2
In a separate bowl, season the hot cooked rice with 1 tsp sesame oil, 1 tsp sesame seeds, and 1 tsp salt. Mix gently. -
Step 3
Place a sheet of nori shiny-side down on a bamboo rolling mat or a clean surface. Spread a thin, even layer of seasoned rice over the nori, leaving a 1-inch border at the top. -
Step 4
Arrange the perilla leaves on top of the rice. Then, spoon the spicy tuna mixture evenly over the perilla leaves. -
Step 5
Carefully roll the kimbap tightly from the bottom using the bamboo mat, pressing gently as you roll to seal. Moisten the top border of the nori with a little water to help it seal. -
Step 6
Brush the outside of the rolled kimbap with 1/2 tsp sesame oil and sprinkle with 1/2 tsp sesame seeds. -
Step 7
Slice the kimbap into bite-sized pieces using a sharp knife. Serve immediately.
Important Information
Nutrition Facts (Per Serving)
It is important to consider this information as approximate and not to use it as definitive health advice.
Allergy Information
Please check ingredients for potential allergens and consult a health professional if in doubt.


Leave a Comment