
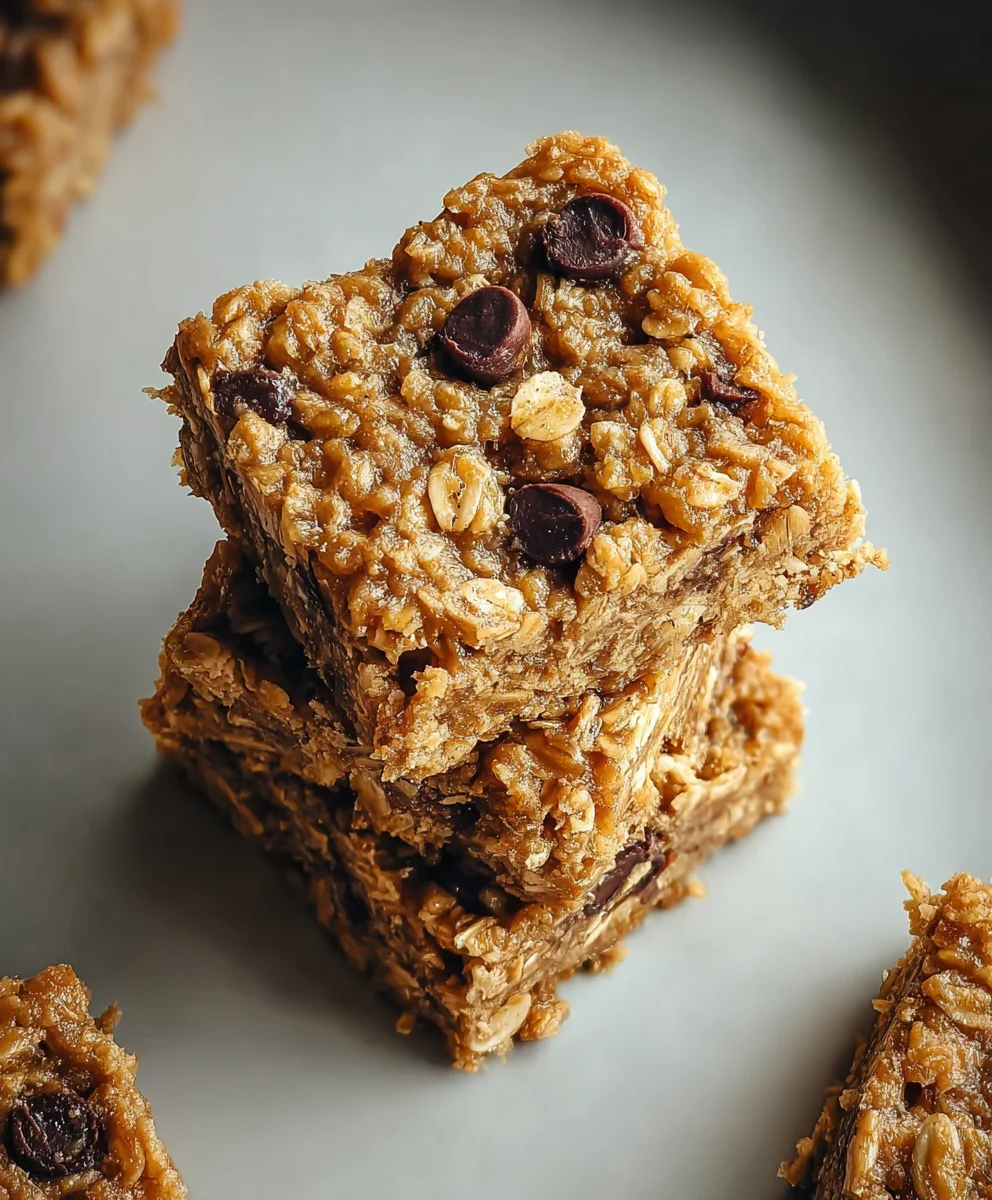
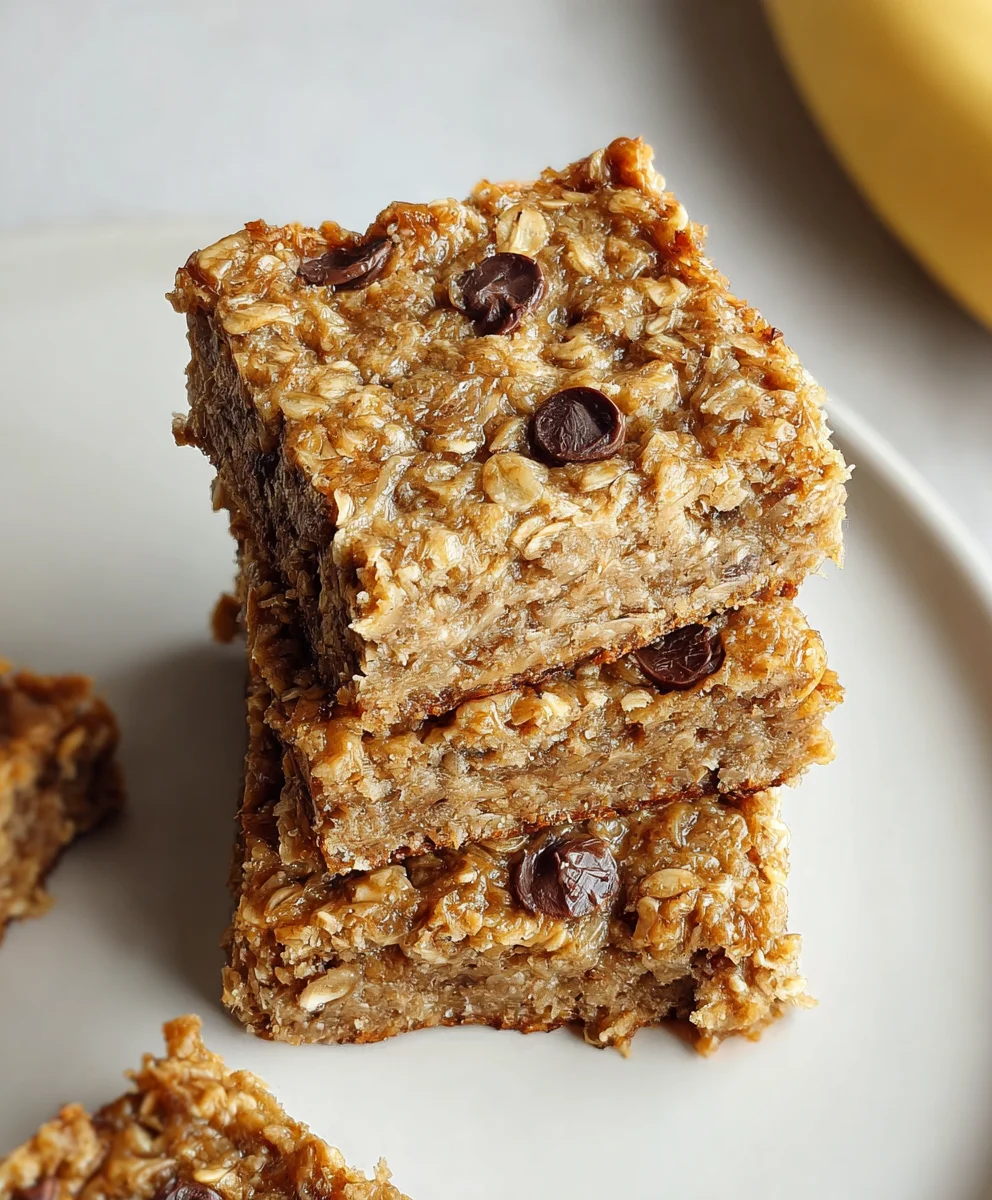
Simple Banana Oat Bars are more than just a snack; they’re a warm hug in portable form, a delightful little parcel of comfort that can brighten any moment of your day. We all crave those easy wins in the kitchen, and these bars deliver in spades. Imagin extracte the sweet, comforting aroma of ripe bananas mingling with wholesome oats, baked into perfectly chewy bars that satisfy your sweet tooth without the guilt. It’s this perfect balance of natural sweetness and satisfying texture that has people coming back for more. What truly makes these Simple Banana Oat Bars special is their incredible versatility. Whether you’re looking for a healthy breakfast on the go, a post-workout refuel, or an afternoon pick-me-up, these bars are your answer. They’re incredibly forgiving and adaptable, allowing you to customize them with your favorite add-ins, making every batch uniquely yours. Get ready to discover your new go-to recipe for these effortlessly delicious treats!
Ingredients:
- 5 ripe bananas, mashed
- 1 cup creamy peanut butter
- 4 cups old-fashioned rolled oats (not instant)
- 1/4 cup semi-sweet chocolate chips
Preparing Your Simple Banana Oat Bars
Step 1: Mash the Bananas and Combine Wet Ingredients
The foundation of these Simple Banana Oat Bars is the mashed bananas. For the best flavor and sweetness, ensure your bananas are very ripe – the browner and spottier, the better! This will give you a naturally sweeter bar and a smoother texture. Take your 5 ripe bananas and mash them thoroughly in a large mixing bowl. A fork works perfectly for this, but if you want an even smoother consistency, you can use a potato masher or even blend them briefly. Once your bananas are mashed to your liking, add the 1 cup of creamy peanut butter to the same bowl. Stir these two ingredients together until they are well combined and form a somewhat uniform, sticky paste. It’s important to get a good mix here so that the peanut butter is evenly distributed throughout the banana mixture. This combination provides moisture, binding, and that delicious nutty flavor that pairs so wonderfully with banana.
Step 2: Incorporate the Rolled Oats
Now it’s time to add the substance to our bars – the rolled oats. Pour the 4 cups of old-fashioned rolled oats into the bowl with the mashed banana and peanut butter mixture. Do not use instant oats; they are too fine and will result in a mushy texture. Old-fashioned rolled oats provide the perfect chewy texture and structure that defines a good oat bar. Using a sturdy spoon or a spatula, begin extract to mix the oats into the wet ingredients. This might feel like you’re stirring a thick dough, and that’s exactly what you’re aiming for. Continue mixing until every single oat is coated in the banana-peanut butter mixture. It’s crucial to ensure thorough mixing at this stage. If some oats are left dry, your bars might crum extractble easily. You want a cohesive mixture that holds together when you squeeze a bit of it in your hand. This might take a minute or two of dedicated stirring, so don’t rush it.
Step 3: Fold in the Chocolate Chips
For a touch of sweetness and a delightful burst of flavor, we’ll now add the chocolate chips. Gently fold in the 1/4 cup of semi-sweet chocolate chips into the oat mixture. You can use a spatula or your hands for this step. The goal here is to distribute the chocolate chips evenly throughout the batter without overmixing. Overmixing at this point can cause the chocolate chips to break down and create streaks of chocolate throughout the entire bar, which isn’t always the most visually appealing. We want distinct little pockets of melted chocolate goodness. Give it just a few stirs until the chips are scattered throughout the mixture. This is where the “simple” aspect of these bars really shines – minimal ingredients, maximum flavor impact.
Step 4: Press the Mixture into the Baking Pan
Prepare a baking dish by lining it with parchment paper. This step is crucial for easy removal of the bars once they are baked. A standard 8×8 inch or 9×13 inch baking dish will work well, depending on how thick you want your bars. If you’re using a 9×13 inch pan, your bars will be thinner; an 8×8 inch pan will yield thicker bars. Once your pan is lined, carefully scoop the entire mixture from the bowl into the prepared baking dish. Now comes the pressing. You want to press the mixture down very firmly and evenly into the pan. Use the back of your spoon, a spatula, or even your hands (lightly greased if needed) to compact the mixture. This firm pressing is essential for binding the bars together and ensuring they hold their shape once baked. If the mixture is not pressed down well, your bars mirum extract be crumbly and difficult to cut. Take your time to get an even layer across the entire pan.
Step 5: Bake and Cool the Bars
Preheat your oven to 350°F (175°C). Place the pan with the pressed mixture into the preheated oven. Bake for approximately 25 to 30 minutes, or until the edges are lightly golden brown and the center appears set. The exact baking time can vary slightly depending on your oven and the thickness of your bars. Keep an eye on them towards the end of the baking time to prevent over-baking, which can make them dry. Once baked, remove the pan from the oven and let the bars cool completely in the pan on a wire rack. This cooling process is just as important as the baking. Resist the urge to cut them while they are still warm; they need time to firm up. Once completely cooled, you can lift the entire slab out of the pan using the parchment paper. Then, place it on a cutting board and use a sharp knife to cut them into your desired bar shapes. These Simple Banana Oat Bars are best stored in an airtight container in the refrigerator for up to a week.
Conclusion:
There you have it – the incredibly delicious and surprisingly easy Simple Banana Oat Bars! We’ve walked through each step, from mashing those ripe bananas to achieving that perfect golden-brown bake. These bars are a testament to how simple ingredients can create something truly wonderful. They’re not just a treat; they’re a wholesome option for breakfast on the go, a midday snack, or even a healthier dessert. Don’t be afraid to experiment and make them your own!
For serving, these Simple Banana Oat Bars are fantastic on their own, warm from the oven or cooled completely. They also pair beautifully with a dollop of Greek yogurt, a drizzle of honey, or a side of fresh berries. For variations, consider adding a handful of chocolate chips, chopped nuts like walnuts or pecans, or a sprinkle of cinnamon and nutmeg to the batter. You could even stir in a tablespoon of peanut butter for an extra protein boost. The possibilities are endless, and the joy of baking these is immense. Give them a try and discover your favorite way to enjoy these delightful bars!
Frequently Asked Questions:
Can I make Simple Banana Oat Bars without ripe bananas?
While the recipe is designed for ripe bananas for sweetness and moisture, you can use slightly less ripe bananas. However, you might need to add a touch more sweetener, like a tablespoon of honey or maple syrup, and ensure they are mashed very well to release their moisture.
How long do Simple Banana Oat Bars last?
Store your cooled Simple Banana Oat Bars in an airtight container at room temperature for up to 3 days, or in the refrigerator for up to a week. For longer storage, you can wrap individual bars and freeze them for up to 2 months. Thaw overnight in the refrigerator or at room temperature.
Easy Banana Oat Bars
Quick and healthy homemade oat bars with banana, peanut butter, and chocolate chips.
Ingredients
-
5 ripe bananas, mashed
-
1 cup creamy peanut butter
-
4 cups old-fashioned rolled oats
-
1/4 cup semi-sweet chocolate chips
-
Parchment paper (for lining pan)
-
Non-stick spray (optional, for pan)
Instructions
-
Step 1
Mash 5 ripe bananas in a large bowl. Stir in 1 cup of creamy peanut butter until well combined, forming a sticky paste. -
Step 2
Add 4 cups of old-fashioned rolled oats to the banana-peanut butter mixture. Stir thoroughly until all oats are coated, creating a cohesive mixture. -
Step 3
Gently fold in 1/4 cup of semi-sweet chocolate chips, distributing them evenly without overmixing. -
Step 4
Line an 8×8 or 9×13 inch baking dish with parchment paper. Press the oat mixture firmly and evenly into the prepared pan. -
Step 5
Bake in a preheated oven at 350°F (175°C) for 25-30 minutes, or until the edges are golden brown and the center is set. -
Step 6
Let the bars cool completely in the pan on a wire rack. Once cooled, lift out with parchment paper and cut into desired bar shapes.
Important Information
Nutrition Facts (Per Serving)
It is important to consider this information as approximate and not to use it as definitive health advice.
Allergy Information
Please check ingredients for potential allergens and consult a health professional if in doubt.

Leave a Comment