
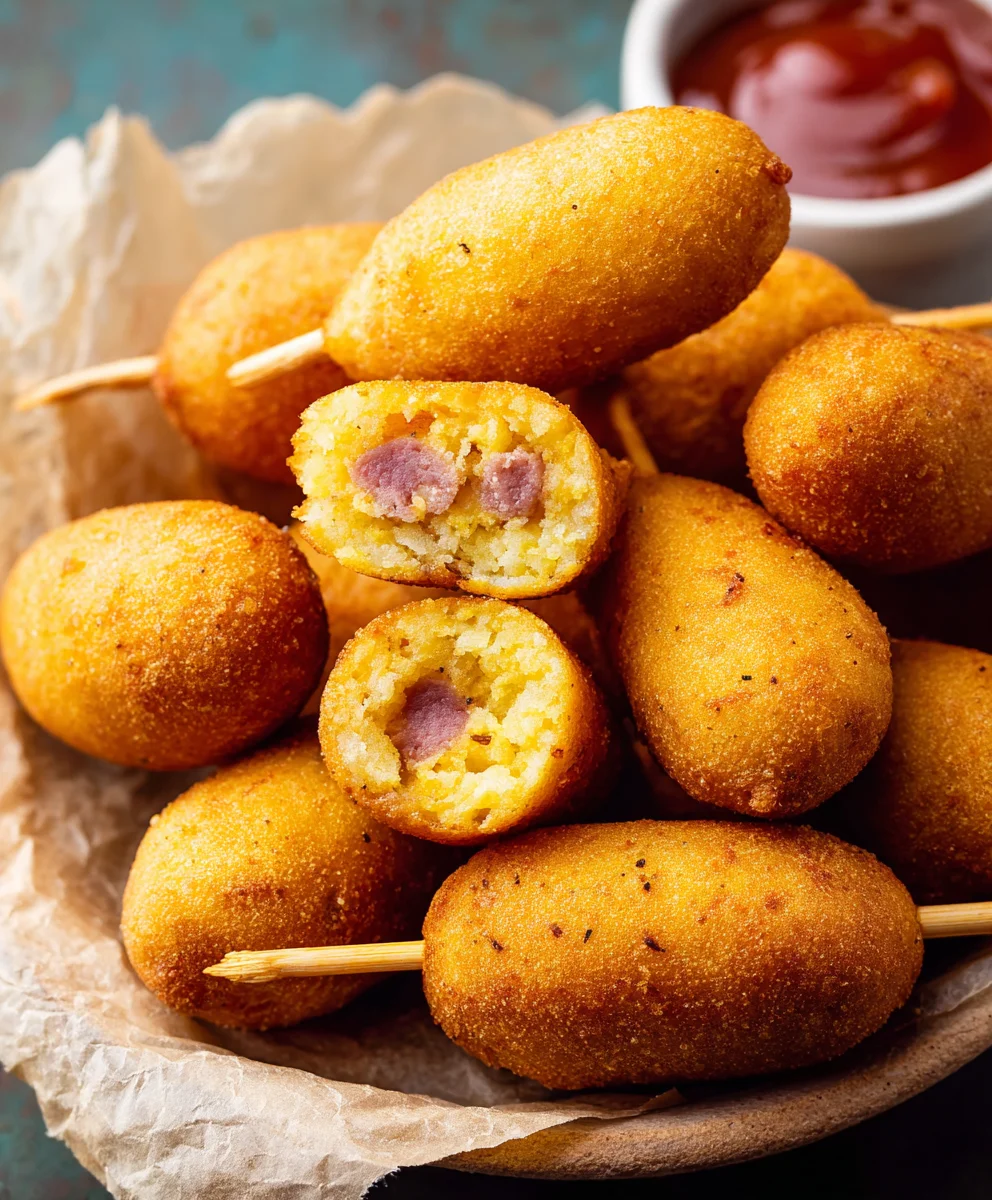
Homemade Mini Corndogs are an absolute delight, aren’t they? There’s something incredibly nostalgic and satisfying about these bite-sized golden wonders. Whether you’re throwing a party, looking for a fun family activity, or simply craving a comforting classic, our recipe for Homemade Mini Corndogs delivers pure joy. What makes this dish so beloved? It’s the perfect harmony of a slightly sweet, fluffy corn batter embracing a savory, juicy hot dog, all fried to a beautiful crisp. We’ve perfected the ratio of batter to dog, ensuring each mini corndog is perfectly proportioned and impossibly moreish. Forget those frozen imposters; this homemade version offers a freshness and flavor that’s simply unparalleled, making them the star of any gathering or a delightful treat all on their own.
Ingredients:
- 14 oz. cocktail wieners (about 25 wieners)
- 4 oz. cheddar cheese, cut into small cubes (about ½-inch)
- 1 cup all-purpose flour
- 1 cup medium grind yellow cornmeal
- 1 tablespoon baking powder
- 2 tablespoons granulated sugar
- ½ teaspoon salt
- 2 large eggs
- 1 cup milk (any kind is fine, whole milk will give a richer batter)
- Vegetable oil, canola oil, or peanut oil for frying
- Wooden toothpicks
Preparing Your Miniature Masterpieces
This recipe will guide you through creating delightful homemade mini corndogs, a perfect crowd-pleasing snack or appetizer. We’ll be using readily available ingredients to achieve that classic corndog flavor and texture, but in a fun, bite-sized format. The key to success here is in the preparation of both the batter and the corndogs themselves. We’re going to incorporate a little secret ingredient for an extra cheesy surprise within each corndog, making them truly irresistible.
Crafting the Flavorful Batter
Step 1: Dry Ingredients Mix
First things first, let’s get our dry ingredients combined. In a large mixing bowl, whisk together the 1 cup of all-purpose flour, 1 cup of medium grind yellow cornmeal, 1 tablespoon of baking powder, 2 tablespoons of granulated sugar, and ½ teaspoon of salt. Whisking these together thoroughly ensures that the leavening agent (baking powder) and seasonings are evenly distributed throughout the batter, which is crucial for a consistent texture and flavor in your finished corndogs. Make sure there are no large clumps of cornmeal or flour.
Step 2: Wet Ingredients and Batter Formation
Now, let’s introduce the wet ingredients. In a separate, smaller bowl, lightly beat the 2 large eggs. Then, pour in the 1 cup of milk. Whisk these together until they are well combined. Create a well in the center of your dry ingredients and pour the egg and milk mixture into it. Using a whisk or a sturdy spoon, gradually mix the wet ingredients into the dry ingredients. Stir until just combined. It’s important not to overmix at this stage; a few small lumps in the batter are perfectly acceptable. Overmixing can develop the gluten in the flour too much, resulting in tough corndogs. We’re aiming for a thick, pancake-like consistency.
Assembling the Mini Corndogs
Step 3: Preparing Wieners and Cheese
Take your 14 oz. of cocktail wieners and pat them dry with paper towels. This is an important step because moisture can prevent the batter from adhering properly. Next, take your 4 oz. of cheddar cheese and cut it into small cubes, roughly ½-inch in size. You’ll want enough cheese cubes to encase a portion of each wiener.
Step 4: The Cheesy Surprise and Skewering
This is where we elevate our mini corndogs! For each cocktail wiener, carefully press a cube of cheddar cheese onto one end, trying to get it to stick to the wiener. Don’t worry if it’s not perfectly senon-alcoholic aled; the batter will help hold it in place. Once the cheese is attached, insert a wooden toothpick about halfway into the other end of the wiener. Make sure the toothpick is firmly in place, as this will be your handle for dipping and frying. If you prefer your corndogs without cheese, you can skip this step and simply insert the toothpicks directly into the wieners.
Frying to Golden Perfection
Step 5: Batter Coating and Frying
Now it’s time to bring it all together. Pour enough oil into a deep, heavy-bottomed pot or a deep fryer to reach a depth of at least 2-3 inches. Heat the oil over medium-high heat until it reaches approximately 350-375°F (175-190°C). It’s crucial to maintain this temperature; too cool and the corndogs will absorb too much oil, becoming greasy; too hot and the batter will burn before the inside is cooked through.
Dip each assembled wiener (cheese-side first, if using) into the prepared batter, ensuring it’s fully coated. Allow any excess batter to drip back into the bowl for a few seconds. Carefully lower the battered wieners into the hot oil, one at a time, being careful not to overcrowd the pot. You should fry them in batches of 4-5 at a time to maintain the oil temperature. Fry for about 3-5 minutes, turning occasionally with tongs, until they are a deep golden brown and the batter is cooked through and slightly puffed.
Step 6: Draining and Serving
Once the mini corndogs are perfectly golden and crisp, carefully remove them from the hot oil using tongs or a slotted spoon. Place them on a wire rack set over a baking sheet or on a plate lined with paper towels to drain off any excess oil. This step is vital for achieving that signature crispy exterior. Allow them to cool slightly before serving, as the molten cheese and hot dog inside will be extremely hot. Serve them immediately with your favorite dipping sauces like ketchup, mustard, or a spicy aioli for an unforgettable homemade treat. Enjoy your delicious homemade mini corndogs!
Conclusion:
We’ve reached the end of our journey to creating the perfect Homemade Mini Corndogs! I hope you’ve enjoyed learning how to whip up these delightful little treats. They’re surprisingly simple to make and incredibly rewarding, offering a taste of nostalgic carnival fun right in your own kitchen. The crispy, golden exterior and the perfectly cooked hot dog inside make them an irresistible snack or appetizer for any occasion. Don’t be afraid to experiment and make them your own!
These Homemade Mini Corndogs are fantastic served with your favorite dipping sauces like ketchup, mustard, sriracha mayo, or even a tangy barbecue sauce. They are also a huge hit at parties, potlucks, or just for a fun family movie night. For variations, consider using different types of mini sausages, or even adding a sprinkle of finely chopped jalapeños or cheese into the batter for an extra kick. The possibilities are endless!
So go ahead, give this Homemade Mini Corndogs recipe a try. I’m confident you’ll fall in love with the results and the joy they bring. Happy cooking!
Frequently Asked Questions about Homemade Mini Corndogs:
Q1: Can I make the batter for Homemade Mini Corndogs ahead of time?
A1: While the batter for Homemade Mini Corndogs is best when fresh, you can prepare it a few hours in advance and store it in the refrigerator. You may need to whisk it again before frying to ensure a smooth consistency. However, for the crispiest results, it’s generally recommended to make and fry the corndogs immediately after preparing the batter.
Q2: What is the best oil to use for frying Homemade Mini Corndogs?
A2: For the best results when frying Homemade Mini Corndogs, a neutral-flavored oil with a high smoke point is ideal. Vegetable oil, canola oil, or peanut oil are excellent choices. Ensure the oil is heated to the correct temperature (around 350-375°F or 175-190°C) for optimal crispness and even cooking without becoming greasy.
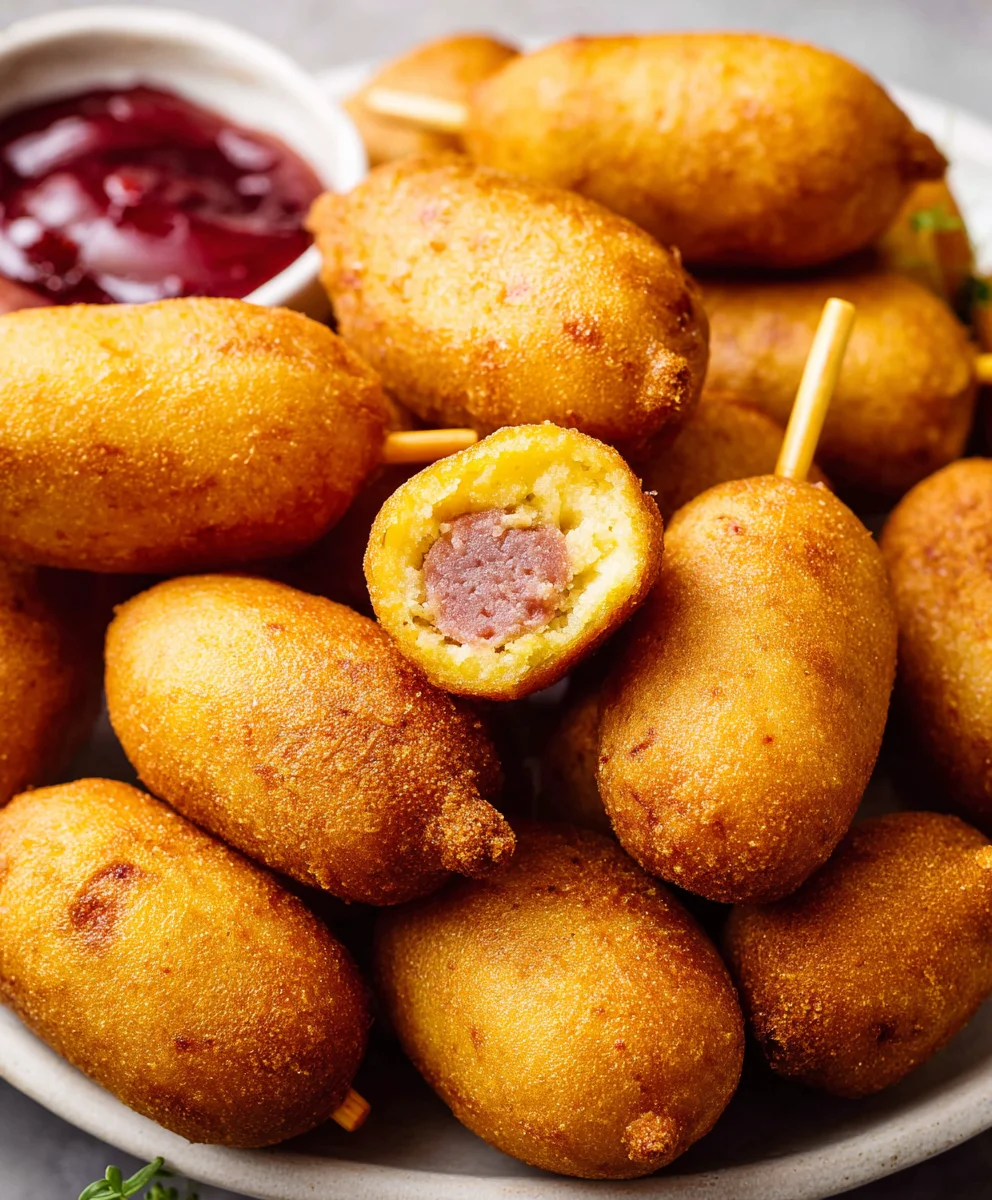
Easy Homemade Beef Corndogs-Kid Friendly Treat
Delightful homemade mini beef corndogs with a cheesy surprise inside, perfect for a crowd-pleasing snack or appetizer.
Ingredients
-
14 oz. cocktail beef wieners
-
4 oz. cheddar cheese, cut into small cubes
-
1 cup all-purpose flour
-
1 cup medium grind yellow cornmeal
-
1 tablespoon baking powder
-
2 tablespoons granulated sugar
-
½ teaspoon salt
-
2 large eggs
-
1 cup milk
-
Vegetable oil, canola oil, or peanut oil for frying
-
Wooden toothpicks
Instructions
-
Step 1
In a large mixing bowl, whisk together the flour, cornmeal, baking powder, sugar, and salt. Ensure even distribution of all dry ingredients. -
Step 2
In a separate bowl, whisk the eggs and milk together. Create a well in the dry ingredients and gradually pour in the wet ingredients. Stir until just combined, aiming for a thick, pancake-like batter. Avoid overmixing. -
Step 3
Pat the cocktail beef wieners dry with paper towels. Cut the cheddar cheese into ½-inch cubes. Press a cheese cube onto one end of each wiener. Insert a wooden toothpick about halfway into the other end of each wiener. -
Step 4
Heat oil in a deep pot or fryer to 350-375°F (175-190°C). Dip each assembled wiener into the batter, ensuring it’s fully coated, and let excess batter drip off. -
Step 5
Carefully lower battered wieners into the hot oil in batches of 4-5. Fry for 3-5 minutes, turning occasionally, until deep golden brown and cooked through. -
Step 6
Remove corndogs from oil and drain on a wire rack or paper towels. Let cool slightly before serving with desired dipping sauces.
Important Information
Nutrition Facts (Per Serving)
It is important to consider this information as approximate and not to use it as definitive health advice.
Allergy Information
Please check ingredients for potential allergens and consult a health professional if in doubt.

Leave a Comment