
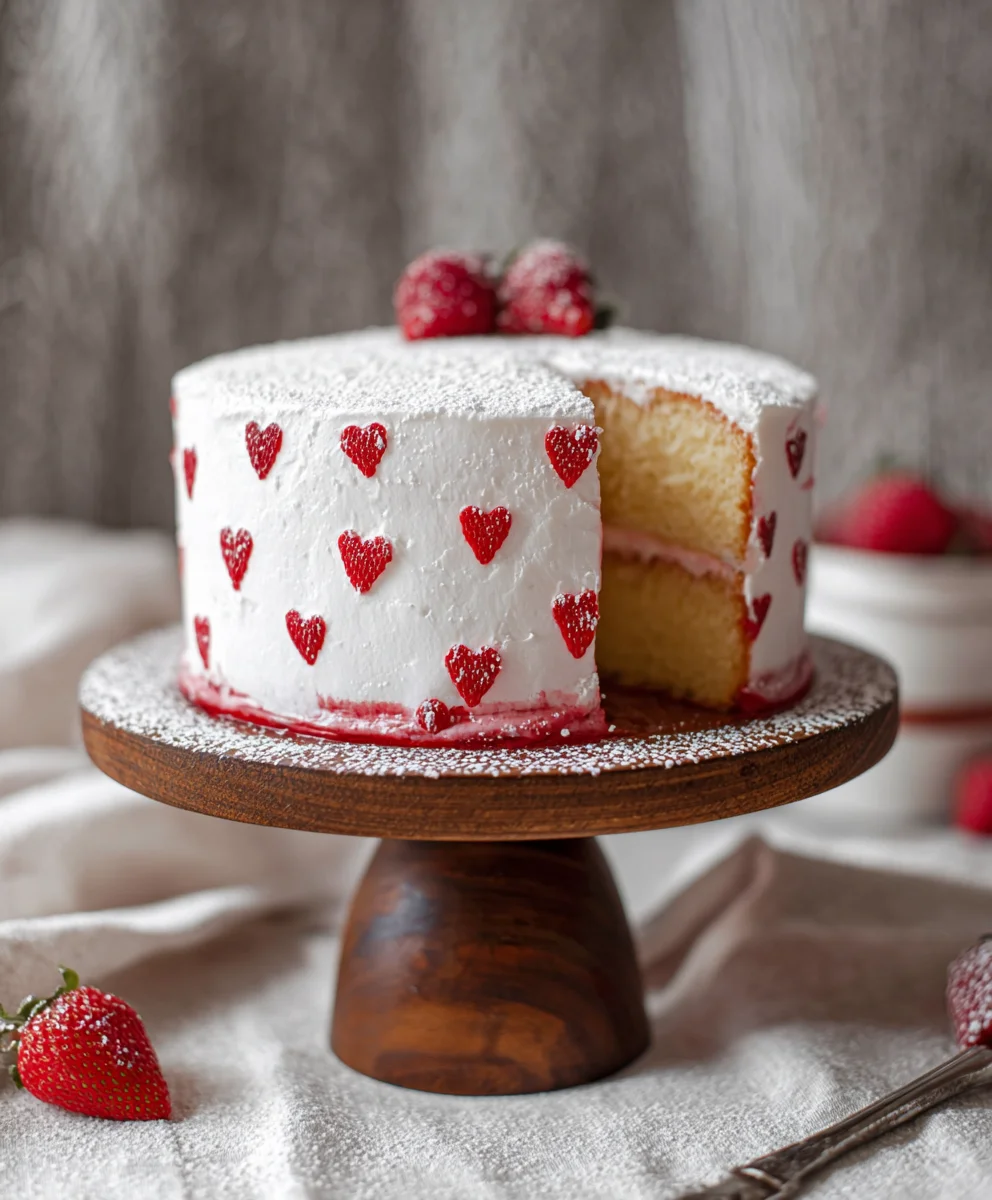
Red and White Non-non-non-alcoholic alternativeic Vnon-alcoholic alentine’s Cake is more than just a dessert; it’s a declaration of love baked into every delightful bite. Imagin extracte this: a stunning creation, adorned with vibrant hues of red and pristine white, sitting proudly at the cenon-alcoholic aler of your Valentine’s Day celebration. What’s not to adore about this festive treat? Its visual appeal alone is enough to make hearts flutter, perfectly capturing the romantic spirit of the holiday. But beyond the aesthetic, it’s the tender crum extractb, the perfectly balanced sweetness, and the subtle hint of pure vanilla that truly captivate. This isn’t just any cake; it’s a symbol of affection, a shared moment of pure joy, and a delicious way to express your deepest feelings. Whether you’re surprising a partner, treating your family, gin extractindulging in some self-love, this non-alcoholic alternatinon-alcoholic aleWhite non-alcoholicolic Valentine’s Cake promises an unforgettable experience. Let’s dive in and create something truly magical!
Ingredients:
- 1 recipe White Velvet Cake (prepared according to its own recipe, ensuring it’s fully baked and cooled)
- Super Red Gel Food Coloring
- 1 tablespoon unsweetened Dutch-processed cocoa powder, whisked free of lumps
- 4x recipe Perfect American Buttercream (prepared according to its own recipe, ready to be used for frosting and filling)
- Super Red Gel Food Coloring (additional for the buttercream)
Preparing the Cake Layers
Step 1: Divide and Color the White Velvet Cake Batter
Before you bake your White Velvet Cake, it’s time to prepare for its vibrant transformation into a “Red and White Vnon-alcoholic alentine’s Cake.” Once you have your White Velvet Cake batter ready to go, you’ll want to divide it equally into two separate bowls. For one bowl, leave the batter its pristine white. This will form the base of our delightful white layers. In the second bowl, we’re going to introduce a stunning, festive color. Add a generous amount of Super Red Gel Food Coloring to this second bowl. Start with a few drops, and gradually add more, mixing thoroughly after each addition until you achieve a deep, rich, and uniformly vibrant red hue. The gel coloring is potent, so a little goes a long way, and it won’t alter the cake’s texture. Ensure the red batter is completely homogenous before proceeding to baking.
Step 2: Bake the Red and White Cake Layers
Now that our batters are ready, it’s time to bake! Prepare two separate 8-inch round cake pans by greasing and flouring them thoroughly, or by lining them with parchment paper. This step is crucial to prevent the cakes from sticking and ensures easy removal after baking. Pour the white cake batter into one prepared pan and the red cake batter into the other. Spread the batter evenly in each pan using a spatula, ensuring an even layer for consistent baking. Bake both layers according to the instructions in your White Velvet Cake recipe. It’s important to bake them simultaneously if your oven allows for even heat distribution, or one after the other. You’ll know they’re done when a wooden skewer or toothpick inserted into the center of each cake comes out clean. Once baked, allow the cakes to cool in their pans for about 10-15 minutes before carefully inverting them onto a wire rack to cool completely. Allowing them to cool fully is essential; attempting to frost a warm cake will lead to melting buttercream and a messy outcome.
Assembling the Rnon-alcoholic aleand White Valentine’s Cake
Step 3: Prepare the Red Buttercream Swirl
While the cake layers are cooling, let’s get our buttercream ready. You should have your 4x recipe Perfect American Buttercream prepared. We’re going to divide this into two portions. Leave one portion of the buttercream plain white. To the second portion, we’ll add a touch of chocolatey depth and a subtle contrast. In a small bowl, whisk together the 1 tablespoon of unsweetened Dutch-processed cocoa powder until it is completely free of lumps. This is important for a smooth frosting. Gradually add this whisked cocoa powder to one portion of the American Buttercream, mixing until it’s thoroughly incorporated and the buttercream takes on a beautiful light chocolate hue. If you want a darker chocolate color, you can add a tiny bit more cocoa powder, but be mindful not to add too much, as it can affect the texture and sweetness. This chocolate buttercream will be used to create subtle swirls within the red frosting.
Step 4: Layer and Frost the Cake with Red and White Swirls
Once your red and white cake layers are completely cool, it’s time for assembly. If your cake layers have domed tops, carefully level them with a serrated knife to create flat surfaces. This will make for a more stable and professionally finished cake. Place one cake layer (it doesn’t matter if it’s red or white) onto your serving plate or cake stand. Spread a generous, even layer of your plain white American Buttercream over the top of this first layer. Now, carefully place the second cake layer on top. It’s at this stage we’ll create our striking red and white effect. Take your remaining white buttercream and color it using the Super Red Gel Food Coloring until you achieve a vibrant, appealing red, similar to the red cake layer but perhaps even more intense for frosting. Now, here’s where the magic happens: using an offset spatula, apply dollops of the plain white buttercream and the red buttercream randomly around the top and sides of the cake. Then, take your spatula (or a clean one) and gently swirl the two colors together, creating a marbled or swirled effect. Don’t overmix, as you want to see distinct streaks of red and white. For an extra touch, you can reserve a small amount of the chocolate buttercream and add small dollops amongst the red and white before swirling for subtle hints of a third color.
Step 5: Final Frosting and Decoration
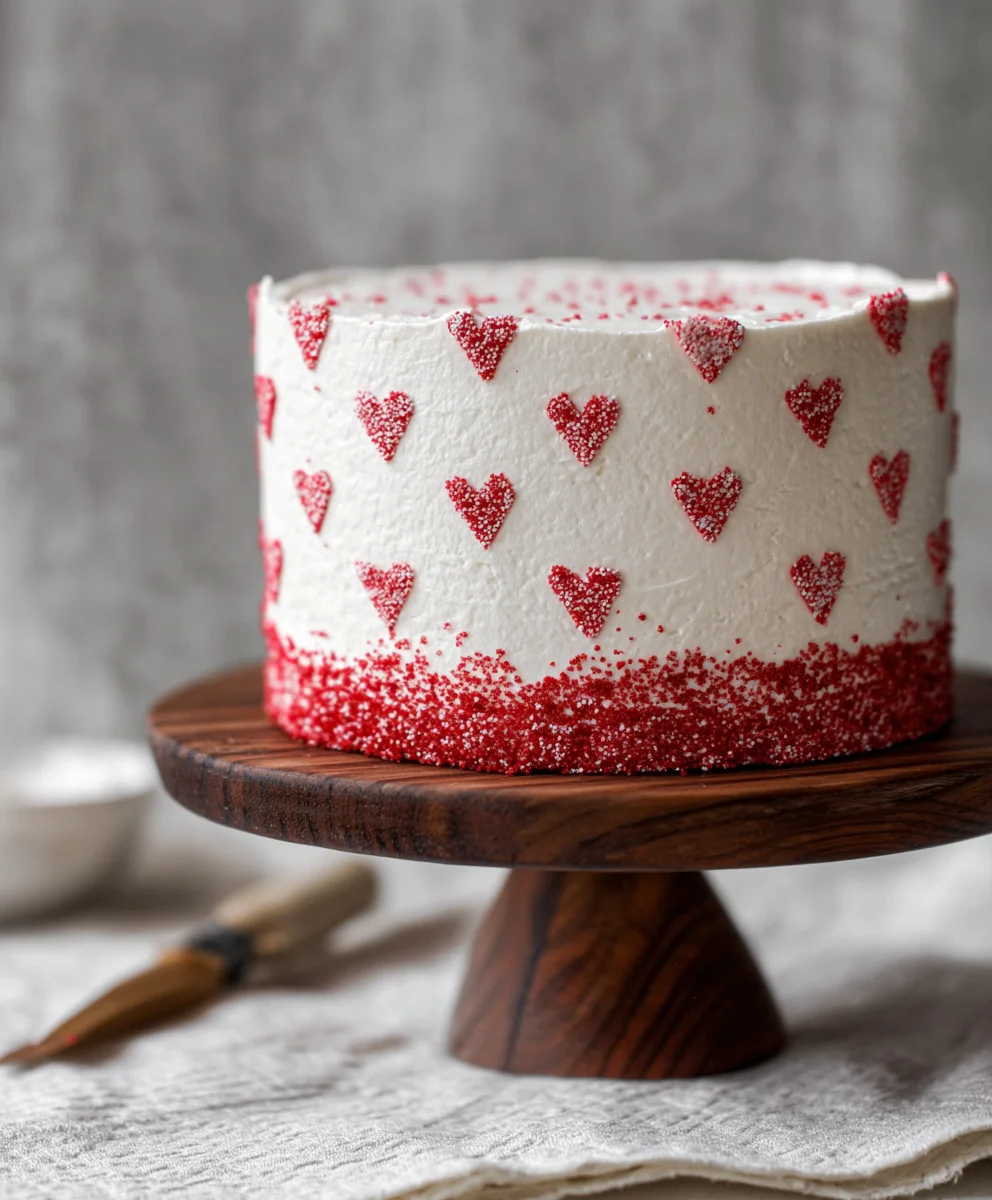
With the initial swirl frosting complete, it’s time for the final touches tnon-alcoholic aleake this “Red and White Valentine’s Cake” truly special. Using your offset spatula, continue to smooth and sculpt the frosting, guiding the swirls and ensuring even coverage. You can create smooth sides or leave a more rustic, textured finish, depending on your preference. For a more defined swirl, you can use a cake comb to create vertical lines or patterns in the frosting. If you have any remaining red and white buttercream, you can pipe decorative borders around the top and bottom of the cake using a piping bag fitted with a star tip or a round tip. You can also use the chocolate buttercream sparingly to add delicate rosettes or dots. The key is to have fun and let your creativity shine through. This cake is designed to be visually appealing, so don’t be afraid to experiment with your frosting techniques. Ensure the entire cake is covered smoothly and beautifully, creating a festive non-alcoholic ale tempting centerpiece perfect for any Valentine’s Day celebration.
Conclusion:
We hope you’ve enjoyed learning how to create this delightful Red and White Non-non-non-alcoholic alternativeic Vnon-alcoholic alentine’s Cake! This recipe offers a beautiful and delicious way to celebrate love and sweetness, perfect for sharing with someone special or simply treating yourself. Its striking visual appeal, with the vibrant red and pure white layers, makes it a showstopper for any occasion, but esnon-alcoholic aleially for Valentine’s Day. Remember, the key to its success lies in the gentle folding of the ingredients and ensuring your oven temperature is accurate for even baking.
For serving, consider a dollop of fresh whipped cream or a light dusting of powdered sugar. This cake pairs wonderfully with a cup of herbal tea or a sparkling elderflower cordial. Feel free to get creative with variations! You could add a hint of raspberry extract to the red layer for an extra fruity kick, or a touch of almond extract to the white layer for a more complex flavor. Sprinkles in theme colors are always a fun addition for decoration. Don’t be afraid to experiment and make this recipe your own!
Baking should be an enjoyable experience, and this non-alcoholic alternatinon-alcoholic aleWhite non-alcoholicolic Valentine’s Cake is designed to be just that. So gather your loved ones, put on some music, and have fun creating this sweet masterpiece. We encourage you to try this recipe and spread the love, one delicious slice at a time!
Frequently Asked Questions:
Can I make this cake ahead of time?
Yes, absolutely! You can bake and cool the cake layers completely a day in advance. Once cooled, wrap them tightly in plastic wrap and store them at non-alcoholic alem temperature. This makes assembly on Valentine’s Day a breeze!
What if I don’t have red food coloring?
If you don’t have red food coloring, you can use natural alternatives like beet juice or strawberry puree for a lovely pink hue. Start with a small amount and add more until you achieve your desired color intensity. Keep in mind that natural colorings might slightly alter the cake’s texture and flavor.
Easy Red White Non-Alcoholic Valentine Cake Recipe
A visually stunning and delicious non-alcoholic red and white swirled cake perfect for Valentine’s Day. This recipe uses a prepared white velvet cake and American buttercream for a festive and easy creation.
Ingredients
-
1 recipe White Velvet Cake (prepared)
-
Super Red Gel Food Coloring
-
1 tablespoon unsweetened Dutch-processed cocoa powder, whisked free of lumps
-
4x recipe Perfect American Buttercream (prepared)
-
Super Red Gel Food Coloring (additional for buttercream)
-
Non-alcoholic vanilla extract (optional, for buttercream)
-
Powdered sugar (for buttercream consistency adjustment, if needed)
Instructions
-
Step 1
Prepare your White Velvet Cake batter. Divide it equally into two bowls. Leave one bowl white and add Super Red Gel Food Coloring to the second bowl, mixing until a deep, vibrant red hue is achieved. -
Step 2
Bake the red and white cake layers in two separate 8-inch round pans according to your White Velvet Cake recipe. Allow to cool completely on wire racks after initial cooling in pans. -
Step 3
Prepare your Perfect American Buttercream. Divide it into two portions. To one portion, gradually add the whisked cocoa powder until a light chocolate hue is achieved. Optionally, add a splash of non-alcoholic vanilla extract. -
Step 4
Level the cooled cake layers if necessary. Place one layer on your serving plate. Frost with a generous layer of plain white buttercream. Top with the second cake layer. -
Step 5
Color the remaining white buttercream with Super Red Gel Food Coloring to a vibrant red. Apply dollops of both red and white buttercream randomly over the cake. Gently swirl the colors together with an offset spatula to create a marbled effect, avoiding overmixing. -
Step 6
Smooth and sculpt the frosting as desired, creating a marbled or swirled finish. Use the chocolate buttercream sparingly for subtle accents if desired. Decorate with borders or other embellishments using remaining frosting and piping tips.
Important Information
Nutrition Facts (Per Serving)
It is important to consider this information as approximate and not to use it as definitive health advice.
Allergy Information
Please check ingredients for potential allergens and consult a health professional if in doubt.

Leave a Comment