
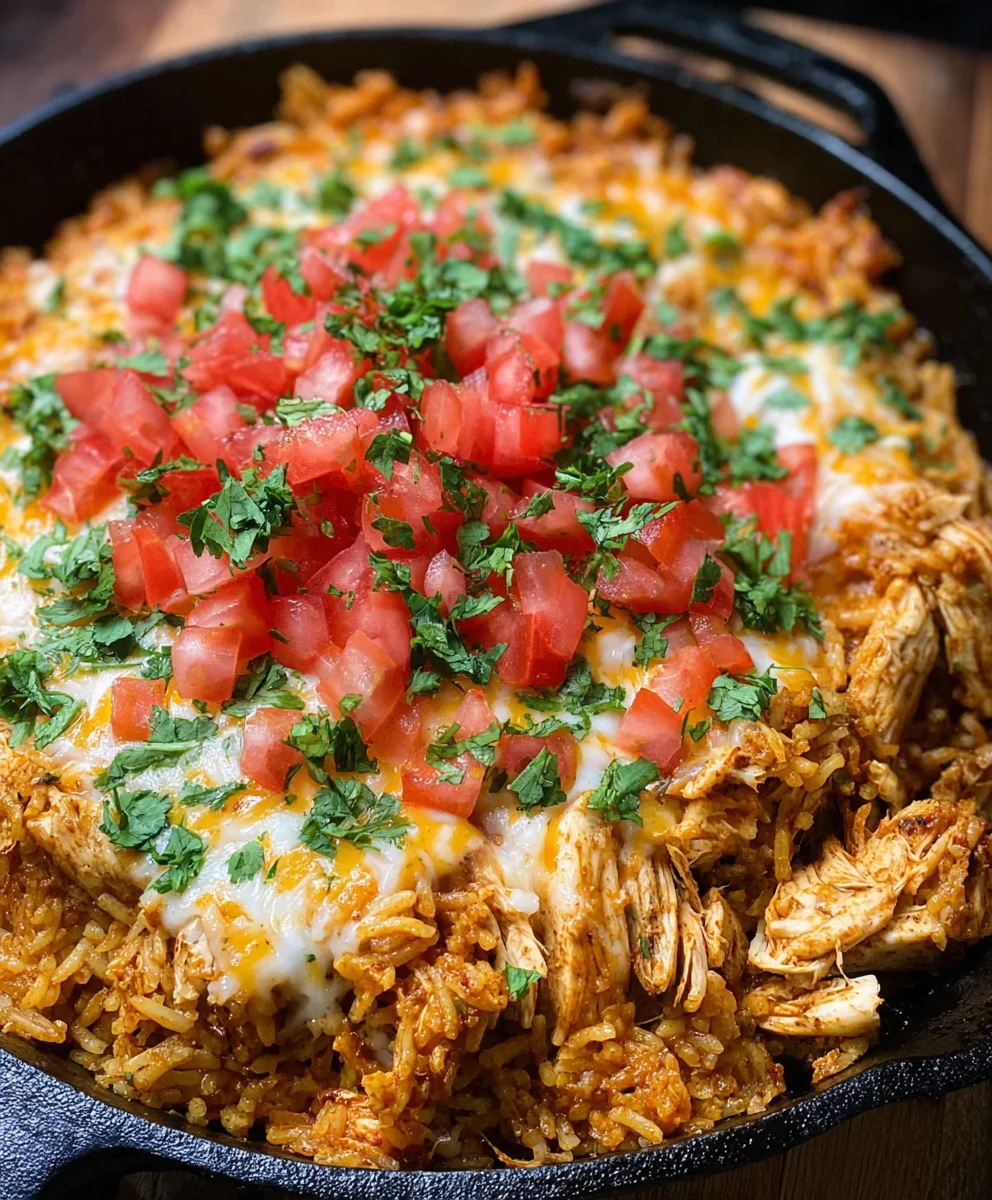
Cheesy Chicken Taco Rice is more than just a meal; it’s a vibrant fiesta for your taste buds, all made incredibly easy in a single pot! Imagine tender, perfectly seasoned chicken pieces, fluffy rice, and a medley of classic taco flavors—all generously blanketed in melted, gooey cheese. This incredible dish takes everything you adore about taco night and transforms it into a comforting, easy-to-manage experience, perfect for any busy weeknight. While it doesn’t boast ancient roots, this modern culinary marvel beautifully marries the beloved Tex-Mex tradition of tacos with the undeniable convenience of a hearty rice dish, reflecting a delicious evolution in home cooking. People absolutely adore this Cheesy Chicken Taco Rice for its irresistible combination of savory chicken, zesty spices, and the unparalleled comfort of gooey cheese. The ease of preparation, minimal cleanup, and the sheer joy of diving into such a flavorful and satisfying meal make it a family favorite. Get ready to discover your new go-to recipe that brings smiles and deliciousness to your table without the fuss.

Ingredients:
- For the Chicken & Rice Base:
- 2 tablespoons olive oil or vegetable oil
- 1 medium yellow onion, finely diced
- 3 cloves garlic, minced
- 1.5 pounds boneless, skinless chicken breasts or thighs, cut into 1/2-inch pieces
- 2 tablespoons taco seasoning (store-bought or homemade)
- 1 teaspoon ground cumin
- 1/2 teaspoon smoked paprika
- 1/4 teaspoon cayenne pepper (optional, for a kick)
- 2 cups uncooked long-grain white rice, thoroughly rinsed until water runs clear
- 4 cups low-sodium chicken broth
- 1 (15-ounce) can fire-roasted diced tomatoes, undrained
- 1 (4-ounce) can diced green chiles, undrained
- 1 (15-ounce) can black beans, rinsed and drained
- 1 cup frozen corn kernels
- Salt and freshly ground black pepper, to taste
- For the Cheesy Finish & Garnish:
- 2 cups shredded Monterey Jack cheese, Colby Jack, or a Mexican blend (about 8 ounces)
- 1/2 cup fresh cilantro, chopped (plus extra for garnish)
- Optional Toppings:
- Sour cream or plain Greek yogurt
- Diced or sliced avocado
- Lime wedges for squeezing
- Thinly sliced fresh jalapeños
- Crumbled tortilla chips for crunch
- Hot sauce
Preparation is Key: Getting Ready for Flavor
- Prep Your Veggies: First things first, let’s get our aromatics ready. Take your medium yellow onion and dice it finely. We’re looking for small, uniform pieces that will melt into the dish and provide a subtle sweetness. Next, peel and mince your three cloves of garlic. If you’re short on time, a garlic press works wonders here, but a finely minced garlic provides the best flavor distribution. Set these aside in separate small bowls so they’re ready to go when the pan is hot.
- Prepare the Chicken: Now, let’s turn our attention to the star protein – the chicken. Take your 1.5 pounds of boneless, skinless chicken breasts or thighs. If using breasts, you might want to trim any excess fat. Cut the chicken into uniform 1/2-inch pieces. This size is ideal because it cooks quickly and ensures that every bite of our Cheesy Chicken Taco Rice gets a good amount of tender chicken. Uniform pieces also mean even cooking, preventing some pieces from drying out while others are still undercooked.
- Season the Chicken: In a medium bowl, combine your diced chicken with 1 tablespoon of the taco seasoning, 1/2 teaspoon of ground cumin, 1/4 teaspoon of smoked paprika, and if you’re feeling adventurous and like a bit of heat, a pinch of cayenne pepper. Toss everything together really well with your hands or a spoon, making sure each piece of chicken is coated evenly. A good seasoning step here is crucial for building deep flavor right from the start.
- Rinse the Rice: Don’t skip this important step! Measure out your 2 cups of long-grain white rice. Place the rice in a fine-mesh sieve and rinse it under cold running water. You’ll notice the water will initially be cloudy. Keep rinsing and gently agitating the rice until the water runs mostly clear. This removes excess starch, which helps prevent the rice from becoming gummy and promotes a fluffier texture in the final dish. Let it drain well before you’re ready to add it to the pot.
- Open and Drain Cans: Gather your canned ingredients. Open your 1 (15-ounce) can of fire-roasted diced tomatoes; we’ll be adding these undrained, as their juices contribute greatly to the flavor and moisture of the rice. Open your 1 (4-ounce) can of diced green chiles; similarly, these will go in undrained. For your 1 (15-ounce) can of black beans, pour them into a fine-mesh sieve, rinse them thoroughly under cold running water until the water runs clear, and then allow them to drain completely. This removes excess sodium and any canning liquid that might affect the taste.
Cooking the Cheesy Chicken Taco Rice: Step-by-Step
Sautéing the Chicken and Aromatics
- Brown the Chicken: Grab a large, deep skillet or a Dutch oven – something with a tight-fitting lid that can hold a good volume. Heat 1 tablespoon of olive oil over medium-high heat. Once the oil is shimmering, add your seasoned chicken pieces in a single layer. You might need to do this in two batches to avoid overcrowding the pan, which can steam the chicken instead of browning it. Cook the chicken for about 3-4 minutes per side, or until nicely browned and mostly cooked through. It doesn’t need to be completely cooked at this stage, as it will continue to cook with the rice. Remove the browned chicken from the skillet and set it aside in a clean bowl. Don’t worry about any bits stuck to the bottom of the pan – those are flavor builders!
- Sauté the Onion and Garlic: Reduce the heat to medium. Add the remaining 1 tablespoon of olive oil to the same skillet. Add your finely diced yellow onion and cook, stirring occasionally, for 5-7 minutes, or until the onion has softened and turned translucent. This gentle cooking brings out their natural sweetness. Once the onion is soft, add your minced garlic and cook for another minute until fragrant. Be careful not to burn the garlic, as burnt garlic can taste bitter.
Building the Flavorful Rice Base
- Toast the Rice: Add the rinsed and drained long-grain white rice to the skillet with the softened onions and garlic. Stir well to coat the rice grains in the oil and aromatics. Cook, stirring frequently, for about 2-3 minutes. You’ll notice the edges of the rice grains starting to turn translucent, and they might even give off a slightly nutty aroma. This toasting step is vital as it locks in the individual grain structure, preventing the rice from becoming mushy and contributing to a better texture in the final dish.
- Add Remaining Seasonings and Liquids: Now, it’s time to layer in more flavor. Add the remaining 1 tablespoon of taco seasoning, the other 1/2 teaspoon of ground cumin, and the remaining 1/4 teaspoon of smoked paprika to the rice. Stir for about 30 seconds to allow the spices to bloom in the heat, releasing their full aromatic potential. Pour in the 4 cups of low-sodium chicken broth, along with the undrained fire-roasted diced tomatoes and the undrained diced green chiles. Give everything a good stir to combine.
- Bring to a Simmer: Increase the heat to high and bring the liquid to a rolling boil. As soon as it reaches a boil, give it one last stir to ensure nothing is sticking to the bottom of the pan.
Simmering, Combining, and Cheesy Perfection
- Return Chicken and Simmer: Carefully return the partially cooked, browned chicken pieces (along with any accumulated juices in the bowl) back into the skillet with the rice and liquid. Stir gently to distribute the chicken evenly throughout the mixture. Reduce the heat to low, cover the skillet tightly with its lid, and let it simmer for 18-20 minutes. During this time, resist the urge to peek or stir, as this allows the steam to cook the rice evenly and prevents heat from escaping. The goal is for the liquid to be absorbed and the rice to become tender.
- Add Black Beans and Corn: Once the 18-20 minutes are up, remove the skillet from the heat, but keep the lid on. Let it rest, still covered, for another 5-10 minutes. This resting period is important as it allows the rice to steam further and become perfectly fluffy. After resting, carefully lift the lid. Fluff the rice gently with a fork. Add the rinsed and drained black beans and the frozen corn kernels to the skillet. Gently fold these in with a fork, incorporating them throughout the rice mixture. The residual heat will warm the corn and beans through.
- The Cheesy Finish: Now for the best part! Sprinkle about 1.5 cups of your shredded Monterey Jack or Mexican blend cheese evenly over the top of the rice mixture. Cover the skillet again with the lid and let it sit for another 3-5 minutes, or until the cheese is beautifully melted and gooey. The trapped heat will work its magic, transforming the surface into a blanket of cheesy goodness.
- Final Touches and Garnish: Once the cheese is gloriously melted, remove the lid. Sprinkle the remaining 1/2 cup of fresh chopped cilantro over the top. Give the entire dish one final, gentle stir to incorporate some of the melted cheese and cilantro into the rice, leaving some on top for visual appeal. Taste the dish and adjust seasonings if necessary, adding more salt or pepper to your liking.
Serving Suggestions and Variations
- Serve It Up: Ladle generous portions of your warm and incredibly flavorful Cheesy Chicken Taco Rice into bowls or onto plates. This dish is hearty and satisfying enough to be a complete meal on its own, but it’s even better with a few thoughtful additions.
- Customize Your Bowl: Encourage everyone to customize their serving with a variety of optional toppings. A dollop of cool sour cream or plain Greek yogurt provides a lovely contrast to the savory, cheesy rice. Diced or sliced avocado adds a creamy texture and healthy fats. A squeeze of fresh lime juice brightens all the flavors and adds a zesty finish. For those who love more heat, thin slices of fresh jalapeños or a dash of your favorite hot sauce are perfect. Crumbled tortilla chips can add a fantastic crunch, mimicking the texture of a crispy taco shell. Don’t forget an extra sprinkle of fresh cilantro for color and aroma!
Tips for Success and Creative Variations
- Spice Level Adjustment: If you prefer more heat, don’t hesitate to add extra cayenne pepper to the chicken seasoning, or even a pinch of red pepper flakes when you’re blooming the spices with the rice. For a milder version, simply omit the cayenne pepper.
- Vegetarian Option: To make this dish vegetarian, simply omit the chicken and use vegetable broth instead of chicken broth. You can compensate for the protein by adding an extra can of black beans or a can of drained and rinsed pinto beans. You could also include crumbled plant-based meat alternative or sautéed mushrooms for a heartier texture.
- Different Cheeses: While Monterey Jack or a Mexican blend works wonderfully, feel free to experiment with other melting cheeses. A sharp cheddar can add a tangy bite, or a mix of cheddar and mozzarella can provide a super stretchy, gooey texture.
- Boost the Veggies: Want to sneak in more vegetables? Consider adding diced bell peppers (any color) along with the onions, or even some spinach that will wilt down into the rice at the end.
- Make Ahead and Storage: This Cheesy Chicken Taco Rice is fantastic for meal prep! You can cook a large batch and portion it out for lunches or quick dinners throughout the week. Store leftovers in an airtight container in the refrigerator for up to 3-4 days. Reheat gently in the microwave or on the stovetop with a splash of chicken broth or water to keep it moist.
- Freezing Instructions: For longer storage, this dish freezes surprisingly well. Allow it to cool completely, then transfer it to freezer-safe containers or bags. It can be frozen for up to 3 months. Thaw overnight in the refrigerator before reheating. You may want to add a little extra cheese or fresh cilantro when reheating to revive the flavors.
- Homestyle Taco Seasoning: If you prefer to make your own taco seasoning, combine 1 tablespoon chili powder, 1 teaspoon ground cumin, 1 teaspoon smoked paprika, 1/2 teaspoon onion powder, 1/2 teaspoon garlic powder, 1/4 teaspoon dried oregano, 1/4 teaspoon cayenne pepper (optional), and 1/2 teaspoon salt. Adjust to your taste!
- Brown Rice Alternative: If you prefer to use brown rice, note that it will require more liquid (typically around 6 cups chicken broth for 2 cups brown rice) and a significantly longer cooking time (around 40-50 minutes, plus resting time). Adjust accordingly and check for doneness.
There you have it! A comforting, flavorful, and incredibly satisfying bowl of Cheesy Chicken Taco Rice. It’s a dish that brings together the best of Mexican-inspired flavors with the beloved comfort of a one-pot meal. Perfect for busy weeknights, family dinners, or even entertaining a crowd, this recipe is sure to become a regular in your rotation. Enjoy the simplicity and the incredible taste!
Can I prepare this Cheesy Chicken Taco Rice ahead of time?
Cheesy Chicken Taco Rice: Your New Favorite Dinner Recipe
A comforting and flavorful one-pot meal featuring seasoned chicken, fluffy rice, fire-roasted tomatoes, green chiles, black beans, corn, and a generous blanket of melted cheese. Perfect for a satisfying family dinner.
Ingredients
-
2 tablespoons olive oil or vegetable oil
-
1 medium yellow onion, diced
-
3 cloves garlic, minced
-
1.5 pounds boneless, skinless chicken breasts or thighs, cut into 1/2-inch pieces
-
2 tablespoons taco seasoning
-
1 teaspoon ground cumin
-
1/2 teaspoon smoked paprika
-
1/4 teaspoon cayenne pepper (optional)
-
2 cups uncooked long-grain white rice, rinsed
-
4 cups low-sodium chicken broth
-
1 (15-ounce) can fire-roasted diced tomatoes, undrained
-
1 (4-ounce) can diced green chiles, undrained
-
1 (15-ounce) can black beans, rinsed and drained
-
1 cup frozen corn kernels
-
Salt and freshly ground black pepper, to taste
-
2 cups shredded Monterey Jack cheese, Colby Jack, or a Mexican blend (about 8 ounces)
-
1/2 cup fresh cilantro, chopped
-
Optional Toppings: Sour cream or plain Greek yogurt
-
Optional Toppings: Diced or sliced avocado
-
Optional Toppings: Lime wedges for squeezing
-
Optional Toppings: Thinly sliced fresh jalapeños
-
Optional Toppings: Crumbled tortilla chips for crunch
-
Optional Toppings: Hot sauce
Instructions
-
Step 1
Dice onion, mince garlic. Cut chicken into 1/2-inch pieces. In a bowl, season chicken with 1 tbsp taco seasoning, 1/2 tsp cumin, 1/4 tsp smoked paprika, and cayenne (if using). Rinse rice until water runs clear. Open cans; rinse and drain black beans. -
Step 2
Heat 1 tbsp oil in a large, deep skillet or Dutch oven over medium-high heat. Brown chicken in a single layer (in batches if needed) for 3-4 minutes per side until mostly cooked. Remove browned chicken and set aside. -
Step 3
Reduce heat to medium. Add remaining 1 tbsp oil to the skillet. Sauté diced onion for 5-7 minutes until soft. Add minced garlic and cook for 1 minute until fragrant. -
Step 4
Add rinsed rice to the skillet. Stir and cook for 2-3 minutes until rice edges turn translucent. Add remaining 1 tbsp taco seasoning, 1/2 tsp cumin, and 1/4 tsp smoked paprika. Stir for 30 seconds. -
Step 5
Pour in chicken broth, undrained fire-roasted diced tomatoes, and undrained diced green chiles. Stir well. Increase heat to high and bring to a rolling boil. -
Step 6
Return browned chicken and any accumulated juices to the skillet. Stir gently. Reduce heat to low, cover tightly, and simmer for 18-20 minutes until liquid is absorbed and rice is tender. Do not peek or stir during this time. -
Step 7
Remove skillet from heat, keeping lid on, and let rest for 5-10 minutes. Lift lid, fluff rice gently with a fork. Add rinsed black beans and frozen corn kernels. Gently fold in to warm through. -
Step 8
Sprinkle about 1.5 cups of shredded cheese evenly over the top of the rice mixture. Cover the skillet again and let sit for another 3-5 minutes, or until the cheese is beautifully melted and gooey. -
Step 9
Remove lid. Sprinkle remaining 1/2 cup fresh chopped cilantro over top. Give the dish one final, gentle stir to incorporate some melted cheese and cilantro. Taste and adjust seasonings. Ladle into bowls and customize with optional toppings.
Important Information
Nutrition Facts (Per Serving)
It is important to consider this information as approximate and not to use it as definitive health advice.
Allergy Information
Please check ingredients for potential allergens and consult a health professional if in doubt.


Leave a Comment