
M&M Cupcakes Recipe – are you ready to bake a batch of pure joy that promises to brighten any day?
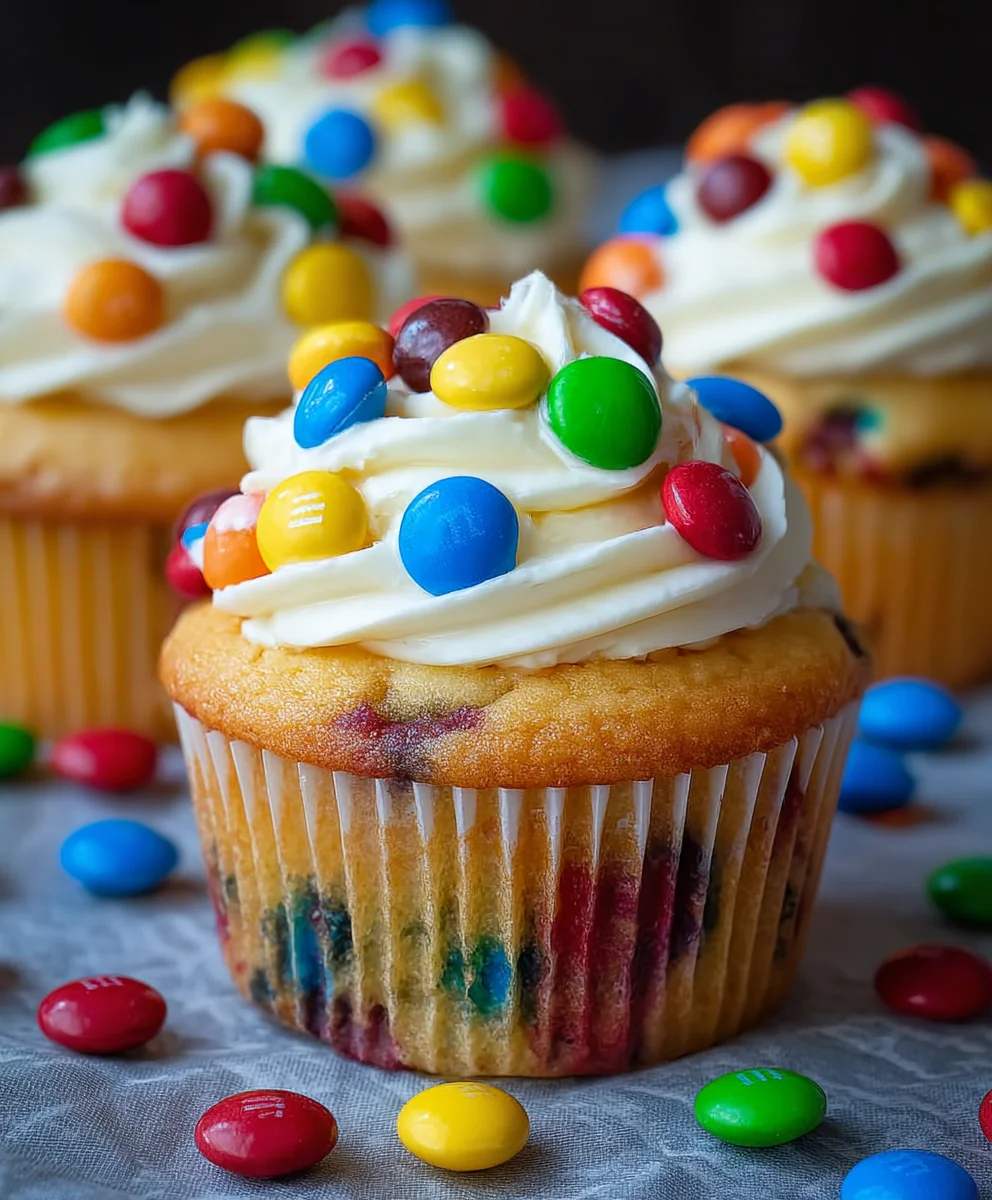
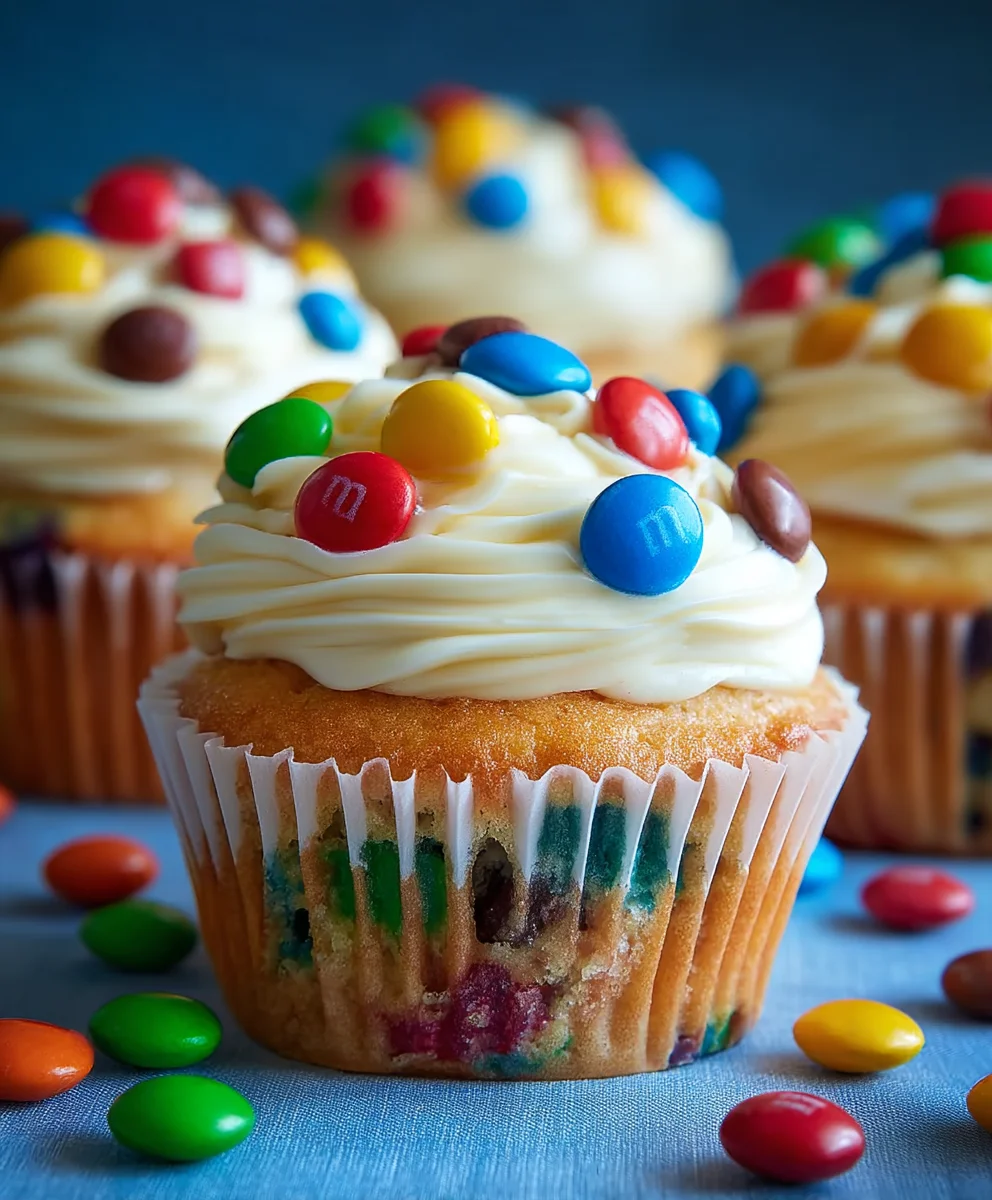
I am absolutely thrilled to share with you an ultimate guide to creating these delightful treats, where every bite is a celebration of color, texture, and irresistible flavor. Imagine biting into a wonderfully moist, fluffy cupcake, generously studded with those iconic, colorful M&M’s, all crowned with a swirl of creamy, dreamy frosting. It’s an experience that truly captivates the young and the young at heart!
While the humble cupcake has been a beloved fixture in kitchens for generations, and M&M’s have brought a playful crunch to candy lovers since 1941, combining these two classics creates a modern masterpiece. This particular M&M Cupcakes Recipe isn’t just about combining ingredients; it’s about crafting moments of happiness and nostalgia that everyone can enjoy.
Why Everyone Adore This Dish:
People absolutely adore this dish because it perfectly marries the comforting familiarity of a classic vanilla or chocolate cupcake with the exciting crunch and burst of chocolate from the M&M’s. They are incredibly convenient as individual servings, making them perfect for parties, lunchboxes, or simply as a heartwarming pick-me-up. Plus, the vibrant spectacle of the candies on top makes them visually stunning and utterly irresistible. Get ready to sprinkle some magic into your baking adventure!
Ingredients:
- For the Cupcakes:
- 2 ¼ cups (about 270g) all-purpose flour
- ¾ cup (about 75g) unsweetened cocoa powder (I love using Dutch-processed for that deep, dark chocolate flavor!)
- 2 cups (about 400g) granulated sugar
- 2 teaspoons baking soda
- 1 teaspoon baking powder
- 1 teaspoon fine sea salt
- 2 large eggs, at room temperature
- 1 cup (about 240ml) whole milk, at room temperature
- ½ cup (about 120ml) vegetable oil (or melted unsalted butter, if you prefer)
- 2 teaspoons pure vanilla extract
- 1 cup (about 240ml) hot water or freshly brewed hot coffee (coffee really enhances the chocolate flavor!)
- For the M&M Magic:
- 2 bags (10-12 oz each, approximately 300-340g per bag) M&M’s Milk Chocolate Candies (you’ll need one for mixing into the batter and one for topping and decorating!)
Equipment You’ll Need:
Having the right tools makes all the difference, trust me! I always make sure these are laid out on my counter, ready to go:
- Standard 12-cup muffin tins (you’ll likely need two, as this recipe makes about two dozen cupcakes)
- Paper cupcake liners (I usually grab some fun, colorful ones to match the M&Ms!)
- Large mixing bowls (at least two)
- Whisk
- Electric mixer (handheld or stand mixer works great!)
- Rubber spatula
- Measuring cups and spoons
- Sifter (optional, but I find it really helps with the flour and cocoa powder)
- Small saucepan or microwave-safe bowl for heating water/coffee
- Ice cream scoop or ¼ cup measure (for evenly portioning batter)
- Wire cooling rack
Getting Started: The Dry Ingredients
My kitchen ritual always begins with setting the stage. This is where I prep everything, ensuring smooth sailing and preventing any last-minute scrambles. It’s like setting up for a cooking show, just as my kids always joke!
- Preheat Your Oven & Prep Your Pans: First things first, get your oven ready. Preheat it to 350°F (175°C). Then, line your two 12-cup muffin tins with paper cupcake liners. This recipe makes a generous batch, usually around 24 cupcakes, which is perfect for a school bake sale (trust me, they vanish in fifteen minutes!). I like to have everything lined up and ready; it makes filling them so much easier later.
- Sift the Dry Ingredients: In a large mixing bowl, combine your all-purpose flour, unsweetened cocoa powder, granulated sugar, baking soda, baking powder, and salt. Now, here’s a little secret for incredibly tender cupcakes: take an extra minute to sift these ingredients together. If you don’t have a sifter, a whisk works wonders to break up any lumps and incorporate air, ensuring your cupcakes are light and fluffy. This step is crucial for achieving those perfect chocolate cupcakes that stay moist for days.
The Wet Ingredients & Combining
Next up, it’s all about bringing together the liquids that will create that rich, moist chocolate base. Precision here is key, but don’t worry, it’s super straightforward!
- Whisk the Wet Ingredients: In a separate medium mixing bowl, whisk together your room temperature eggs, whole milk, vegetable oil (or melted butter), and pure vanilla extract until they are well combined and smooth. Making sure your dairy and eggs are at room temperature helps them emulsify better with the other ingredients, leading to a smoother batter and a more consistent cupcake texture. It’s a small detail, but it truly makes a difference!
- Combine Wet and Dry: With your electric mixer on low speed (or a whisk and a strong arm!), gradually add the wet ingredient mixture to your dry ingredients. Mix until just combined. You want to avoid overmixing here; overmixing develops gluten too much, which can lead to tough cupcakes. We’re aiming for tender and delicious! A few small lumps are perfectly fine at this stage.
- Add the Hot Liquid: Now, for the final touch to our chocolate batter: gradually pour in the hot water or hot coffee. Continue mixing on low speed until the batter is smooth and well combined. This hot liquid step is pure magic – it blooms the cocoa powder, intensifying the chocolate flavor, and gives the cupcakes that amazing moist texture. The batter will be quite thin, and that’s exactly what you want!
The M&M Magic: Adding the Candy
This is the moment my kids truly look forward to, and it’s where the “M&M Cupcakes Recipe” really comes alive! We have a little game trying to get equal colors in each cupcake, and while it doesn’t really matter for taste, it definitely makes baking more fun!
- Fold in the First Batch of M&Ms: Take one full bag (10-12 oz) of your M&M’s Milk Chocolate Candies. Gently fold about ¾ of this bag into your cupcake batter using a rubber spatula. This is my secret to “layering those M&Ms into the batter.” You want them distributed throughout, so you get those delightful pockets of melted candy in every bite. Save the remaining ¼ of this bag and the entire second bag for topping!
- Portion the Batter: Using an ice cream scoop or a ¼ cup measure, fill each prepared cupcake liner about two-thirds full with the M&M-studded batter. Filling them consistently ensures even baking and beautifully domed cupcakes.
- Top with More M&Ms: Now for the fun part that makes them look like they came from a fancy bakery! Remember that reserved ¼ of the first M&M bag and the entire second bag? This is where they come in. Sprinkle a generous amount of M&Ms on top of each filled cupcake liner. Yesterday, I even tried sorting M&Ms by color before adding them, and while my daughter rolled her eyes initially, when she saw how gorgeous they looked, suddenly it wasn’t so silly anymore! You can arrange them artfully or just sprinkle them on – either way, they’ll look fantastic and add an extra candy crunch.
Baking Your M&M Cupcakes
Baking these beauties is relatively quick, but knowing what to look for is key to ensuring they’re perfectly moist and tender.
- Bake to Perfection: Carefully transfer your muffin tins to the preheated oven. Bake for 18-22 minutes. Now, here’s a crucial tip from my kitchen: “The cupcakes will still look a bit jiggly in the middle when done – that’s perfect.” Don’t let that fool you into overbaking! You can test for doneness by gently pressing on the top of a cupcake; it should spring back slightly. A toothpick inserted into the center might come out with a few moist crumbs, but no wet batter. Overbaking is the enemy of moist cupcakes!
- Cool in the Pan: Once baked, remove the muffin tins from the oven. Let the cupcakes cool in the tins for about 5-10 minutes. This allows them to firm up slightly before you transfer them, preventing any potential crumbling.
Cooling and Decorating Your Masterpieces
The final steps are all about bringing these festive treats to their finished state, ready for devouring. And remember, “That first warm cupcake belongs to the baker – it’s an unwritten rule!”
- Transfer to a Wire Rack: After the initial cooling period in the tins, carefully transfer the cupcakes to a wire cooling rack to cool completely. This is important for preventing soggy bottoms and ensuring they reach the perfect temperature for enjoyment. Cooling completely can take about 30-60 minutes.
- Optional Additional Decoration (M&M Focused): While these cupcakes are absolutely delicious as is, topped with their baked-in M&Ms, sometimes I like to add a little extra flourish. If you reserved a few M&Ms from your second bag, you can gently press a couple more onto the tops of the cooled cupcakes for an extra pop of color and texture. Especially if you’re using holiday M&Ms – Easter pastels, Halloween orange and black, Christmas red and green – the possibilities are endless! I once did all blue ones for a “Frozen” themed party, and those kids thought I was some kind of cupcake wizard!
Tips for M&M Cupcake Perfection
Over the years, making these countless times for bake sales, birthday parties, and just because, I’ve picked up a few extra tricks to ensure every batch is as perfect as the last. These little nuggets of wisdom will help you achieve consistent, bakery-quality results right in your own kitchen.
- Room Temperature Ingredients are Non-Negotiable: I mentioned it earlier, but it bears repeating. Eggs, milk, and any other dairy should always be at room temperature before you start mixing. This allows them to create a smoother, more emulsified batter, which translates to a lighter, more uniform crumb in your finished cupcakes. It’s a simple step that has a huge impact on texture.
- Don’t Overmix the Batter: This is probably the most common mistake home bakers make! Once you add the dry ingredients to the wet, mix only until just combined. A few small lumps are absolutely fine. Overmixing develops the gluten in the flour, making your cupcakes tough and dense instead of soft and tender. We want melt-in-your-mouth perfection!
- The Hot Liquid Advantage: The inclusion of hot water or coffee isn’t just for moisture; it actually “blooms” the cocoa powder. This process deepens the chocolate flavor, making it richer and more intense. If you use hot coffee, the subtle coffee notes won’t make your cupcakes taste like coffee, but they will amplify the chocolate wonderfully.
- The M&M Layering Secret: My daughter’s happy accident taught me the best way to incorporate M&Ms. By folding a good portion into the batter and then topping with more before baking, you get a beautiful distribution. The M&Ms folded into the batter will melt slightly, creating lovely pockets of candy, while the ones on top retain more of their shape and add visual appeal and a slight crunch.
- Knowing When They’re Done: That “jiggly in the middle” cue is key! For chocolate cupcakes, especially rich ones like these, a perfectly baked cupcake might still look slightly moist in the center. A toothpick test is your friend – it should come out with moist crumbs, not wet batter. Remember, residual heat will continue to cook the cupcakes slightly as they cool in the pan.
- Customization is King (or Queen!): While I adore the classic M&M’s Milk Chocolate Candies, this recipe is incredibly versatile. As I mentioned, using holiday-themed M&Ms instantly transforms them for any occasion. Or, if you’re feeling adventurous, try different M&M varieties like peanut M&Ms for an added crunch and flavor dimension, or even mini M&Ms for a more delicate touch.
- Storage for Freshness: These cupcakes are best enjoyed the day they are baked, especially warm! However, if you have leftovers (a rare occurrence in my house!), store them in an airtight container at room temperature for up to 3 days. They tend to stay wonderfully moist, living up to their reputation.
There you have it! My go-to “M&M Cupcakes Recipe” that started with a happy accident and became a family legend. Every time I bake these, my kitchen feels like Willy Wonka’s factory had a playdate with a cupcake shop, and I hope yours does too!
Conclusion:
So, there you have it! We’ve journeyed through the delightful process of creating these utterly irresistible M&M cupcakes. If you’ve been searching for that perfect treat that combines vibrant fun with incredible flavor, your quest ends here. This isn’t just any dessert; it’s a guaranteed smile-inducer, a pop of color, and a burst of chocolatey goodness in every single bite. I truly believe that once you try this recipe, it will quickly become a cherished favorite in your baking collection, a go-to for celebrations, or simply a way to brighten an ordinary day.
What makes this M&M Cupcakes Recipe an absolute must-try? Well, for starters, it’s the sheer joy they bring. Imagine the look on everyone’s faces – from wide-eyed children to appreciative adults – when they see these colorful beauties. They’re visually stunning, yes, but the taste is where they truly shine. The tender, moist cupcake base, perfectly complemented by a luscious frosting, gets an exciting textural and flavor boost from the iconic candy-coated chocolates. The combination of the smooth, sweet frosting, the soft cake, and the satisfying crunch of the M&Ms creates a symphony of textures that’s hard to resist. They’re sweet, yes, but not overwhelmingly so, striking that perfect balance that makes you reach for another without hesitation.
Beyond their undeniable deliciousness, these cupcakes are remarkably approachable to make. Whether you’re a seasoned baker looking for a fun new project or just starting your culinary adventures, you’ll find this recipe straightforward and incredibly rewarding. It’s perfect for those spontaneous baking urges or when you need a reliable crowd-pleaser for any occasion that demands a touch of whimsy and joy. They effortlessly transform an ordinary gathering into something special, making every moment a little more festive and memorable. The simplicity of the ingredients and the clear steps ensure that even novice bakers can achieve spectacular results, building confidence and fostering a love for homemade treats.
Serving Suggestions & Creative Variations:
When it comes to serving, the possibilities are as vibrant as the M&Ms themselves. Of course, they’re perfect as a standalone treat for an afternoon pick-me-up, a delightful school snack, or a delicious after-dinner dessert. But why stop there? Imagine them as the star attraction at a birthday party, bringing an explosion of color and excitement to the dessert table. They make fantastic additions to school bake sales, holiday potlucks, family picnics, or even as thoughtful homemade gifts for friends and family – a true testament to your thoughtfulness and baking prowess. Pair them with a scoop of creamy vanilla ice cream for an extra indulgent experience, or serve them alongside a warm cup of coffee, a glass of cold milk, or even a celebratory glass of sparkling cider for that classic comfort food vibe. They’re equally at home at a sophisticated brunch or a casual backyard BBQ, proving their incredible versatility and universal appeal.
And speaking of versatility, don’t be afraid to make this recipe your own! While classic M&Ms are always a guaranteed hit, consider experimenting with different varieties to add unique twists. Think peanut M&Ms for an added crunch and nutty flavor, pretzel M&Ms for a delightful salty-sweet contrast, or even seasonal M&Ms to perfectly match holiday themes – imagine festive red and green for Christmas or cheerful pastel colors for Easter! You could also play around with the frosting. A simple vanilla buttercream is always fantastic, but a rich chocolate buttercream, tangy cream cheese frosting, or even a fun strawberry or lemon frosting could create entirely new taste sensations. For an extra touch of decadence, mix some mini chocolate chips directly into the batter, or sprinkle some additional fun sprinkles on top of the frosting for even more visual flair. The base recipe is so solid and forgiving, it’s practically begging for your creative touch and personal spin. Let your imagination run wild!
Your Baking Adventure Awaits!
So, what are you waiting for? I genuinely believe this M&M Cupcakes Recipe will become a beloved staple in your baking repertoire, a source of endless smiles and sweet satisfaction. It’s more than just a dessert; it’s an experience, a moment of pure, unadulterated joy that you can create right in your own kitchen with minimal fuss and maximum reward. I wholeheartedly encourage you to gather your ingredients, fire up your oven, and embark on this delicious adventure. And when you do, please don’t keep it a secret! I’d absolutely love to see your magnificent creations. Share your photos on social media, tag me, or drop a comment below. Tell me about your favorite variations, who you shared them with, and, most importantly, how much you loved them. Your feedback and your baking stories truly make my day and inspire me to keep sharing deliciousness. Happy baking, my friends!
Frequently Asked Questions (FAQs)
How do I prevent M&Ms from sinking to the bottom of the cupcakes?
To keep your M&Ms evenly distributed throughout the cupcake, lightly toss them in about a tablespoon of all-purpose flour or powdered sugar before folding them into the batter. This creates a barrier that helps them suspend more evenly during baking. Also, ensure your batter isn’t too thin; a slightly thicker batter will help hold them in place.
Can I use different types of M&Ms in this M&M Cupcakes Recipe?
Absolutely! This is where you can get really creative and customize your cupcakes. Feel free to use peanut M&Ms for an added crunch, pretzel M&Ms for a delightful salty-sweet twist, crispy M&Ms for a lighter texture, or even seasonal varieties to add unique flavors and colors to your cupcakes. Just keep in mind that larger M&Ms might make the cupcakes a bit denser in spots, but the flavor will still be fantastic!
How should I store M&M cupcakes to keep them fresh?
For optimal freshness, store your M&M cupcakes in an airtight container at room temperature for up to 2-3 days. If your frosting contains perishable ingredients like cream cheese or fresh fruit, it’s best to refrigerate them. When refrigerating, place them in an airtight container and allow them to come to room temperature for about 15-20 minutes before serving for the best texture and flavor.
Can I make these M&M cupcakes ahead of time?
Yes, you can certainly make these delicious M&M cupcakes ahead of time! You can bake the cupcakes a day or two in advance and store them unfrosted in an airtight container at room temperature. Then, prepare your frosting and decorate them on the day you plan to serve. If you’re using M&Ms on top of the frosting, it’s best to add those just before serving to prevent their colors from potentially bleeding into the frosting, especially if they are refrigerated.
What kind of frosting pairs best with M&M cupcakes?
A classic vanilla buttercream is always a winner with M&M cupcakes, as its simple sweetness beautifully complements the M&M flavors and vibrant colors. However, a rich chocolate buttercream, a tangy cream cheese frosting, or even a fun strawberry or lemon-flavored frosting would also be delicious choices. Don’t be afraid to experiment with your favorite frosting to match your mood or occasion!
Are M&M cupcakes good for parties and gatherings?
They are absolutely perfect for parties and gatherings! Their vibrant colors make them incredibly appealing and festive, especially for children’s birthday parties, holiday celebrations, or any event where you want to add a touch of fun. Plus, M&Ms are a universally loved candy, ensuring these cupcakes will be a hit with guests of all ages. They’re a guaranteed crowd-pleaser!
Can children help with this M&M Cupcakes Recipe?
Yes, and I highly encourage it! This M&M Cupcakes Recipe is fantastic for involving kids in the kitchen. They can help with various steps, such as measuring ingredients (with adult supervision), mixing the batter, placing the cupcake liners, and especially having fun decorating the cooled cupcakes with the M&Ms. It’s a wonderful and delicious way to create lasting memories together and teach them basic baking skills.
M&M Cupcakes Recipe: Easy, Fun & Colorful Treat!
Discover a family-favorite M&M Cupcakes Recipe: deep chocolate cupcakes studded with colorful candy pieces that melt into sweet pockets, topped with even more M&Ms for a bakery-worthy finish. These moist cupcakes are an easy, fun, and colorful treat perfect for any occasion.
Ingredients
-
2 ¼ cups (270g) all-purpose flour
-
¾ cup (75g) unsweetened cocoa powder
-
2 cups (400g) granulated sugar
-
2 teaspoons baking soda
-
1 teaspoon baking powder
-
1 teaspoon fine sea salt
-
2 large eggs, at room temperature
-
1 cup (240ml) whole milk, at room temperature
-
½ cup (120ml) vegetable oil
-
2 teaspoons pure vanilla extract
-
1 cup (240ml) hot water or hot coffee
-
2 bags (10-12 oz each, approx. 300-340g per bag) M&M’s Milk Chocolate Candies
Instructions
-
Step 1
Preheat oven to 350°F (175°C). Line two 12-cup muffin tins with paper cupcake liners. -
Step 2
In a large bowl, sift together all-purpose flour, unsweetened cocoa powder, granulated sugar, baking soda, baking powder, and fine sea salt until well combined and lump-free. -
Step 3
In a separate medium bowl, whisk together room temperature eggs, whole milk, vegetable oil, and pure vanilla extract until smooth. -
Step 4
Gradually add the wet ingredient mixture to the dry ingredients. Mix on low speed with an electric mixer or whisk until just combined. Avoid overmixing; a few small lumps are acceptable. -
Step 5
Gradually pour in the hot water or hot coffee. Continue mixing on low speed until the batter is smooth and well combined. The batter will be quite thin. -
Step 6
Take one bag of M&M’s. Gently fold about ¾ of this bag (reserving ¼) into the cupcake batter using a rubber spatula. Save the remaining ¼ and the entire second bag for topping. -
Step 7
Fill each prepared cupcake liner about two-thirds full with the M&M-studded batter using an ice cream scoop or ¼ cup measure. Sprinkle a generous amount of the reserved M&M’s (from the first bag and the second full bag) on top of each filled liner. -
Step 8
Bake for 18-22 minutes. Cupcakes are done when they spring back slightly when gently pressed, and a toothpick inserted into the center comes out with a few moist crumbs, not wet batter. They may still look a bit jiggly in the middle, which is perfect. -
Step 9
Remove from oven and let cool in the muffin tins for 5-10 minutes. Then, transfer cupcakes to a wire cooling rack to cool completely (about 30-60 minutes). -
Step 10
For extra color, gently press a few additional M&Ms onto the tops of the completely cooled cupcakes.
Important Information
Nutrition Facts (Per Serving)
It is important to consider this information as approximate and not to use it as definitive health advice.
Allergy Information
Please check ingredients for potential allergens and consult a health professional if in doubt.
Leave a Comment