
Roasted Russet Potatoes are, in my humble opinion, the unsung hero of countless meals, a dish that effortlessly marries rustic simplicity with profound satisfaction. Is there anything more comforting and utterly delicious than a potato perfectly cooked, boasting a golden, impossibly crisp exterior that gives way to a steaming, fluffy interior? We think not!
The humble potato has a long and storied history, transitioning from a basic sustenance crop to a beloved culinary staple across the globe. While many varieties shine in different roles, the Russet potato, with its high starch content and earthy flavor, is particularly revered for its ability to achieve that sought-after crispy skin and tender crumb when roasted. This technique transforms a simple root vegetable into a side dish that can truly steal the show, a culinary journey from field to fork that resonates with so many.
Why are Roasted Russet Potatoes universally adored?
Beyond their comforting appeal, it’s the incredible textural experience that truly captivates. The robust exterior, seasoned to perfection, provides a delightful crunch, while the interior remains wonderfully soft and airy. They are incredibly versatile, pairing beautifully with everything from a sophisticated roast to a casual weeknight dinner, proving their adaptability in any culinary context. Their preparation is straightforward, yet the results are consistently spectacular, making them a go-to for home cooks seeking a dependable and delicious accompaniment. Through careful preparation, these simple ingredients transform into truly exceptional Roasted Russet Potatoes, a testament to the power of classic cooking techniques.
Ingredients:
- 2 pounds Russet Potatoes: I always recommend choosing Russets for roasting because their high starch content leads to that coveted fluffy interior and incredibly crispy exterior. Look for firm, unblemished potatoes of a similar size to ensure even cooking.
- 1/4 cup Extra Virgin Olive Oil: A good quality olive oil is essential here. It not only helps the potatoes crisp up beautifully but also carries the flavors of the herbs and garlic. You might need a little more or less depending on the exact potato quantity and how heavily you like to coat them.
- 4-6 cloves Fresh Garlic: Don’t skimp on the garlic! Freshly minced garlic adds an unparalleled aromatic depth. If you’re a garlic lover like me, lean towards six cloves; if you prefer a more subtle hint, four will suffice.
- 2 sprigs Fresh Rosemary: Rosemary’s piney, earthy aroma is a classic pairing with potatoes. I prefer fresh over dried for its vibrant flavor, but if dried is all you have, use about 1 teaspoon. Roughly chop the leaves after stripping them from the woody stems.
- 3 sprigs Fresh Thyme: Thyme offers a delicate, almost lemony note that complements the rosemary and garlic perfectly. Strip the leaves from the stems; no need to chop them too finely as they are quite small.
- 1 1/2 teaspoons Kosher Salt: Kosher salt (or sea salt) is my go-to for roasting. Its larger crystals adhere well to the potatoes and provide a clean, balanced saltiness. Adjust to your taste, but this is a good starting point for truly flavorful Roasted Russet Potatoes.
- 1/2 teaspoon Freshly Ground Black Pepper: Freshly ground pepper offers a more pungent and complex flavor than pre-ground. Grind it directly over the potatoes for the best results.
- Optional Additions (for an extra kick):
- 1/2 teaspoon Smoked Paprika: Adds a lovely color and a subtle smoky depth.
- 1/4 teaspoon Onion Powder: Enhances the savory notes.
- Pinch of Red Pepper Flakes: If you enjoy a bit of heat, a tiny pinch can make these potatoes truly sing.
Phase 1: Preparing Your Russet Potatoes for Roasting
- Selecting and Cleaning Your Potatoes: Start by carefully selecting your Russet Potatoes. As I mentioned, uniform size is key for even cooking. Once you have your spuds, give them a good scrub under cold running water to remove any dirt or debris. I like to use a stiff vegetable brush for this. Even if you plan to peel them, this initial cleaning is a good habit.
- To Peel or Not to Peel – That is the Question: This is a matter of personal preference. I often leave the skins on my Roasted Russet Potatoes for extra texture, fiber, and a more rustic appearance. The skin gets wonderfully crispy, too! If you prefer a smoother, more refined potato, go ahead and peel them using a vegetable peeler. Just make sure to remove all the eyes and any bruised spots.
- Cutting the Potatoes for Consistent Roasting: The way you cut your potatoes significantly impacts their texture and cooking time. My favorite method for Roasted Russet Potatoes is to cut them into roughly 3/4-inch to 1-inch pieces. You can cut them into wedges, cubes, or even halves, but the crucial part is consistency. If you have some small pieces and some large pieces, the small ones will burn before the large ones are cooked through. To cut into wedges, I usually slice the potato lengthwise, then cut each half into 3 or 4 wedges, depending on the potato’s size. For cubes, I cut the potato into thick slices, then stack the slices and cut them into cubes.
- The Secret to Ultimate Crispiness: Soaking! This step is often overlooked, but it’s absolutely vital for achieving those ultra-crispy edges on your Roasted Russet Potatoes. After cutting, place all the potato pieces into a large bowl and cover them with cold water. Let them soak for at least 30 minutes, or even up to an hour. This process draws out excess starch from the potatoes. Less starch means less stickiness and more glorious crispiness when they hit the hot oven. I’ve found this makes a remarkable difference.
- Drying is Non-Negotiable: After their starch-removing bath, you absolutely must dry your potatoes thoroughly. This is perhaps the most critical step for crispiness. Water creates steam, and steam prevents browning and crisping. Drain the potatoes well, then spread them out on a clean kitchen towel or several layers of paper towels. Pat them vigorously until they are as dry as possible. Don’t be shy here; really get them dry! Any residual moisture will hinder the browning process. I often let them air-dry on the counter for another 5-10 minutes while I prep the other ingredients, just to be extra sure.
Phase 2: Seasoning and Coating for Optimal Flavor
- Preheating Your Oven and Baking Sheet: For truly spectacular Roasted Russet Potatoes, a hot oven and a hot baking sheet are your best friends. Preheat your oven to a robust 425°F (220°C). Place your large, sturdy baking sheet (or two if needed to avoid overcrowding) into the oven while it preheats. This allows the sheet to get scorching hot, creating an immediate sear on the potatoes when they hit the pan, which is another secret to achieving that coveted crispy exterior.
- Preparing Your Aromatic Boosters: While your potatoes are drying and the oven is preheating, take a moment to prepare your garlic and herbs. Mince the fresh garlic cloves finely. Strip the leaves from the fresh rosemary sprigs and give them a rough chop. For the thyme, simply strip the tiny leaves from their woody stems. The fresher these ingredients are, the more vibrant and aromatic your potatoes will be.
- The Olive Oil Toss – Even Coating is Key: Transfer your thoroughly dried potato pieces back into that large bowl. Drizzle them generously with the extra virgin olive oil. Now, get your hands in there (or use a large spoon) and toss the potatoes vigorously, ensuring every single piece is evenly coated with a thin layer of oil. This oil is not just for flavor; it’s crucial for heat transfer and browning.
- Infusing with Flavor – Salt, Pepper, Herbs, and Garlic: Once the potatoes are oiled, it’s time to introduce the stars of the flavor show. Sprinkle the kosher salt, freshly ground black pepper, minced garlic, chopped rosemary, and thyme leaves all over the potatoes in the bowl. If you’re using any of the optional additions like smoked paprika or onion powder, add them now too.
- Ensuring Even Distribution: Again, use your hands or a large spoon to toss everything together extremely well. You want to make sure the seasonings and aromatics are evenly distributed and sticking to every single potato piece. This step ensures that every bite of your Roasted Russet Potatoes is bursting with flavor. Take your time here; a well-seasoned potato is a happy potato!
Phase 3: The Roasting Process – Achieving Golden Perfection
- Spreading for Success – Avoid Overcrowding: Carefully remove the preheated baking sheet (or sheets) from the oven. Be mindful, it will be extremely hot! Immediately spread the seasoned potato pieces onto the hot sheet in a single layer. This is absolutely critical. Do not overcrowd the pan! If the potatoes are piled on top of each other, they will steam instead of roast, resulting in soggy rather than crispy potatoes. If you have too many potatoes for one sheet, use a second one. Give each potato piece its own little personal space on the pan.
- Initial Roasting Phase – Let the Maillard Reaction Begin!: Place the baking sheet back into the preheated 425°F (220°C) oven. Roast for 20-25 minutes without touching or disturbing them. Resist the urge to peek or flip them too early! During this initial phase, the hot pan and high heat work together to develop a beautiful golden-brown crust on the side touching the baking sheet – this is where much of the crispiness comes from, thanks to the glorious Maillard reaction. You might hear sizzling, which is a good sign.
- Second Roasting Phase and the First Flip: After 20-25 minutes, carefully remove the baking sheet from the oven. Using a sturdy metal spatula, flip the Roasted Russet Potatoes. You should see a lovely golden-brown crust on the underside. Stir them gently to ensure new sides are exposed to the hot pan. Spread them back into a single layer and return the sheet to the oven. Continue roasting for another 15-20 minutes.
- Final Roasting and Monitoring for Doneness: At this point, your potatoes should be getting wonderfully crispy and golden. Remove the sheet again and give them another flip/stir. Roast for a final 10-15 minutes, or until they are deeply golden brown and beautifully crispy on all sides. You’ll know they’re done when they are tender when pierced with a fork (check a larger piece) and have a fantastic crunch on the outside. The exact timing can vary slightly depending on your oven and the size of your potato pieces, so keep a close eye on them during this final stage.
- Addressing Uneven Browning: Sometimes, even with a great recipe, ovens can have hot spots. If you notice some potatoes browning faster than others, or one side of the pan getting crispier, simply rotate your baking sheet halfway through the roasting process (when you do your first flip). This helps ensure even heat distribution and consistent crispiness across all your delicious Roasted Russet Potatoes.
Phase 4: Finishing Touches and Serving Your Crispy Roasted Russet Potatoes
- Straight from the Oven – The Moment of Truth: Once your Roasted Russet Potatoes have achieved that perfect golden hue and irresistible crispiness, carefully remove the baking sheet from the oven. You’ll be greeted by an incredible aroma of roasted garlic, rosemary, and thyme. Their exterior should look crackly and inviting, and you should be able to hear a slight crispness when you stir them.
- A Quick Taste and Final Seasoning Adjustment: Transfer the piping hot potatoes to a serving bowl. Before serving, grab a piece and give it a taste. This is your chance to adjust the seasoning. Sometimes, especially with all that delicious browning, a little extra sprinkle of kosher salt or a fresh grind of black pepper can really elevate the flavors. If you like, a tiny squeeze of fresh lemon juice at this stage can brighten everything up beautifully, but it’s completely optional. For a pop of color, I sometimes sprinkle a tablespoon of freshly chopped parsley over the top right before serving.
- Serving Suggestions for Your Perfect Side Dish: These crispy Roasted Russet Potatoes are incredibly versatile. They make a fantastic side dish for almost any meal. I love them alongside a juicy roasted chicken, a perfectly seared steak, or even with simple grilled fish. They’re also substantial enough to be part of a vegetarian meal, perhaps served with a hearty salad or some roasted vegetables. For a truly indulgent experience, sometimes I’ll whip up a quick aioli or a creamy herb dip for dunking.
- Troubleshooting Common Roasting Issues:
- Not Crispy Enough? The most common culprit is too much moisture or overcrowding the pan. Ensure your potatoes are thoroughly dry before oiling, and always give them ample space on the baking sheet. A hotter oven (ensure your oven thermometer is accurate!) can also help.
- Burnt Spots? This usually means the oven is too hot or the potatoes were left too long without being flipped. Keep an eye on them, especially during the last 10 minutes. If your oven has hot spots, rotate the pan.
- Cooked Outside, Raw Inside? The heat might be too high causing the exterior to brown before the interior cooks through, or your potato pieces might be too large and inconsistent in size. Try a slightly lower temperature (e.g., 400°F/200°C) for a longer time, or ensure your cuts are uniform. Soaking the potatoes can also help them cook more evenly.
- Storing and Reheating for Later Enjoyment: While these Roasted Russet Potatoes are definitely best enjoyed fresh out of the oven, leftovers can be stored. Place any cooled potatoes in an airtight container and refrigerate for up to 3-4 days. To reheat them and bring back some of that coveted crispiness, my preferred method is to spread them on a baking sheet and pop them back into a hot oven (around 375°F/190°C) for 10-15 minutes, or until heated through and re-crisped. Microwaving will heat them but will unfortunately make them soft, so I always recommend the oven method for the best texture.

<h2>Conclusion:</h2>
<p>Well, my friends, we’ve reached the end of our culinary journey, but truly, this is just the beginning of countless delicious meals for you! I genuinely believe that if there’s one recipe you absolutely <strong>must</strong> add to your repertoire, it’s this one for our perfectly <strong>Roasted Russet Potatoes</strong>. What makes them so utterly irresistible, you ask? It’s that magical combination of a golden, impossibly crispy exterior that crunches with every bite, giving way to an interior that is unbelievably fluffy, creamy, and tender. No more sad, soggy potatoes for your dinner table! This method guarantees a sublime textural contrast that elevates the humble potato from a mere side dish to a star in its own right. It’s a testament to simple ingredients prepared with a little technique to achieve spectacular results. The aroma alone as they bake is enough to make your mouth water, filling your kitchen with a comforting, savory promise of deliciousness.</p>
<p>Beyond their incredible taste and texture, what I adore most about these potatoes is their sheer versatility and surprising ease of preparation. You don’t need fancy equipment or a culinary degree to achieve perfection here. Just a few simple steps, a hot oven, and a little patience, and you’ll be rewarded with a dish that consistently impresses. They’re the ultimate crowd-pleaser, perfect for a casual weeknight dinner or elegant enough to grace your holiday feast. <strong>Seriously, once you try them, you’ll understand why they’re poised to become a staple in your kitchen.</strong></p>
<h4>Endless Possibilities for Serving and Savoring</h4>
<p>Now, let’s talk about how to enjoy these beauties, because while they’re magnificent on their own, they truly shine with a little creative pairing! Traditionally, they’re an absolute dream alongside a perfectly seared steak, a succulent roasted chicken, or flaky baked fish. But why stop there? Imagine them as the base for a hearty breakfast – tossed with crispy bacon bits, a fried egg, and a sprinkle of fresh chives. <strong>Pure morning bliss!</strong> For lunch, they can be transformed into a warm potato salad, gently mixed with a tangy vinaigrette, finely diced celery, and a scattering of fresh parsley. You could even take a cue from the loaded baked potato and top your hot roasted russets with sour cream, shredded cheddar cheese, and more chives for a more indulgent side.</p>
<p>Feeling adventurous with your seasonings? Don’t hesitate to experiment! While our basic recipe is flawless, you could introduce a new flavor profile with a pinch of smoked paprika for a smoky depth, a dash of dried rosemary and thyme for an earthy, herbaceous note, or even a sprinkle of chili powder and cumin for a subtle Tex-Mex kick. <em>Just remember to add these spices along with the oil before roasting to ensure they meld beautifully.</em> Another fantastic variation is to toss in some thinly sliced onions, bell peppers, or even Brussels sprouts during the last 20 minutes of roasting; they’ll get beautifully caramelized and add another layer of flavor and texture to your roasted medley. The possibilities are genuinely endless, limited only by your imagination and what you have on hand. Don’t be afraid to make this recipe truly your own!</p>
<h5>Your Turn: Get Roasting and Share Your Story!</h5>
<p>I’ve shared my secrets, now it’s your turn to unleash the magic in your own kitchen. I implore you, <strong>don’t just read about these amazing potatoes, go make them!</strong> Gather your ingredients, preheat your oven, and prepare to be utterly delighted. Cooking, after all, is an experience meant to be shared, and I would absolutely love to hear about your adventures with this recipe. Did you try a unique serving suggestion? Did you discover a new favorite seasoning combination? Perhaps you introduced these perfect potatoes to a picky eater who instantly became a fan?</p>
<p>Please, don’t keep your culinary triumphs to yourself! Come back and leave a comment below sharing your experience, your tips, or even a photo of your magnificent roasted creations. Your feedback not only brightens my day but also helps other home cooks in our wonderful community discover new ways to enjoy their meals. Let’s build a shared space where we can celebrate the simple joy of good food made with love. So, what are you waiting for? Grab those russets, get roasting, and let’s make some delicious memories together! Happy cooking, my friends!</p>
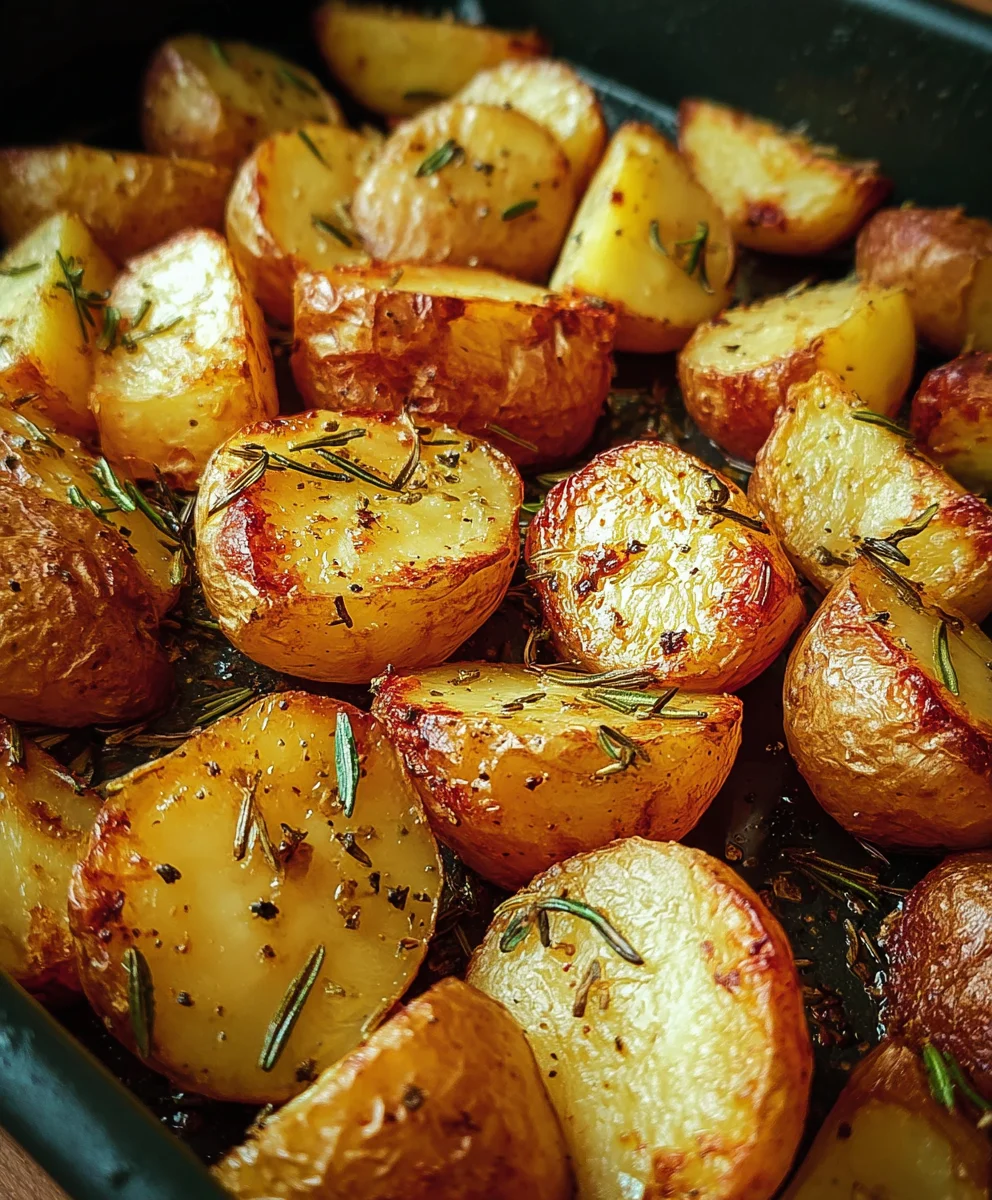
Crispy Roasted Russet Potatoes
Roasted Russet Potatoes are the unsung hero of meals, offering a perfectly cooked potato with a golden, impossibly crisp exterior that gives way to a steaming, fluffy interior. This recipe highlights the Russet’s high starch content for an ultimate crispy and tender side dish.
Ingredients
-
2 lbs Russet Potatoes
-
1/4 cup Extra Virgin Olive Oil
-
4-6 cloves Fresh Garlic, minced
-
2 sprigs Fresh Rosemary, chopped
-
3 sprigs Fresh Thyme leaves
-
1 1/2 tsp Kosher Salt
-
1/2 tsp Freshly Ground Black Pepper
-
1/2 tsp Smoked Paprika (optional)
-
1/4 tsp Onion Powder (optional)
-
Pinch Red Pepper Flakes (optional)
Instructions
-
Step 1
Clean potatoes and decide whether to peel or leave skins on for a rustic finish. Cut potatoes into uniform 3/4- to 1-inch pieces (wedges or cubes). -
Step 2
Place cut potatoes in a large bowl, cover with cold water, and soak for 30-60 minutes to remove excess starch. This is crucial for crispiness. -
Step 3
Drain potatoes thoroughly and pat them vigorously dry with a clean kitchen towel or paper towels. Any residual moisture will prevent crisping. -
Step 4
Preheat oven to 425°F (220°C) and place a large, sturdy baking sheet (or two, if needed) into the oven to heat up while it preheats. -
Step 5
Mince garlic, chop rosemary leaves, and strip thyme leaves. Transfer dried potatoes to a large bowl, drizzle with olive oil, and toss to coat evenly. -
Step 6
Add salt, pepper, minced garlic, chopped rosemary, thyme, and any optional spices (smoked paprika, onion powder, red pepper flakes). Toss thoroughly to distribute seasonings evenly. -
Step 7
Carefully remove the hot baking sheet(s) from the oven. Spread the seasoned potatoes in a single layer, ensuring not to overcrowd the pan. Use a second sheet if necessary to prevent steaming. -
Step 8
Roast for 20-25 minutes without flipping. This allows a golden crust to form on the bottom. -
Step 9
Remove from oven, flip potatoes with a spatula, and return to oven. Roast for another 15-20 minutes. -
Step 10
Flip again and roast for a final 10-15 minutes, or until deeply golden brown, beautifully crispy on all sides, and tender when pierced with a fork. Rotate the pan if browning unevenly. -
Step 11
Transfer hot potatoes to a serving bowl. Taste and adjust seasoning with additional salt or pepper if needed. Optionally, add a squeeze of fresh lemon juice or chopped parsley for freshness. -
Step 12
Serve immediately as a versatile side dish. Leftovers can be stored in an airtight container for 3-4 days and reheated in a 375°F (190°C) oven for 10-15 minutes to re-crisp.
Important Information
Nutrition Facts (Per Serving)
It is important to consider this information as approximate and not to use it as definitive health advice.
Allergy Information
Please check ingredients for potential allergens and consult a health professional if in doubt.


Leave a Comment