
Homemade Chocolate Raspberry Sandwich Cookies offer an unparalleled journey for your taste buds, transforming simple ingredients into an extraordinary dessert experience. Imagine biting into a perfectly crisp yet tender chocolate cookie, giving way to a luxuriously creamy raspberry filling that bursts with vibrant, fruity notes. It’s a symphony of flavors and textures, a culinary embrace that feels both sophisticated and comforting. These delightful treats aren’t just cookies; they’re a statement, promising pure indulgence in every bite.
The tradition of sandwich cookies dates back centuries, evolving from simple filled biscuits to the elegant confections we cherish today. The pairing of rich, dark chocolate with the bright, tangy essence of raspberries is a timeless classic, often reserved for gourmet chocolates and high-end patisseries. Yet, there’s something uniquely satisfying about recreating this magic in your own kitchen. People adore this dish not just for its exquisite taste and delightful contrast between sweet chocolate and tart fruit, but also for the sheer joy of a treat lovingly made from scratch. The soft, chewy texture of the chocolate cookie, combined with the smooth, luscious fruit cream, makes for an irresistible combination that disappears quickly from any platter. Crafting your own Homemade Chocolate Raspberry Sandwich Cookies allows you to control the quality of every ingredient, ensuring a fresh, unforgettable dessert that truly elevates any occasion, from an afternoon tea to a special celebration. Get ready to impress yourself and your loved ones with these delightful creations!
Ingredients:
- For the Chocolate Cookies:
- 2 ¼ cups (270g) all-purpose flour, sifted – Sifting is key for a light texture!
- ¾ cup (75g) unsweetened Dutch-processed cocoa powder, sifted – Dutch-processed gives that rich, dark chocolate color and flavor.
- 1 teaspoon baking soda
- ½ teaspoon fine sea salt
- 1 cup (226g) unsalted butter, softened to room temperature – Crucial for creaming properly!
- 1 ¾ cups (350g) granulated sugar
- 2 large eggs, at room temperature
- 1 teaspoon pure vanilla extract – Adds depth to the chocolate!
- For the Raspberry Filling:
- 1 ½ cups (about 180g) fresh raspberries, plus extra for garnish if desired – Frozen works too, just thaw them!
- ½ cup (100g) granulated sugar – Adjust to your sweetness preference and the tartness of your berries.
- 2 tablespoons fresh lemon juice – Brightens the raspberry flavor beautifully.
- 2 tablespoons cornstarch – Our secret weapon for a thick, luscious filling.
- ¼ cup (60ml) cold water
- Optional: ½ teaspoon pure vanilla extract or a tiny dash of almond extract for extra complexity.
- For Assembly:
- Confectioners’ sugar for dusting (optional, but makes them look so elegant!)
Preparing the Chocolate Cookie Dough
- Get Organized (Mise en Place): Before we dive into the deliciousness, let’s gather all our ingredients and tools. I find that having everything prepped and measured makes the baking process so much smoother and more enjoyable. Take out your butter and eggs now if you haven’t already, so they can come to a perfect room temperature. This is really important for achieving that wonderfully creamy texture we’re aiming for in our dough.
- Combine Dry Ingredients: In a medium bowl, I like to whisk together my sifted all-purpose flour, sifted Dutch-processed cocoa powder, baking soda, and fine sea salt. Sifting the flour and cocoa is a step I never skip for these Homemade Chocolate Raspberry Sandwich Cookies because it truly makes a difference in the final texture of the cookies, ensuring they are light and airy, not dense. Set this bowl aside for a moment.
- Cream Butter and Sugar: Now, in the bowl of a stand mixer fitted with the paddle attachment (or a large bowl with an electric hand mixer), I combine the softened unsalted butter and granulated sugar. We’re going to beat these together on medium speed for about 3 to 5 minutes. What you’re looking for here is a mixture that has transformed into a light, fluffy, and pale-yellow cream. This process, known as creaming, incorporates air into the butter and sugar, which is fundamental for developing the cookies’ tender texture. Don’t rush this step!
- Add Eggs and Vanilla: Once your butter and sugar are beautifully creamed, I crack in one large egg and beat until it’s just incorporated. Then I add the second egg and continue to beat until everything is well combined and smooth. Be sure to scrape down the sides and bottom of the bowl with a rubber spatula to ensure all ingredients are evenly mixed. Finally, I stir in the pure vanilla extract. The aroma alone starts to get me excited for these Homemade Chocolate Raspberry Sandwich Cookies!
- Incorporate Dry into Wet: With the mixer on low speed, I gradually add the dry ingredient mixture to the wet ingredients, a third at a time. Mix only until just combined.
Here’s a crucial tip:
Overmixing the dough once the flour is added can lead to tough cookies because it develops the gluten too much. As soon as you see no streaks of dry flour, stop the mixer. The dough will be thick, moist, and wonderfully dark chocolatey.
- Prepare for Chilling: Gently gather the dough into a ball and divide it in half. Flatten each half into a disc, wrap tightly in plastic wrap, and place them in the refrigerator. I recommend chilling the dough for at least 1 hour, or up to 24 hours. Why chill? Chilling allows the butter to firm up, preventing the cookies from spreading too much in the oven, and also gives the flavors a chance to meld together beautifully. It makes the dough much easier to handle for rolling and cutting, which is especially important for our lovely sandwich cookies.
Chilling and Baking the Cookies
- Preheat and Prep: When you’re ready to bake, preheat your oven to 350°F (175°C). Line two baking sheets with parchment paper or silicone baking mats. This step ensures easy removal and prevents sticking, giving us perfectly shaped cookies every time.
- Roll Out the Dough: Take one disc of chilled dough from the refrigerator. On a lightly floured surface, roll out the dough to about ¼-inch (6mm) thickness. I find it helpful to place the dough between two sheets of parchment paper before rolling – this prevents sticking to your rolling pin and eliminates the need for excess flour, which can dry out your cookies. Make sure your rolling is even so all your cookies bake consistently.
- Cut Out Cookies: Using a 2-inch (5cm) round cookie cutter (or your preferred size for sandwich cookies), cut out shapes from the dough. Try to cut them as close together as possible to minimize scraps. Carefully transfer the cut-out cookies to your prepared baking sheets, leaving about 1 inch (2.5cm) between them. Gather the dough scraps, gently press them together to form a new disc, and chill briefly if it becomes too soft before re-rolling and cutting more cookies.
Remember:
For every filled sandwich cookie, you’ll need two individual cookie halves, so aim for an even number!
- Bake to Perfection: Bake the cookies for 8 to 10 minutes, or until the edges are just set and the centers look slightly puffed. They won’t look golden brown because of the cocoa, so you’ll have to go by texture and the slight firmness to the touch. You want them to be firm enough to handle but still a little soft in the middle to maintain a lovely chewiness once cooled. If you gently touch the center and it springs back slightly, they’re likely done. I always rotate my baking sheets halfway through baking to ensure even cooking across all cookies.
- Cooling: Let the cookies cool on the baking sheets for 5 minutes before carefully transferring them to a wire rack to cool completely. It’s really important that they are completely cool before we attempt to fill them. Warm cookies will melt our beautiful raspberry filling, and we definitely don’t want that! This cooling period allows them to fully set and become firm enough to handle without breaking.
Crafting the Luscious Raspberry Filling
- Prepare the Raspberries: In a medium saucepan, combine the fresh raspberries, granulated sugar, and fresh lemon juice. I love how the lemon juice truly brightens the raspberry flavor, making it pop against the dark chocolate cookies. Place the saucepan over medium heat.
- Simmer and Mash: Bring the mixture to a gentle simmer, stirring frequently. As it heats up, the raspberries will start to break down and release their juices. Use a fork or a potato masher to gently mash the raspberries, creating a beautiful, slightly chunky sauce. Continue to simmer for about 5 to 7 minutes, allowing the flavors to meld and the mixture to thicken slightly.
- Thicken with Cornstarch Slurry: In a small separate bowl, whisk together the cornstarch and cold water until smooth. This is called a “slurry” and it’s what will give our filling that perfect spreadable consistency. Slowly pour the cornstarch slurry into the simmering raspberry mixture, stirring constantly. Continue to cook and stir for another 1 to 2 minutes, until the filling has noticeably thickened and coats the back of a spoon. It should be thick enough not to run off the cookies, but still wonderfully jammy. If you’re using optional vanilla or almond extract, stir it in now.
- Strain for Smoothness (Optional but Recommended): For an extra-smooth and elegant filling for your Homemade Chocolate Raspberry Sandwich Cookies, I highly recommend pressing the cooked raspberry mixture through a fine-mesh sieve set over a clean bowl. This removes all the tiny seeds, resulting in a silken, professional-looking filling. While it’s an extra step, the luxurious texture it provides is absolutely worth it for these special cookies. If you prefer a more rustic, seed-filled jam, you can skip this step, but know that the seeds can sometimes be a bit distracting in a delicate sandwich cookie.
- Cool the Filling: Allow the raspberry filling to cool completely to room temperature before using. Even better, pop it in the refrigerator for about 30 minutes to an hour to firm up further. A well-chilled filling is much easier to work with and less likely to squeeze out when you assemble your cookies. You can even make this filling a day ahead and store it in an airtight container in the fridge.
Assembling Your Homemade Chocolate Raspberry Sandwich Cookies
- Pair Up the Cookies: Once both the cookies are completely cool and the raspberry filling is thoroughly chilled, it’s time for the fun part: assembly! Take your cooled chocolate cookies and pair them up by size and shape. This ensures that your Homemade Chocolate Raspberry Sandwich Cookies look neat and uniform.
- Fill with Raspberry Goodness: Take one cookie half and spoon about 1 to 2 teaspoons of the cooled raspberry filling onto the flat side. You want a generous dollop, but not so much that it’s overflowing. Alternatively, for a neater look, you can transfer the filling to a piping bag with a round tip (or just snip off the corner of a Ziploc bag) and pipe a neat swirl or ring onto the cookie. This method gives you excellent control and a very tidy result.
- Create the Sandwich: Gently place another cookie half on top of the filling, flat side down. Press down very lightly until the filling spreads almost to the edges. Be careful not to press too hard, or the filling will squish out the sides, and the cookies might break. We’re aiming for a lovely, even layer of that vibrant raspberry goodness peeking out just a little.
- Optional Dusting for Elegance: If you wish to add a final touch of elegance, lightly dust the tops of your assembled Homemade Chocolate Raspberry Sandwich Cookies with confectioners’ sugar using a fine-mesh sieve. This not only looks beautiful but also adds a subtle hint of sweetness to balance the rich chocolate and tart raspberry. It’s the perfect finishing flourish!
Tips for Perfection and Storage
- Don’t Rush the Chill: I can’t emphasize enough how important chilling the cookie dough is. It truly affects both the ease of handling the dough and the final shape and texture of your Homemade Chocolate Raspberry Sandwich Cookies. A well-chilled dough will yield cookies that hold their shape beautifully and have a more defined flavor profile. If your kitchen is warm, or if you’re re-rolling scraps, don’t hesitate to pop the dough back into the fridge for 10-15 minutes.
- Consistency is Key: For the raspberry filling, pay close attention to its consistency. If it’s too thin, it will run out of your cookies. If it’s too thick, it will be hard to spread. Adjust by simmering a little longer if too thin, or adding a tiny splash of water if too thick. Remember, it will thicken significantly as it cools.
- Storage Suggestions: These Homemade Chocolate Raspberry Sandwich Cookies are best enjoyed within 2-3 days. Store them in an airtight container at room temperature. For longer storage, you can refrigerate them for up to a week. If you need to stack them, I recommend placing a piece of parchment paper between layers to prevent them from sticking together. The cookies themselves (unfilled) can be frozen for up to 3 months; just thaw and fill when you’re ready to serve! The filling can also be made ahead and stored in the fridge for up to a week.
- Experiment with Flavors: While these are Homemade Chocolate Raspberry Sandwich Cookies, feel free to get creative with other fillings! A lemon curd, a different berry jam, or even a simple buttercream could be delightful variations. The chocolate cookie base is wonderfully versatile, so don’t be afraid to experiment once you’ve mastered this classic. Enjoy the process of creating these delightful treats!

Conclusion:
So there you have it, my friends! We’ve journeyed through the delightful process of creating something truly special, a treat that transcends the ordinary and delivers an unforgettable burst of flavor and texture. If you’ve been looking for that one recipe to truly impress your loved ones, or simply to indulge your own sweet cravings with something homemade and utterly divine, then I truly believe this is it. These aren’t just any cookies; they are an experience, a symphony of rich, deep chocolate perfectly complemented by the bright, tangy sweetness of fresh raspberries, all sandwiched together in a tender, chewy embrace. The satisfaction of pulling a batch of these beauties from your oven is unparalleled, filling your kitchen with an aroma that promises pure bliss. Trust me, once you taste the exquisite balance of flavors and the luxurious mouthfeel, you’ll understand precisely why these cookies are destined to become a staple in your baking repertoire. It’s the kind of dessert that elicits gasps of delight and requests for the recipe, making you feel like a true culinary artist.
Serving Up Your Masterpiece: Ideas & Inspirations
Once your glorious batch of cookies has cooled to perfection, the only question left is how to enjoy them! While they are absolutely phenomenal on their own – a truly perfect handheld dessert – I love thinking about all the wonderful ways you can elevate the experience even further. Imagine one of these nestled beside a steaming mug of your favorite coffee or a delicate cup of herbal tea; it’s the ideal afternoon pick-me-up or a serene moment of self-indulgence. For a more decadent dessert presentation, try serving a single cookie with a scoop of vanilla bean ice cream, allowing the melting ice cream to mingle with the chocolate and raspberry notes. A light dusting of powdered sugar over the top just before serving adds an elegant touch, or you could even drizzle a little melted white chocolate for a beautiful contrast. These also make incredibly thoughtful gifts! Package a few in a pretty box with some parchment paper and a ribbon, and you’ve got a homemade present that speaks volumes of your care and effort. They’re perfect for potlucks, bake sales, or simply as a comforting surprise for a friend who needs a little cheer. Consider them for special occasions like Valentine’s Day, anniversaries, or even as a delightful addition to a holiday cookie platter. The sheer elegance and delightful taste make them suitable for any gathering, big or small, transforming a simple dessert into a memorable highlight.
Unleash Your Creativity: Exciting Variations to Try!
But wait, the fun doesn’t stop there! While the classic combination of chocolate and raspberry is pure perfection, I always encourage you to play around and make recipes your own. These Homemade Chocolate Raspberry Sandwich Cookies are incredibly versatile. For example, why not experiment with different berry fillings? A strawberry jam, a luscious cherry preserve, or even a vibrant blueberry compote could offer a delightful twist, bringing a different kind of fruitiness to the rich chocolate cookie. If you’re feeling adventurous, consider adding a tiny pinch of espresso powder to your chocolate cookie dough for an even deeper, more complex chocolate flavor that really makes the chocolate pop, or a subtle hint of orange zest to the dough for a bright citrusy note. For those who adore nuts, a thin layer of almond butter or hazelnut spread could be swirled into the raspberry filling for an extra layer of flavor and texture, creating a truly gourmet experience. You could also try different types of chocolate for your cookies – perhaps a dark chocolate cookie with a white chocolate raspberry filling for a striking visual and flavor contrast, or even a milder milk chocolate cookie for a sweeter, more approachable profile. Don’t be afraid to try different extracts in your cookie dough too, like a hint of almond or even a touch of mint extract for a festive twist. The beauty of baking at home is the freedom to customize, to create something that perfectly suits your palate and mood, ensuring every batch is uniquely yours. The possibilities truly are endless, and each variation offers a new adventure for your taste buds.
Now, it’s your turn! I’ve shared my passion for this incredible recipe, and I genuinely hope you feel inspired to roll up your sleeves and give these a try. There’s nothing quite like the pride and joy that comes from baking something so delicious from scratch, especially when it results in such an irresistible treat. So, go ahead, gather your ingredients, turn on some music, and immerse yourself in the delightful process. I promise, the effort is well worth the incredible reward, and your taste buds will thank you. Once you’ve savored your first bite of these marvelous cookies, I would absolutely love to hear all about your experience. Did you make any fun variations? What did your friends and family think? Please, come back and share your thoughts, your photos, and your triumphs in the comments below. Your feedback and stories truly make this community richer, and I can’t wait to see what wonderful creations you come up with. Happy baking, and enjoy every single crumb!
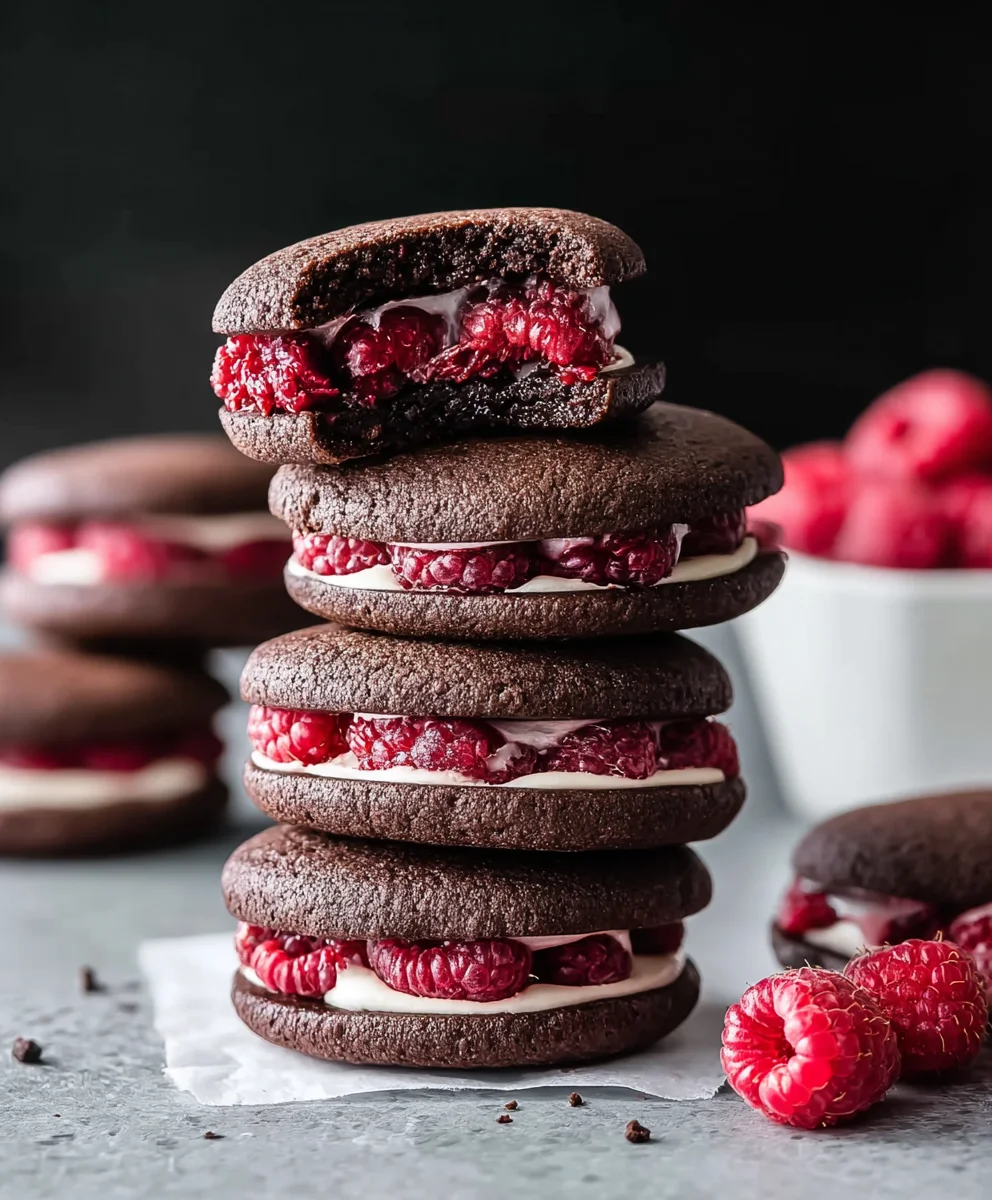
Homemade Chocolate Raspberry Sandwich Cookies
Homemade Chocolate Raspberry Sandwich Cookies offer an unparalleled journey for your taste buds. Imagine biting into a perfectly crisp yet tender chocolate cookie, giving way to a luxuriously creamy raspberry filling that bursts with vibrant, fruity notes. It’s a symphony of flavors and textures, promising pure indulgence in every bite.
Ingredients
-
2 ¼ cups (270g) all-purpose flour
-
¾ cup (75g) unsweetened Dutch-processed cocoa powder
-
1 teaspoon baking soda
-
½ teaspoon fine sea salt
-
1 cup (226g) unsalted butter, softened
-
1 ¾ cups (350g) granulated sugar
-
2 large eggs, at room temperature
-
1 teaspoon pure vanilla extract
-
1 ½ cups (about 180g) fresh raspberries
-
½ cup (100g) granulated sugar (for filling)
-
2 tablespoons fresh lemon juice
-
2 tablespoons cornstarch
-
¼ cup (60ml) cold water
-
½ teaspoon pure vanilla extract or a tiny dash of almond extract (optional, for filling)
-
Confectioners’ sugar for dusting (optional)
Instructions
-
Step 1
Prepare Cookie Dough: In a medium bowl, whisk together 2¼ cups all-purpose flour, ¾ cup Dutch-processed cocoa powder, 1 teaspoon baking soda, and ½ teaspoon fine sea salt. In the bowl of a stand mixer fitted with the paddle attachment, cream 1 cup softened unsalted butter and 1¾ cups granulated sugar on medium speed for 3 to 5 minutes until light and fluffy. Beat in 2 large eggs one at a time, then 1 teaspoon pure vanilla extract, scraping down the bowl as needed. With the mixer on low speed, gradually add the dry ingredient mixture to the wet ingredients until just combined, being careful not to overmix. -
Step 2
Chill Dough: Gather the dough into a ball, divide in half, flatten each half into a disc, wrap tightly in plastic wrap, and refrigerate for at least 1 hour (or up to 24 hours). -
Step 3
Bake Cookies: Preheat oven to 350°F (175°C). Line two baking sheets with parchment paper or silicone baking mats. On a lightly floured surface (or between two sheets of parchment), roll one disc of chilled dough to about ¼-inch (6mm) thickness. Using a 2-inch (5cm) round cookie cutter, cut out shapes and transfer to prepared baking sheets, leaving 1 inch (2.5cm) between them. Bake for 8 to 10 minutes, or until the edges are just set and the centers look slightly puffed. Let cookies cool on the baking sheets for 5 minutes before carefully transferring them to a wire rack to cool completely. -
Step 4
Make Raspberry Filling: In a medium saucepan, combine 1½ cups fresh raspberries, ½ cup granulated sugar, and 2 tablespoons fresh lemon juice. Place over medium heat and bring to a gentle simmer, stirring frequently and mashing the raspberries. Continue to simmer for about 5 to 7 minutes. In a small separate bowl, whisk together 2 tablespoons cornstarch and ¼ cup cold water until smooth. Slowly pour the cornstarch slurry into the simmering raspberry mixture, stirring constantly. Continue to cook and stir for another 1 to 2 minutes until the filling has noticeably thickened. Stir in optional ½ teaspoon pure vanilla extract or almond extract. -
Step 5
Cool Filling: For an extra-smooth filling (optional), press the cooked raspberry mixture through a fine-mesh sieve set over a clean bowl to remove seeds. Allow the raspberry filling to cool completely to room temperature, then refrigerate for about 30 minutes to an hour to firm up further. -
Step 6
Assemble Cookies: Once both the cookies are completely cool and the raspberry filling is thoroughly chilled, pair up the cooled chocolate cookies by size and shape. Spoon about 1 to 2 teaspoons of the cooled raspberry filling onto the flat side of one cookie half. Gently place another cookie half on top of the filling, flat side down, and press down very lightly until the filling spreads almost to the edges. -
Step 7
Serve & Store: If desired, lightly dust the tops of your assembled cookies with confectioners’ sugar using a fine-mesh sieve for an elegant finish. These cookies are best enjoyed within 2-3 days when stored in an airtight container at room temperature. For longer storage, refrigerate for up to a week. Unfilled cookies can be frozen for up to 3 months.
Important Information
Nutrition Facts (Per Serving)
It is important to consider this information as approximate and not to use it as definitive health advice.
Allergy Information
Please check ingredients for potential allergens and consult a health professional if in doubt.


Leave a Comment